Page 295 of 568

295
3-4. Using the hands-free phone system (for mobile phones)
3
Interior features
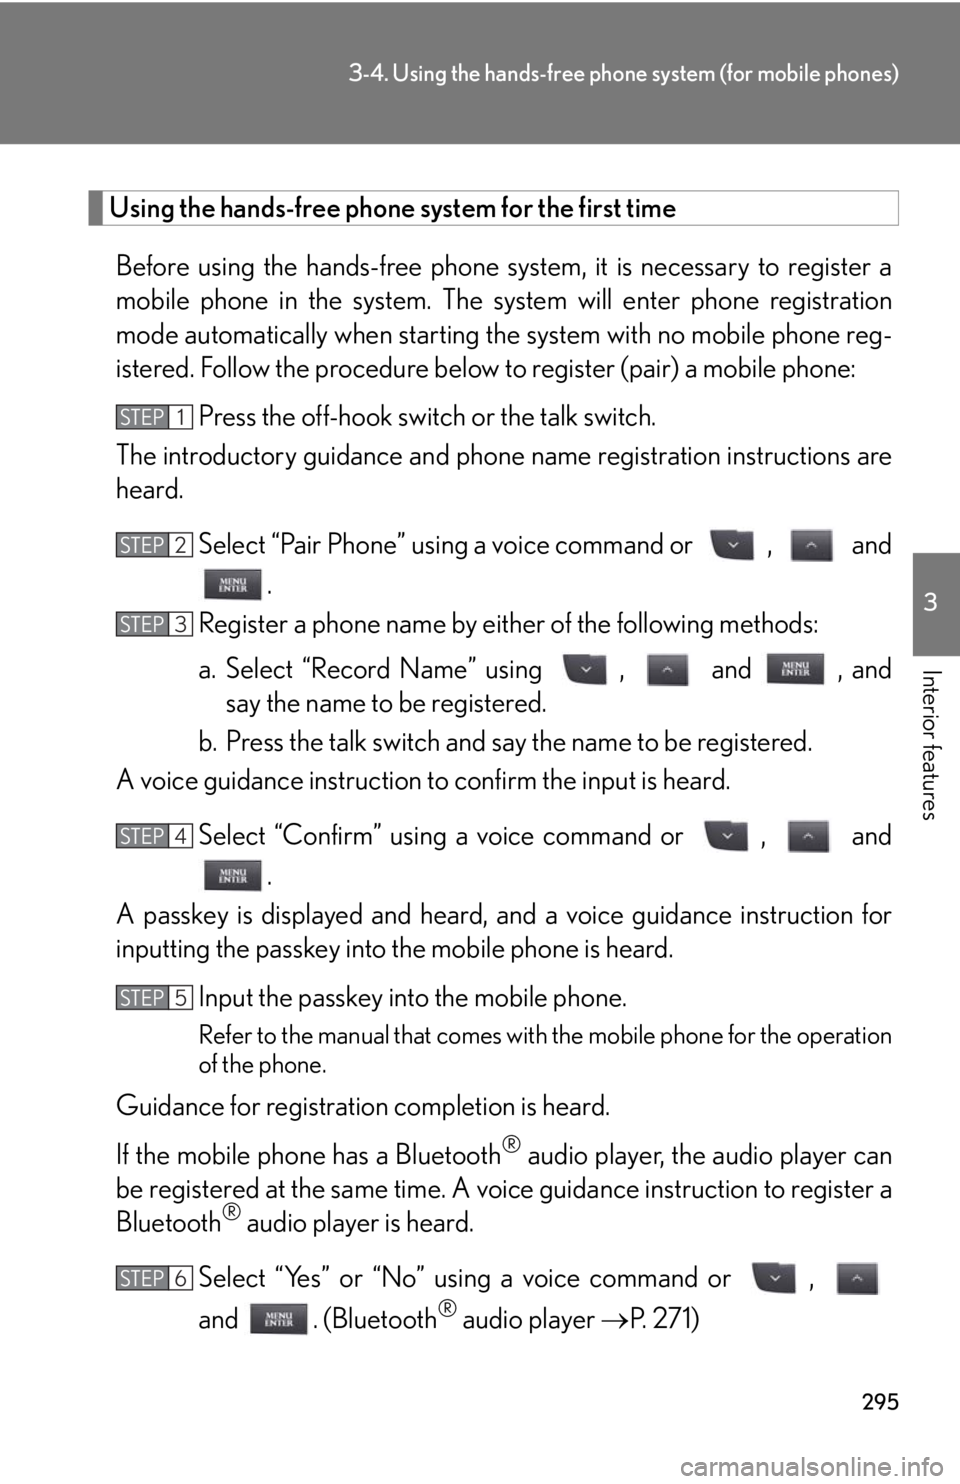
Using the hands-free phone system for the first time
Before using the hands-free phone sy stem, it is necessary to register a
mobile phone in the system. The sy stem will enter phone registration
mode automatically when starting th e system with no mobile phone reg-
istered. Follow the procedure below to register (pair) a mobile phone:
Press the off-hook switch or the talk switch.
The introductory guidance and phone name registration instructions are
heard.
Select “Pair Phone” using a voice command or , and
.
Register a phone name by either of the following methods:
a. Select “Record Name” using , and , and say the name to be registered.
b. Press the talk switch and say the name to be registered.
A voice guidance instruction to confirm the input is heard.
Select “Confirm” using a voice command or , and .
A passkey is displayed and heard, an d a voice guidance instruction for
inputting the passkey into the mobile phone is heard.
Input the passkey into the mobile phone.
Refer to the manual that comes with the mobile phone for the operation
of the phone.
Guidance for registration completion is heard.
If the mobile phone has a Bluetooth
® audio player, the audio player can
be registered at the same time. A voic e guidance instruction to register a
Bluetooth
® audio player is heard.
Select “Yes” or “No” using a voice command or ,
and . (Bluetooth
® audio player P. 2 7 1 )
STEP1
STEP2
STEP3
STEP4
STEP5
STEP6
Page 308 of 568

308
3-4. Using the hands-free phone system (for mobile phones)
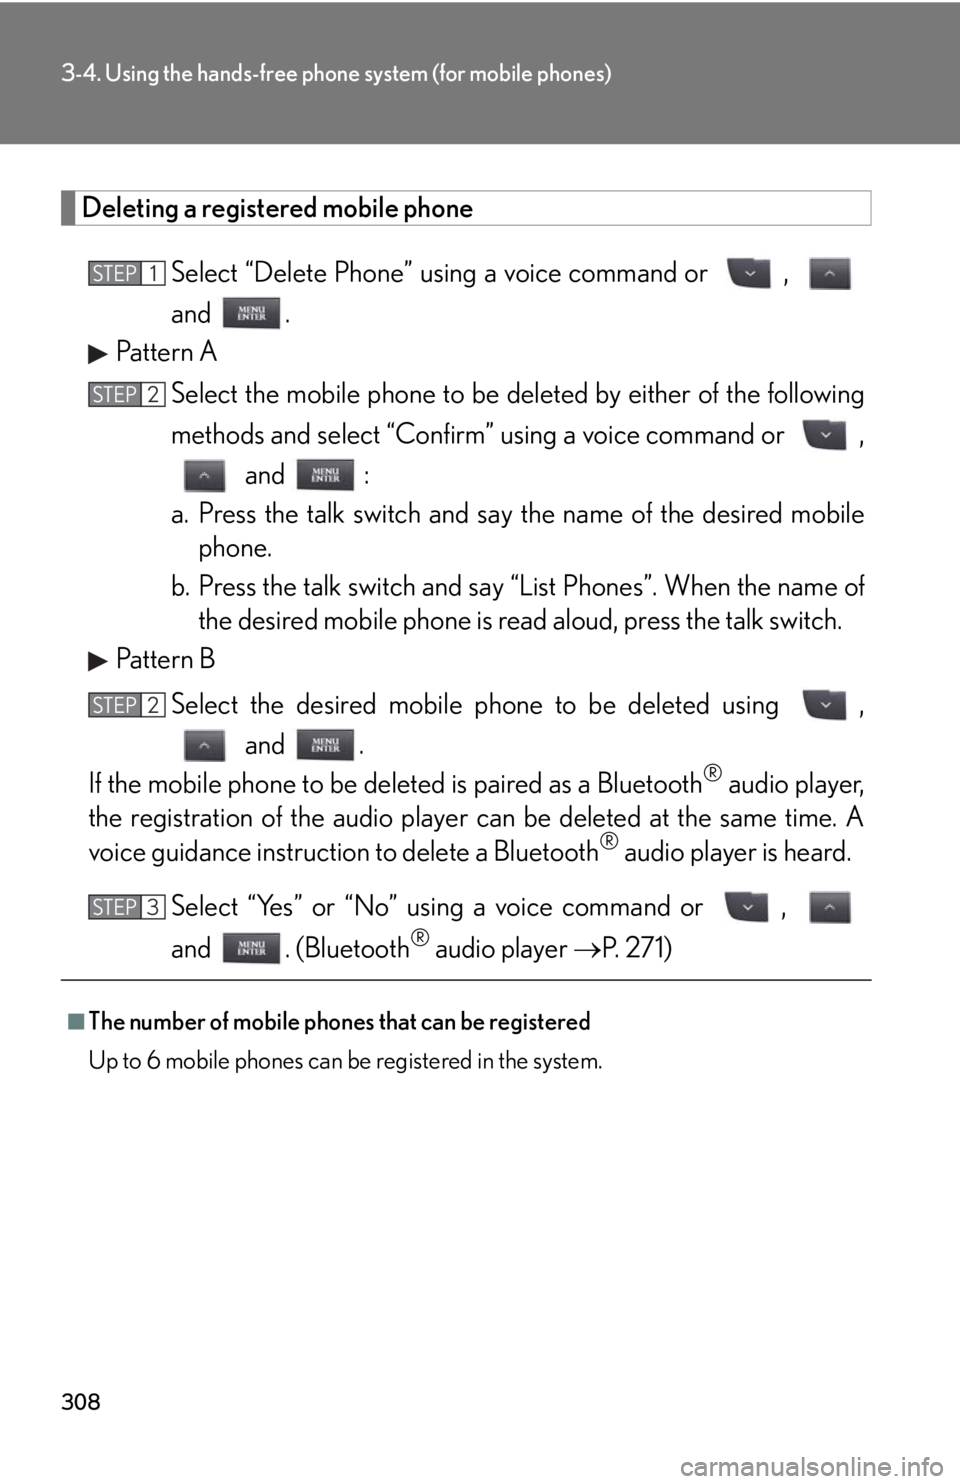
Deleting a registered mobile phoneSelect “Delete Phone” using a voice command or ,
and .
Pattern A
Select the mobile phone to be deleted by either of the following
methods and select “Confirm” using a voice command or ,
and :
a. Press the talk switch and sa y the name of the desired mobile
phone.
b. Press the talk switch and say “List Phones”. When the name of
the desired mobile phone is read aloud, press the talk switch.
Pattern B
Select the desired mobile phone to be deleted using , and .
If the mobile phone to be de leted is paired as a Bluetooth
® audio player,
the registration of the audio player can be deleted at the same time. A
voice guidance instructio n to delete a Bluetooth
® audio player is heard.
Select “Yes” or “No” using a voice command or ,
and . (Bluetooth
® audio player P. 2 7 1 )
■The number of mobile phones that can be registered
Up to 6 mobile phones can be registered in the system.
STEP1
STEP2
STEP2
STEP3
Page 312 of 568
312
3-4. Using the hands-free phone system (for mobile phones)
■Initialization
●The following data in the system can be initialized:
•Phone book
• Outgoing and incoming call history
•Speed dials
• Registered mobile phone data
•Security code
• Registered Bluetooth
® enabled portable player data
• Passkey for the mobile phones
• Passkey for the Bluetooth
® audio players
•Guidance volume
• Receiver volume
• Ring tone volume
●Once the initialization has been complete d, the data cannot be restored to its
original state.
■When the phone book is locked
The following functions cannot be used:
●Dialing by inputting a name
●Speed dialing
●Dialing a number stored in the call history memory
●Using the phone book
Page 371 of 568

371
4-1. Maintenance and care
4
Maintenance and care
NOTICE
■Cleaning detergents
●Do not use organic substances such as benzene or gasoline, acidic or alkaline
solutions, dye, bleach or other detergent. Doing so may discolor the vehicle inte-
rior or cause streaks or damage to painted surfaces.
●Do not use polish wax or polish cleaner. The instrument panel's or other interior
part’s painted surface may be damaged.
■Preventing damage to leather surfaces
Observe the following precautions to avoid damage to and deterioration of leather
surfaces.
●Remove any dust or dirt on leather surfaces immediately.
●Do not expose the vehicle to direct sunlight for extended pe riods of time. Park
the vehicle in the shade, especially during summer.
●Do not place items made of vinyl, plastic, or that contain wax on the upholstery, as
they may stick to the leather surface if th e vehicle interior heats up significantly.
■Water on the floor
Do not wash the vehicle floor with water.
Vehicle systems such as the audio system may be damaged if water comes into
contact with electrical components under the floor of the vehicle, and may also
cause the body to rust.
■Cleaning the inside of the rear window
●Do not use glass cleaner to clean the re ar window, as this may cause damage to
the rear window defogger heater wires or antenna. Use a cloth dampened with
lukewarm water to gently wipe the window clean. Wipe the window in strokes
running parallel to the heater wires or antenna.
●Be careful not to scratch or damage the heater wires or antenna.
Page 423 of 568
423
4-3. Do-it-yourself maintenance
4
Maintenance and care
Fuse layout and amperage ratings■ Engine compartment (type A)
FuseAmpereCircuit
1ALT-S7. 5 ACharging system
2TURN-HAZ15 AEmergency flashers, turn signals
3IG2 MAIN20 AIG2, IGN, GAUGE
4RAD NO. 230 AAudio system
5D/C CUT20 ADOME, MPX-B
6RAD NO. 130 AAudio system
7MPX-B10 A
Headlights, front fog lights, parking
lights, windshield washer, horns,
power door lock system, power win-
dows, power seats, electric tilt and
telescopic steering column, meters
and gauges, smart access system with
push-button start, outside rear view
mirrors, air conditioning system
8DOME10 AInterior lights, meters and gauges,
front footwell lights
9CDS10 AElectric cooling fans
Page 430 of 568
430
4-3. Do-it-yourself maintenance
■Passenger’s side instrument panel
FuseAmpereCircuit
1FR P/SEAT RH30 APo w e r s e a t
2DOOR DL15 A
3OBD7. 5 AOn-board diagnosis system
4STOP SW7. 5 A
Stop lights, VDIM, shift lock system,
multiport fuel injection system/
sequential multiport fuel injection sys-
tem, smart access system with push-
button start
5TI & TE20 AElectric tilt and telescopic steering
column
6RAD NO. 310 AAudio system
7GAUGE7. 5 AMeters and gauges
8IGN10 A
SRS airbag system, stop lights, steer-
ing lock system, fuel system, front pas-
senger occupant classification system,
safety connect
Page 431 of 568
431
4-3. Do-it-yourself maintenance
4
Maintenance and care
9ACC7. 5 A
Clock, air conditioning system, audio
system, navigation system, display,
outside rear view mirrors, smart
access system with push-button start,
glove box light, console box light,
safety connect
10CIG15 ACigarette lighter
11PWR OUTLET15 APo w e r o u t l e t
12RR DOOR RH20 APo w e r w i n d o w s
13FR DOOR RH20 APower windows, outside rear view
mirrors
14AM27. 5 ASmart access system with push-button
start
15RH-IG7. 5 A
Seat belts, intuitive parking assist,
automatic transmission, seat heaters,
windshield wiper de-icer
16FR S/HTR RH15 ASeat heaters
17ECU-IG RH10 A
Power seats, smart access system with
push-button start, outside rear view
mirrors, VDIM, air conditioning sys-
tem, pre-collision seat belt, electric tilt
and telescopic steering, power win-
dows, navigation system, headlights,
front fog lights, parking lights, license
plate lights, windshield washer
FuseAmpereCircuit
Page 493 of 568

5
When trouble arises
493
5-2. Steps to take in an emergency
■Starting the engine when the battery is discharged
The engine cannot be started by push-starting.
■To prevent battery discharge
●Turn off the headlights and the audio system while the engine is off.
●Turn off any unnecessary electrical components when the vehicle is running at a
low speed for an extended period, such as in heavy traffic, etc.
Start the engine of the second vehicle. Increase the engine
speed slightly and maintain at that level for approximately 5
minutes to recharge the battery of your vehicle.
Open and close any of the do ors with the “ENGINE START
STOP” switch OFF.
Maintain the engine speed of th e second vehicle and turn the
“ENGINE START STOP” switch to IGNITION ON mode,
then start the vehicle’s engine.
Once the vehicle’s engine ha s started, remove the jumper
cables in the exact reverse ord er in which they were con-
nected.
Once the engine starts, have the ve hicle checked at your Lexus dealer
as soon as possible.STEP2
STEP3
STEP4
STEP5