Page 8 of 90

AUDIO/VIDEO SYSTEM
186
Co−location: This transmitter must
not be co−located or operated in con-
junction with any other antenna or
transmitter.
�Laser products
�Do not take this unit apart or at-
tempt to make any changes
yourself. This is an intricate unit
that uses a laser pickup to re-
trieve information from the sur-
face of compact discs. The la-
ser is carefully shielded so that
its rays remain inside the cabi-
net. Therefore, never try to dis-
assemble the player or alter any
of its parts since you may be ex-
posed to laser rays and danger-
ous voltages.
�This product utilizes a laser.
Use of controls or adjustments
or performance of procedures
other than those specified here-
in may result in hazardous radi-
ation exposure.
NOTICE
To prevent the battery from being dis-
charged, do not leave the audio/video
system on longer than necessary
when the engine is not running.
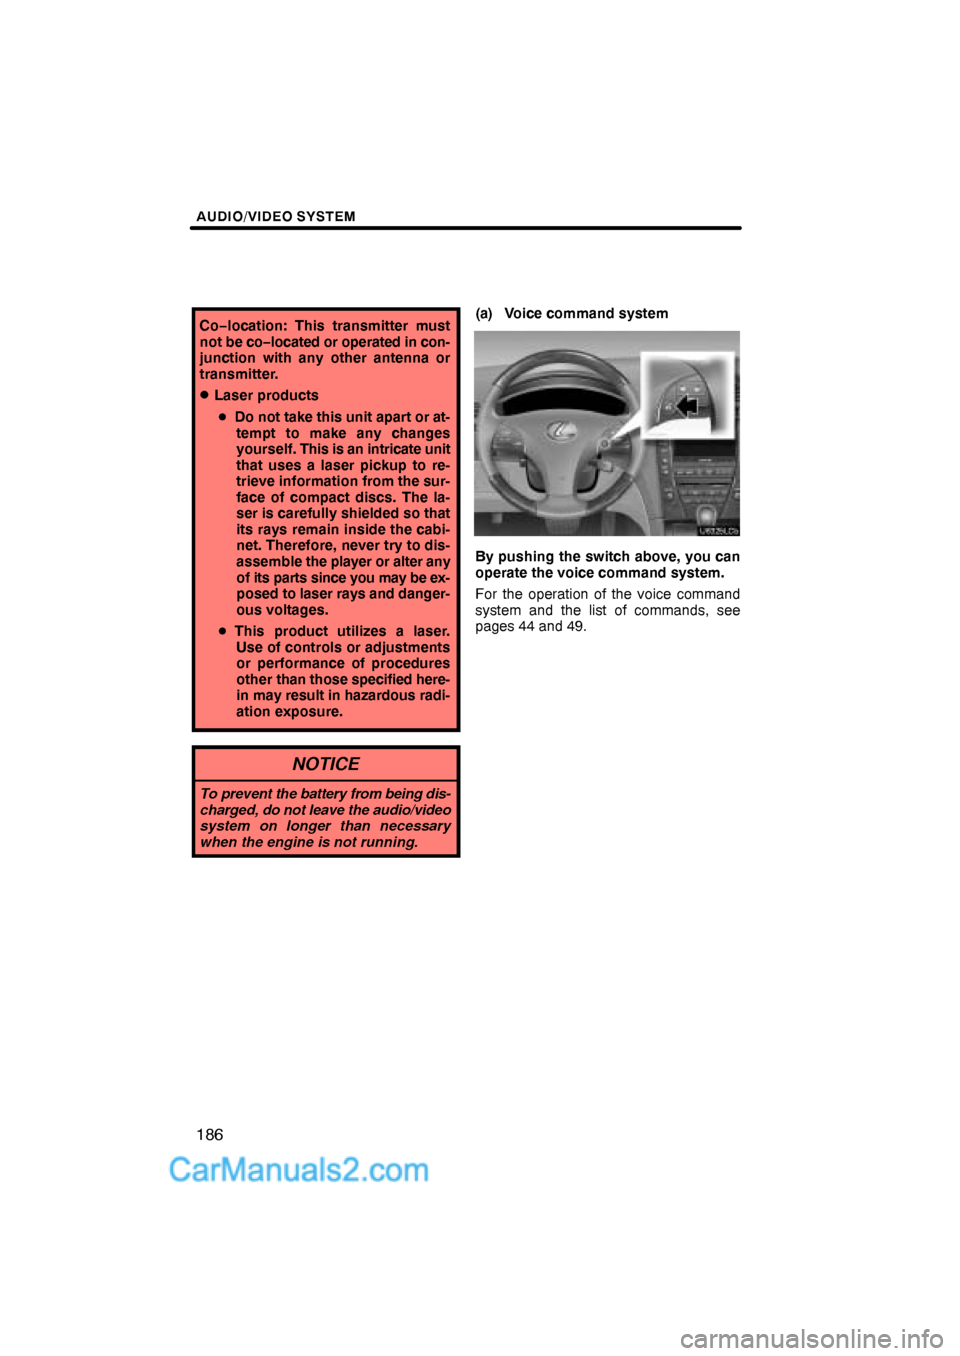
(a) Voice command system
By pushing the switch above, you can
operate the voice command system.
For the operation of the voice command
system and the list of commands, see
pages 44 and 49.
Page 16 of 90
AUDIO/VIDEO SYSTEM
194
Turn the knob clockwise to step up the
station band or counterclockwise to
step down.
Your radio automatically changes to stereo
reception when a stereo broadcast is re-
ceived. “ST” appears on the screen. If the
signal becomes weak, the radio reduces
the amount of channel separation to pre-
vent the weak signal from creating noise.
If the signal becomes extremely weak, the
radio switches from stereo to mono recep-
tion. In this case, “ST” disappears from the
screen.(b) Presetting a station
1. Tune in the desired station.
2. Touch one of the buttons (1 — 6) you
want and hold it until a beep is heard.
This sets the station to the button and
the frequency appears on the button.
Each radio mode (AM, FM1 or FM2) can
store up to 6 stations. To change the pre-
set station to a different one, follow the
same procedure.
The preset station memory is cancelled
when the power source is interrupted by
battery disconnection or a blown fuse.
Page 22 of 90

AUDIO/VIDEO SYSTEM
200
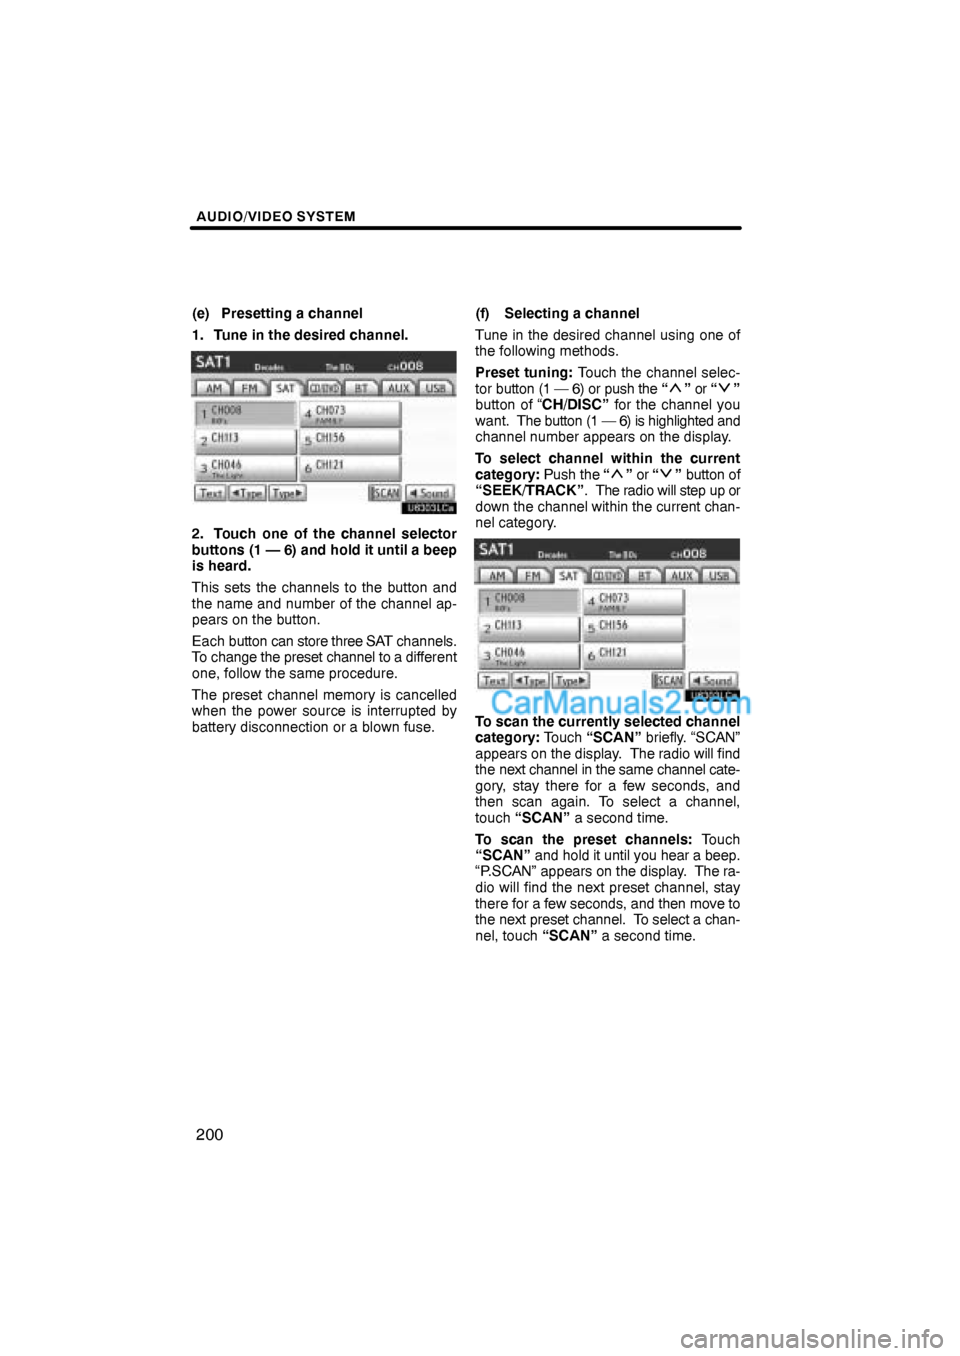
(e) Presetting a channel
1. Tune in the desired channel.
2. Touch one of the channel selector
buttons (1 — 6) and hold it until a beep
is heard.
This sets the channels to the button and
the name and number of the channel ap-
pears on the button.
Each button can store three SAT channels.
To change the preset channel to a different
one, follow the same procedure.
The preset channel memory is cancelled
when the power source is interrupted by
battery disconnection or a blown fuse.(f) Selecting a channel
Tune in the desired channel using one of
the following methods.
Preset tuning: Touch the channel selec-
tor button (1 — 6) or push the “
” or “”
button of “CH/DISC” for the channel you
want. The button (1 — 6) is highlighted and
channel number appears on the display.
To select channel within the current
category: Push the “
” or “” button of
“SEEK/TRACK”. The radio will step up or
down the channel within the current chan-
nel category.
To scan the currently selected channel
category: Touch “SCAN” briefly. “SCAN”
appears on the display. The radio will find
the next channel in the same channel cate-
gory, stay there for a few seconds, and
then scan again. To select a channel,
touch “SCAN” a second time.
To scan the preset channels: Touch
“SCAN” and hold it until you hear a beep.
“P.SCAN” appears on the display. The ra-
dio will find the next preset channel, stay
there for a few seconds, and then move to
the next preset channel. To select a chan-
nel, touch “SCAN” a second time.
Page 66 of 90

AUDIO/VIDEO SYSTEM
244
Bluetooth is a trademark owned by
Bluetooth SIG. Inc.
CAUTION
Do not operate the player’s controls
or connect to the Bluetooth� audio
system while driving.
NOTICE
Do not leave your portable player in
the car. In particular, high tempera-
tures inside the vehicle may damage
the portable player.
INFORMATION
�In the following conditions, the
system may not function.
�The portable player is turned off.
�The portable player is not con-
nected.
�The portable player has a low bat-
tery.
�It may take time, the phone connec-
tion is carried out during
Bluetooth� audio play.
1Indicates the condition of the
Bluetooth� connection.
“Blue” indicates an excellent connection
to Bluetooth�.
“Yellow” indicates a bad connection to
Bluetooth�, resulting in possible deteriora-
tion of audio quality.
: No connection to Bluetooth�.
2Indicates the amount of battery
charge left.
Empty Full
Remaining charge is not displayed while
the Bluetooth� is connecting.
The amount left does not always corre-
spond with the one of your portable player.
This system doesn’t have a charging func-
tion.