2011 KIA VENGA ignition
[x] Cancel search: ignitionPage 593 of 761

541
Driving your vehicle
Remember, your vehicle does notrequire extended warm-up. After the
engine has started, allow the engine to
run for 10 to 20 seconds prior to plac-
ing the vehicle in gear. In very cold
weather, however, give your engine a
slightly longer warm-up period.
Don't "lug" or "over-rev" the engine. Lugging is driving too slowly in too
high a gear resulting engine bucking. If
this happens, shift to a lower gear.
Over-revving is racing the engine
beyond its safe limit. This can be avoid-
ed by shifting at the recommended
speeds. Use your air conditioning sparingly.
The air conditioning system is operat-
ed by engine power so your fuel econ-
omy is reduced when you use it.
Open windows at high speeds can reduce fuel economy.
Fuel economy is less in crosswinds and headwinds. To help offset some of
this loss, slow down when driving in
these conditions.
Keeping a vehicle in good operating con-
dition is important both for economy and
safety. Therefore, have an authorised KIA
dealer perform scheduled inspections
and maintenance.
WARNING - Engine off dur-
ing motion
Never turn the engine off to coast
down hills or anytime the vehicle is
in motion. The power steering and
power brakes will not function
properly without the engine run-
ning. Instead, keep the engine on
and downshift to an appropriate
gear for engine braking effect. In
addition, turning off the ignition
whilst driving could engage the
steering wheel lock resulting in
loss of vehicle steering which
could cause serious injury ordeath.
YN RHD 5.QXP 10/20/2009 4:41 PM Page 41
Page 601 of 761

549
Driving your vehicle
Use high quality ethylene glycol coolant
Your vehicle is delivered with high quality
ethylene glycol coolant in the cooling
system. It is the only type of coolant that
should be used because it helps prevent
corrosion in the cooling system, lubri-
cates the water pump and prevents
freezing. Be sure to replace or replenish
your coolant in accordance with themaintenance schedule in section 7.
Before winter, have your coolant tested toassure that its freezing point is sufficient
for the temperatures anticipated during
the winter.
Check battery and cables
Winter puts additional burdens on the
battery system. Visually inspect the bat-
tery and cables as described in section
7. The level of charge in your battery can
be checked by an authorised KIA dealer
or a service station.Change to "winter weight" oil if
necessary In some climates it is recommended that
a lower viscosity "winter weight" oil be
used during cold weather. See section 8
for recommendations. If you aren't sure
what weight oil you should use, consult
an authorised KIA dealer.
Check spark plugs and ignition system
Inspect your spark plugs as described in
section 7 and replace them if necessary.
Also check all ignition wiring and compo-
nents to be sure they are not cracked,
worn or damaged in any way.
WARNING
- Tyre chains
The use of chains may adversely affect vehicle handling.
Do not exceed 30 km/h (20 mph) or the chain manufacturer’s rec-
ommended speed limit, whichev-
er is lower.
Drive carefully and avoid bumps, holes, sharp turns, and other
road hazards, which may cause
the vehicle to bounce.
Avoid sharp turns or locked- wheel braking.
CAUTION
Chains that are the wrong size or
improperly installed can damage
your vehicle's brake lines, sus-pension, body and wheels.
Stop driving and retighten the chains any time you hear themhitting the vehicle.
YN RHD 5.QXP 10/20/2009 4:41 PM Page 49
Page 613 of 761

What to do in an emergency
2
6
ROAD WARNING
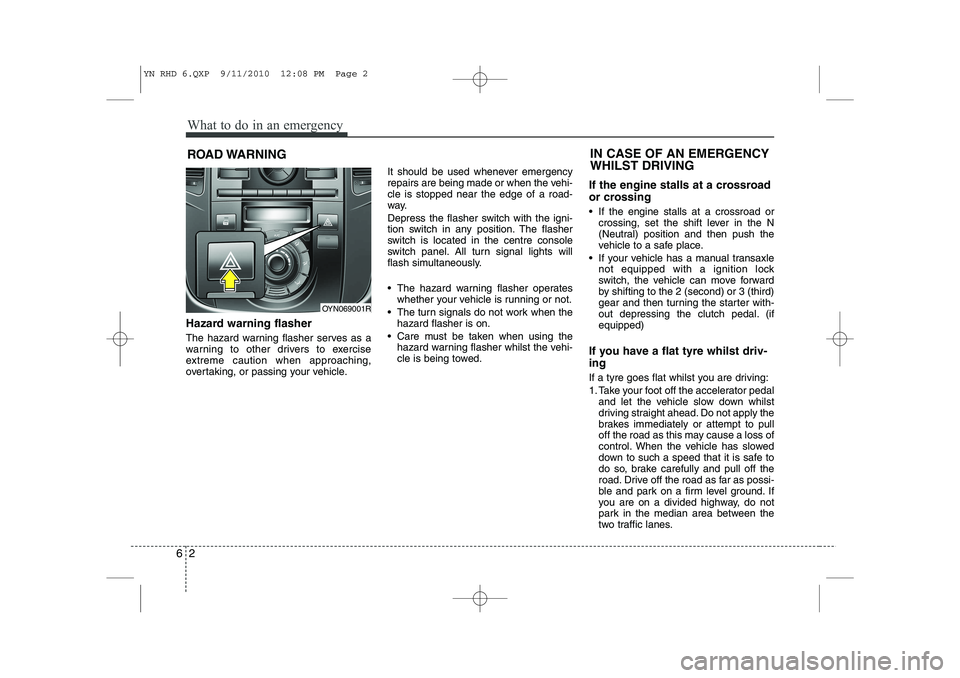
Hazard warning flasher
The hazard warning flasher serves as a
warning to other drivers to exercise
extreme caution when approaching,
overtaking, or passing your vehicle. It should be used whenever emergency
repairs are being made or when the vehi-cle is stopped near the edge of a road-
way.
Depress the flasher switch with the igni-
tion switch in any position. The flasher
switch is located in the centre console
switch panel. All turn signal lights will
flash simultaneously.
• The hazard warning flasher operates
whether your vehicle is running or not.
The turn signals do not work when the hazard flasher is on.
Care must be taken when using the hazard warning flasher whilst the vehi-
cle is being towed. If the engine stalls at a crossroad
or crossing
If the engine stalls at a crossroad or
crossing, set the shift lever in the N
(Neutral) position and then push the
vehicle to a safe place.
If your vehicle has a manual transaxle not equipped with a ignition lock
switch, the vehicle can move forward
by shifting to the 2 (second) or 3 (third)
gear and then turning the starter with-
out depressing the clutch pedal. (ifequipped)
If you have a flat tyre whilst driv- ing
If a tyre goes flat whilst you are driving:
1. Take your foot off the accelerator pedal and let the vehicle slow down whilst
driving straight ahead. Do not apply the
brakes immediately or attempt to pull
off the road as this may cause a loss of
control. When the vehicle has slowed
down to such a speed that it is safe to
do so, brake carefully and pull off the
road. Drive off the road as far as possi-
ble and park on a firm level ground. If
you are on a divided highway, do not
park in the median area between the
two traffic lanes.
IN CASE OF AN EMERGENCY WHILST DRIVING
OYN069001R
YN RHD 6.QXP 9/11/2010 12:08 PM Page 2
Page 614 of 761

63
What to do in an emergency
2. When the vehicle is stopped, turn onyour emergency hazard flashers, set
the parking brake and put the transaxle
in P (automatic transaxle) or reverse
(manual transaxle).
3. Have all passengers get out of the vehicle. Be sure they all get out on the
side of the vehicle that is away from
traffic.
4. When changing a flat tyre, follow the instruction provided later in this sec-tion.
If engine stalls whilst driving
1. Reduce your speed gradually, keeping a straight line. Move cautiously off the
road to a safe place.
2. Turn on your emergency flashers.
3. Try to start the engine again. If your vehicle will not start, contact an autho-
rised KIA dealer or seek other quali-
fied assistance. If engine doesn't turn over or
turns over slowly
1. If your vehicle has an automatic
transaxle, be sure the shift lever is in N
(Neutral) or P (Park) and the emer-
gency brake is set.
2. Check the battery connections to be sure they are clean and tight.
3. Turn on the interior light. If the light dims or goes out when you operate the
starter, the battery is discharged.
4. Check the starter connections to be sure they are securely tightened.
5. Do not push or pull the vehicle to start it. See instructions for "Jump starting". If engine turns over normally but
does not start
1. Check the fuel level.
2. With the ignition switch in the LOCK
position, check all connectors at the
ignition coils and spark plugs.
Reconnect any that may be discon-
nected or loose.
3. Check the fuel line in the engine com- partment.
4. If the engine still does not start, call an authorised KIA dealer or seek other
qualified assistance.
IF THE ENGINE WILL NOT START
WARNING
If the engine will not start, do not
push or pull the vehicle to start it.This could result in a collision or
cause other damage. In addition,
push or pull starting may cause the
catalytic converter to be over-
loaded and create a fire hazard.
YN RHD 6.QXP 1/25/2010 11:35 AM Page 3
Page 615 of 761

What to do in an emergency
4
6
EMERGENCY STARTING
Connect cables in numerical order and
disconnect in reverse order. Jump starting
Jump starting can be dangerous if done
incorrectly. Therefore, to avoid harm to
yourself or damage to your vehicle or
battery, follow the jump starting proce-
dures. If in doubt, we strongly recom-
mend that you have a competent techni-
cian or towing service jump start your
vehicle.
Jump starting procedure
CAUTION
Use only a 12-volt jumper system.
You can damage a 12-volt starting
motor, ignition system, and otherelectrical parts beyond repair by use of a 24-volt power supply (eithertwo 12-volt batteries in series or a
24-volt motor generator set).
WARNING - Battery
• Keep all flames or sparks away from the battery. The battery pro-
duces hydrogen gas which may
explode if exposed to flame orsparks.
Do not attempt to jump start the vehicle if the discharged battery
is frozen or if the electrolyte level
is low; the battery may rupture or
explode.
WARNING - Battery
Never attempt to check the elec-
trolyte level of the battery as this
may cause the battery to rupture or
explode causing serious injury.
1VQA4001
Discharged battery
Jumper Cables
Booster
battery
(-)
(+)
(+)(-)
CAUTION -AGM battery (if equipped)
Absorbent Glass Matt (AGM) bat-
teries are maintenance-free and
should only be serviced by anauthorised KIA dealer. For charg-ing your AGM battery, use only fully automatic battery chargers
that are specially developed forAGM batteries.
When replacing the AGM battery, use only the KIA genuine batteryfor the ISG system.
(Continued)
YN RHD 6.QXP 1/25/2010 11:35 AM Page 4
Page 616 of 761

65
What to do in an emergency
1. Make sure the booster battery is 12-volt and that its negative terminal is
grounded.
2. If the booster battery is in another vehicle, do not allow the vehicles comein contact.
3. Turn off all unnecessary electrical loads.
4. Connect the jumper cables in the exact sequence shown in the illustration.First connect one end of a jumper
cable to the positive terminal of the
discharged battery (1), then connect
the other end to the positive terminal
on the booster battery (2). 5. Proceed to connect one end of the
other jumper cable to the negative ter-
minal of the booster battery (3), then
the other end to a solid, stationary,
metallic point (for example, the engine
lifting bracket) away from the battery
(4). Do not connect it to or near any
part that moves when the engine is
cranked.
Do not allow the jumper cables to con-
tact anything except the correct battery
terminals or the correct ground. Do not
lean over the battery when making
connections.
6. Start the engine of the vehicle with the booster battery and let it run at 2,000
rpm, then start the engine of the vehi-
cle with the discharged battery.
If the cause of your battery discharging is
not apparent, you should have your vehi-cle checked by an authorised KIA dealer.
Push-starting
Your manual transaxle-equipped vehicle
should not be push-started because itmight damage the emission control sys-tem.
Vehicles equipped with automatic
transaxle cannot be push-started.
Follow the directions in this section for
jump-starting.
WARNING
Never tow a vehicle to start it
because the sudden surge forward
when the engine starts could cause
a collision with the tow vehicle.
CAUTION - Battery cables
Do not connect the jumper cable
from the negative terminal of the booster battery to the negative ter-minal of the discharged battery. This can cause the discharged bat-
tery to overheat and crack, releas- ing battery acid.
(Continued)
If the AGM battery is reconnected or replaced, ISG function will notoperate immediately.
If you want to use the ISG func-tion, the battery sensor needs to be calibrated for approximately 4hours with the ignition off.
YN RHD 6.QXP 1/25/2010 11:35 AM Page 5
Page 628 of 761

617
What to do in an emergency
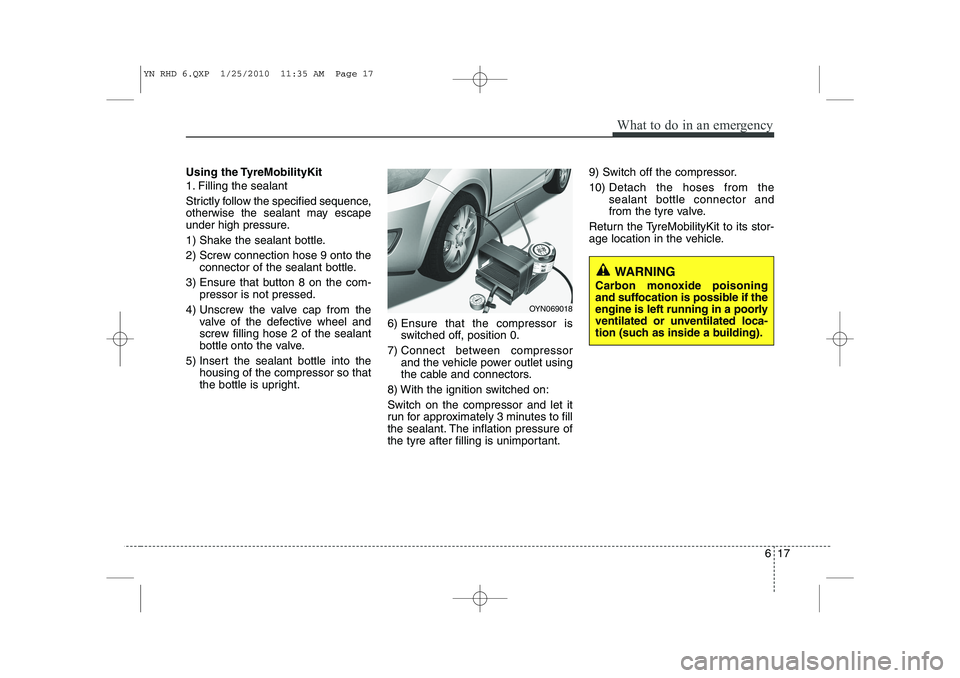
Using the TyreMobilityKit
1. Filling the sealant
Strictly follow the specified sequence,
otherwise the sealant may escape
under high pressure.
1) Shake the sealant bottle.
2) Screw connection hose 9 onto theconnector of the sealant bottle.
3) Ensure that button 8 on the com- pressor is not pressed.
4) Unscrew the valve cap from the valve of the defective wheel and
screw filling hose 2 of the sealant
bottle onto the valve.
5) Insert the sealant bottle into the housing of the compressor so that
the bottle is upright. 6) Ensure that the compressor is
switched off, position 0.
7) Connect between compressor and the vehicle power outlet using
the cable and connectors.
8) With the ignition switched on: Switch on the compressor and let it
run for approximately 3 minutes to fill
the sealant. The inflation pressure of
the tyre after filling is unimportant. 9) Switch off the compressor. 10)
Detach the hoses from the sealant bottle connector and
from the tyre valve.
Return the TyreMobilityKit to its stor-
age location in the vehicle.
WARNING
Carbon monoxide poisoning
and suffocation is possible if the
engine is left running in a poorly
ventilated or unventilated loca-
tion (such as inside a building).
OYN069018
YN RHD 6.QXP 1/25/2010 11:35 AM Page 17
Page 632 of 761

621
What to do in an emergency
✽✽NOTICE
If the TPMS, Low Tyre Pressure and Position indicators do not illuminate
for 3 seconds when the ignitionswitch is turned to the ON position
or engine is running, or if they
remain illuminated after coming on
for approximately 3 seconds, take
your car to your nearest authorised
KIA dealer and have the systemchecked.Low tyre pressure tell- tale
Low tyre pressure posi- tion telltale
When the tyre pressure monitoring
system warning indicators are illumi-
nated, one or more of your tyres is
significantly under-inflated. The lowtyre pressure position telltale lightwill indicate which tyre is significant-
ly under-inflated by illuminating thecorresponding position light.
If either telltale illuminates, immedi-
ately reduce your speed, avoid hard
cornering and anticipate increased
stopping distances. You should stop
and check your tyres as soon as pos-
sible. Inflate the tyres to the proper
pressure as indicated on the vehi-
cle’s placard or tyre inflation pres-
sure label located on the driver’s side
centre pillar outer panel. If you can-
not reach a service station or if the
tyre cannot hold the newly added air,
replace the low pressure tyre with
the spare tyre. Then the TPMS malfunction indicator
may turn on and the Low Tyre
Pressure and Position telltales will
remain on after restarting and about
20 minutes of continuous driving
before you have the low pressuretyre repaired and replaced on the
vehicle.
CAUTION
In winter or cold weather, the
low tyre pressure telltale may beilluminated if the tyre pressurewas adjusted to the recom- mended tyre inflation pressurein warm weather. It does notmean your TPMS is malfunction- ing because the decreased tem-perature leads to a proportionallowering of tyre pressure.
When you drive your vehiclefrom a warm area to a cold area or from a cold area to a warmarea, or the outside temperatureis greatly higher or lower, you should check the tyre inflationpressure and adjust the tyres tothe recommended tyre inflation pressure.
YN RHD 6.QXP 1/25/2010 11:36 AM Page 21