2011 KIA VENGA ignition
[x] Cancel search: ignitionPage 476 of 761
455
Features of your vehicle
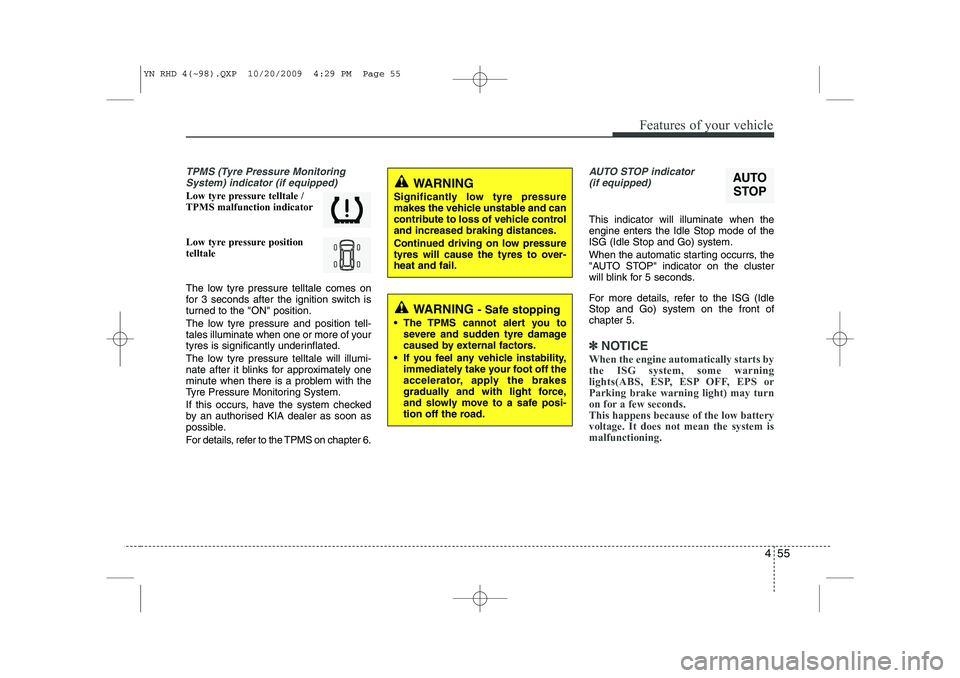
TPMS (Tyre Pressure MonitoringSystem) indicator (if equipped)
Low tyre pressure telltale / TPMS malfunction indicator
Low tyre pressure position telltale
The low tyre pressure telltale comes on
for 3 seconds after the ignition switch is
turned to the "ON" position.
The low tyre pressure and position tell-
tales illuminate when one or more of your
tyres is significantly underinflated.
The low tyre pressure telltale will illumi-
nate after it blinks for approximately one
minute when there is a problem with the
Tyre Pressure Monitoring System.
If this occurs, have the system checked
by an authorised KIA dealer as soon as
possible.
For details, refer to the TPMS on chapter 6.
AUTO STOP indicator(if equipped)
This indicator will illuminate when the engine enters the Idle Stop mode of theISG (Idle Stop and Go) system.
When the automatic starting occurrs, the
"AUTO STOP" indicator on the cluster
will blink for 5 seconds.
For more details, refer to the ISG (Idle Stop and Go) system on the front ofchapter 5.
✽✽ NOTICE
When the engine automatically starts by
the ISG system, some warning
lights(ABS, ESP, ESP OFF, EPS orParking brake warning light) may turn
on for a few seconds. This happens because of the low batteryvoltage. It does not mean the system ismalfunctioning.
AUTO
STOPWARNING
Significantly low tyre pressure
makes the vehicle unstable and can
contribute to loss of vehicle controland increased braking distances.
Continued driving on low pressure
tyres will cause the tyres to over-heat and fail.
WARNING - Safe stopping
The TPMS cannot alert you to severe and sudden tyre damage
caused by external factors.
If you feel any vehicle instability, immediately take your foot off the
accelerator, apply the brakes
gradually and with light force,
and slowly move to a safe posi-
tion off the road.
YN RHD 4(~98).QXP 10/20/2009 4:29 PM Page 55
Page 477 of 761
Features of your vehicle
56
4
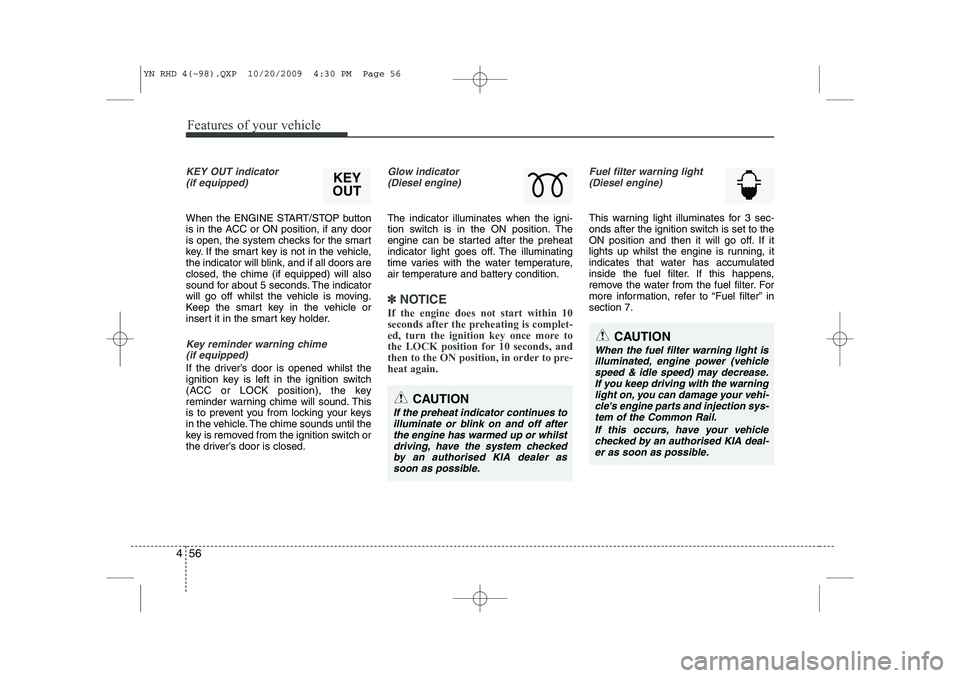
KEY OUT indicator
(if equipped)
When the ENGINE START/STOP button
is in the ACC or ON position, if any door
is open, the system checks for the smart
key. If the smart key is not in the vehicle,
the indicator will blink, and if all doors areclosed, the chime (if equipped) will also
sound for about 5 seconds. The indicator
will go off whilst the vehicle is moving.
Keep the smart key in the vehicle or
insert it in the smart key holder.
Key reminder warning chime
(if equipped)
If the driver’s door is opened whilst the
ignition key is left in the ignition switch
(ACC or LOCK position), the key
reminder warning chime will sound. This
is to prevent you from locking your keys
in the vehicle. The chime sounds until the
key is removed from the ignition switch or
the driver’s door is closed.
Glow indicator (Diesel engine)
The indicator illuminates when the igni-
tion switch is in the ON position. The
engine can be started after the preheat
indicator light goes off. The illuminating
time varies with the water temperature,
air temperature and battery condition.
✽✽ NOTICE
If the engine does not start within 10
seconds after the preheating is complet-
ed, turn the ignition key once more to
the LOCK position for 10 seconds, and
then to the ON position, in order to pre-heat again.
Fuel filter warning light (Diesel engine)
This warning light illuminates for 3 sec-
onds after the ignition switch is set to the
ON position and then it will go off. If it
lights up whilst the engine is running, it
indicates that water has accumulated
inside the fuel filter. If this happens,
remove the water from the fuel filter. For
more information, refer to “Fuel filter” insection 7.
CAUTION
When the fuel filter warning light isilluminated, engine power (vehicle
speed & idle speed) may decrease. If you keep driving with the warninglight on, you can damage your vehi-cle's engine parts and injection sys-
tem of the Common Rail.
If this occurs, have your vehiclechecked by an authorised KIA deal-er as soon as possible.
CAUTION
If the preheat indicator continues to illuminate or blink on and off afterthe engine has warmed up or whilst
driving, have the system checked by an authorised KIA dealer assoon as possible.
KEY
OUT
YN RHD 4(~98).QXP 10/20/2009 4:30 PM Page 56
Page 478 of 761
457
Features of your vehicle
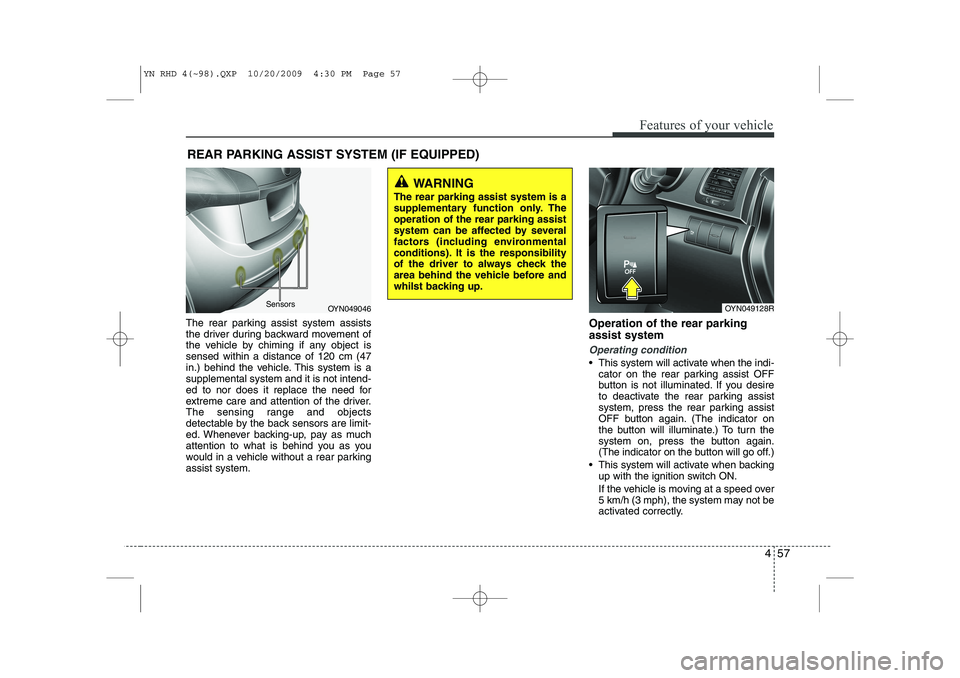
The rear parking assist system assists
the driver during backward movement of
the vehicle by chiming if any object issensed within a distance of 120 cm (47
in.) behind the vehicle. This system is asupplemental system and it is not intend-
ed to nor does it replace the need for
extreme care and attention of the driver.
The sensing range and objects
detectable by the back sensors are limit-
ed. Whenever backing-up, pay as much
attention to what is behind you as you
would in a vehicle without a rear parkingassist system.Operation of the rear parking assist system
Operating condition
This system will activate when the indi-
cator on the rear parking assist OFF
button is not illuminated. If you desire
to deactivate the rear parking assist
system, press the rear parking assist
OFF button again. (The indicator on
the button will illuminate.) To turn the
system on, press the button again.
(The indicator on the button will go off.)
This system will activate when backing up with the ignition switch ON.
If the vehicle is moving at a speed over
5 km/h (3 mph), the system may not be
activated correctly.
REAR PARKING ASSIST SYSTEM (IF EQUIPPED)
WARNING
The rear parking assist system is a
supplementary function only. Theoperation of the rear parking assist
system can be affected by several
factors (including environmental
conditions). It is the responsibility
of the driver to always check the
area behind the vehicle before and
whilst backing up.
OYN049046
SensorsOYN049128R
YN RHD 4(~98).QXP 10/20/2009 4:30 PM Page 57
Page 481 of 761
Features of your vehicle
60
4
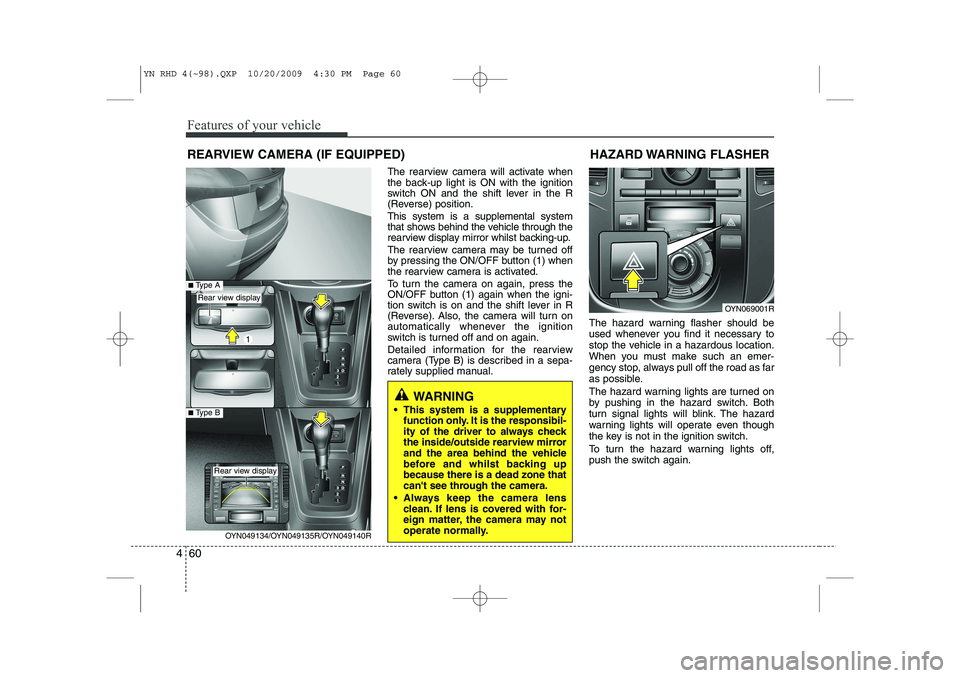
The rearview camera will activate when
the back-up light is ON with the ignition
switch ON and the shift lever in the R
(Reverse) position. This system is a supplemental system
that shows behind the vehicle through the
rearview display mirror whilst backing-up.
The rearview camera may be turned off
by pressing the ON/OFF button (1) when
the rearview camera is activated.
To turn the camera on again, press the
ON/OFF button (1) again when the igni-
tion switch is on and the shift lever in R
(Reverse). Also, the camera will turn on
automatically whenever the ignition
switch is turned off and on again.
Detailed information for the rearview
camera (Type B) is described in a sepa-
rately supplied manual. The hazard warning flasher should be
used whenever you find it necessary to
stop the vehicle in a hazardous location.
When you must make such an emer-
gency stop, always pull off the road as far
as possible.
The hazard warning lights are turned on
by pushing in the hazard switch. Both
turn signal lights will blink. The hazard
warning lights will operate even though
the key is not in the ignition switch.
To turn the hazard warning lights off,
push the switch again.HAZARD WARNING FLASHER
OYN069001R
WARNING
This system is a supplementary function only. It is the responsibil-
ity of the driver to always check
the inside/outside rearview mirror
and the area behind the vehicle
before and whilst backing upbecause there is a dead zone that
can't see through the camera.
Always keep the camera lens clean. If lens is covered with for-
eign matter, the camera may not
operate normally.
REARVIEW CAMERA (IF EQUIPPED)
OYN049134/OYN049135R/OYN049140R
Rear view display
Rear view display
■Type A
■Type B
YN RHD 4(~98).QXP 10/20/2009 4:30 PM Page 60
Page 482 of 761
461
Features of your vehicle
Battery saver function
• The purpose of this feature is to pre-vent the battery from being dis-
charged. The system automatically
turns off the parking lights when the
driver removes the ignition key and
opens the driver-side door.
With this feature, the parking lights will turn off automatically if the driver parkson the side of road at night.
If necessary, to keep the lights on
when the ignition key is removed, per-
form the following:
1) Open the driver-side door.
2) Turn the parking lights OFF and ON again using the light switch on the
steering column. Headlight escort function (if equipped)
If you turn the ignition switch to the ACC or OFF position with the headlights ON,the headlights (and/or tail lights) remain
on for about 20 minutes. However, if the
driver’s door is opened and closed, the
headlights are turned off after 30 sec-
onds.
The headlights can be turned off by
pressing the lock button on the transmit-
ter (or smart key) twice or turning the
light switch to the OFF or Auto position.
However, if you turn the light switch to the
Auto position when it is dark outside, the
headlights will not be turned off.
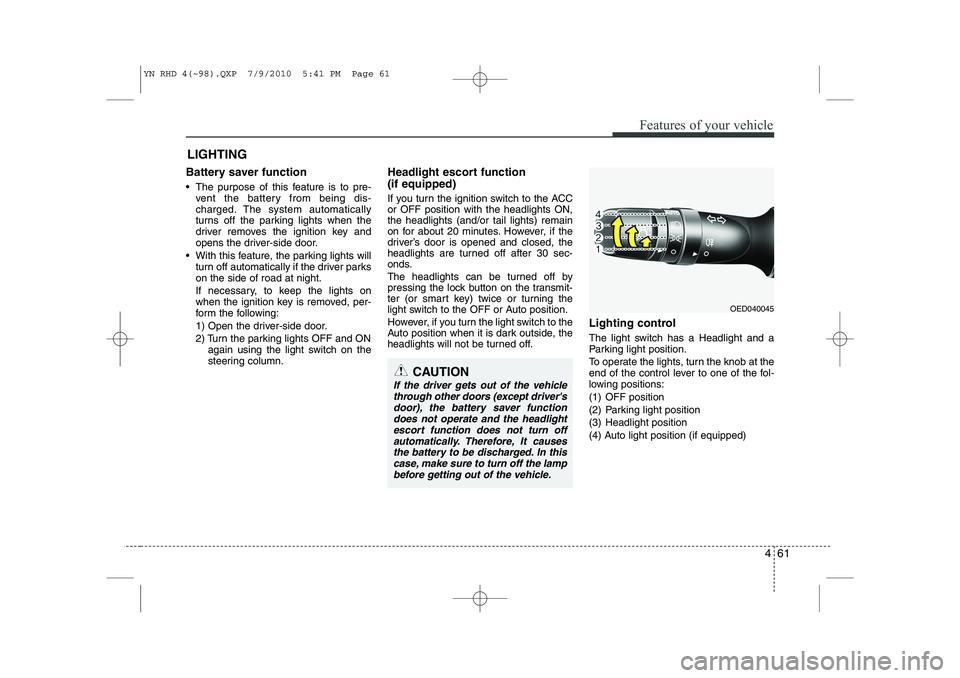
Lighting control
The light switch has a Headlight and a
Parking light position.
To operate the lights, turn the knob at the
end of the control lever to one of the fol-
lowing positions:
(1) OFF position
(2) Parking light position
(3) Headlight position
(4) Auto light position (if equipped)
LIGHTING
OED040045
CAUTION
If the driver gets out of the vehicle
through other doors (except driver's door), the battery saver functiondoes not operate and the headlight
escort function does not turn off automatically. Therefore, It causesthe battery to be discharged. In thiscase, make sure to turn off the lamp
before getting out of the vehicle.
YN RHD 4(~98).QXP 7/9/2010 5:41 PM Page 61
Page 483 of 761
Features of your vehicle
62
4
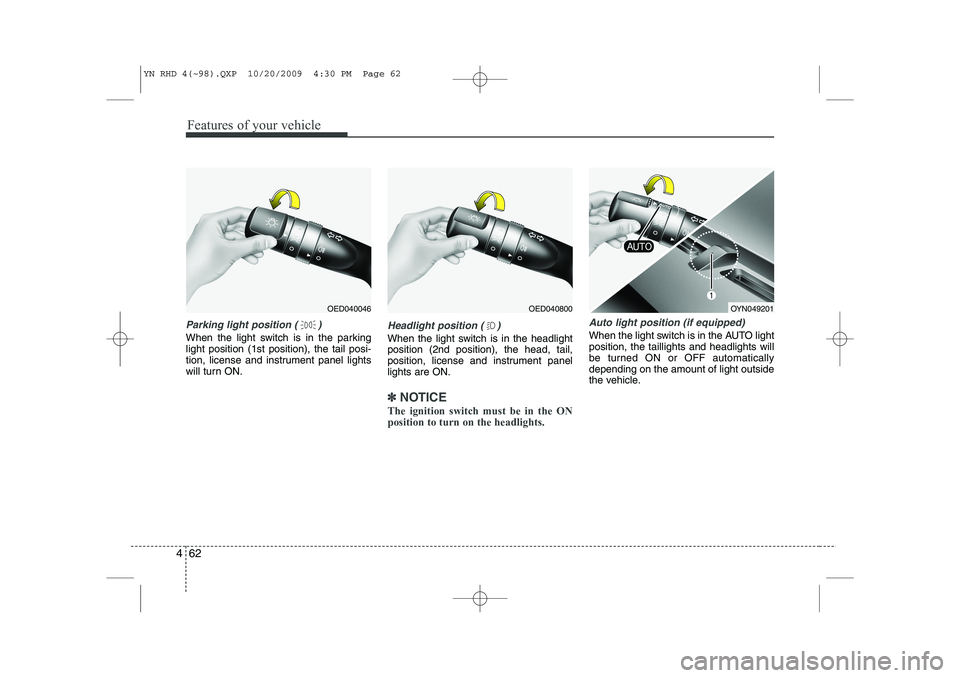
Parking light position ( )
When the light switch is in the parking light position (1st position), the tail posi-
tion, license and instrument panel lights
will turn ON.
Headlight position ( )
When the light switch is in the headlight position (2nd position), the head, tail,
position, license and instrument panellights are ON.
✽✽
NOTICE
The ignition switch must be in the ON position to turn on the headlights.
Auto light position (if equipped)
When the light switch is in the AUTO light position, the taillights and headlights will
be turned ON or OFF automaticallydepending on the amount of light outside
the vehicle.
OED040800OYN049201OED040046
YN RHD 4(~98).QXP 10/20/2009 4:30 PM Page 62
Page 485 of 761
Features of your vehicle
64
4
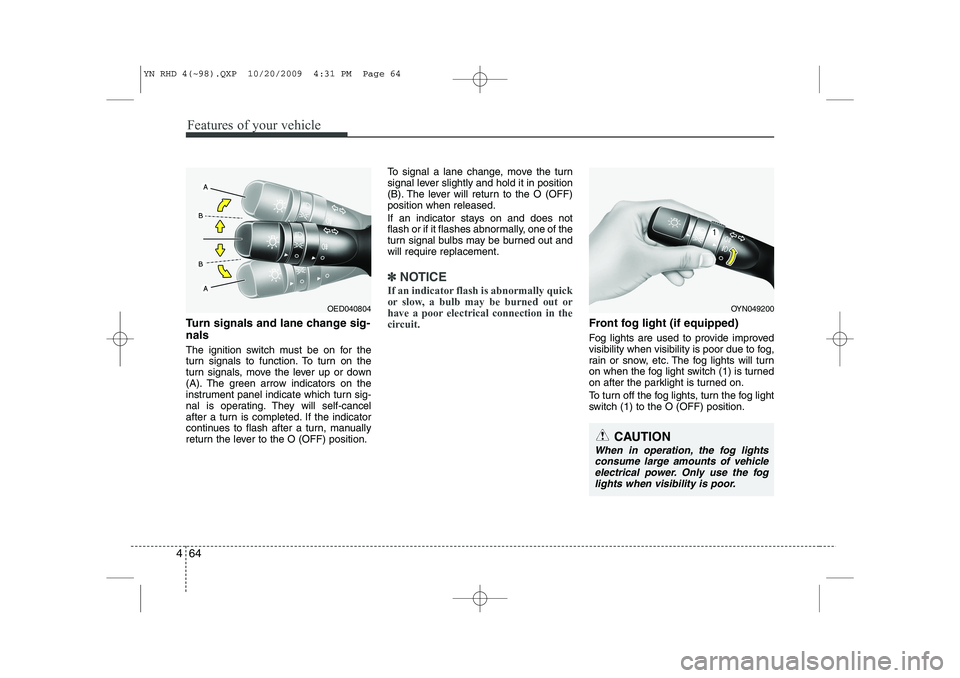
Turn signals and lane change sig- nals
The ignition switch must be on for the
turn signals to function. To turn on the
turn signals, move the lever up or down
(A). The green arrow indicators on the
instrument panel indicate which turn sig-
nal is operating. They will self-cancel
after a turn is completed. If the indicator
continues to flash after a turn, manually
return the lever to the O (OFF) position. To signal a lane change, move the turn
signal lever slightly and hold it in position
(B). The lever will return to the O (OFF)position when released.
If an indicator stays on and does not
flash or if it flashes abnormally, one of the
turn signal bulbs may be burned out andwill require replacement.
✽✽
NOTICE
If an indicator flash is abnormally quick
or slow, a bulb may be burned out or
have a poor electrical connection in the
circuit.
Front fog light (if equipped)
Fog lights are used to provide improved
visibility when visibility is poor due to fog,
rain or snow, etc. The fog lights will turn
on when the fog light switch (1) is turned
on after the parklight is turned on.
To turn off the fog lights, turn the fog light
switch (1) to the O (OFF) position.
OYN049200
CAUTION
When in operation, the fog lights consume large amounts of vehicleelectrical power. Only use the fog lights when visibility is poor.
OED040804
YN RHD 4(~98).QXP 10/20/2009 4:31 PM Page 64
Page 488 of 761
467
Features of your vehicle
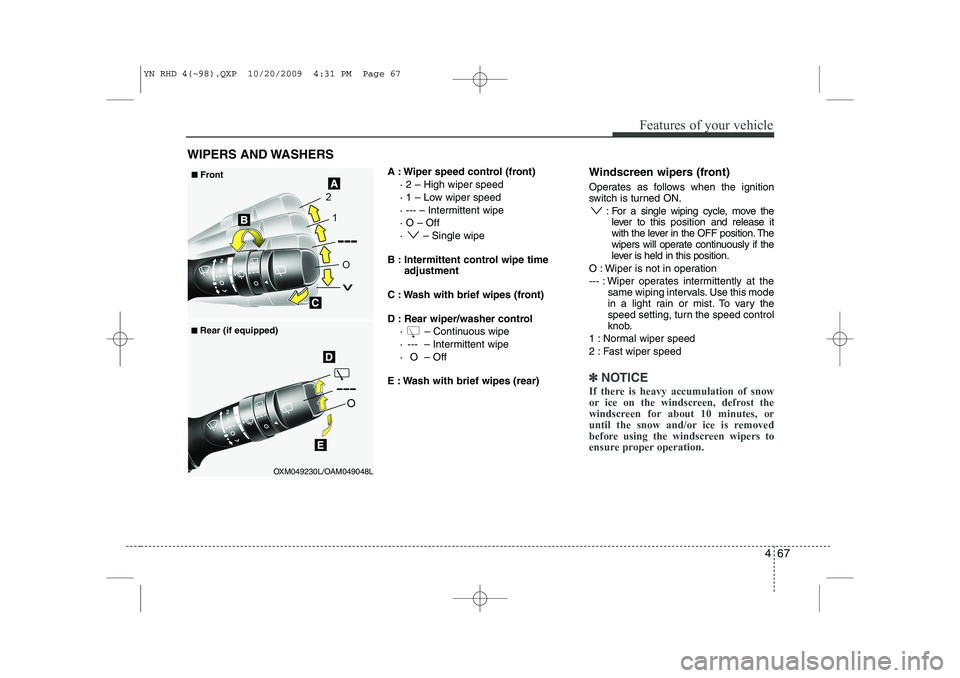
A : Wiper speed control (front)· 2 – High wiper speed
· 1 – Low wiper speed
· --- – Intermittent wipe · O – Off
· – Single wipe
B : Intermittent control wipe time adjustment
C : Wash with brief wipes (front)
D : Rear wiper/washer control · – Continuous wipe
· --- – Intermittent wipe
· O – Off
E : Wash with brief wipes (rear) Windscreen wipers (front)
Operates as follows when the ignition
switch is turned ON.
: For a single wiping cycle, move thelever to this position and release it
with the lever in the OFF position. The
wipers will operate continuously if the
lever is held in this position.
O : Wiper is not in operation
--- : Wiper operates intermittently at the same wiping intervals. Use this mode
in a light rain or mist. To vary the
speed setting, turn the speed control
knob.
1 : Normal wiper speed
2 : Fast wiper speed
✽✽ NOTICE
If there is heavy accumulation of snow
or ice on the windscreen, defrost the
windscreen for about 10 minutes, or
until the snow and/or ice is removed
before using the windscreen wipers to
ensure proper operation.
WIPERS AND WASHERS
OXM049230L/OAM049048L
■
■
Front
■
■ Rear (if equipped)
YN RHD 4(~98).QXP 10/20/2009 4:31 PM Page 67