2011 KIA VENGA warning light
[x] Cancel search: warning lightPage 333 of 761
Maintenance
70
7
APPEARANCE CARE
Exterior care
Exterior general caution
It is very important to follow the label
directions when using any chemical
cleaner or polish. Read all warning andcaution statements that appear on thelabel.
Finish maintenance
Washing
To help protect your vehicle’s finish from
rust and deterioration, wash it thoroughlyand frequently at least once a month with
lukewarm or cold water.
If you use your vehicle for off-road driv-
ing, you should wash it after each off-
road trip. Pay special attention to the
removal of any accumulation of salt, dirt,
mud, and other foreign materials. Make
sure the drain holes in the lower edges of
the doors and rocker panels are keptclear and clean.
Insects, tar, tree sap, bird droppings,
industrial pollution and similar deposits
can damage your vehicle’s finish if not
removed immediately.
Even prompt washing with plain water
may not completely remove all these
deposits. A mild soap, safe for use on
painted surfaces, may be used. After washing, rinse the vehicle thor-
oughly with lukewarm or cold water. Do
not allow soap to dry on the finish.
WARNING -
Wet brakes
After washing the vehicle, test the
brakes while driving slowly to see if
they have been affected by water. If
braking performance is impaired,
dry the brakes by applying them
lightly while maintaining a slow for-
ward speed.
CAUTION
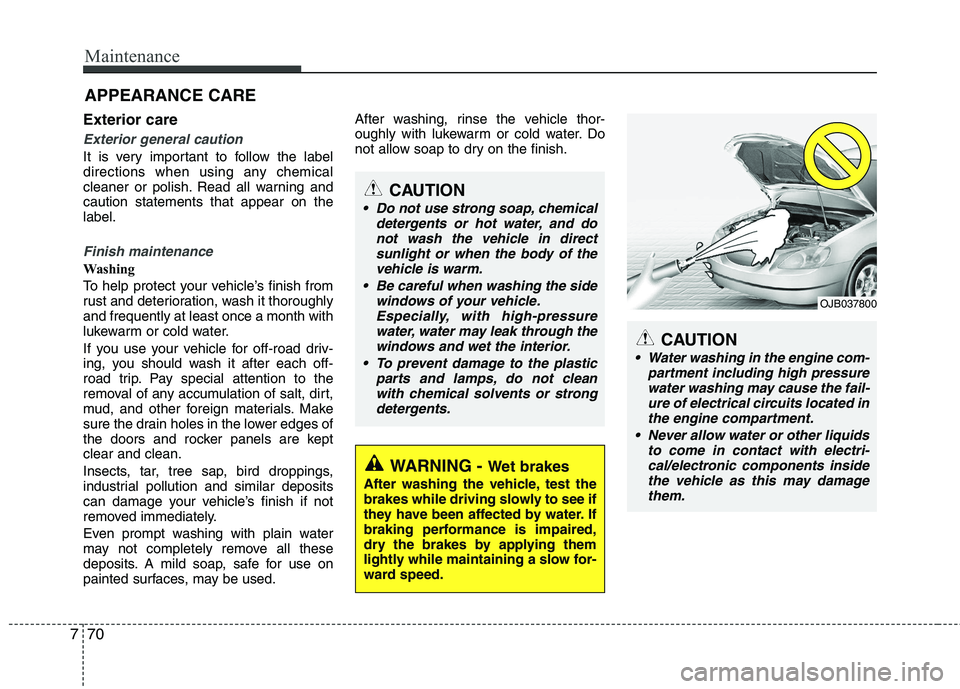
Water washing in the engine com- partment including high pressurewater washing may cause the fail-ure of electrical circuits located in the engine compartment.
Never allow water or other liquids to come in contact with electri-cal/electronic components inside the vehicle as this may damage
them.
OJB037800
CAUTION
Do not use strong soap, chemical detergents or hot water, and donot wash the vehicle in direct
sunlight or when the body of the vehicle is warm.
Be careful when washing the side windows of your vehicle.Especially, with high-pressure
water, water may leak through thewindows and wet the interior.
To prevent damage to the plastic parts and lamps, do not clean
with chemical solvents or strongdetergents.
Page 335 of 761
Maintenance
72
7
Underbody maintenance
Corrosive materials used for ice and
snow removal and dust control may col-
lect on the underbody. If these materials
are not removed, accelerated rusting can
occur on the underbody parts such as
the fuel lines, frame, floor pan and
exhaust system, even though they have
been treated with rust protection.
Thoroughly flush the vehicle underbody
and wheel openings with lukewarm or
cold water once a month, after off-road
driving and at the end of each winter. Payspecial attention to these areas because
it is difficult to see all the mud and dirt. It
will do more harm than good to wet down
the road grime without removing it. The
lower edges of the doors, rocker panels,
and frame members have drain holes
that should not clog with dirt; trapped
water in these areas can cause rusting.
Aluminum wheel maintenance
The aluminum wheels are coated with a
clear protective finish.
Do not use any abrasive cleaner, pol-
ishing compound, solvent, or wire
brushes on aluminum wheels. They
may scratch or damage the finish.
Use only a mild soap or neutral deter- gent, and rinse thoroughly with water.
Also, be sure to clean the wheels after
driving on salted roads. This helps pre-
vent corrosion.
Avoid washing the wheels with high- speed car wash brushes.
Do not use any acid detergent. It may damage and corrode the aluminum
wheels coated with a clear protectivefinish.WARNING
After washing the vehicle, test the
brakes while driving slowly to see if
they have been affected by water. If
braking performance is impaired,
dry the brakes by applying them
lightly while maintaining a slow for-
ward speed.
Page 354 of 761
Introduction
2
1
We want to help you get the greatest
possible driving pleasure from your vehi-
cle. Your Owner’s Manual can assist you
in many ways. We strongly recommend
that you read the entire manual. In order
to minimize the chance of death or injury,
you must read the WARNING and CAU-
TION sections in the manual.
Illustrations complement the words in this
manual to best explain how to enjoy your
vehicle. By reading your manual, you
learn about features, important safety
information, and driving tips under vari-
ous road conditions.
The general layout of the manual is pro-
vided in the Table of Contents. A good
place to start is the index; it has an alpha-
betical listing of all information in your
manual.
Sections: This manual has eight sections
plus an index. Each section begins with a
brief list of contents so you can tell at a
glance if that section has the information
you want. You will find various WARNINGs,
CAUTIONs, and NOTICEs in this manu-
al. These WARNINGs were prepared to
enhance your personal safety. You should
carefully read and follow ALL procedures
and recommendations provided in these
WARNINGs, CAUTIONs and NOTICEs.
✽✽
NOTICE
A NOTICE indicates interesting or help-
ful information is being provided.
Petrol engine
Unleaded
For Europe
For the optimal vehicle performance, we
recommend you to use unleaded petrol
with an octane rating of RON (Research
Octane Number) 95 / AKI (Anti Knock
Index) 91 or higher.
You may use unleaded petrol with an
octane rating of RON 91~94 / AKI 87~90
but it may result in slight performance
reduction of the vehicle.
Except Europe
Your new KIA vehicle is designed to use
only unleaded fuel having an Octane
Rating of RON (Research Octane
Number) 91 / AKI (Anti-Knock Index) 87
or higher.
Your new vehicle is designed to obtain
maximum performance with UNLEADED
FUEL, as well as minimize exhaust emis-
sions and spark plug fouling.
HOW TO USE THIS MANUAL
WARNING
A WARNING indicates a situation in
which harm, serious bodily injury ordeath could result if the warning isignored.
CAUTION
A CAUTION indicates a situation in which damage to your vehicle could
result if the caution is ignored.
FUEL REQUIREMENTS
YN RHD 1.QXP 6/1/2010 4:00 PM Page 2
Page 358 of 761

Introduction
6
1
INDICATOR SYMBOLS ON THE INSTRUMENT CLUSTER
Engine coolant temperature
warning light
Seat belt warning light
High beam indicator
Turn signal indicator
ABS warning light*
Parking brake & Brake fluid
warning light
Malfunction indicator*
Immobiliser indicator*
Glow indicator (Diesel only)
Fuel filter warning light (Diesel only)
Tailgate open warning light*
❈ For more detailed explanations, refer to “Instrument cluster” in section 4.
Charging system warning light
Door ajar warning light*
ESP indicator*
ESP OFF indicator*
Front fog light indicator*
Engine oil pressure warning light
Electric power steering (EPS)
system warning light*
Air bag warning light*
Low tyre pressure telltale* / TPMS malfunction indicator*
Rear fog light indicator*
Cruise SET indicator*
Speed limit indicator* AUTO STOP for ISG system indicator*
Cruise indicator*
AUTOSTOP
KEY OUT indicator*KEY
OUT
Light on indicator
Automatic transaxle shift pattern indicator*
Manual transaxle shift pattern indicator*
* if equipped
Door open position indicator*
Low fuel level warning light Low tyre pressure position telltale*
YN RHD 1.QXP 6/1/2010 4:00 PM Page 6
Page 361 of 761
23
Your vehicle at a glance
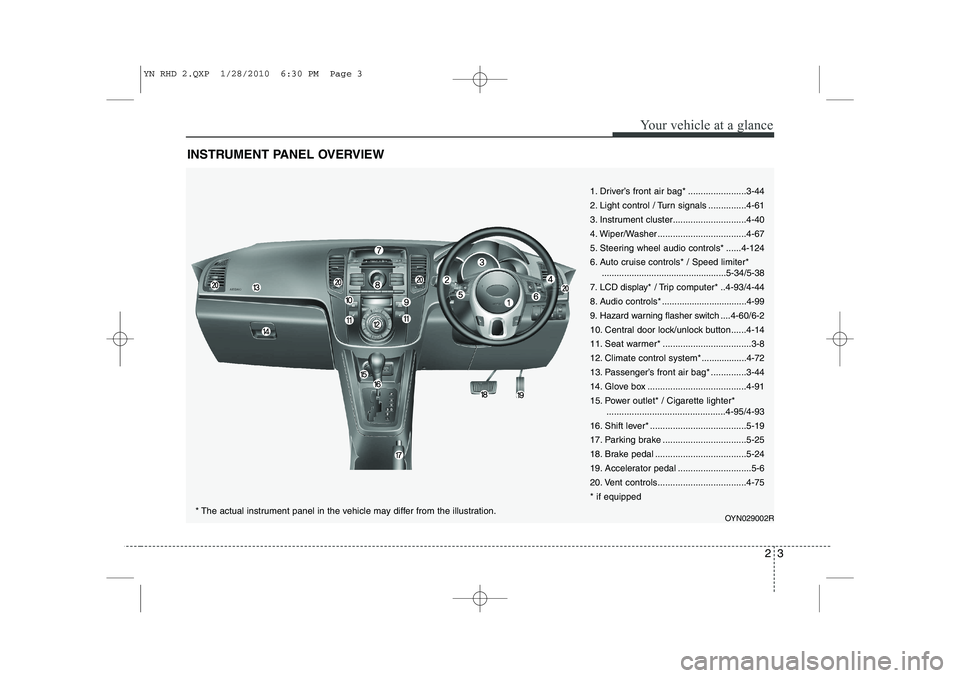
INSTRUMENT PANEL OVERVIEW
1. Driver’s front air bag* .......................3-44
2. Light control / Turn signals ...............4-61
3. Instrument cluster.............................4-40
4. Wiper/Washer ...................................4-67
5. Steering wheel audio controls* ......4-124
6. Auto cruise controls* / Speed limiter*..................................................5-34/5-38
7. LCD display* / Trip computer* ..4-93/4-44
8. Audio controls * ..................................4-99
9. Hazard warning flasher switch ....4-60/6-2
10. Central door lock/unlock button......4-14
11. Seat warmer* ...................................3-8
12. Climate control system*..................4-72
13. Passenger’s front air bag* ..............3-44
14. Glove box .......................................4-91
15. Power outlet* / Cigarette lighter* ...............................................4-95/4-93
16. Shift lever* ......................................5-19
17. Parking brake .................................5-25
18. Brake pedal ....................................5-24
19. Accelerator pedal .............................5-6
20. Vent controls...................................4-75* if equipped
OYN029002R
* The actual instrument panel in the vehicle may differ from the illustration.
YN RHD 2.QXP 1/28/2010 6:30 PM Page 3
Page 377 of 761
315
Safety features of your vehicle
Seat belt warning
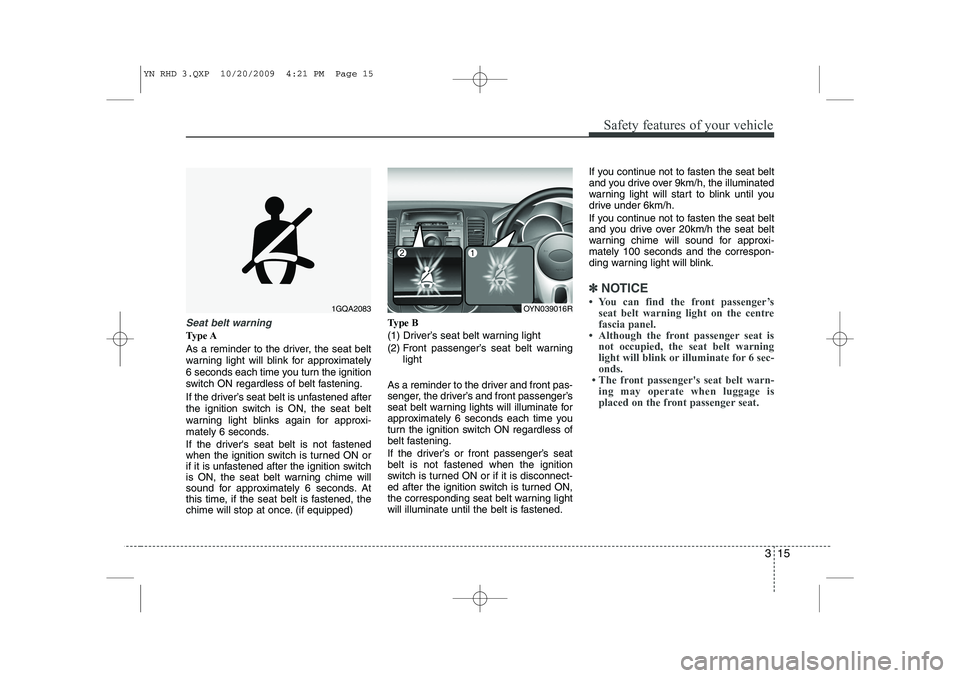
Type A
As a reminder to the driver, the seat belt
warning light will blink for approximately
6 seconds each time you turn the ignition
switch ON regardless of belt fastening.
If the driver’s seat belt is unfastened after
the ignition switch is ON, the seat belt
warning light blinks again for approxi-
mately 6 seconds.
If the driver's seat belt is not fastened
when the ignition switch is turned ON or
if it is unfastened after the ignition switch
is ON, the seat belt warning chime will
sound for approximately 6 seconds. At
this time, if the seat belt is fastened, the
chime will stop at once. (if equipped)Type B
(1) Driver’s seat belt warning light
(2) Front passenger’s seat belt warning
light
As a reminder to the driver and front pas-
senger, the driver’s and front passenger’s
seat belt warning lights will illuminate for
approximately 6 seconds each time you
turn the ignition switch ON regardless of
belt fastening.
If the driver’s or front passenger’s seat
belt is not fastened when the ignition
switch is turned ON or if it is disconnect-
ed after the ignition switch is turned ON,
the corresponding seat belt warning light
will illuminate until the belt is fastened. If you continue not to fasten the seat belt
and you drive over 9km/h, the illuminated
warning light will start to blink until you
drive under 6km/h.
If you continue not to fasten the seat belt
and you drive over 20km/h the seat belt
warning chime will sound for approxi-mately 100 seconds and the correspon-
ding warning light will blink.
✽✽
NOTICE
Page 383 of 761
321
Safety features of your vehicle
When the vehicle stops suddenly, or if
the occupant tries to lean forward too
quickly, the seat belt retractor will lock
into position. In certain frontal collisions,
the pre-tensioner will activate and pullthe seat belt into tighter contact against
the occupant's body.
If the system senses excessive seat belt
tension on the driver or passenger's seat
belt when the pre-tensioner activates, theload limiter inside the pre-tensioner willrelease some of the pressure on the
affected seat belt. (if equipped)The seat belt pre-tensioner system con-
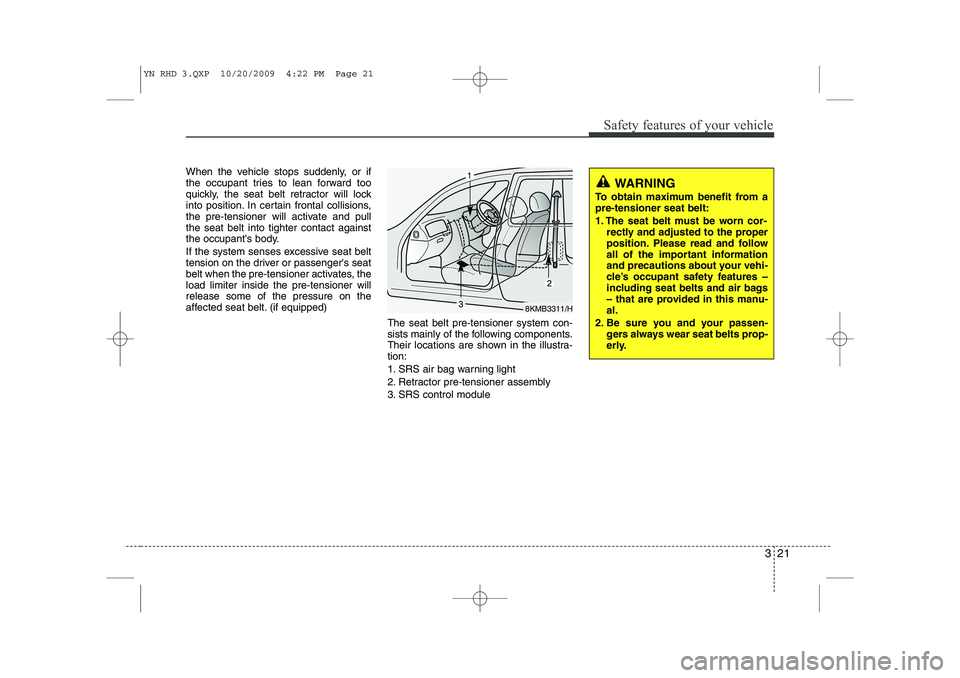
sists mainly of the following components.
Their locations are shown in the illustra-tion:
1. SRS air bag warning light
2. Retractor pre-tensioner assembly
3. SRS control module
WARNING
To obtain maximum benefit from a pre-tensioner seat belt:
1. The seat belt must be worn cor- rectly and adjusted to the proper
position. Please read and follow
all of the important information
and precautions about your vehi-
cle’s occupant safety features –
including seat belts and air bags
– that are provided in this manu-al.
2. Be sure you and your passen- gers always wear seat belts prop-
erly.
8KMB3311/H
YN RHD 3.QXP 10/20/2009 4:22 PM Page 21
Page 386 of 761
Safety features of your vehicle
24
3
Larger children
Children who are too large for child
restraint systems should always occupy
the rear seat and use the available
lap/shoulder belts. The lap portion should
be fastened and snugged on the hips
and as low as possible. Check if belt fits
periodically. A child's squirming could put
the belt out of position. Children are
given the most safety in the event of an
accident when they are restrained by a
proper restraint system in the rear seat. If
a larger child (over age 12) must be seat-ed in the front seat, the child should be
securely restrained by the availablelap/shoulder belt and the seat should be
placed in the rearmost position. Children
age 12 and under should be restrained
securely in the rear seat. NEVER place achild age 12 and under in the front seat.
NEVER place a rear facing child seat in
the front seat of a vehicle.
If the shoulder belt portion slightly touch-
es the child’s neck or face, try placing the
child closer to the centre of the vehicle. If
the shoulder belt still touches their face
or neck they need to be returned to a
child restraint system.
Pregnant women
The use of a seat belt is recommended
for pregnant women to lessen the chance
of injury in an accident. When a seat belt
is used, the lap belt portion should be
placed as low and snugly as possible on
the hips, not across the abdomen. For
specific recommendations, consult a
physician.
Injured person
A seat belt should be used when an
injured person is being transported.
When this is necessary, you should con-
sult a physician for recommendations.
One person per belt
Two people (including children) should
never attempt to use a single seat belt.
This could increase the severity of
injuries in case of an accident.
WARNING - Shoulder belts
on small children
Never allow a shoulder belt to be in contact with a child’s neck or
face whilst the vehicle is inmotion.
If seat belts are not properly worn and adjusted on children, there is
a risk of death or serious injury.
WARNING - Pregnant
women
Pregnant women must never place
the lap portion of the safety belt
over the area of the abdomen
where the fetus is located or abovethe abdomen where the belt could
crush the fetus during an impact.
YN RHD 3.QXP 10/20/2009 4:22 PM Page 24