2011 KIA Soul brake light
[x] Cancel search: brake lightPage 133 of 356
461
Features of your vehicle
D190900AUN-EU
Daytime running light
Daytime Running Lights (DRL) can make
it easier for others to see the front of your
vehicle during the day. DRL can be help-
ful in many different driving conditions,
and it is especially helpful after dawn and
before sunset.
The DRL system will make the head-
lights turn OFF when:
1. The headlight switch is ON.
2. The parking brake is applied.
3. Engine stops.
Page 204 of 356

53
Driving your vehicle
E020100AUN
Before entering vehicle
• Be sure that all windows, outside mir-ror(s), and outside lights are clean.
Check the condition of the tires.
Check under the vehicle for any sign of leaks.
Be sure there are no obstacles behind you if you intend to back up.
E020200AUN
Necessary inspections
Fluid levels, such as engine oil, engine
coolant, brake fluid, and washer fluid
should be checked on a regular basis,
with the exact interval depending on the
fluid. Further details are provided in sec-
tion 7, “Maintenance”.E020300AHM
Before starting
Close and lock all doors.
Position the seat so that all controls areeasily reached.
Adjust the inside and outside rearview mirrors.
Be sure that all lights work.
Check all gauges.
Check the operation of warning lights when the ignition switch is turned to
the ON position.
Release the parking brake and make sure the brake warning light goes out.
For safe operation, be sure you are famil-
iar with your vehicle and its equipment.
BEFORE DRIVING
WARNING
All passengers must be properly
belted whenever the vehicle is mov-
ing. Refer to “Seat belts” in section
3 for more information on their
proper use.
WARNING
Always check the surrounding
areas near your vehicle for people,
especially children, before putting a
car into D (Drive) or R (Reverse).
WARNING
Driving while distracted can result
in a loss of vehicle control, that
may lead to an accident, severe
personal injury, and death. (Continued)
(Continued)
The driver's primary responsibility
is in the safe and legal operation of
a vehicle, and use of any handheld
devices, other equipment, or vehi-
cle systems which take the driver's
eyes, attention and focus away
from the safe operation of a vehicle
or which are not permissible by law
should never be used during oper-
ation of the vehicle.
Page 206 of 356
55
Driving your vehicle
E030202AHM
ACC (Accessory)
The steering wheel is unlocked and elec-
trical accessories are operative.
✽ ✽NOTICE
If difficulty is experienced turning the
ignition switch to the ACC position, turn
the key while turning the steering wheel
right and left to release the tension.
E030203AUN
ON
The warning lights can be checked
before the engine is started. This is the
normal running position after the engine
is started.
Do not leave the ignition switch ON if the
engine is not running to prevent batterydischarge.
E030204APB
START
Turn the ignition switch to the START
position to start the engine. The engine
will crank until you release the key; then
it returns to the ON position. The brake
warning light can be checked in this posi-
tion.
E030205AHM
WARNING - Ignition
switch
Never turn the ignition switch to LOCK or ACC while the vehicle is
moving. This would result in loss
of directional control and braking
function, which could cause an
accident.
The anti-theft steering column lock is not a substitute for the parking
brake. Before leaving the driver’s
seat, always make sure the shift
lever is engaged in 1st gear for the
manual transaxle or P (Park) for
automatic transaxle, set the park-
ing brake fully and shut the engine
off. Unexpected and sudden vehi-
cle movement may occur if these
precautions are not taken.
(Continued)
(Continued)
Never reach for the ignition switch,or any other controls through the
steering wheel while the vehicle is
in motion. The presence of your
hand or arm in this area could
cause a loss of vehicle control, an
accident and serious bodily injury
or death.
Do not place any movable objects around the driver’s seat as they
may move while driving, interfere
with the driver and lead to an acci-
dent.
Page 209 of 356
Driving your vehicle
85
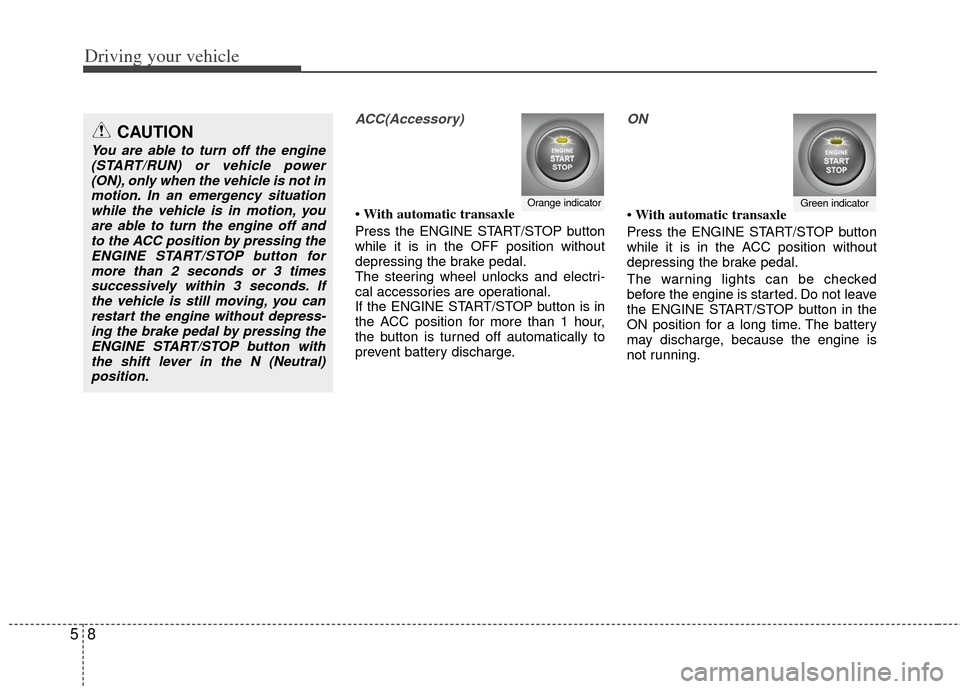
ACC(Accessory)
• With automatic transaxle
Press the ENGINE START/STOP button
while it is in the OFF position without
depressing the brake pedal.
The steering wheel unlocks and electri-
cal accessories are operational.
If the ENGINE START/STOP button is in
the ACC position for more than 1 hour,
the button is turned off automatically to
prevent battery discharge.
ON
• With automatic transaxle
Press the ENGINE START/STOP button
while it is in the ACC position without
depressing the brake pedal.
The warning lights can be checked
before the engine is started. Do not leave
the ENGINE START/STOP button in the
ON position for a long time. The battery
may discharge, because the engine is
not running.Orange indicatorGreen indicator
CAUTION
You are able to turn off the engine(START/RUN) or vehicle power(ON), only when the vehicle is not inmotion. In an emergency situationwhile the vehicle is in motion, you are able to turn the engine off andto the ACC position by pressing theENGINE START/STOP button formore than 2 seconds or 3 timessuccessively within 3 seconds. Ifthe vehicle is still moving, you canrestart the engine without depress-ing the brake pedal by pressing the ENGINE START/STOP button withthe shift lever in the N (Neutral)position.
Page 214 of 356
513
Driving your vehicle
During cold weather, shifting may bedifficult until the transaxle lubricant has
warmed up. This is normal and not
harmful to the transaxle.
If you've come to a complete stop and it's hard to shift into 1st or R (Reverse),
put the shift lever in N (Neutral) posi-
tion and release the clutch. Press the
clutch pedal back down, and then shift
into 1st or R (Reverse) gear position.E050101AUN
Using the clutch
The clutch should be pressed all the way
to the floor before shifting, then released
slowly. The clutch pedal should always be
fully released while driving. Do not rest
your foot on the clutch pedal while driv-
ing. This can cause unnecessary wear.
Do not partially engage the clutch to hold
the car on an incline. This causes unnec-
essary wear. Use the foot brake or park-
ing brake to hold the car on an incline. Do
not operate the clutch pedal rapidly and
repeatedly.
E050102AUN
Downshifting
When you must slow down in heavy traf-
fic or while driving up steep hills, down-
shift before the engine starts to labor.
Downshifting reduces the chance of
stalling and gives better acceleration
when you again need to increase your
speed. When the vehicle is traveling
down steep hills, downshifting helps
maintain safe speed and prolongs brake
life.
This vehicle is geared for improved fuel
economy and may need to be driven in a
lower gear when driving up hills or into
high winds. Using top gear is best for fuel
economy, but you should use the best
gear for the road conditions.
CAUTION
To avoid premature clutch wear and damage, do not drive withyour foot resting on the clutchpedal. Also, don’t use the clutchto hold the vehicle stopped on an uphill grade, while waiting for atraffic light, etc.
Do not use the shift lever as a handrest during driving, as thiscan result in premature wear ofthe transaxle shift forks.
WARNING
Before leaving the driver’s seat, always set the parking brake fully
and shut the engine off. Then
make sure the transaxle is shifted
into 1st gear when the vehicle is
parked on a level or uphill grade,
and shifted into R (Reverse) on a
downhill grade. Unexpected and
sudden vehicle movement can
occur if these precautions are not
followed in the order identified.
Page 218 of 356
517
Driving your vehicle
R (Reverse)
Use this position to drive the vehicle
backward.N (Neutral)
The wheels and transaxle are not
engaged. The vehicle will roll freely even
on the slightest incline unless the parking
brake or service brakes are applied.
D (Drive)
This is the normal forward driving posi-
tion. The transaxle will automatically shift
through a 4-gear sequence, providing the
best fuel economy and power.
For extra power when passing another
vehicle or climbing grades, depress the
accelerator fully, at which time the
transaxle will automatically downshift to
the next lower gear (or gears, as appro-
priate).
✽ ✽
NOTICE
Always come to a complete stop before
shifting into D (Drive).
2 (Second Gear)
Use 2 (Second Gear) for more power
when climbing hills and for increased
braking when going down hills. This posi-
tion also helps reduce wheel spin on slip-
pery surfaces. When the shift lever is
placed in 2 (Second Gear), the transaxle
will automatically shift from first to sec-
ond gear.
L (Low)
Move the shift lever to this position in
hard pulling situations and for climbing
steep grades.CAUTION
The transaxle may be damaged if
you shift into P (Park) while thevehicle is in motion.
CAUTION
Always come to a complete stopbefore shifting into or out of R(Reverse); you may damage the transaxle if you shift into R(Reverse) while the vehicle is inmotion, except when “Rocking thevehicle” explained in this section.
CAUTION
Do not exceed the recommendedmaximum speed in 2 (Second Gear)or L (Low). Operating the vehicleabove the maximum speed recom- mended for 2 (Second Gear) or L(Low) may cause excessive heat which could damage the automatictransaxle.
Page 219 of 356
Driving your vehicle
18
5
E060104ASA
O/D (Over Drive) system (if equipped)
Pressing the O/D system button cancels
and engages the overdrive system.
When the O/D system is cancelled, the
O/D OFF indicator illuminates and the
transaxle gear range is limited to 1st
through 3rd. The transaxle will not shift to
4th gear until the O/D system button is
pressed again to release the switch.
When driving down a sloping road with
the transaxle in O/D (4th), you can
decrease the vehicle speed without using
the brakes by pressing the O/D button.
When the ignition is switched OFF, O/D
OFF mode is automatically cancelled. O/D OFF Indicator
This indicator light illuminates in the
instrument panel when the O/D mode is
cancelled.
✽ ✽
NOTICE
If the O/D OFF indicator flashes, it indi-
cates an electrical problem with the
transaxle. Should this occur, have the
vehicle checked by an authorized KIA
dealer as soon as possible.
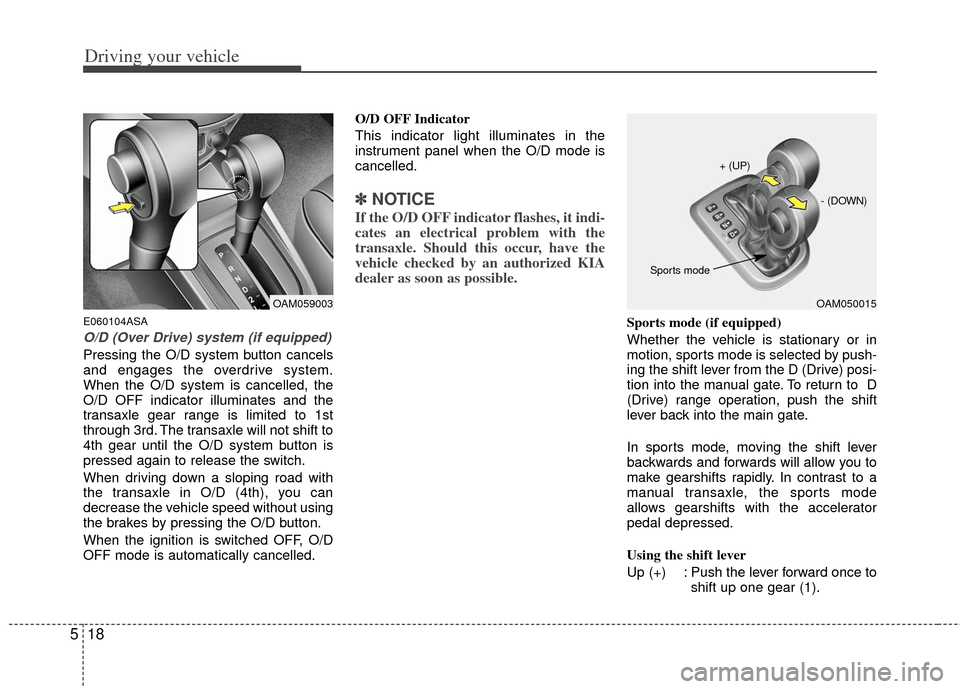
Sports mode (if equipped)
Whether the vehicle is stationary or in
motion, sports mode is selected by push-
ing the shift lever from the D (Drive) posi-
tion into the manual gate. To return to D
(Drive) range operation, push the shift
lever back into the main gate.
In sports mode, moving the shift lever
backwards and forwards will allow you to
make gearshifts rapidly. In contrast to a
manual transaxle, the sports mode
allows gearshifts with the accelerator
pedal depressed.
Using the shift lever
Up (+) : Push the lever forward once to
shift up one gear (1).
OAM059003OAM050015
+ (UP)
- (DOWN)
Sports mode
Page 223 of 356
Driving your vehicle
22
5
E070100AHM
Power brakes
Your vehicle has power-assisted brakes
that adjust automatically through normal
usage.
In the event that the power-assisted
brakes lose power because of a stalled
engine or some other reason, you can
still stop your vehicle by applying greater
force to the brake pedal than you nor-
mally would. The stopping distance, how-
ever, will be longer.
When the engine is not running, the
reserve brake power is partially depleted
each time the brake pedal is applied. Do
not pump the brake pedal when the
power assist has been interrupted.
Pump the brake pedal only when neces-
sary to maintain steering control on slip-
pery surfaces.
E070101AUN
In the event of brake failure
If service brakes fail to operate while the
vehicle is in motion, you can make an
emergency stop with the parking brake.
The stopping distance, however, will be
much greater than normal.
BRAKE SYSTEM
WARNING- Brakes
Do not drive with your foot rest-
ing on the brake pedal. This will
create abnormal high brake tem-
peratures, excessive brake lining
and pad wear, and increased
stopping distances.
When descending a long or steep hill, shift to a lower gear and
avoid continuous application of
the brakes. Continuous brake
application will cause the brakes
to overheat and could result in a
temporary loss of braking per-
formance.
Wet brakes may impair the vehi- cle’s ability to safely slow down;
the vehicle may also pull to one
side when the brakes are applied.
Applying the brakes lightly will
indicate whether they have been
affected in this way. Always test
your brakes in this fashion after
driving through deep water. To
dry the brakes, apply them lightly
while maintaining a safe forward
speed until brake performance
returns to normal.
(Continued)
(Continued)
Always, confirm the position ofthe brake and accelerator pedal
before driving. If you don't check
the position of the accelerator
and brake pedal before driving,
you may depress the accelerator
instead of the brake pedal. It may
cause a serious accident.
WARNING- Parking brake
Applying the parking brake while
the vehicle is moving at normal
speeds can cause a sudden loss of
control of the vehicle. If you must
use the parking brake to stop the
vehicle, use great caution in apply-
ing the brake.