2011 KIA Soul odometer
[x] Cancel search: odometerPage 109 of 356
437
Features of your vehicle
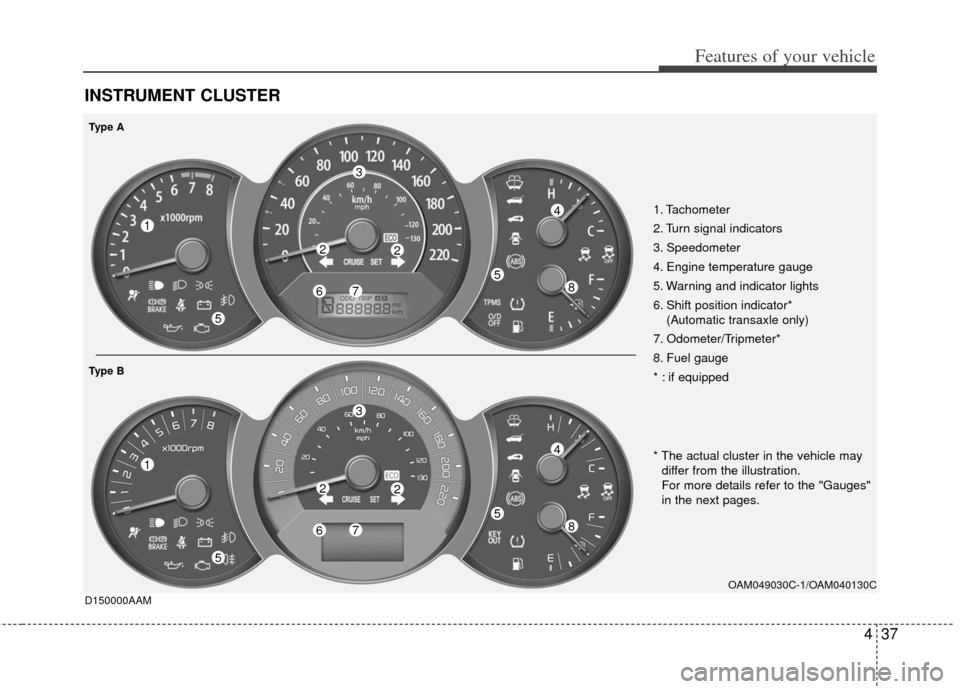
INSTRUMENT CLUSTER
D150000AAM
OAM049030C-1/OAM040130C
14
5867
22
3
5
14
5867
22
3
5
Type A
Type B
1. Tachometer
2. Turn signal indicators
3. Speedometer
4. Engine temperature gauge
5. Warning and indicator lights
6. Shift position indicator*(Automatic transaxle only)
7. Odometer/Tripmeter*
8. Fuel gauge
* : if equipped
* The actual cluster in the vehicle may differ from the illustration.
For more details refer to the "Gauges"
in the next pages.
Page 112 of 356
Features of your vehicle
40
4
D150204BHM-EE
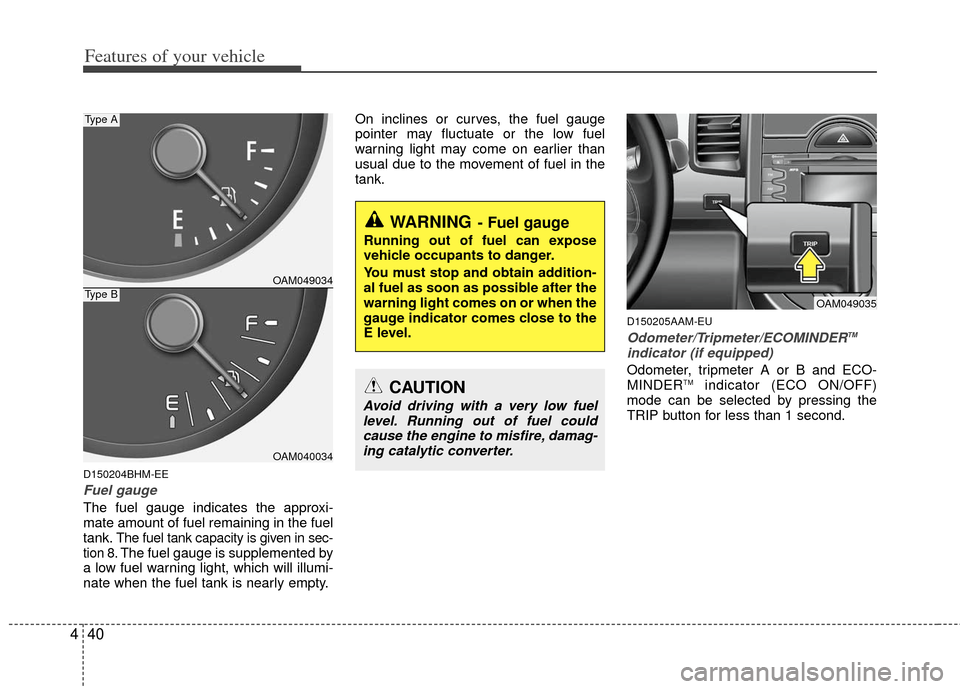
Fuel gauge
The fuel gauge indicates the approxi-
mate amount of fuel remaining in the fuel
tank.
The fuel tank capacity is given in sec-
tion 8.The fuel gauge is supplemented by
a low fuel warning light, which will illumi-
nate when the fuel tank is nearly empty. On inclines or curves, the fuel gauge
pointer may fluctuate or the low fuel
warning light may come on earlier than
usual due to the movement of fuel in the
tank.
D150205AAM-EU
Odometer/Tripmeter/ECOMINDERTM
indicator (if equipped)
Odometer, tripmeter A or B and ECO-
MINDERTMindicator (ECO ON/OFF)
mode can be selected by pressing the
TRIP button for less than 1 second.
OAM049035
WARNING- Fuel gauge
Running out of fuel can expose
vehicle occupants to danger.
You must stop and obtain addition-
al fuel as soon as possible after the
warning light comes on or when the
gauge indicator comes close to the
E level.
CAUTION
Avoid driving with a very low fuel level. Running out of fuel couldcause the engine to misfire, damag- ing catalytic converter.
OAM049034
OAM040034
Type A
Type B
Page 113 of 356
441
Features of your vehicle
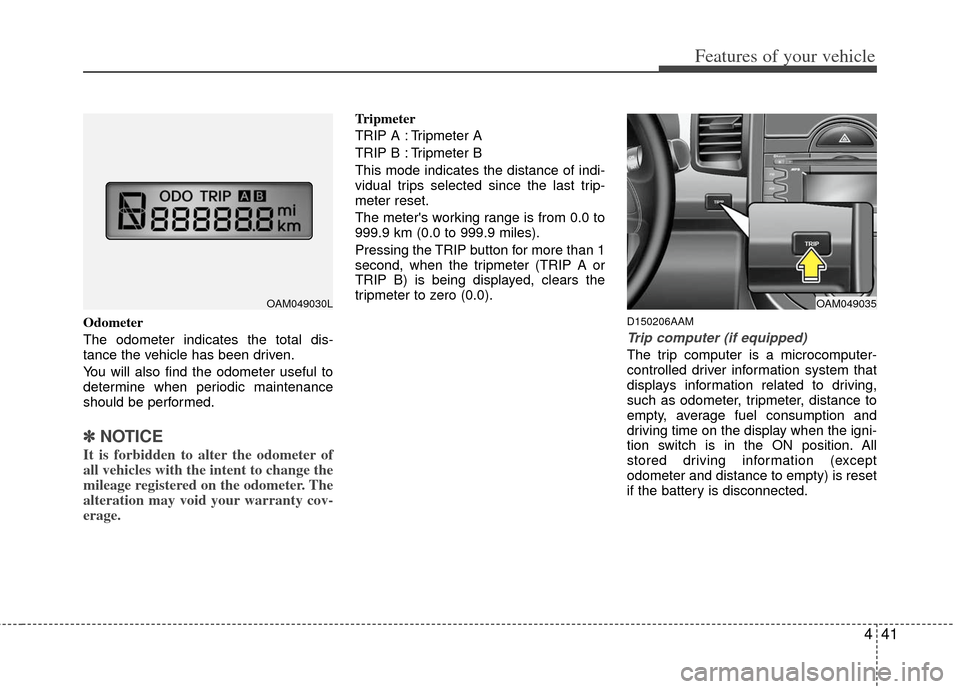
Odometer
The odometer indicates the total dis-
tance the vehicle has been driven.
You will also find the odometer useful to
determine when periodic maintenance
should be performed.
✽ ✽NOTICE
It is forbidden to alter the odometer of
all vehicles with the intent to change the
mileage registered on the odometer. The
alteration may void your warranty cov-
erage.
Tripmeter
TRIP A : Tripmeter A
TRIP B : Tripmeter B
This mode indicates the distance of indi-
vidual trips selected since the last trip-
meter reset.
The meter's working range is from 0.0 to
999.9 km (0.0 to 999.9 miles).
Pressing the TRIP button for more than 1
second, when the tripmeter (TRIP A or
TRIP B) is being displayed, clears the
tripmeter to zero (0.0).
D150206AAM
Trip computer (if equipped)
The trip computer is a microcomputer-
controlled driver information system that
displays information related to driving,
such as odometer, tripmeter, distance to
empty, average fuel consumption and
driving time on the display when the igni-
tion switch is in the ON position. All
stored driving information (except
odometer and distance to empty) is reset
if the battery is disconnected.
OAM049030LOAM049035
Page 114 of 356
Features of your vehicle
42
4
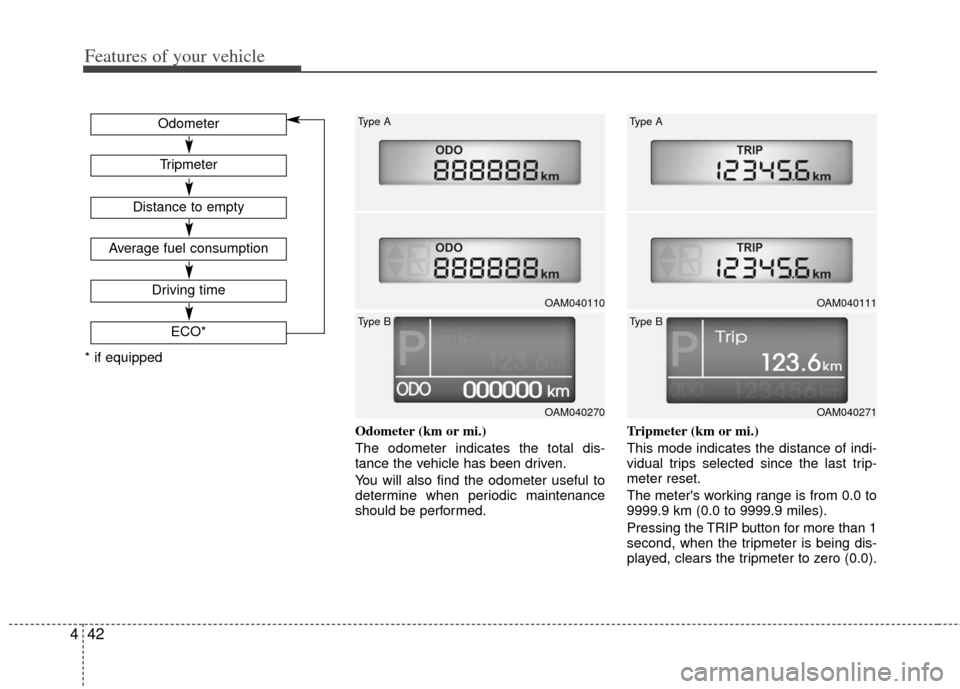
Odometer (km or mi.)
The odometer indicates the total dis-
tance the vehicle has been driven.
You will also find the odometer useful to
determine when periodic maintenance
should be performed. Tripmeter (km or mi.)
This mode indicates the distance of indi-
vidual trips selected since the last trip-
meter reset.
The meter's working range is from 0.0 to
9999.9 km (0.0 to 9999.9 miles).
Pressing the TRIP button for more than 1
second, when the tripmeter is being dis-
played, clears the tripmeter to zero (0.0).
ECO*
Tripmeter
Odometer
Distance to empty
Average fuel consumption
Driving time
* if equipped
OAM040110
Type A
OAM040270
Type B
OAM040111
Type A
OAM040271
Type B
Page 116 of 356

Features of your vehicle
44
4
✽
✽
NOTICE
• If the vehicle is not on level ground or
the battery power has been interrupt-
ed, the “Distance to empty” function
may not operate correctly.
The trip computer may not register
additional fuel if less than 6 liters (1.6
gallons) of fuel are added to the vehi-
cle.
• The fuel consumption and distance to empty values may vary significantly
based on driving conditions, driving
habits, and condition of the vehicle.
• The distance to empty value is an esti- mate of the available driving distance.
This value may differ from the actual
driving distance available.
ECOMINDERTMINDICATOR
ECO ON/OFF mode (if equipped)
You can turn the ECOMINDER
TMindica-
tor on/off on the instrument cluster in this
mode. If you push the TRIP button more than 1
second in the ECO ON mode, ECOMIN-
DER
TMOFF is displayed in the screen
and the ECO indicator turns off.
If you want to display the ECO indicator
again, press the TRIP button more than 1
second in the ECO OFF mode and then
ECO ON mode is displayed in the
screen.
When you press the TRIP button less
than 1 second in the ECO mode, the
mode is changed to odometer.
D150300AAM
Warnings and indicators
All warning lights are checked by turning
the ignition switch ON (do not start the
engine). Any light that does not illuminate
should be checked by an authorized KIA
dealer.
After starting the engine, check to make
sure that all warning lights are off. If any
warning lights are still on, this indicates a
situation that needs attention. When
releasing the parking brake, the brake
system warning light should go off. The
fuel warning light will stay on if the fuel
level is low.
OAM049105N
Type A
OAM040277
Type B
Page 118 of 356
Features of your vehicle
46
4
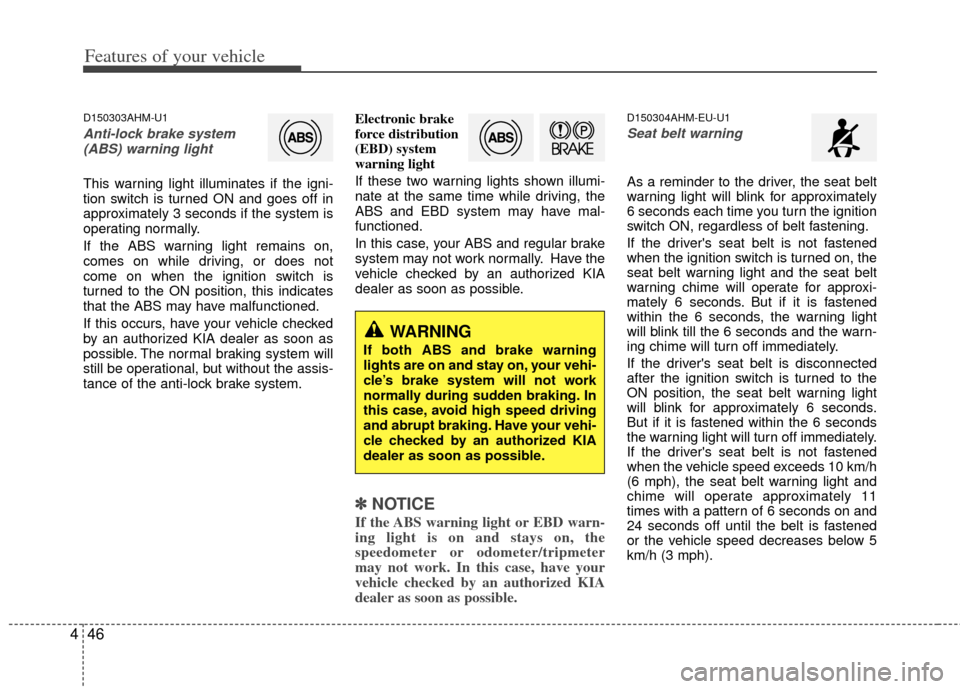
D150303AHM-U1
Anti-lock brake system
(ABS) warning light
This warning light illuminates if the igni-
tion switch is turned ON and goes off in
approximately 3 seconds if the system is
operating normally.
If the ABS warning light remains on,
comes on while driving, or does not
come on when the ignition switch is
turned to the ON position, this indicates
that the ABS may have malfunctioned.
If this occurs, have your vehicle checked
by an authorized KIA dealer as soon as
possible. The normal braking system will
still be operational, but without the assis-
tance of the anti-lock brake system. Electronic brake
force distribution
(EBD) system
warning light
If these two warning lights shown illumi-
nate at the same time while driving, the
ABS and EBD system may have mal-
functioned.
In this case, your ABS and regular brake
system may not work normally. Have the
vehicle checked by an authorized KIA
dealer as soon as possible.
✽ ✽
NOTICE
If the ABS warning light or EBD warn-
ing light is on and stays on, the
speedometer or odometer/tripmeter
may not work. In this case, have your
vehicle checked by an authorized KIA
dealer as soon as possible.
D150304AHM-EU-U1
Seat belt warning
As a reminder to the driver, the seat belt
warning light will blink for approximately
6 seconds each time you turn the ignition
switch ON, regardless of belt fastening.
If the driver's seat belt is not fastened
when the ignition switch is turned on, the
seat belt warning light and the seat belt
warning chime will operate for approxi-
mately 6 seconds. But if it is fastened
within the 6 seconds, the warning light
will blink till the 6 seconds and the warn-
ing chime will turn off immediately.
If the driver's seat belt is disconnected
after the ignition switch is turned to the
ON position, the seat belt warning light
will blink for approximately 6 seconds.
But if it is fastened within the 6 seconds
the warning light will turn off immediately.
If the driver's seat belt is not fastened
when the vehicle speed exceeds 10 km/h
(6 mph), the seat belt warning light and
chime will operate approximately 11
times with a pattern of 6 seconds on and
24 seconds off until the belt is fastened
or the vehicle speed decreases below 5
km/h (3 mph).
WARNING
If both ABS and brake warning
lights are on and stay on, your vehi-
cle’s brake system will not work
normally during sudden braking. In
this case, avoid high speed driving
and abrupt braking. Have your vehi-
cle checked by an authorized KIA
dealer as soon as possible.
Page 315 of 356
735
Maintenance
G200601AUN
Compact spare tire replacement
A compact spare tire has a shorter
tread life than a regular size tire.
Replace it when you can see the
tread wear indicator bars on the tire.
The replacement compact spare tire
should be the same size and design
tire as the one provided with your
new vehicle and should be mounted
on the same compact spare tire
wheel. The compact spare tire is not
designed to be mounted on a regular
size wheel, and the compact spare
tire wheel is not designed for mount-
ing a regular size tire.
G200700BHM-EC
Wheel replacement
When replacing the metal wheels for
any reason, make sure the new
wheels are equivalent to the original
factory units in diameter, rim width
and offset.
G200800AHM
Tire traction
Tire traction can be reduced if you
drive on worn tires, tires that are
improperly inflated or on slippery
road surfaces. Tires should be
replaced when tread wear indicators
appear. Slow down whenever there
is rain, snow or ice on the road to
reduce the possibility of losing con-
trol of the vehicle.
G200900AUN
Tire maintenance
In addition to proper inflation, correct
wheel alignment helps to decrease
tire wear. If you find a tire is worn
unevenly, have your dealer check the
wheel alignment.
When you have new tires installed,
make sure they are balanced. This
will increase vehicle ride comfort and
tire life. Additionally, a tire should
always be rebalanced if it is removed
from the wheel.
WARNING
A wheel that is not the correct
size may adversely affect wheel
and bearing life, braking and
stopping abilities, handling
characteristics, ground clear-
ance, body-to-tire clearance,
speedometer and odometer cal-
ibration, headlight aim and
bumper height.
Page 352 of 356
I5
Index
Indicators and warnings ··················\
··················\
·············4-44
Indicator symbols on the instrument cluster ··················\
·1-6
Instrument cluster ··················\
··················\
··················\
····4-37Engine temperature gauge··················\
··················\
·····4-39
Fuel gauge ··················\
··················\
··················\
···········4-40
Instrument panel illumination ··················\
·················4-38\
Odometer/Tripmeter ··················\
··················\
··············4-40
Speedometer ··················\
··················\
··················\
········4-38
Tachometer ··················\
··················\
··················\
··········4-38
Trip computer ··················\
··················\
··················\
······4-41
Warning and indicators ··················\
··················\
·········4-44
Instrument panel illumination··················\
··················\
····4-38
Instrument panel overview ··················\
··················\
··········2-3
Interior care··················\
··················\
··················\
··············7-57
Interior features··················\
··················\
··················\
········4-88 Astray ··················\
··················\
··················\
··················\
4-89
Cigarette lighter··················\
··················\
··················\
···4-89
Clothes hanger··················\
··················\
··················\
·····4-91
Cup holder ··················\
··················\
··················\
···········4-89
Floor mat anchor(s) ··················\
··················\
···············4-92
Luggage net holder··················\
··················\
················4-92
Power outlet ··················\
··················\
··················\
········4-90
Shopping bag holder ··················\
··················\
·············4-91
Sunvisor··················\
··················\
··················\
···············4-90
Interior lights ··················\
··················\
··················\
···········4-65
Interior overview ··················\
··················\
··················\
·······2-2
Interlock system ··················\
··················\
··················\
·······5-19 Jack and tools··················\
··················\
··················\
···········6-17
Jump starting··················\
··················\
··················\
··············6-4
Key positions ··················\
··················\
··················\
·············5-4
Keys ··················\
··················\
··················\
··················\
·········4-2
Immobilizer system ··················\
··················\
·················4-3
Label Air bag warning label··················\
··················\
············3-59
Certification label ··················\
··················\
··················\
5-48
Tire and loading information label··················\
··········5-46
Tire sidewall labeling ··················\
··················\
············7-36
Tire specification and pressure label··················\
·········8-7
Vehicle certification label··················\
··················\
········8-6
Latch system, see lower anchor system ··················\
······3-31
Lighting··················\
··················\
··················\
··················\
··4-58 Battery saver function ··················\
··················\
···········4-58
Low tire pressure telltale ··················\
··················\
····6-8, 6-13
Lower anchor system ··················\
··················\
·················3-31\
Lubricants and capacities··················\
··················\
·············8-4
Luggage net holder ··················\
··················\
··················\
··4-92
Luggage rack, see roof rack ··················\
··················\
······4-93J
K
L