2011 KIA Sedona ignition
[x] Cancel search: ignitionPage 53 of 370

Features of your vehicle
36
3
Resetting the sunroof
Whenever the vehicle battery is discon-
nected or discharged, you have to reset
your sunroof system as follows:
1. Turn the ignition key to the ON posi-
tion.
2. According to the position of the sun- roof, do as follows.
1) in case that the sunroof has closedcompletely or been tilted :
Press the tilt button until the sun-
roof has tilted upward completely.
2) in case that the sunroof has slide- opened:
Press and hold the close button
(for more than 5 seconds) until the
sunroof has closed completely.
Press the tilt button until the sun-
roof has tilted upward completely.
3. Release the tilt button. 4. Press and hold the tilt button (for
more than 10 seconds) until the sun-
roof has returned to the original posi-
tion of tilt after it is raised a little high-
er than the maximum tilt position.
Then, release the button.
5. Press and hold the tilt button (for more than 5 seconds) until the sun-
roof is operated as follows;
TILT DOWN → SLIDE OPEN →
SLIDE CLOSE
Then, release the button.
When this is complete, the sunroof sys-
tem is reset.
Page 57 of 370

Features of your vehicle
40
3
Seat cushion height (for driver’s seat)
To change the height of the seat cushion,
push the lever up or down located on the
outside of the seat cushion.
To lower the seat cushion, push down
the lever several times.
To raise the seat cushion, pull up the lever several times.
Front seat adjustment - power
The front seat can be adjusted by using
the control knob on the front door. Before
driving, adjust the seat to the proper
position so as to easily control the steer-
ing wheel, pedals and switches on the
instrument panel.
1VQA2328
WARNING
The power seats are operable with
the ignition OFF.
Therefore, children should never be
left unattended in the car.
CAUTION
Power seats are driven by an electric motor. Stop operatingonce the adjustment is complet- ed. Excessive operation maydamage the electrical equipment.
When in operation, the power seats consume large amounts ofelectrical power. To prevent unnec- essary charging system drain,don’t adjust the power seatslonger than necessary while the engine is not running.
Do not operate two or more power seat control buttons at the sametime. Doing so may result inpower seat motor or electrical component malfunction.
1VQA2044
Page 62 of 370

345
Features of your vehicle
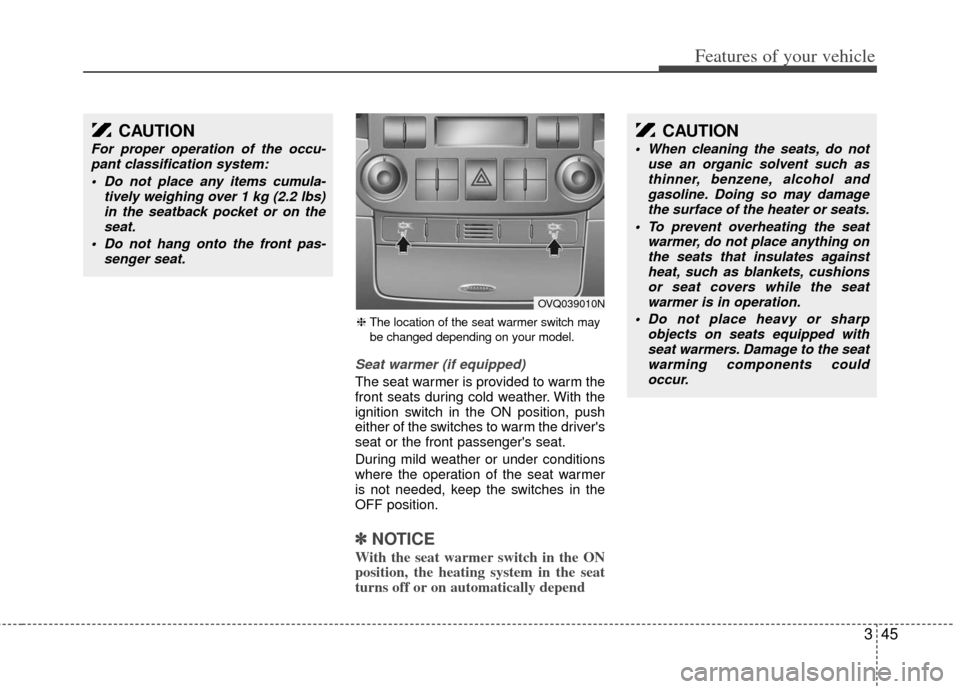
Seat warmer (if equipped)
The seat warmer is provided to warm the
front seats during cold weather. With the
ignition switch in the ON position, push
either of the switches to warm the driver's
seat or the front passenger's seat.
During mild weather or under conditions
where the operation of the seat warmer
is not needed, keep the switches in the
OFF position.
✽ ✽NOTICE
With the seat warmer switch in the ON
position, the heating system in the seat
turns off or on automatically depend
❈ The location of the seat warmer switch may
be changed depending on your model.
OVQ039010N
CAUTION
For proper operation of the occu- pant classification system:
Do not place any items cumula- tively weighing over 1 kg (2.2 lbs)in the seatback pocket or on theseat.
Do not hang onto the front pas- senger seat.
CAUTION
When cleaning the seats, do notuse an organic solvent such asthinner, benzene, alcohol and gasoline. Doing so may damagethe surface of the heater or seats.
To prevent overheating the seat warmer, do not place anything onthe seats that insulates against heat, such as blankets, cushionsor seat covers while the seatwarmer is in operation.
Do not place heavy or sharp objects on seats equipped withseat warmers. Damage to the seat warming components couldoccur.
Page 76 of 370

359
Features of your vehicle
A driver position memory system is pro-
vided to store and recall the driver seat,
outside rearview mirror and adjustable
pedal positions with a simple button
operation. By saving the desired posi-
tions into the system memory, different
drivers can reposition the driver seat,
outside rearview mirror and adjustable
pedal based upon their driving prefer-
ence.
If battery is disconnected, the position
memory will be lost and the driving posi-
tions should be restored in the system.
Storing positions into memory
using the buttons on the door
Storing driver’s seat positions
1. Shift the transaxle lever into P whilethe ignition switch is ON.
2. Adjust the driver seat, outside rearview mirror and adjustable pedal
to positions comfortable for the driver.
3. Press SET button on the control panel. The system will beep once.
4. Press one of the memory buttons (1 or 2) within 5 seconds after pressing the
SET button. The system will beep
twice when memory has been suc-
cessfully stored.
Recalling positions from memory
1. Shift the transaxle lever into P whilethe ignition switch is ON.
2. To recall the position in memory, press the desired memory button (1 or 2).
The system will beep once, then the
driver seat, outside rearview mirror
and adjustable pedal will automatically
adjust to the stored positions.
Adjusting one of the control knobs for the
driver seat, outside rearview mirror and
adjustable pedal while the system is
recalling the stored positions will cause
the movement for that component to stop
and move in the direction that the control
knob is moved. Other components will
continue position recalling.
DRIVER POSITION MEMORY SYSTEM (IF EQUIPPED)
WARNING
Never attempt to operate the driver
position memory system while the
vehicle is moving.
This could result in loss of control,
and an accident causing death,
serious injury, or property damage.
WARNING
Use caution when recalling adjust-
ment memory while sitting in the
vehicle. Push the seat position con-
trol knob to the desired position
immediately if the seat moves too
far in any direction.
OVQ039094
Page 77 of 370

Features of your vehicle
60
3
Storing and recalling with trans-
mitter
Storing with the transmitter
Remove the key from the ignition switch
and lock all the doors using the transmit-
ter. The driver seat, outside rearview mir-
ror and adjustable pedal positions will be
stored in the system memory.
Driver’s position recalling with trans-
mitter
Unlock the door with the transmitter,
positions stored in the system memory
will be recalled automatically.
✽ ✽ NOTICE
The buzzer sounds 10 times if there is a
malfunction of the memory system.
Have the driver position memory system
checked by an authorized Kia dealer.
Easy access function
When the AUTO button is ON (the indi-
cator light illuminates) with the shift lever
in P position, the system will move the
driver’s seat forward or rearward auto-
matically so you can comfortably enter
and exit the vehicle.
the ignition key is removed.
It will move driver’s seat forward when the ignition key is inserted.
Reverse parking aid function
(if equipped)
While the vehicle is moving backward,
the outside rearview mirror(s) will move
downward to aid reverse parking.
According to the position of the outside
rearview mirror switch (1), the outside
rearview mirror(s) will operate as follows:
OVQ0390951VQA2109
Page 78 of 370

361
Features of your vehicle
L/R: When the remote control outside
rearview mirror switch is selected to
the L (left) or R (right) position, both
outside rearview mirrors will move
downward.
Neutral : When the remote control out-
side rearview mirror switch is
placed in the middle position,
the outside rearview mirrors
will not operate while the vehi-
cle is moving backward.
✽ ✽ NOTICE
The outside rearview mirrors will auto-
matically revert to their original posi-
tions under the following conditions:
1. Ignition switch is in the LOCK posi-
tion.
2. Shift lever is moved to any position except R.
3. Remote control outside rearview mir- ror switch is placed in the middle
position.To adjust the position of the accelerator
and brake pedals, push the switch with
the shift lever in the P position.
If you push the ▲ portion of the switch,
the pedals move toward the driver.
If you push the ▼ portion of the switch,
the pedals move away from the driver.
Setting the adjustable pedal posi-
tion
1. Be sure the parking brake is engaged.
2. Move the accelerator and brake ped- als to the front most position by push-
ing the ▼ portion of the switch.
3. Adjust the seat position and the steer- ing wheel angle properly.
4. Move the pedals toward you until you can fully depress the brake pedal by
pushing the ▲ portion of the switch.
5. Depress the pedals a few times to get used to the feel after adjusting.
POWER ADJUSTABLE PEDALS (IF EQUIPPED)
1VQA2066
WARNING
Adjust the pedals after parkingthe vehicle on level ground. Never
attempt to adjust the pedals while
the vehicle is moving.
Never adjust the pedals with your foot on the accelerator pedal as
this may result in increasing the
engine speed and acceleration.
Make sure that you can fully depress the brake pedal before
driving. Otherwise, you may not
be able to hold down the brake
pedal firmly in an emergency
stop.
Page 89 of 370

Features of your vehicle
72
3
Pre-tensioner safety belt
Your vehicle is equipped with driver's and
front passenger's pre-tensioner safety
belts. The purpose of the pre-tensioner is
to make sure that excess slack is taken
up in certain frontal collisions. The pre-
tensioners may activate along with the
front air bags in frontal collisions based
on angle of impact, seat belt usage and
impact severity.
✽ ✽
NOTICE
The pre-tensioner seat belt is installed at
the front seats, and the sensor is
equipped inside the buckle, where pres-
ence of passenger is sensed by the fas-
tening of the seat belts. Therefore, pre-
tensioner will not activate if the passen-
ger is not fastened with the seat belts.
Likewise, it will activate if buckled even
without a passenger in the seat. Pre-ten-
sioner seat belt is designed to activate
when the seatbelt is in use. To ensure the
pretensioner seatbelts activate in event
of a possible seatbelt buckle switch mal-
function, the system is designed to acti-
vate regardless of whether a seat belt is
in use or if no seat belt use is detected
within 6 seconds of turning the ignition
switch ON.
The seat belt pre-tensioner system con-
sists mainly of the following components.
Their locations are shown in the illustra-
tion.
(1) SRS air bag warning light
(2) Seatbelt pre-tensioner assembly
(3) SRS air bag control module
WARNING- Safety belt
adjustment
To obtain maximum benefit from a
pre-tensioner seat belt:
The safety belt must be worn cor-
rectly.
The safety belt must be adjusted to the correct position.
1LDE3100OED030300
WARNING
For your safety, be sure that the belt
webbing is not loose or twisted and
always sit properly on your seat.
Page 100 of 370

383
Features of your vehicle
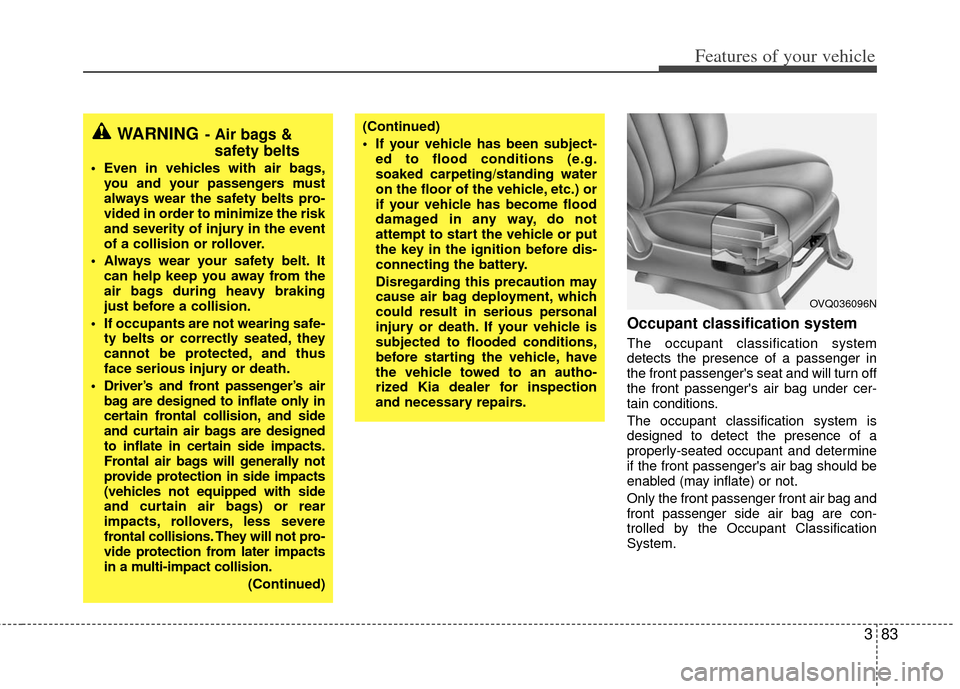
Occupant classification system
The occupant classification system
detects the presence of a passenger in
the front passenger's seat and will turn off
the front passenger's air bag under cer-
tain conditions.
The occupant classification system is
designed to detect the presence of a
properly-seated occupant and determine
if the front passenger's air bag should be
enabled (may inflate) or not.
Only the front passenger front air bag and
front passenger side air bag are con-
trolled by the Occupant Classification
System.
WARNING- Air bags &safety belts
Even in vehicles with air bags,
you and your passengers must
always wear the safety belts pro-
vided in order to minimize the risk
and severity of injury in the event
of a collision or rollover.
Always wear your safety belt. It can help keep you away from the
air bags during heavy braking
just before a collision.
If occupants are not wearing safe- ty belts or correctly seated, they
cannot be protected, and thus
face serious injury or death.
Driver’s and front passenger’s air bag are designed to inflate only in
certain frontal collision, and side
and curtain air bags are designed
to inflate in certain side impacts.
Frontal air bags will generally not
provide protection in side impacts
(vehicles not equipped with side
and curtain air bags) or rear
impacts, rollovers, less severe
frontal collisions. They will not pro-
vide protection from later impacts
in a multi-impact collision.
(Continued)
(Continued)
If your vehicle has been subject-ed to flood conditions (e.g.
soaked carpeting/standing water
on the floor of the vehicle, etc.) or
if your vehicle has become flood
damaged in any way, do not
attempt to start the vehicle or put
the key in the ignition before dis-
connecting the battery.
Disregarding this precaution may
cause air bag deployment, which
could result in serious personal
injury or death. If your vehicle is
subjected to flooded conditions,
before starting the vehicle, have
the vehicle towed to an autho-
rized Kia dealer for inspection
and necessary repairs.
OVQ036096N