Page 45 of 394

331
Safety features of your vehicle
1. Route the child restraint seat tetherstrap over the seatback.
For vehicles with adjustable headrest,
route the tether strap under the head-
rest and between the headrest posts,
otherwise route the tether strap over
the top of the seatback.
2. Connect the tether strap hook to the appropriate child restraint hook holder
and tighten to secure the child restraint
seat. Check that the child restraint system is
secure by pushing and pulling it in differ-
ent directions. Incorrectly fitted child
restraints may swing, twist, tip or sepa-
rate causing death or serious injury.Securing a child restraint seat with
child seat lower anchor system
Some child seat manufacturers make
child restraint seats that are labeled as
LATCH or LATCH-compatible child
restraint seats. LATCH stands for "Lower
Anchors and Tethers for Children". These
seats include two rigid or webbing
mounted attachments that connect to
two LATCH anchors at specific seating
positions in your vehicle. This type of
child restraint seat eliminates the need to
use seat belts to attach the child seat in
the rear seats.
WARNING - Tether strap
Never mount more than one child
restraint to a single tether or to a
single lower anchorage point. The
increased load caused by multiple
seats may cause the tethers or
anchorage points to break.
OTF030030NB230D01NF
Page 46 of 394
Safety features of your vehicle
32
3
Child restraint symbols are located on
the left and right rear seat backs to indi-
cate the position of the lower anchors for
child restraints. LATCH anchors have been provided in
your vehicle. The LATCH anchors are
located in the left and right outboard rear
seating positions. Their locations are
shown in the illustration. There is no
LATCH anchor provided for the center
rear seating position.
The LATCH anchors are located between
the seatback and the seat cushion of the
rear seat left and right outboard seating
positions.
WARNING - Unused rear
seatbelts
Always fasten the seatbelts behind
the child restraint seat when they
are not used to secure the child
seat. Failure to do so may result in
child strangulation.
OTF030031N
Lower Anchor
Position Indicator
Lower Anchor
OTD039037N
Page 83 of 394

Features of your vehicle
12
4
DOOR LOCKS
Operating door locks from out-
side the vehicle
Turn the key toward the rear of the
vehicle to unlock and toward the front
of the vehicle to lock.
If you lock/unlock the door with a key, all vehicle doors will lock/unlock auto-
matically.
From the driver’s door, turn the key toward the rear of the vehicle once to
unlock the driver’s door and once more
within 4 seconds to unlock all doors.
Doors can also be locked and unlocked with smart key. Once the doors are unlocked, they may
be opened by pulling the door handle.
When closing the door, push the door by hand. Make sure the doors are
closed securely.
✽ ✽ NOTICE
• In cold and wet climates, door lock
and door mechanisms may not work
properly due to freezing conditions.
• If the door is locked/unlocked multi- ple times in rapid succession with
either the vehicle key or door lock
switch, the system may stop operating
temporarily in order to protect the
circuit and prevent damage to system
components.
OYFH041005N
LockUnlock
Page 89 of 394
Features of your vehicle
18
4
Emergency trunk lid release
cable
1. Remove the cover. Using a key or
screwdriver to pry up the cover may
will help in removing.
2. Pull up on the loop to open the trunk.
3. After opening the trunk, securely close the cover.
Closing the trunk
To close, lower the trunk lid, then press
down on it until it locks. To be sure the
trunk lid is securely fastened, always
check by trying to pull it up again.
OTF040017
CAUTION
• While driving the vehicle, do not use the emergancy trunk release.
If there is the problem with trunk, have the vehicle checked andrepaired by an authorized Kiadealer.
WARNING
The trunk lid should be always kept
completely closed while the vehicle
is in motion. If it is left open or ajar,
poisonous exhaust gases may
enter the car and serious illness or
death may result.
Page 96 of 394

425
Features of your vehicle
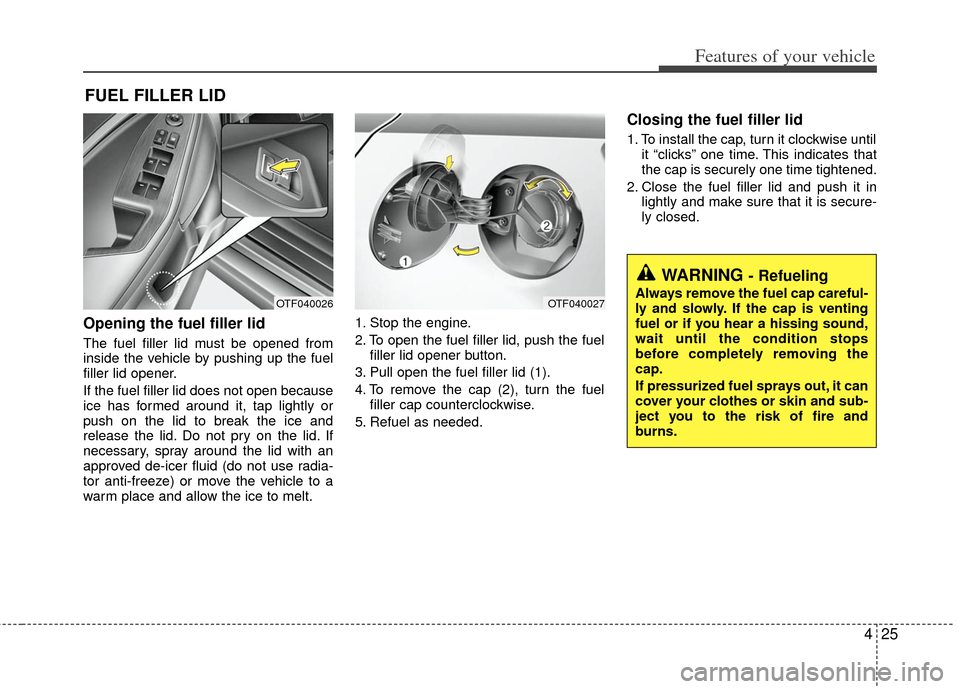
Opening the fuel filler lid
The fuel filler lid must be opened from
inside the vehicle by pushing up the fuel
filler lid opener.
If the fuel filler lid does not open because
ice has formed around it, tap lightly or
push on the lid to break the ice and
release the lid. Do not pry on the lid. If
necessary, spray around the lid with an
approved de-icer fluid (do not use radia-
tor anti-freeze) or move the vehicle to a
warm place and allow the ice to melt.1. Stop the engine.
2. To open the fuel filler lid, push the fuel
filler lid opener button.
3. Pull open the fuel filler lid (1).
4. To remove the cap (2), turn the fuel filler cap counterclockwise.
5. Refuel as needed.
Closing the fuel filler lid
1. To install the cap, turn it clockwise until it “clicks” one time. This indicates that
the cap is securely one time tightened.
2. Close the fuel filler lid and push it in lightly and make sure that it is secure-
ly closed.
FUEL FILLER LID
WARNING - Refueling
Always remove the fuel cap careful-
ly and slowly. If the cap is venting
fuel or if you hear a hissing sound,
wait until the condition stops
before completely removing the
cap.
If pressurized fuel sprays out, it can
cover your clothes or skin and sub-
ject you to the risk of fire and
burns.OTF040026OTF040027
Page 97 of 394

Features of your vehicle
26
4
Always check that the fuel cap is installed
securely to prevent fuel spillage in the
event of an accident.✽ ✽
NOTICE
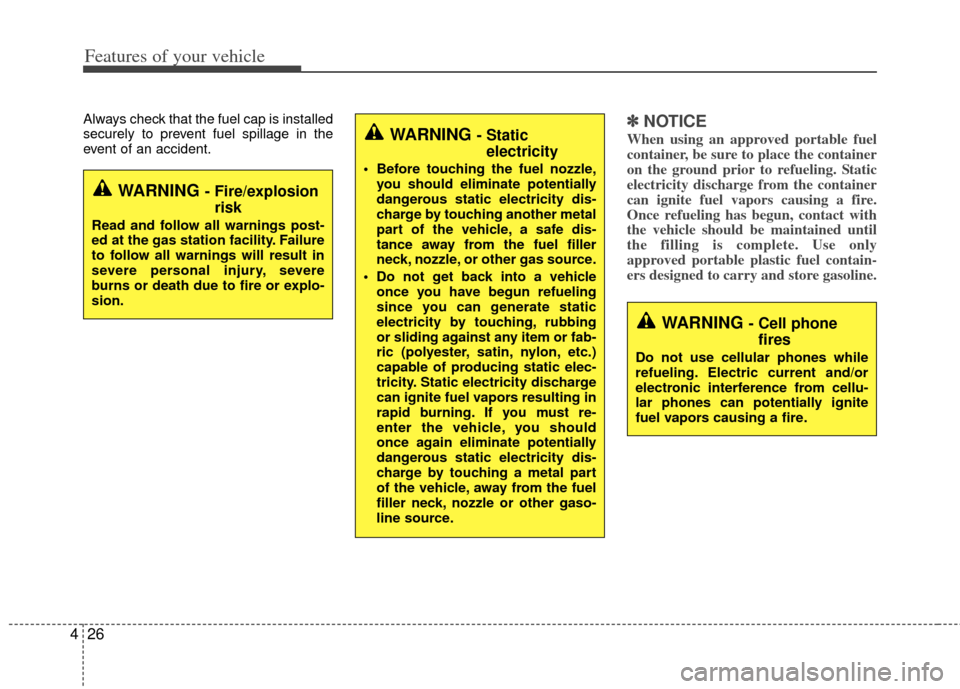
When using an approved portable fuel
container, be sure to place the container
on the ground prior to refueling. Static
electricity discharge from the container
can ignite fuel vapors causing a fire.
Once refueling has begun, contact with
the vehicle should be maintained until
the filling is complete. Use only
approved portable plastic fuel contain-
ers designed to carry and store gasoline.
WARNING - Fire/explosion
risk
Read and follow all warnings post-
ed at the gas station facility. Failure
to follow all warnings will result in
severe personal injury, severe
burns or death due to fire or explo-
sion.
WARNING - Cell phonefires
Do not use cellular phones while
refueling. Electric current and/or
electronic interference from cellu-
lar phones can potentially ignite
fuel vapors causing a fire.
WARNING - Static electricity
Before touching the fuel nozzle,
you should eliminate potentially
dangerous static electricity dis-
charge by touching another metal
part of the vehicle, a safe dis-
tance away from the fuel filler
neck, nozzle, or other gas source.
Do not get back into a vehicle once you have begun refueling
since you can generate static
electricity by touching, rubbing
or sliding against any item or fab-
ric (polyester, satin, nylon, etc.)
capable of producing static elec-
tricity. Static electricity discharge
can ignite fuel vapors resulting in
rapid burning. If you must re-
enter the vehicle, you should
once again eliminate potentially
dangerous static electricity dis-
charge by touching a metal part
of the vehicle, away from the fuel
filler neck, nozzle or other gaso-
line source.
Page 98 of 394

427
Features of your vehicle
Make sure to refuel your vehicle accord-
ing to the "Fuel requirements" suggested
in section 1.
If the fuel filler cap requires replacement,
use only a genuine Kia cap or the equiv-
alent specified for your vehicle. An incor-
rect fuel filler cap can result in a serious
malfunction of the fuel system or emis-
sion control system.
CAUTION- Exterior paint
Do not spill fuel on the exterior sur-faces of the vehicle. Any type of fuelspilled on painted surfaces maydamage the paint.
WARNING - Refueling& Vehicle fires
When refueling, always shut the
engine off. Sparks produced by
electrical components related to
the engine can ignite fuel vapors
causing a fire. Once refueling is
complete, check to make sure the
filler cap and filler door are secure-
ly closed, before starting the
engine.
WARNING - Smoking
DO NOT use matches or a lighter
and DO NOT SMOKE or leave a lit
cigarette in your vehicle while at a
gas station especially during refu-
eling. Automotive fuel is highly
flammable and can, when ignited,
result in fire.
Page 111 of 394

Features of your vehicle
40
4
To adjust the Zone setting:
1. Determine the desired Zone Number
based upon your current location on
the Zone Map.
2. Press and hold the button for more than 3 but less than 6 seconds, the
current Zone Number will appear on
the display.
3. Pressing and holding the button again will cause the numbers to incre-
ment (Note: they will repeat …13, 14,
15, 1, 2, …). Releasing the button
when the desired Zone Number
appears on the display will set the new
Zone.
4. Within about 5 seconds the compass will start displaying a compass head-
ing again.
There are some conditions that can
cause changes to the vehicle magnets,
such as installing a ski rack or a CB
antenna. Body repair work on the vehicle
can also cause changes to the vehicle's
magnetic field. In these situations, the
compass will need to be re-calibrated to
quickly correct for these changes. To re-
calibrate the compass: 1. Press and hold the button for more
than 6 seconds. When the compass
memory is cleared a "C" will appear in
the display.
2. To calibrate the compass, drive the vehicle in 2 complete circles at less
than 8 km/h (5 mph).
Integrated HomeLink
®Wireless Control
System
The HomeLink® Wireless Control
System provides a convenient way to
replace up to three hand-held radio-fre-
quency (RF) transmitters with a single
built-in device. This innovative feature will
learn the radio frequency codes of most
current transmitters to operate devices
such as gate operators, garage door
openers, entry door locks, security sys-
tems, even home lighting. Both standard
and rolling code-equipped transmitters
can be programmed by following the out-
lined procedures. Additional HomeLink
®
information can be found at: www.home-
link.com or by calling 1-800-355-3515. Retain the original transmitter of the RF
device you are programming for use in
other vehicles as well as for future
HomeLink
®programming. It is also sug-
gested that upon the sale of the vehicle,
the programmed HomeLink
®buttons be
erased for security purposes.
CAUTION
Before programming HomeLink®to
a garage door opener or gate oper- ator, make sure that people and objects are out of the way of thedevice to prevent potential harm ordamage. Do not use HomeLink
®
with any garage door opener thatlacks the safety stop and reverse features required by U.S. federalsafety standards (this includes any garage door opener model manu-factured before April 1, 1982). Agarage door that cannot detect anobject - signaling the door to stop and reverse - does not meet currentU.S. federal safety standards. Using a garage door opener without thesefeatures increases the risk of seri- ous injury or death.