2011 KIA Borrego set clock
[x] Cancel search: set clockPage 199 of 464

4119
Features of your vehicle
D280600AEN
Digital clock
Whenever the battery terminals or relat-
ed fuses are disconnected, you must
reset the time.
When the ignition switch is in the ACC or
ON position, the clock buttons operate as
follows:
D280601AHM
Hour (1)
Pressing the H button will advance the
time displayed by one hour.
D280602AHM
Minute (2)
Pressing the M button will advance the
time displayed by one minute.
D280603AHM
Reset (3)
To clear away minutes, press the R but-
ton. Then the clock will be set precisely
on the hour.
For example, if the R button is pressed
while the time is between 9:01 and 9:29,
the display will reset to 9:00.
9:01 ~ 9:29 display changed to 9:00
9:30 ~ 9:59 display changed to 10:00
D280604AHM
Display conversion
To change the 12 hour format to the 24
hour format, press the R button until the
display blinks.
For example, if the R button is pressed
while the time is 10:15 p.m., the display
will change to 22:15.
OHM048137
OHM048136
■Type A
■ Type B
WARNING
Do not adjust the clock while driv-
ing. You may lose your steering
control and cause an accident that
results in severe personal injury or
death.
Page 214 of 464

Features of your vehicle
134
4
How to Activate RADIO,
SET UP, VOLUME Control
1. FM/AM Selection Button The FM/AM button toggles between FM
and AM. Listed below are the paths as
the system switches from FM to AM and
back to FM.
FM/AM : FM1
➟FM2➟AM➟FM1...
FM : FM1
➟FM2➟FM1...
2. Power ON/OFF Button & Volume Control Knob
Turns the audio system on/off when
the ignition switch is on ACC or ON.
If the knob is turned clockwise/counter- clockwise, the volume will increase
/decrease.
3. Automatic Channel Selection Button
When the [TRACK ] is pressed, it
will automatically tune to the next lower
station.
When the [SEEK ] is pressed, it will automatically tune to the next higher
station.
4. SCAN Selection Button
When the button is pressed, it auto-matically scans the radio stations
upwards.
The SCAN feature steps through each station, starting from the initial station,
for ten seconds.
Press the [SCAN] button again to stop the scan feature and to listen to the
currently selected channel.
5. Preset Selection Button
Press [1]~[6] buttons less than 0.8 sec-ond to play the station saved in each
button.
Press [1]~[6] b utton more than 0.8 sec-
ond or longer to save the current station
to the respective button with a beep.
6. TUNE/AUDIO Knob
If the knob is turned clockwise/counter-
clockwise, the frequency will increase/
decrease.
(AM 10kHz, FM 200kHz)
■Audio Setup MODE
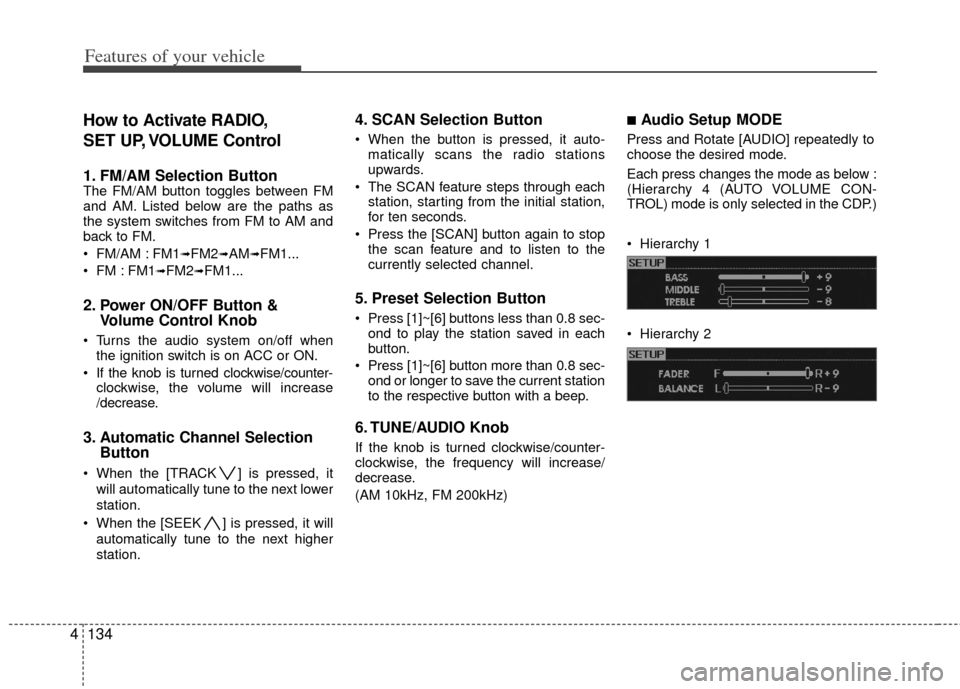
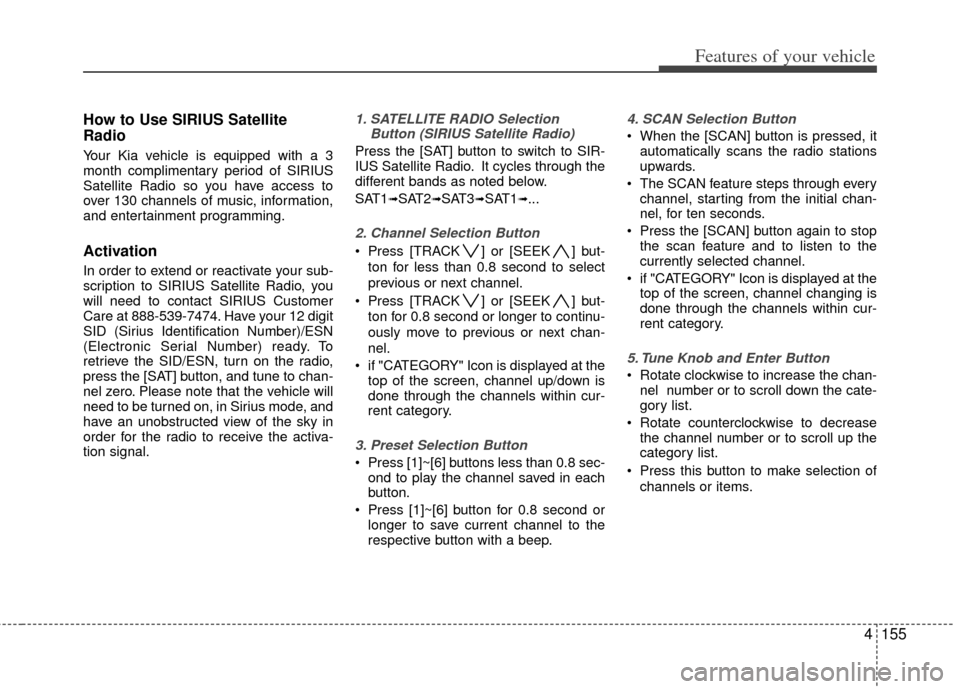
Press and Rotate [AUDIO] repeatedly to
choose the desired mode.
Each press changes the mode as below :
(Hierarchy 4 (AUTO VOLUME CON-
TROL) mode is only selected in the CDP.)
Hierarchy 1
Hierarchy 2
Page 235 of 464

4155
Features of your vehicle
How to Use SIRIUS Satellite
Radio
Your Kia vehicle is equipped with a 3
month complimentary period of SIRIUS
Satellite Radio so you have access to
over 130 channels of music, information,
and entertainment programming.
Activation
In order to extend or reactivate your sub-
scription to SIRIUS Satellite Radio, you
will need to contact SIRIUS Customer
Care at 888-539-7474. Have your 12 digit
SID (Sirius Identification Number)/ESN
(Electronic Serial Number) ready. To
retrieve the SID/ESN, turn on the radio,
press the [SAT] button, and tune to chan-
nel zero. Please note that the vehicle will
need to be turned on, in Sirius mode, and
have an unobstructed view of the sky in
order for the radio to receive the activa-
tion signal.
1. SATELLITE RADIO SelectionButton (SIRIUS Satellite Radio)
Press the [SAT] button to switch to SIR-
IUS Satellite Radio. It cycles through the
different bands as noted below.
SAT1
➟SAT2➟SAT3➟SAT1➟...
2. Channel Selection Button
Press [TRACK ] or [SEEK ] but-
ton for less than 0.8 second to select
previous or next channel.
Press [TRACK ] or [SEEK ] but- ton for 0.8 second or longer to continu-
ously move to previous or next chan-
nel.
if "CATEGORY" Icon is displayed at the top of the screen, channel up/down is
done through the channels within cur-
rent category.
3. Preset Selection Button
Press [1]~[6] buttons less than 0.8 sec-ond to play the channel saved in each
button.
Press [1]~[6] button for 0.8 second or longer to save current channel to the
respective button with a beep.
4. SCAN Selection Button
When the [SCAN] button is pressed, itautomatically scans the radio stations
upwards.
The SCAN feature steps through every channel, starting from the initial chan-
nel, for ten seconds.
Press the [SCAN] button again to stop the scan feature and to listen to the
currently selected channel.
if "CATEGORY" Icon is displayed at the top of the screen, channel changing is
done through the channels within cur-
rent category.
5. Tune Knob and Enter Button
Rotate clockwise to increase the chan-nel number or to scroll down the cate-
gory list.
Rotate counterclockwise to decrease the channel number or to scroll up the
category list.
Press this button to make selection of channels or items.
Page 240 of 464

Features of your vehicle
160
4
How to Activate RADIO,
SET UP, VOLUME Control
1. FM/AM Selection Button The FM/AM button toggles between FM
and AM. Listed below are the paths as
the system switches from FM to AM and
back to FM.
FM/AM : FM1
➟FM2➟AM➟FM1...
FM : FM1
➟FM2➟FM1...
2. Power ON/OFF Button & Volume Control Knob
Turns the audio system on/off when
the ignition switch is on ACC or ON.
If the knob is turned clockwise/counter- clockwise, the volume will increase
/decrease.
3. Automatic Channel Selection Button
When the [TRACK ] is pressed, it
will automatically tune to the next lower
station.
When the [SEEK ] is pressed, it will automatically tune to the next higher
station.
4. SCAN Selection Button
When the button is pressed, it auto-matically scans the radio stations
upwards.
The SCAN feature steps through each station, starting from the initial station,
for ten seconds.
Press the [SCAN] button again to stop the scan feature and to listen to the
currently selected channel.
5. Preset Selection Button
Press [1]~[6] buttons less than 0.8 sec-ond to play the station saved in each
button.
Press [1]~[6] b utton more than 0.8 sec-
ond or longer to save the current station
to the respective button with a beep.
6. TUNE/AUDIO Knob
If the knob is turned clockwise/counter-
clockwise, the frequency will increase/
decrease.
(AM 10kHz, FM 200kHz)
■Audio Setup MODE
Press and Rotate [AUDIO] repeatedly to
choose the desired mode.
Each press changes the mode as below :
(Hierarchy 4 (AUTO VOLUME CON-
TROL) mode is only selected in the CDP.)
Hierarchy 1
Hierarchy 2
Page 261 of 464

4181
Features of your vehicle
How to Use SIRIUS Satellite
Radio
Your Kia vehicle is equipped with a 3
month complimentary period of SIRIUS
Satellite Radio so you have access to
over 130 channels of music, information,
and entertainment programming.
Activation
In order to extend or reactivate your sub-
scription to SIRIUS Satellite Radio, you
will need to contact SIRIUS Customer
Care at 888-539-7474. Have your 12 digit
SID (Sirius Identification Number)/ESN
(Electronic Serial Number) ready. To
retrieve the SID/ESN, turn on the radio,
press the [SAT] button, and tune to chan-
nel zero. Please note that the vehicle will
need to be turned on, in Sirius mode, and
have an unobstructed view of the sky in
order for the radio to receive the activa-
tion signal.
1. SATELLITE RADIO SelectionButton(SIRIUS Satellite Radio)
Press the [SAT] button to switch to SIR-
IUS Satellite Radio. It cycles through the
different bands as noted below.
SAT1
➟SAT2➟SAT3➟SAT1➟...
2. Channel Selection Button
Press [TRACK ] or [SEEK ] but-
ton for less than 0.8 second to select
previous or next channel.
Press [TRACK ] or [SEEK ] but- ton for 0.8 second or longer to continu-
ously move to previous or next chan-
nel.
if "CATEGORY" Icon is displayed at the top of the screen, channel up/down is
done through the channels within cur-
rent category.
3. Preset Selection Button
Press [1]~[6] buttons less than 0.8 sec-ond to play the channel saved in each
button.
Press [1]~[6] button for 0.8 second or longer to save current channel to the
respective button with a beep.
4. SCAN Selection Button
When the [SCAN] button is pressed, itautomatically scans the radio stations
upwards.
The SCAN feature steps through every channel, starting from the initial chan-
nel, for ten seconds.
Press the [SCAN] button again to stop the scan feature and to listen to the
currently selected channel.
if "CATEGORY" Icon is displayed at the top of the screen, channel changing is
done through the channels within cur-
rent category.
5. Tune Knob and Enter Button
Rotate clockwise to increase the chan-nel number or to scroll down the cate-
gory list.
Rotate counterclockwise to decrease the channel number or to scroll up the
category list.
Press this button to make selection of channels or items.
Page 419 of 464

727
Maintenance
G190300AHM
Reset items
Items should be reset after the battery
has been discharged or the battery has
been disconnected.
Auto up/down window (See section 4)
Sunroof (See section 4)
Driver position memory system (See section 4)
Trip computer (See section 4)
Climate control system (See section 4)
Clock (See section 4)
Audio (See section 4)
WARNING
Before performing maintenance or recharging the battery, turn off
all accessories and stop the
engine.
The negative battery cable must be removed first and installed
last when the battery is discon-
nected.
Page 436 of 464

Maintenance
44
7
G210101AHM
Memory fuse (SHUNT connector)
Your vehicle is equipped with a memory
fuse (SHUNT connector) to prevent bat-
tery discharge if your vehicle is parked
without being operated for prolonged
periods. Use the following procedures
before parking the vehicle for prolonged
periods.
1. Turn off the engine.
2. Turn off the headlights and tail lights.
3. Open the driver’s side panel cover and
pull out the memory fuse (SHUNT
connector).
✽ ✽NOTICE
• If the memory fuse is pulled out from
the fuse panel, the warning chime,
audio, clock and interior lamps, etc.,
will not operate. Some items must be
reset after replacement. Refer to
“Battery” in this section.
• Even though the memory fuse is pulled out, the battery can still be dis-
charged by operation of the head-
lights or other electrical devices.
G210200AHM
Engine compartment fuse
replacement
1. Turn the ignition switch and all other
switches off.
2. Remove the fuse panel cover by pressing the tab and pulling the cover
up.
OHM078023
OHM078024N
OHM078025N