Page 150 of 603
To Raise The Rear Seat
Raise the seatback and lock it into place. If interference
from the cargo area prevents the seatback from fully
locking, you will have difficulty returning the seat to its
proper position.
NOTE:If the rear seatback is not fully latched, the
center shoulder belt will not be able to be extended for
use. If you cannot extend the center shoulder belt, make
sure your seatback is fully latched.
WARNING!
Be certain that the seatback is securely locked into
position. If the seatback in not securely locked into
position the seat will not provide the proper stability
for child seats and/or passengers. An improperly
latched seat could cause serious injury.
TO OPEN AND CLOSE THE HOOD
Release both the hood latches.
Raise the hood and locate the safety latch, located in the
middle of the hood opening. Push the latch to the left side
of the vehicle, to open the hood. You may have to push
Hood Latch
148 UNDERSTANDING THE FEATURES OF YOUR VEHICLE
Page 151 of 603
down slightly on the hood before pushing the safety
latch. Insert the support rod into the slot on the hood.
To close the hood, remove the support rod from the hood
panel and place it in the retaining clip. Lower the hood
slowly. Secure both of the hood latches.
WARNING!
Be sure the hood is fully latched before driving your
vehicle. If the hood is not fully latched, it could open
when the vehicle is in motion and block your vision.
Failure to follow this warning could result in serious
injury or death.
LIGHTS
Multifunction Lever
The multifunction lever controls the operation of the
parking lights, headlights, headlight beam selection,passing light, fog lights, instrument panel light dimming
and turn signals. The lever is located on the left side of
the steering column.
Multifunction Lever
3
UNDERSTANDING THE FEATURES OF YOUR VEHICLE 149
Page 173 of 603
•Two Sunrider�secure straps (if equipped)
•Two rear swing gate brackets
2. Remove the hard top. Refer to “Freedom Top Three-
Piece Modular Hard Top — Front/Rear Panel Removal”
in this section.
3. Remove the soft top bow assembly pivot bracket
screws (two per side) using a #T30 Torx� head driver.
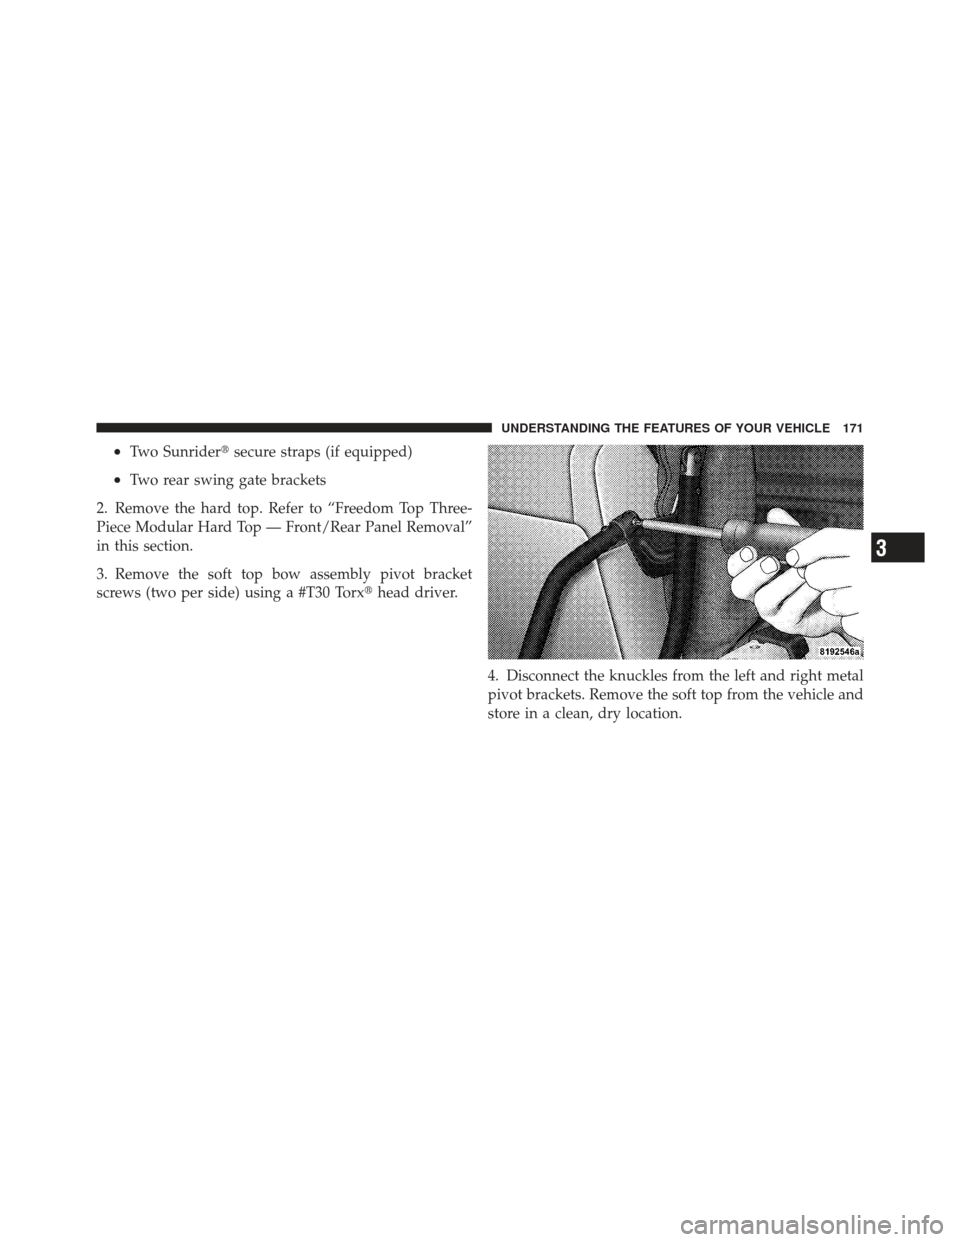
4. Disconnect the knuckles from the left and right metal
pivot brackets. Remove the soft top from the vehicle and
store in a clean, dry location.
3
UNDERSTANDING THE FEATURES OF YOUR VEHICLE 171
Page 177 of 603
d. Screw the pivot screws back into place using a #T30
Torx�head driver. Secure them until they are snug,
being careful not to cross-thread the screws or over-
tighten.CAUTION!
Do not overtighten the screws. You can strip the
screws if they are overtightened.
5. Remove the swing gate bar (black metal bar for
bottom of rear window) and set aside.
NOTE: Be sure the wire harness in the left rear corner is
not tangled in the soft top bows before you lift the top.
6. Unsnap and remove the black boot cover. This cover
should be discarded. It was intended as a protective
cover for shipping only.
NOTE: A visual instruction sheet is enclosed in the dual
top wrap.
7. Put up the soft top. Refer to “Soft Top — Putting Up
The Soft Top” in this section.
3
UNDERSTANDING THE FEATURES OF YOUR VEHICLE 175
Page 182 of 603
Insert the right side Freedom panel into the bag with the
latches facing downward.Unfold the black panel divider (ensure the divider is
laying flat). Secure the Velcro, located at the center of the
divider.
180 UNDERSTANDING THE FEATURES OF YOUR VEHICLE
Page 184 of 603
Install the seat attachment strap (at the top of the bag)
through the loops.
Lift the Freedom bag into the vehicle with the hooks and
straps facing the back of the rear seat. Attach the clips at
the bottom of the bag to the child restraint anchorages,
located at the base of the rear seat.Wrap the upper strap around the rear head restraints and
loop the strap through the buckle. Pull on the strap to
tighten the Freedom bag securely against the rear seat.
182 UNDERSTANDING THE FEATURES OF YOUR VEHICLE
Page 186 of 603
NOTE:The front panel(s) must be positioned properly
to ensure sealing. Set the panels on the windshield frame
so that there is no overhang. Also, make sure that the
panels are sitting flush with the body.
2. Install the right panel first, then the left panel.
3. Reinstall the panel(s) using the same steps for removal
in reverse order.
Rear Hard Top Removal
1. Remove both front panels. Refer to “Front Panel(s)
Removal” in this section.
2. Open both doors.
3. Remove the two Torx� head screws that secure the
hard top at the B-pillar (near the top of the door) using a
#40 Torx� head driver (Four–Door Only). 4. Remove the six Torx�
head screws that secure the hard
top to the vehicle (along the interior bodyside) using a
#40 Torx� head driver.
5. Open the swing gate all the way to ensure clearance of
the rear window glass. Lift the rear window glass.
184 UNDERSTANDING THE FEATURES OF YOUR VEHICLE
Page 191 of 603
2. Place one hand on the upper rear and one hand on the
front of the door frame.
3. Pull the frame toward you with your rearward hand to
remove the frame from the vehicle.
4. Screw the knobs back into the door frame and fold for
storage. Store in a secure location.
WARNING!
Never store the door frames in your vehicle. In an
event of an accident, a loose door frame many cause
personal injury. If removed, always store the door
frames outside of the vehicle.
3
UNDERSTANDING THE FEATURES OF YOUR VEHICLE 189


. Secure the Velcro, located at the center of the
di")

through the loops.
Lift the Freedom bag into the vehicle with the hooks and
straps facing the back of the rear seat. Attach the clips at
the b")
 must be positioned properly
to ensure sealing. Set the panels on the windshield frame
so that there is no overhang. Also, make sure that the
panels are sitting flush with the b")
