2011 HYUNDAI VERACRUZ tow
[x] Cancel search: towPage 119 of 419

441
Features of your vehicle
D140100AUN
Inside rearview mirror
Adjust the rearview mirror to center on
the view through the rear window. Make
this adjustment before you start driving.D140101AUN
Day/night rearview mirror
Make this adjustment before you start
driving and while the day/night lever is in
the day position.
Pull the day/night lever toward you to
reduce glare from the headlights of vehi-
cles behind you during night driving.
Remember that you lose some rearviewclarity in the night position.
D140102AUN
Electric chromic mirror (ECM) (if equipped)
The electric rearview mirror automatical- ly controls the glare from the headlights
of the car behind you in nighttime or low
light driving conditions. The sensormounted in the mirror senses the light
level around the vehicle, and automati-cally controls the headlight glare from
vehicles behind you.
When the engine is running, the glare is
automatically controlled by the sensor
mounted in the rearview mirror.
Whenever the shift lever is shifted into
reverse (R), the mirror will automatically
go to the brightest setting in order to
improve the drivers view behind the vehi-
cle.
MIRRORS
WARNING -
Rear visibility
Do not place objects in the rear
seat or cargo area which would
interfere with your vision through
the rear window.
OEN046032
CAUTION
When cleaning the mirror, use a paper towel or similar materialdampened with glass cleaner. Donot spray glass cleaner directly on the mirror as that may cause the liq-
uid cleaner to enter the mirror hous- ing.
Day
Night
procarmanuals.com
Page 126 of 419

Features of your vehicle
48
4
D140202AEN
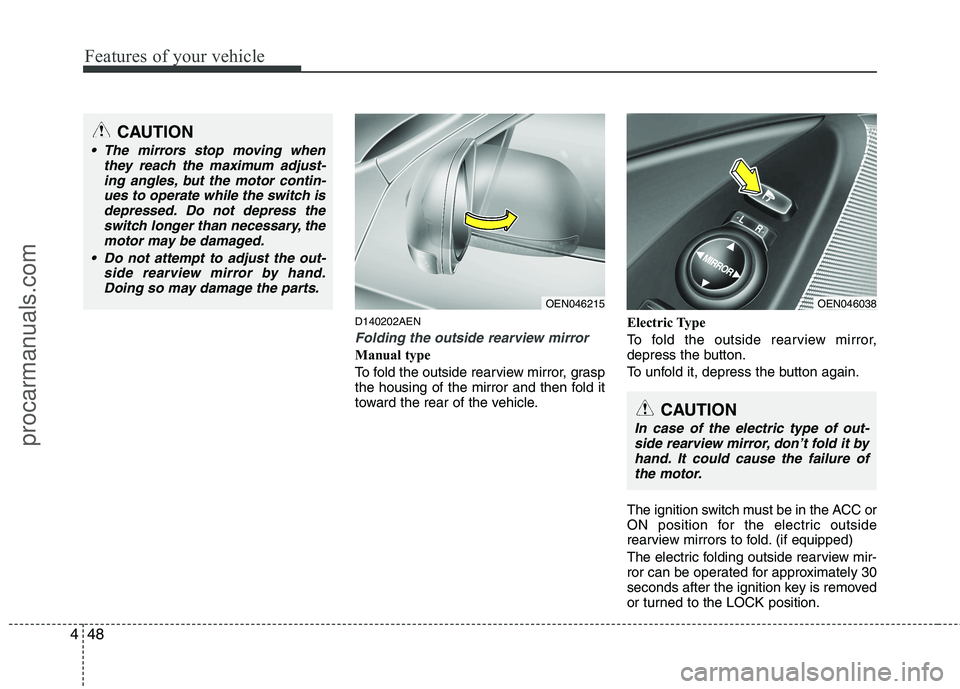
Folding the outside rearview mirror
Manual type
To fold the outside rearview mirror, grasp
the housing of the mirror and then fold it
toward the rear of the vehicle. Electric Type
To fold the outside rearview mirror,
depress the button.
To unfold it, depress the button again.
The ignition switch must be in the ACC or
ON position for the electric outside
rearview mirrors to fold. (if equipped)
The electric folding outside rearview mir-
ror can be operated for approximately 30
seconds after the ignition key is removed
or turned to the LOCK position.
CAUTION
The mirrors stop moving when
they reach the maximum adjust-
ing angles, but the motor contin-ues to operate while the switch isdepressed. Do not depress the switch longer than necessary, the
motor may be damaged.
Do not attempt to adjust the out- side rearview mirror by hand.Doing so may damage the parts.
OEN046215OEN046038
CAUTION
In case of the electric type of out-side rearview mirror, don’t fold it by
hand. It could cause the failure of the motor.
procarmanuals.com
Page 129 of 419

451
Features of your vehicle
D150202AUN
Tachometer
The tachometer indicates the approxi-
mate number of engine revolutions per
minute (rpm). Use the tachometer to select the correct
shift points and to prevent lugging and/or
over-revving the engine. When the door is open, or if the engine is
not started within 1 minute, the tachome-
ter pointer may move slightly in ON posi-
tion with the engine OFF. This movement
is normal and will not affect the accuracy
of the tachometer once the engine is run-ning.D150203AEN-EE
Engine temperature gauge
This gauge shows the temperature of the
engine coolant when the ignition switchis ON.
Do not continue driving with an overheat-
ed engine. If your vehicle overheats, refer
to “If the engine overheats” in section 6.
OEN046044/OEN046045
Gasoline Diesel
OEN049047L
CAUTION
If the gauge pointer moves beyond
the normal range area toward the“130°C/H” position, it indicates
overheating that may damage theengine.
CAUTION
Do not operate the engine within the tachometer's RED ZONE.
This may cause severe engine dam-age.
Type A Type B
procarmanuals.com
Page 139 of 419

461
Features of your vehicle
3. Do not drive the vehicle if leaks arefound, the warning light remains on or
the brakes do not operate properly.
Have the vehicle towed to any author-
ized HYUNDAI dealer for a brake sys-
tem inspection and necessary repairs.
Your vehicle is equipped with dual-diago-
nal braking systems. This means you still
have braking on two wheels even if one
of the dual systems should fail. With only
one of the dual systems working, more
than normal pedal travel and greaterpedal pressure are required to stop the
car. Also, the car will not stop in as short
a distance with only a portion of the
brake system working. If the brakes fail
while you are driving, shift to a lower gear
for additional engine braking and stop the
car as soon as it is safe to do so.
To check bulb operation, check whether
the parking brake and brake fluid warning
light illuminates when the ignition switchis in the ON position. D150331AFDLow tire pressure
telltale (if equipped)
Low tire pressure positiontelltale (if equipped)
The low tire pressure and position tell-
tales come on for 3 seconds after the
ignition switch is turned to the ON posi-tion.
If the warning lights do not come on, or
continuously remain on after coming on
for about 3 seconds when you turned the
ignition switch to the ON position, the
Tire Pressure Monitoring System is not
working properly. If this occurs, have your
vehicle checked by an authorized
HYUNDAI dealer as soon as possible.
WARNING
Driving the vehicle with a warning
light on is dangerous. If the brake
warning light remains on, have the
brakes checked and repaired imme-
diately by an authorized HYUNDAI
dealer.
procarmanuals.com
Page 148 of 419

Features of your vehicle
70
4
D170200AEN Non-operational conditions of rear parking assist system
The rear parking assist system may
not operate properly when:
1. Moisture is frozen to the sensor. (It will
operate normally when the moisture has been cleared.)
2. The sensor is covered with foreign matter, such as snow or water, or the
sensor cover is blocked. (It will operate
normally when the material is removed
or the sensor is no longer blocked.)
3. Driving on uneven road surfaces (unpaved roads, gravel, bumps, gradi-ent).
4. Objects generating excessive noise (vehicle horns, loud motorcycle
engines, or truck air brakes) are within
range of the sensor.
5. Heavy rain or water spray exists.
6. Wireless transmitters or mobile phones are within range of the sensor.
7. The sensor is covered with snow.
8. Trailer towing The detecting range may decrease when:
1. The sensor is stained with foreign mat-
ter such as snow or water. (The sens-
ing range will return to normal when
removed.)
2. Outside air temperature is extremely hot or cold.
The following objects may not be rec-
ognized by the sensor:
1. Sharp or slim objects such as ropes, chains or small poles.
2. Objects which tend to absorb the sen- sor frequency such as clothes, spongy
material or snow.
3. Undetectable objects smaller than 1 m (40 in.) in height and narrower than 14
cm (6 in.) in diameter. D170300AEN Rear parking assist system pre- cautions
The rear parking assist system may
not sound sequentially depending on the speed and shapes of the objectsdetected.
The rear parking assist system may malfunction if the vehicle bumperheight or sensor installation has been
modified or damaged. Any non-factory
installed equipment or accessories
may also interfere with the sensor per-
formance.
The sensor may not recognize objects less than 40 cm (15 in.) from the sen-
sor, or it may sense an incorrect dis-
tance. Use caution.
When the sensor is frozen or stained with snow, dirt, or water, the sensor
may be inoperative until the stains are
removed using a soft cloth.
Do not push, scratch or strike the sen- sor. Sensor damage could occur.
procarmanuals.com
Page 153 of 419

475
Features of your vehicle
D190500AUN High beam operation
To turn on the high beam headlights,
push the lever away from you. Pull it back
for low beams. The high beam indicator will light when
the headlight high beams are switchedon.
To prevent the battery from being dis-
charged, do not leave the lights on for aprolonged time while the engine is not
running.To flash the headlights, pull the lever
towards you. It will return to the normal
(low beam) position when released. The
headlight switch does not need to be on
to use this flashing feature.
CAUTION
Never place anything over sensor
(1) located on the instrument
panel. This will ensure betterauto-light system control.
Don’t clean the sensor using a window cleaner. The cleaner may
leave a light film which could interfere with sensor operation.
If your vehicle has window tint or other types of metallic coating onthe front windshield, the Auto
light system may not work prop-erly.
OEN040065OEN040064
procarmanuals.com
Page 160 of 419

Features of your vehicle
82
4
D200200BUN
Windshield washers
In the 0 (OFF) position, pull the lever
gently toward you to spray washer fluid
on the windshield and to run the wipers
1-3 cycles. Use this function when the windshield is
dirty. The spray and wiper operation will con-
tinue until you release the lever.
If the washer does not work, check the
washer fluid level. If the fluid level is not
sufficient, you will need to add appropri-
ate non-abrasive windshield washer fluid
to the washer reservoir.
The reservoir filler neck is located in the
front of the engine compartment on the
passenger side.
CAUTION
When washing the vehicle, set the
wiper switch in the 0 (OFF) position
to stop the auto wiper operation.
The wiper may operate and be dam-aged if the switch is set in the AUTO mode while washing the vehicle.
Do not remove the sensor coverlocated on the upper end of the pas-senger side windshield glass.Damage to system parts could occur and may not be covered by
your vehicle warranty.
When starting the vehicle in winter,set the wiper switch in the 0 (OFF)position. Otherwise, wipers mayoperate and ice may damage the
windshield wiper blades. Alwaysremove all snow and ice and defrostthe windshield properly prior tooperating the windshield wipers.
OEN040070L
OEN040070
Type B
Type A
procarmanuals.com
Page 169 of 419

491
Features of your vehicle
❈❈
2nd row outlet vents (E)
• The air flow of the 2nd row outlet vents is controlled by the front climate control
system and delivered through the
inside air duct of the front doors. If the
door is open or not closed completely,
the air flow of the 2nd row outlet vent is
not delivered properly. Make sure the
front doors are closed completely.
The air flow of the 2nd row outlet vents may be weaker than the instrument
panel vents for the long air duct in the
front doors.
Close the air vents in cold weather. The air flow of the 2nd row outlet vents may
cool a little during heating operation.
(Use the 2nd row outlet vents during
cooling operation.) D230101AEN
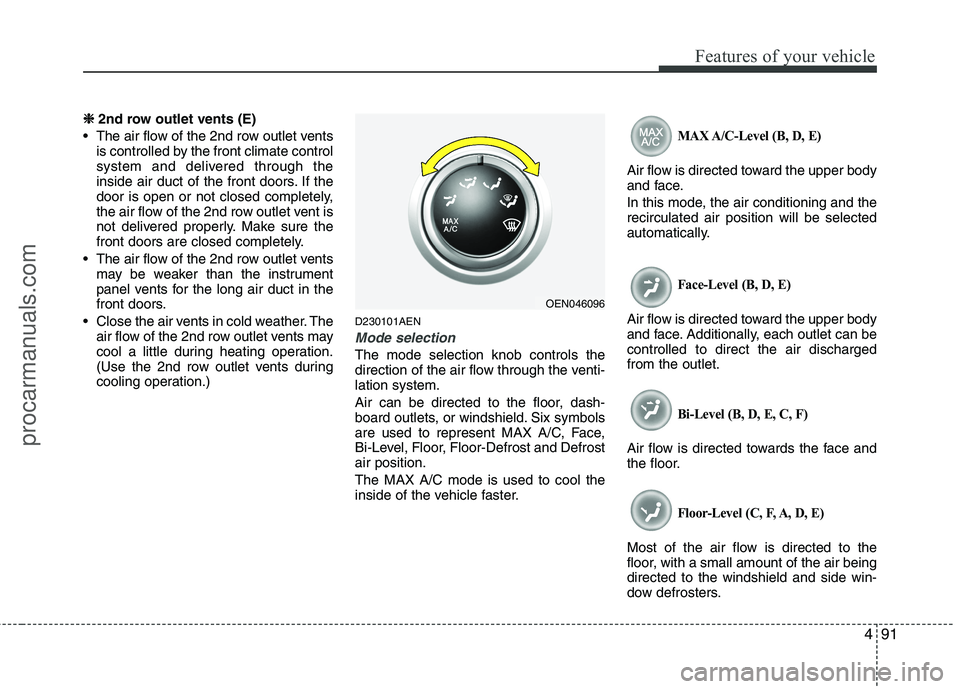
Mode selection
The mode selection knob controls the
direction of the air flow through the venti-lation system.
Air can be directed to the floor, dash-
board outlets, or windshield. Six symbols
are used to represent MAX A/C, Face,
Bi-Level, Floor, Floor-Defrost and Defrostair position. The MAX A/C mode is used to cool the
inside of the vehicle faster.
MAX A/C-Level (B, D, E)
Air flow is directed toward the upper body
and face.
In this mode, the air conditioning and the recirculated air position will be selected
automatically.
Face-Level (B, D, E)
Air flow is directed toward the upper body
and face. Additionally, each outlet can becontrolled to direct the air dischargedfrom the outlet.
Bi-Level (B, D, E, C, F)
Air flow is directed towards the face and
the floor.
Floor-Level (C, F, A, D, E)
Most of the air flow is directed to the
floor, with a small amount of the air beingdirected to the windshield and side win-
dow defrosters.
OEN046096
procarmanuals.com