2011 HYUNDAI VERACRUZ roof
[x] Cancel search: roofPage 122 of 419

Features of your vehicle
44
4
4. With the compass heading displaying
normally, press and hold the button
(2) again for about 6~7 seconds untilthe "CAL" appears and release the
button.
5. Drive your vehicle in at least 2~3 com- plete circle (either clockwise or coun-
terclockwise) at less than 5 mph (8
km/h) until the "CAL" disappears, andthe compass heading appears then
calibration will be complete. If the compass mirror does not recog-
nize the terrestrial magnetism correct-
ly depending on the external circum-
stances, it may be delayed in the cal-
ibration procedure.
6. If the vehicle's compass headings become inaccurate again, repeat
above steps. Setting the compass zone
This compass must be set to compen-
sate for the variation between true north
and magnetic north. To set variation:
1. Find your current location and vari-
ance zone number on the zone map.
2. Press and hold the COMPASS button (2) for about 3 seconds until the
"ZONE" appears in the display, and
release the button. Then the zone
number will appear in the display.
3. Press the button (2) repeatedly until the correct zone number for your loca-
tion appears in the display. 4. If the desired zone number is selected,
release the button (2). After about 3
seconds, the "ZONE" disappears and
a compass direction will be shown in
the display.
5. If the new compass zone is set, per- form the "Calibration procedure".
✽✽ NOTICE
Do not install a ski rack, antenna, etc. that is attached to the vehicle using a
magnet as anything attached to the
roof of the vehicle with a magnet will
effect compass operation.
If the compass deviates from the cor-
rect indication after repeated adjust-
ment, have the compass checked at an
authorized dealer.
The compass may not indicate the
correct compass point in tunnels or
while driving up or down a steep hill.
(The compass returns to the correct
compass point when the vehicle moves
to an area where the geomagnetism is
stabilized.)
OEN046036OEN046035
procarmanuals.com
Page 201 of 419

4123
Features of your vehicle
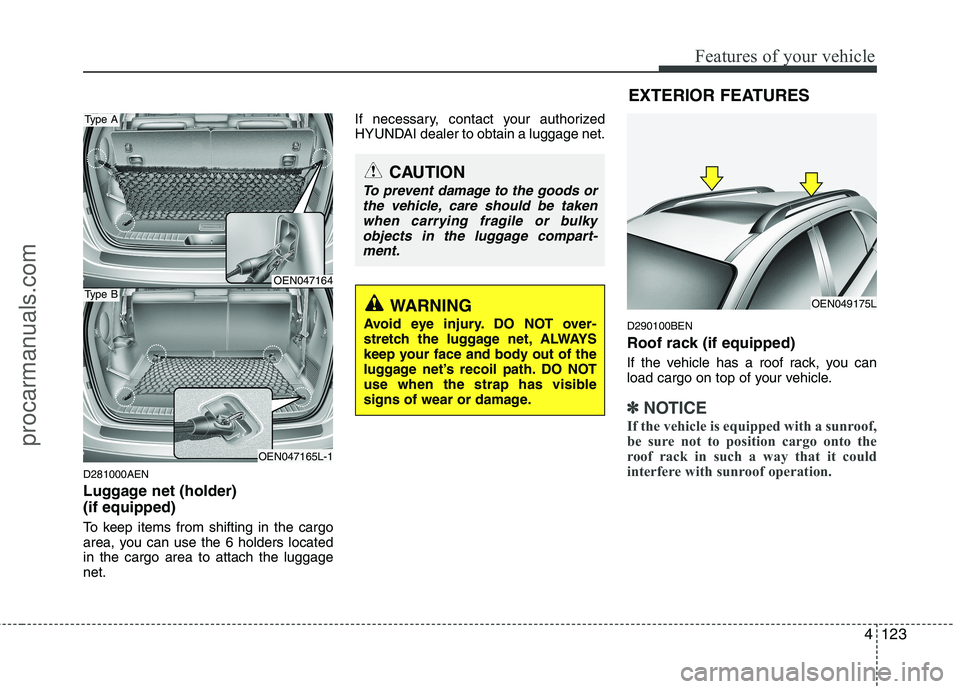
D281000AEN
Luggage net (holder) (if equipped)
To keep items from shifting in the cargo
area, you can use the 6 holders locatedin the cargo area to attach the luggagenet.If necessary, contact your authorized
HYUNDAI dealer to obtain a luggage net.
D290100BEN
Roof rack (if equipped)
If the vehicle has a roof rack, you can
load cargo on top of your vehicle.
✽✽NOTICE
If the vehicle is equipped with a sunroof,
be sure not to position cargo onto the
roof rack in such a way that it could
interfere with sunroof operation.
OEN049175L
CAUTION
To prevent damage to the goods or the vehicle, care should be takenwhen carrying fragile or bulky
objects in the luggage compart-ment.
WARNING
Avoid eye injury. DO NOT over-
stretch the luggage net, ALWAYS
keep your face and body out of the
luggage net’s recoil path. DO NOT
use when the strap has visible
signs of wear or damage.
EXTERIOR FEATURES
OEN047164
OEN047165L-1
Type A
Type B
procarmanuals.com
Page 202 of 419

Features of your vehicle
124
4
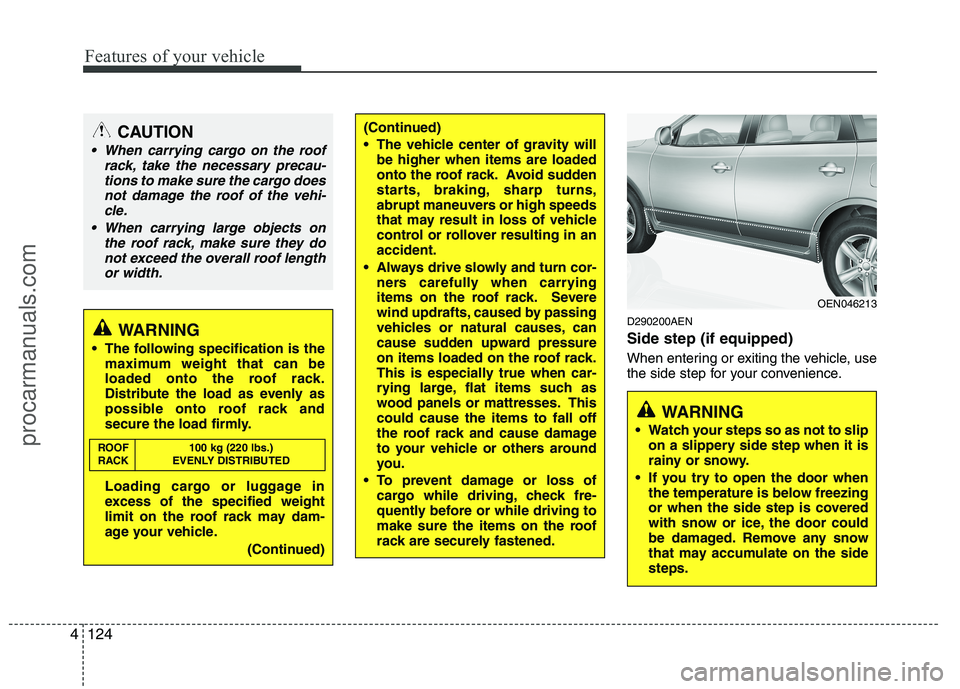
D290200AEN Side step (if equipped)
When entering or exiting the vehicle, use
the side step for your convenience.WARNING
The following specification is the maximum weight that can be
loaded onto the roof rack.
Distribute the load as evenly as
possible onto roof rack and
secure the load firmly.
Loading cargo or luggage in
excess of the specified weight
limit on the roof rack may dam-
age your vehicle.
(Continued)
ROOF 100 kg (220 lbs.)
RACK EVENLY DISTRIBUTED
(Continued)
The vehicle center of gravity will
be higher when items are loaded
onto the roof rack. Avoid sudden
starts, braking, sharp turns,
abrupt maneuvers or high speeds
that may result in loss of vehicle
control or rollover resulting in anaccident.
Always drive slowly and turn cor- ners carefully when carrying
items on the roof rack. Severe
wind updrafts, caused by passing
vehicles or natural causes, can
cause sudden upward pressure
on items loaded on the roof rack.
This is especially true when car-
rying large, flat items such as
wood panels or mattresses. Thiscould cause the items to fall off
the roof rack and cause damage
to your vehicle or others around
you.
To prevent damage or loss of cargo while driving, check fre-
quently before or while driving to
make sure the items on the roof
rack are securely fastened.
OEN046213
WARNING
Watch your steps so as not to slip on a slippery side step when it is
rainy or snowy.
If you try to open the door when the temperature is below freezing
or when the side step is covered
with snow or ice, the door could
be damaged. Remove any snow
that may accumulate on the sidesteps.
CAUTION
When carrying cargo on the roof
rack, take the necessary precau-
tions to make sure the cargo doesnot damage the roof of the vehi-cle.
When carrying large objects on the roof rack, make sure they donot exceed the overall roof lengthor width.
procarmanuals.com
Page 203 of 419

4125
Features of your vehicle
✽✽NOTICE
If you install an aftermarket HID head
lamp, your vehicle’s audio and electron-
ic device may malfunction.
Antenna
D300102AUN
Roof antenna
Your car uses a roof antenna to receive
both AM and FM broadcast signals. This
antenna is a removable type. To remove
the antenna, turn it counterclockwise. To
install the antenna, turn it clockwise.
AUDIO SYSTEM
OHM048154L
CAUTION
• Before entering a place with a low
height clearance, be sure that the
antenna is fully folded down or removed.
Be sure to remove the antenna before washing the car in an auto-
matic car wash or it may be dam- aged.
When reinstalling your antenna, it is important that it is fully tight-ened and adjusted to the upright
position to ensure proper recep-tion. But it could be folded orremoved when parking the vehi- cle or when loading cargo on the
roof rack.
When cargo is loaded on the roof rack, do not place the cargo nearthe antenna pole to ensure properreception.
procarmanuals.com
Page 278 of 419

541
Driving your vehicle
E111000AEN
Reducing the risk of a rollover
This multi-purpose passenger vehicle is
defined as a Sports Utility Vehicle (SUV).
SUV’s have higher ground clearance
and a narrower track to make them capa-
ble of performing in a wide variety of off-
road applications. Specific design char-
acteristics give them a higher center of
gravity than ordinary cars. An advantage
of the higher ground clearance is a better
view of the road, which allows you to
anticipate problems. They are not
designed for cornering at the same
speeds as conventional passenger drive
vehicles, any more than low-slung sports
cars are designed to perform satisfactori-
ly in off-road conditions. Due to this risk,
driver and passengers are strongly rec-
ommended to buckle their seat belts. In
a rollover crash, an unbelted person is
more likely to die than a person wearing
a seat belt. There are steps that a driver
can make to reduce the risk of a rollover.
If at all possible, avoid sharp turns or
abrupt maneuvers, do not load your roof
rack with heavy cargo, and never modify
your vehicle in any way.
WARNING - Rollover
As with other Sports Utility Vehicle
(SUV), failure to operate this vehi-
cle correctly may result in loss of
control, an accident or vehicle
rollover.
Utility vehicles have a significant- ly higher rollover rate than other
types of vehicles.
Specific design characteristics (higher ground clearance, nar-
rower track, etc.) give this vehicle
a higher center of gravity than
ordinary cars.
A SUV is not designed for corner- ing at the same speeds as con-
ventional vehicles.
Avoid sharp turns or abrupt maneuvers.
In a rollover crash, an unbelted person is significantly more like-
ly to die than a person wearing a
seat belt. Make sure everyone in
the vehicle is properly buckledup.
procarmanuals.com
Page 363 of 419

Maintenance
46
7
G190400AEN
Removing the battery
1. Remove the nut (1) and disconnect the
battery cable from the negative termi-
nal of the battery.
2. Remove the nuts (2, 3) and disconnect the battery cable from the positive ter-
minal of the battery.
3. Remove the battery.
4. Reinstall the battery in the reverse order of removal. G190300AEN Reset items
Items should be reset after the battery
has been discharged or the battery hasbeen disconnected.
Power tailgate (See section 4)
Auto up/down window (See section 4)
Sunroof (See section 4)
Driver position memory system
(See section 4)
Trip computer (See section 4)
Climate control system (See section 4)
Clock (See section 4)
Audio (See section 4)
OEN076052
WARNING
Before performing maintenance or recharging the battery, turn off all accessories and stop the
engine.
The negative battery cable must be removed first and installed
last when the battery is discon-nected.
procarmanuals.com
Page 379 of 419

Maintenance
62
7
Instrument panel fuse panel
Description Fuse rating Protected component
AUDIO 2 10A Audio, Console & rear power outlet relay, Digital clock, BCM
C/LIGHTER 20A Front cigarette lighter & Power outlet
A/BAG 2 10A -
A/BAG 1 15A SRS control module
A/BAG IND 10A Instrument cluster (Air bag indicator lamp)
B/UP LP 10A Back-up lamp relay, TCM, Electro chromic mirror, Back warning control module
CRUISE 10A Multifunction switch, PIC immobilizer module, Driver/Passenger seat warmer switch
ATM CONT 10A ATM key lock unit, 4WD ECM, BCM, Multifunction switch, Semi active engine mounting control module
CLUSTER 10A Instrument cluster, Generator, BCM, PIC immobilizer module
START 10A Burglar alarm relay, Power tailgate control module
EPS 10A BCM, Rheostat, Power window main/assist switch
A/CON 10A Front A/C control module, Blower relay, Rear A/C control module, Rear A/C relay, Rain sensor, Sunroof control module, Electro chromic mirror
FR S/HTR 15A Driver/Passenger Seat warmer switch
RR S/HTR 15A -
IMS 10A IMS control module, Tilt & Telescopic module, PTC heater relay, Power tailgate control module
H/LP, AQS 10A Head lamp low relay, AQS sensor
FR WASHER 15A Front wiper relay, Front washer relay
RR WIPER 15A Rear wiper control module, Rear wiper motor
TAIL LH 10A Head lamp LH, Rear combi lamp LH, Front fog lamp relay, Tailgate handler license lamp
TAIL RH 10A Head lamp RH, Rear combi lamp RH, Glove box lamp, Illuminations
procarmanuals.com
Page 380 of 419

763
Maintenance
Description Fuse ratingProtected component
DR LOCK 20A Power window main switch, Power tailgate relay, Tailgate actuator
STOP LP 15A Stop lamp switch
ADJ-PEDAL 15A -
H/LP WASHER 20A Headlight washer switch
FUEL LID 15A Fuel filler lid switch
RR FOG 15A Rear fog lamp relay
FR WIPER 30A Front wiper motor
TILT & TELE 15A Tilt & Telescopic module
DRL 15A DRL control module
P/WDW LH 25A Driver safety window ECM, Rear power window switch LH
P/WDW RH 25A Front/Rear power window switch RH
MIRR HTD 10A Power outside mirror defogger LH/RH, Rear window defogger
P/SEAT 30A IMS control module, Driver/Passenger seat manual switch
KEY SOL 10A ATM key lock solenoid, 4WD ECM, Back warning buzzer, PIC mechanical steering column lock
DEICER 15A Windshield defogger relay
S/ROOF 15A Sunroof control module
RSE, SMART KEY 10A PIC immobilizer module 15A Audio
15A Instrument cluster, Power window main switch, Door lamp, Room lamp, Data link connector, BCM, Door warning switch
SPARE 10A Spare fuse
SPARE 15A Spare fuse
SPARE 20A Spare fuse
SPARE 30A Spare fuse
AUDIO 1
(MEMORY FUSE)
ROOM LP
(MEMORY FUSE)
procarmanuals.com