2011 HYUNDAI TUCSON buttons
[x] Cancel search: buttonsPage 153 of 382
Features of your vehicle
72
4
Manual heating and air conditioing
The heating and cooling system can be
controlled manually by pushing buttons
or turning knob(s) other than the AUTO
button. In this case, the system workssequentially according to the order of
buttons or knob(s) selected.
✽✽
NOTICE
When pressing any button (or turning
any knob) except the AUTO button
while using automatic operation, the
functions not selected will continue to be
controlled automatically.
1. Start the engine.
2. Set the mode to the desired position. For improving the effectiveness of heating and cooling;- Heating: - Cooling:
3. Set the temperature control to the desired position.
4. Set the air intake control to the outside (fresh) air position.
5. Set the fan speed control to the desired speed.
6. If air conditioning is desired, turn the air conditioning system on.
Press the AUTO button in order to convert to full automatic control of the system.
Mode selection
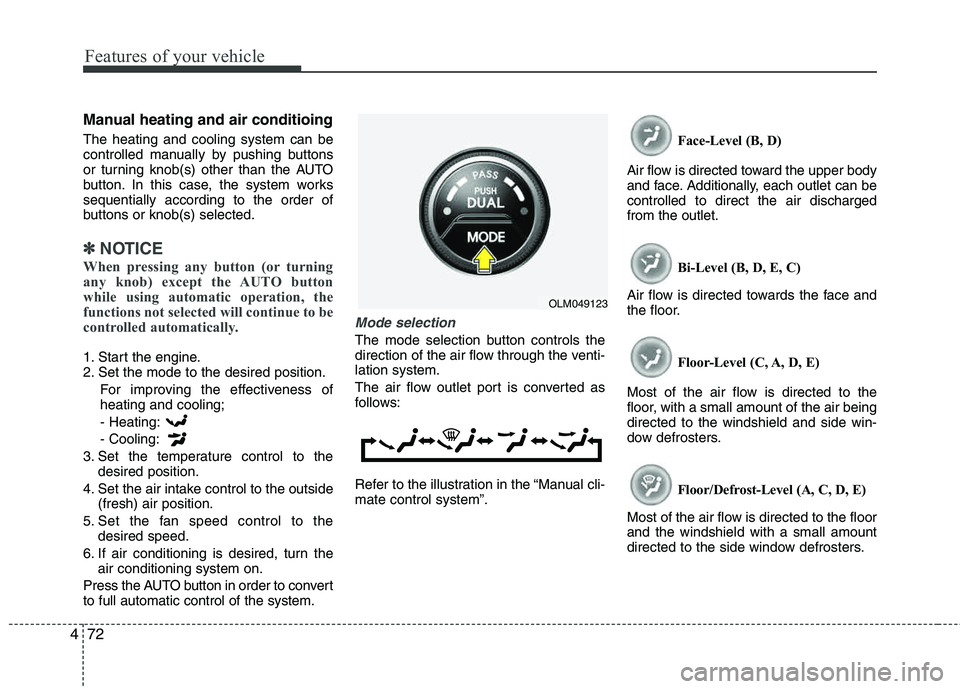
The mode selection button controls the
direction of the air flow through the venti-lation system.
The air flow outlet port is converted as
follows:
Refer to the illustration in the “Manual cli- mate control system”. Face-Level (B, D)
Air flow is directed toward the upper body
and face. Additionally, each outlet can becontrolled to direct the air dischargedfrom the outlet.
Bi-Level (B, D, E, C)
Air flow is directed towards the face and
the floor.
Floor-Level (C, A, D, E)
Most of the air flow is directed to the
floor, with a small amount of the air being directed to the windshield and side win-
dow defrosters.
Floor/Defrost-Level (A, C, D, E)
Most of the air flow is directed to the floorand the windshield with a small amount
directed to the side window defrosters.
OLM049123
Page 166 of 382
485
Features of your vehicle
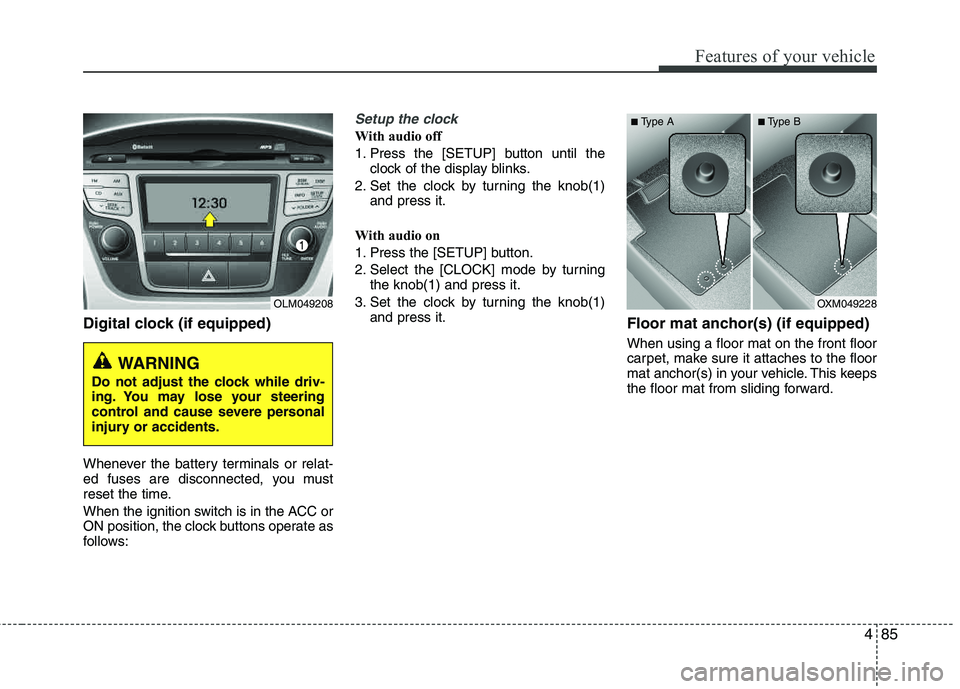
Digital clock (if equipped)
Whenever the battery terminals or relat-
ed fuses are disconnected, you must
reset the time.
When the ignition switch is in the ACC or
ON position, the clock buttons operate as
follows:
Setup the clock
With audio off
1. Press the [SETUP] button until theclock of the display blinks.
2. Set the clock by turning the knob(1) and press it.
With audio on
1. Press the [SETUP] button.
2. Select the [CLOCK] mode by turning the knob(1) and press it.
3. Set the clock by turning the knob(1) and press it.
Floor mat anchor(s) (if equipped)
When using a floor mat on the front floor
carpet, make sure it attaches to the floor
mat anchor(s) in your vehicle. This keeps
the floor mat from sliding forward.
OLM049208
WARNING
Do not adjust the clock while driv-
ing. You may lose your steering
control and cause severe personal
injury or accidents.
OXM049228
■
Type A ■Type B
Page 171 of 382
Features of your vehicle
90
4
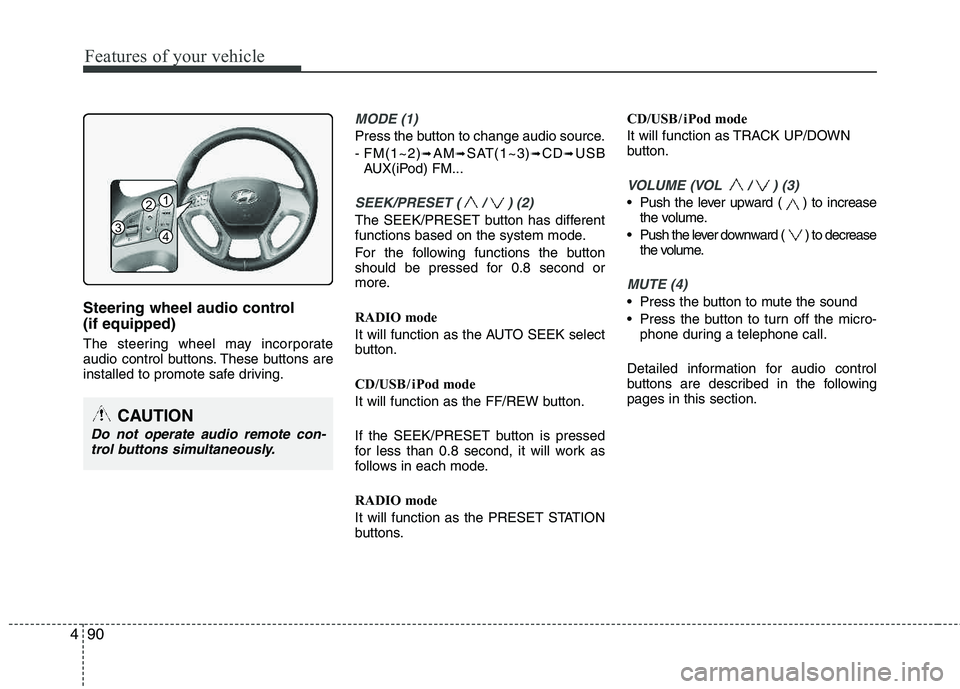
Steering wheel audio control (if equipped)
The steering wheel may incorporate
audio control buttons. These buttons are
installed to promote safe driving.
MODE (1)
Press the button to change audio source.
- FM(1~2)
➟AM➟SAT(1~3)➟CD➟USB
AUX(iPod) FM...
SEEK/PRESET ( / ) (2)
The SEEK/PRESET button has different
functions based on the system mode.
For the following functions the button
should be pressed for 0.8 second or
more.
RADIO mode
It will function as the AUTO SEEK select
button.
CD/USB / i Pod mode
It will function as the FF/REW button.
If the SEEK/PRESET button is pressed
for less than 0.8 second, it will work as
follows in each mode.
RADIO mode
It will function as the PRESET STATION
buttons. CD/USB / i Pod mode
It will function as TRACK UP/DOWN
button.
VOLUME (VOL / ) (3)
• Push the lever upward ( ) to increase
the volume.
Push the lever downward ( ) to decrease the volume.
MUTE (4)
Press the button to mute the sound
Press the button to turn off the micro-phone during a telephone call.
Detailed information for audio control
buttons are described in the followingpages in this section.
CAUTION
Do not operate audio remote con- trol buttons simultaneously.
1
3
2
4
Page 177 of 382
![HYUNDAI TUCSON 2011 Owners Manual Features of your vehicle
96
4
Using RADIO, SETUP, VOLUME
and AUDIO CONTROL
1. AM Selection Button
Pressing the [AM] button selects the AM
band. AM Mode is displayed on the LCD.
2. FM Selection But HYUNDAI TUCSON 2011 Owners Manual Features of your vehicle
96
4
Using RADIO, SETUP, VOLUME
and AUDIO CONTROL
1. AM Selection Button
Pressing the [AM] button selects the AM
band. AM Mode is displayed on the LCD.
2. FM Selection But](/manual-img/35/56206/w960_56206-176.png)
Features of your vehicle
96
4
Using RADIO, SETUP, VOLUME
and AUDIO CONTROL
1. AM Selection Button
Pressing the [AM] button selects the AM
band. AM Mode is displayed on the LCD.
2. FM Selection Button Turns to FM mode and toggles FM1 and
FM2 when the button is pressed each
time.
3. Automatic Station Seek Button
When the [SEEK ] is pressed, it will
automatically tune to the next lower station.
When the [SEEK ] is pressed, it will automatically tune to the next higher station.
4. Power ON/OFF Button & Volume Control Knob
Turns the audio system on/off whenthe ignition switch is on ACC or ON.
If the knob is turned clockwise/counter- clockwise, the volume will increase
/decrease.
5. Preset Selection Button
Press [1]~[6] buttons less than 0.8 sec-ond to play the station saved in each
button.
Press [1]~[6] b utton more than 0.8 sec-
ond or longer to save the current station
to the respective button with a beep.
6. SCAN Button
When the button is pressed, it auto- matically scans the radio stations
upwards.
The SCAN feature steps through each station, starting from the initial station,
for ten seconds.
Press the [SCAN] button again to stop the scan feature and to listen to the currently selected channel.
7. DISP Button
Turn the LCD Display & Backlight on/off
when [DISP] button press.
8. SETUP Button
Press this Button to enter SETUP mode,
If no action is taken for 8 seconds, it will
return to previous mode.
In “SETUP” mode, rotate the TUNE knob
to move the cursor between items, and
push the TUNE knob to select.
Select whether long file names are
scrolled continuously (“ON”) or just once(“OFF”).
Select this item to turn the SDVC(Speed
Dependent Volume Control) feature ON
or OFF. If it is turned ON, volume level is adjusted automatically according to the
vehicle speed.
This function creates virtual sound
effects and allows adjustments to the
BASS level. HIGH
➟MID ➟LOW ➟OFF
Select default display of XM mode.
“Category/Channel name” or “Artist/Song
Title” can be selected.
Page 186 of 382
4105
Features of your vehicle
✽✽NOTICE FOR USING THE IPOD ®
DEVICE
Some iPod models might not sup-
port the communication protocol
and the files will not be played.
Supported iPod models:
- iPod Mini
- iPod 4th(Photo) ~ 6th(Classic)
generation
- iPod Nano 1st~4th generation
- iPod Touch 1st~2nd generation
The order of search or playback of
songs in the iPod can be different
from the order searched in the
audio system.
If the iPod disabled due to its own malfunction, reset the iPod. (Reset:
Refer to iPod manual)
An iPod may not operate normally on low battery.
Some iPod devices, such as the
iPhone, can be connected through
the Bluetooth ®
interface. The device
must have audio Bluetooth ®
capa-
bility (such as for stereo headphone
Bluetooth ®
). The device can play,
but it will not be controlled by the
audio system.
CAUTION IN USING THE
IPOD ®
DEVICE
The HYUNDAI iPod Power Cable
is needed in order to operate iPodwith the audio buttons on the
audio system. The USB cable pro- vided by Apple may cause mal-function and should not be used
for HYUNDAI vehicles.
❋
❋ The HYUNDAI iPod Power Cable
may be purchased through yourHYUNDAI Dealership.
When connecting iPod with the iPod Power Cable, insert the con-nector to the multimedia socket completely. If not inserted com-
pletely, communications betweeniPod and audio may be interrupted.
When adjusting the sound effects of the iPod and the audio system,the sound effects of both deviceswill overlap and might reduce ordistort the quality of the sound.
Deactivate (turn off) the equalizer function of an iPod when adjust-ing the audio system’s volume,
and turn off the equalizer of theaudio system when using theequalizer of an iPod.
(Continued)
(Continued)
When the iPod cable is connect- ed, the system can be switched toAUX mode even without iPod
device and may cause noise.Disconnect the iPod cable whenyou are not using the iPod device.
When not using iPod with car audio, detach the iPod cable fromiPod. Otherwise, iPod may remainin accessory mode, and may notwork properly.
Page 190 of 382
4109
Features of your vehicle
Using XM Satellite Radio
Your vehicle is equipped with 3 months
complimentary period of XM Satellite
Radio so you have access to over 130
channels of music, information, and
entertainment programming.
1. XM Selection Button
Turns to XM Satellite Radio Mode. XMmode toggles in order to XM1➟XM2➟XM3➟XM1... when the button is pressed
each time.
2. Channel Selection Button
Push [TRACK ] button for less than
0.8 seconds to select previous channel.
Push [TRACK ] button for 0.8 sec- onds or longer to continuously move to
previous channel.
Push [SEEK ] button for less than 0.8 seconds to select next channel.
Push [SEEK ] button for 0.8 sec- onds or longer to continuously move to
next channel.
Radio ID : Seek or Tune to XM channel 0 to display the Radio ID.
3. Preset Selection Button
Push [1]~[6] buttons less than 0.8 sec-
onds to play the channel saved in each
button. Push Preset button for 0.8 sec-
onds or longer to save current channel to
the respective button with a beep.
4. SCAN Selection Button
Press to hear a brief sampling of all
channel. To cancel the scan mode, press
the button once again.
5. INFO Button
Displays the information of the current
channel in the order of Artist/Song title➟Category/Channel name➟Current Play
Channel➟Artist/Song title➟Category/
Channel name... when the button is
pressed each time.
If can not display the whole text informa-
tion, rotate the tune button to see the
next page.
6. CATEGORY Search Button
Push [FOLDER ] button to search
previous category.
Push [CAT ] button to search next category. To listen to the displayed cat-
egory, press the TUNE/SETUP button.
To scan channel in displayed category,
press the scan button. To search chan-
nel in displayed category, press seek
buttons or turn the tune button clock-
wise/counterclockwise.(CATEGORY
icon is will be turned on in Categorymode)
7. Manual Channel Selection Button
While listening to XM broadcast, rotate
this control to the right or left to searchother channels while listening to current
channel. (Turn to the right to searchhigh-
er channels and left, lower channels)
Page 199 of 382
Features of your vehicle
118
4
A phone call can be made by dialing the
spoken numbers. The system can recog-
nize single digits from zero to nine.
➀Press button.
➁Say “Call”.
➂Say “Number” when prompted.
➃Say desired phone numbers.
➄Say “Dial” to complete the number and
make a call.
✽✽
Tip
A shortcut to each of the following func-
tions is available:
➀Say “Dial Number”
➁Say “Dial
■ Receiving a Phone Call
When receiving a phone call, a ringtone
is audible from speakers and the audio
system changes into telephone mode.
When receiving a phone call, “Incoming”
message and incoming phone number
(if available) are displayed on the audio.
- Press button on the steering wheel.
- Press button on the steering wheel.
- Use VOLUME buttons on the steering
wheel.
Call):
- Press and hold button on the steer- ing wheel until the audio system trans-
fers a call to the phone.
■ Talking on the Phone
When talking on the phone, “Active Calls”
message and the other party’s phone
number (if available) are displayed on the
audio.
- Press button on the steering wheel.
- Press button on the steering wheel.
✽✽ NOTICE
In the following situations, you or the
other party may have difficulty hearing
each other:
1. Speaking at the same time, your voice may not reach each other parties. (This
is not a malfunction.) Speak alternate-
ly with the other party on the phone.
2. Keep the Bluetooth ®
volume to a low
level. High-level volume may result in
distortion and echo.
3. When driving on a rough road.
4. When driving at high speeds.
5. When the window is open.
6. When the air conditioning vents are facing the microphone.
7. When the sound of the air condition- ing fan is loud.