2011 HYUNDAI TUCSON lock
[x] Cancel search: lockPage 206 of 382
55
Driving your vehicle
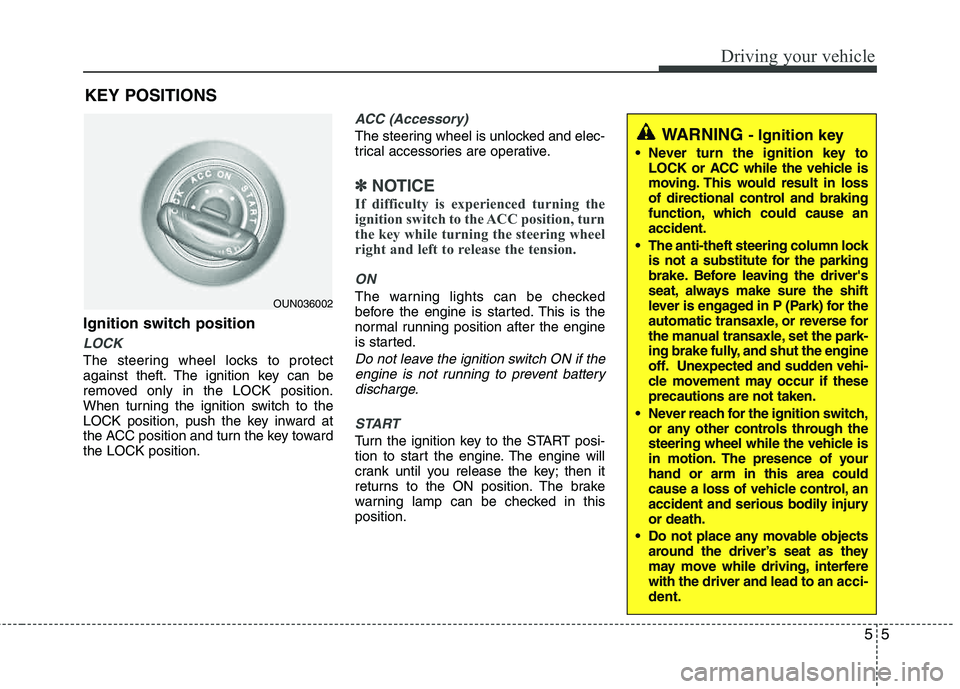
Ignition switch position
LOCK
The steering wheel locks to protect
against theft. The ignition key can be
removed only in the LOCK position.
When turning the ignition switch to the
LOCK position, push the key inward at
the ACC position and turn the key toward the LOCK position.
ACC (Accessory)
The steering wheel is unlocked and elec-
trical accessories are operative.
✽✽NOTICE
If difficulty is experienced turning the
ignition switch to the ACC position, turn
the key while turning the steering wheel
right and left to release the tension.
ON
The warning lights can be checked
before the engine is started. This is the
normal running position after the engine
is started.
Do not leave the ignition switch ON if the engine is not running to prevent batterydischarge.
START
Turn the ignition key to the START posi-
tion to start the engine. The engine will
crank until you release the key; then it
returns to the ON position. The brake
warning lamp can be checked in thisposition.
WARNING - Ignition key
Never turn the ignition key to LOCK or ACC while the vehicle is
moving. This would result in loss
of directional control and braking
function, which could cause an accident.
The anti-theft steering column lock is not a substitute for the parking
brake. Before leaving the driver's
seat, always make sure the shift
lever is engaged in P (Park) for the
automatic transaxle, or reverse for
the manual transaxle, set the park-
ing brake fully, and shut the engine
off. Unexpected and sudden vehi-
cle movement may occur if theseprecautions are not taken.
Never reach for the ignition switch, or any other controls through the
steering wheel while the vehicle is
in motion. The presence of your hand or arm in this area could
cause a loss of vehicle control, an
accident and serious bodily injuryor death.
Do not place any movable objects around the driver’s seat as they
may move while driving, interferewith the driver and lead to an acci-
dent.
OUN036002
KEY POSITIONS
Page 208 of 382
57
Driving your vehicle
Manual transaxle operation
The manual transaxle has 5 (or 6*) for-
ward gears.
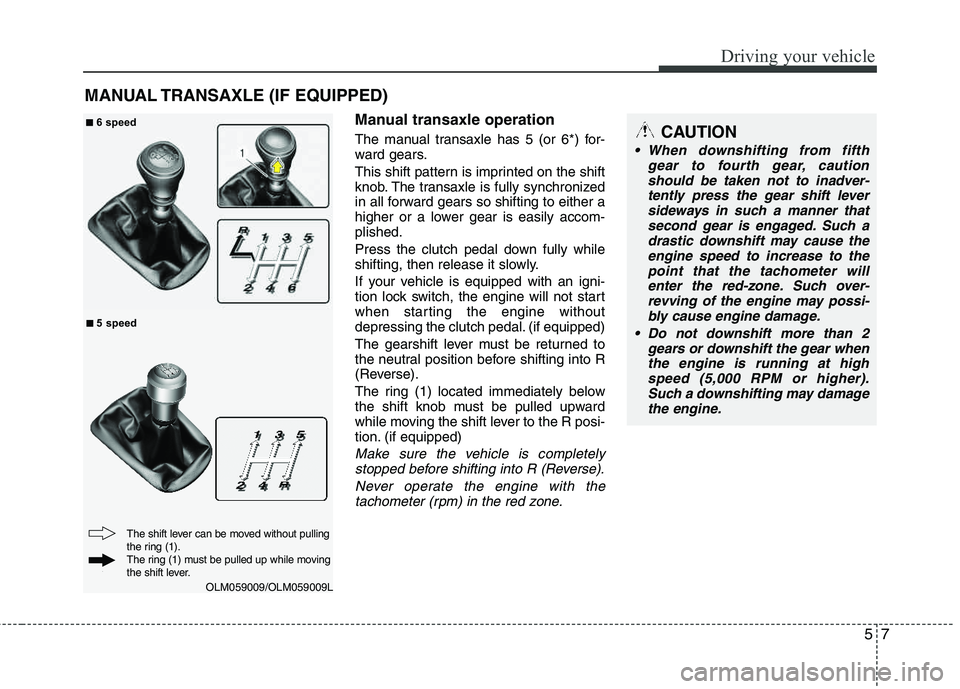
This shift pattern is imprinted on the shift
knob. The transaxle is fully synchronized
in all forward gears so shifting to either a
higher or a lower gear is easily accom- plished.
Press the clutch pedal down fully while
shifting, then release it slowly.
If your vehicle is equipped with an igni-
tion lock switch, the engine will not start
when starting the engine without
depressing the clutch pedal. (if equipped)
The gearshift lever must be returned to
the neutral position before shifting into R
(Reverse).
The ring (1) located immediately below
the shift knob must be pulled upward
while moving the shift lever to the R posi-
tion. (if equipped)
Make sure the vehicle is completelystopped before shifting into R (Reverse).
Never operate the engine with thetachometer (rpm) in the red zone.
MANUAL TRANSAXLE (IF EQUIPPED)
OLM059009/OLM059009L
CAUTION
When downshifting from fifth gear to fourth gear, cautionshould be taken not to inadver-
tently press the gear shift leversideways in such a manner that second gear is engaged. Such adrastic downshift may cause the
engine speed to increase to thepoint that the tachometer willenter the red-zone. Such over-
revving of the engine may possi-bly cause engine damage.
Do not downshift more than 2 gears or downshift the gear when
the engine is running at high speed (5,000 RPM or higher).Such a downshifting may damage
the engine.
The shift lever can be moved without pulling
the ring (1).
The ring (1) must be pulled up while moving
the shift lever.
■■ 6 speed
■
■ 5 speed
Page 212 of 382
511
Driving your vehicle
For smooth operation, depress the brakepedal when shifting from N (Neutral) to a
forward or reverse gear.Transaxle ranges
The indicator in the instrument cluster
displays the shift lever position when the
ignition switch is in the ON position.
P (Park)
Always come to a complete stop before
shifting into P (Park). This position locks
the transaxle and prevents the frontwheels from rotating.
WARNING- Automatic
transaxle
Always check the surrounding areas near your vehicle for peo-
ple, especially children, before
shifting a vehicle into D (Drive) or
R (Reverse).
Before leaving the driver’s seat, always make sure the shift lever
is in the P (Park) position; then
set the parking brake fully and
shut the engine off. Unexpected
and sudden vehicle movementcan occur if these precautions
are not followed in the order iden- tified.
CAUTION
To avoid damage to your
transaxle, do not accelerate theengine in R (Reverse) or any for-
ward gear position with thebrakes on.
When stopped on an incline, do not hold the vehicle stationary
with engine power. Use the serv-ice brake or the parking brake.
Do not shift from N (Neutral) or P (Park) into D (Drive), or R(Reverse) when the engine isabove idle speed.
WARNING
Shifting into P (Park) while the vehicle is in motion will cause the
drive wheels to lock which will
cause you to lose control of the
vehicle.
Do not use the P (Park) position in place of the parking brake.
Always make sure the shift lever
is latched in the P (Park) position
and set the parking brake fully.
Never leave a child unattended in a vehicle.
Page 215 of 382
Driving your vehicle
14
5
Shift lock system
For your safety, the automatic transaxle
has a shift lock system which prevents
shifting the transaxle from P (Park) or N
(Neutral) into R (Reverse) unless the
brake pedal is depressed.
To shift the transaxle from P (Park) or N
(Neutral) into R (Reverse):
1. Depress and hold the brake pedal.
2. Start the engine or turn the ignition
switch to the ON position.
3. Move the shift lever.
If the brake pedal is repeatedly depressed and released with the shift
lever in the P (Park) position, a chattering
noise near the shift lever may be heard.
This is a normal condition. Shift-lock override
If the shift lever cannot be moved from
the P (Park) or N (Neutral) position into R
(Reverse) position with the brake pedal
depressed, continue depressing the
brake, then do the following:
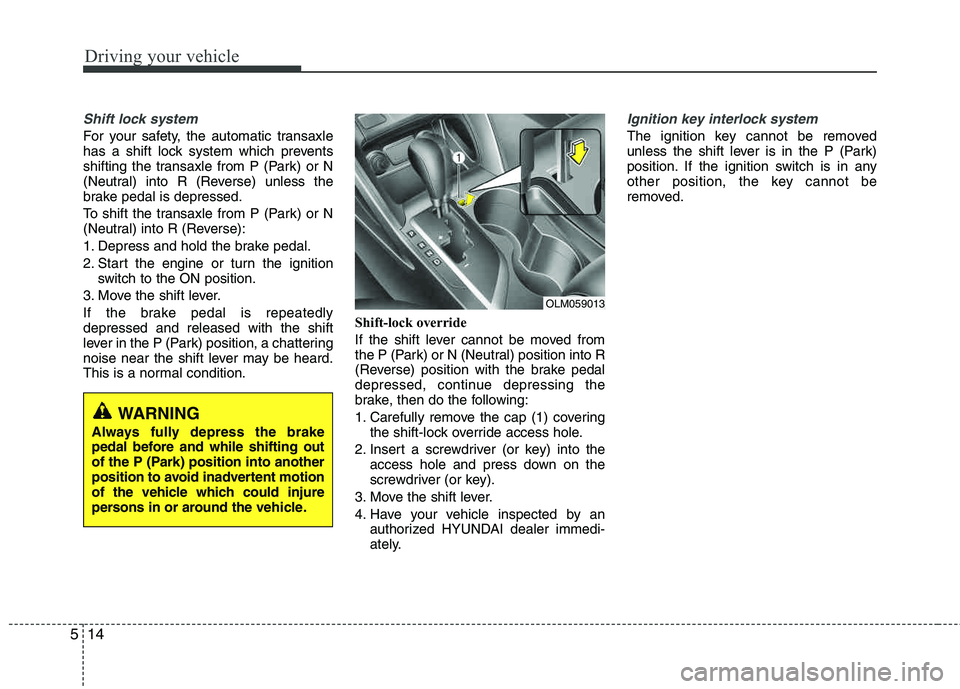
1. Carefully remove the cap (1) covering
the shift-lock override access hole.
2. Insert a screwdriver (or key) into the access hole and press down on the
screwdriver (or key).
3. Move the shift lever.
4. Have your vehicle inspected by an authorized HYUNDAI dealer immedi-
ately.
Ignition key interlock system
The ignition key cannot be removed
unless the shift lever is in the P (Park)
position. If the ignition switch is in any
other position, the key cannot be
removed.
WARNING
Always fully depress the brake
pedal before and while shifting out
of the P (Park) position into another
position to avoid inadvertent motion
of the vehicle which could injure
persons in or around the vehicle.
OLM059013
Page 219 of 382
Driving your vehicle
18
5
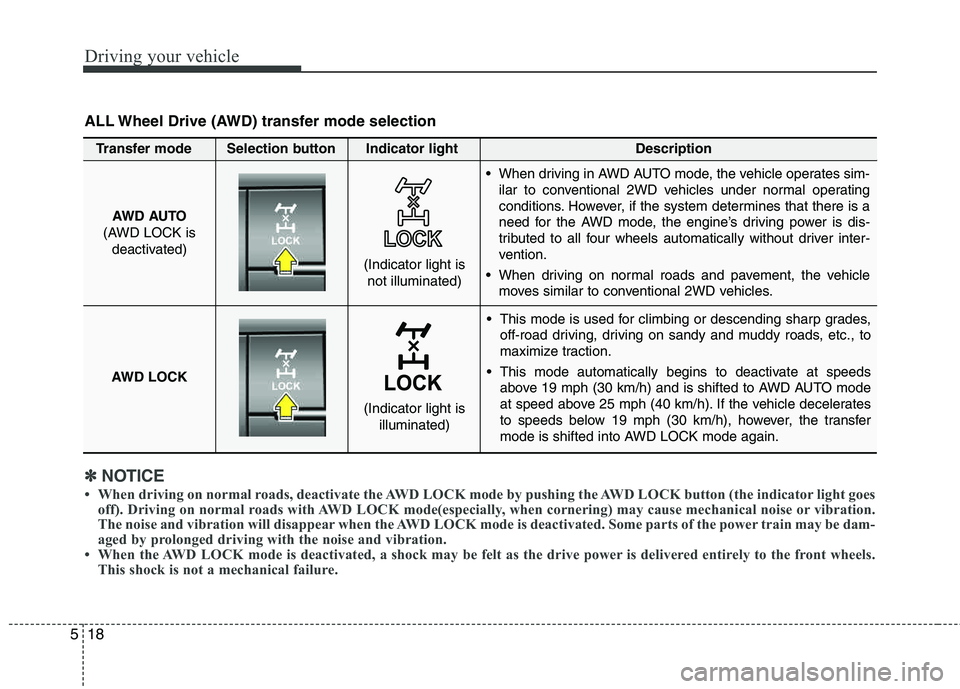
This mode is used for climbing or descending sharp grades,
off-road driving, driving on sandy and muddy roads, etc., to
maximize traction.
This mode automatically begins to deactivate at speeds above 19 mph (30 km/h) and is shifted to AWD AUTO mode
at speed above 25 mph (40 km/h). If the vehicle decelerates
to speeds below 19 mph (30 km/h), however, the transfer
mode is shifted into AWD LOCK mode again.
AWD AUTO
(AWD LOCK is deactivated)
(Indicator light isnot illuminated)
✽✽ NOTICE
When driving on normal roads, deactivate the AWD LOCK mode by pushing the AWD LOCK button (the indicator light goes
off). Driving on normal roads with AWD LOCK mode(especially, when cornering) may cause mechan ical noise or vibration.
The noise and vibration will disappear when the AWD LOCK mode is deactivated. Some parts of the power train may be dam-
aged by prolonged driving with the noise and vibration.
When the AWD LOCK mode is deactivated, a shock may be felt as the drive power is delivered entirely to the front wheels.
This shock is not a mechanical failure.
ALL Wheel Drive (AWD) transfer mode selection
Transfer mode Selection button Indicator light Description
When driving in AWD AUTO mode, the vehicle operates sim-
ilar to conventional 2WD vehicles under normal operating
conditions. However, if the system determines that there is a
need for the AWD mode, the engine’s driving power is dis-
tributed to all four wheels automatically without driver inter-
vention.
When driving on normal roads and pavement, the vehicle moves similar to conventional 2WD vehicles.
AWD LOCK
(Indicator light is illuminated)
Page 221 of 382
Driving your vehicle
20
5
You must consciously take the effort to
learn how to corner in a AWD vehicle.
Do not rely on your experience in con-
ventional 2WD vehicles in choosing
safe cornering speed in AWD mode.
For starters, you must drive more slow-
ly in AWD.
Drive carefully off-road because your vehicle may be damaged by rocks or
roots of trees. Become familiar with the
off-road conditions where you are
going to drive before you begin driving.
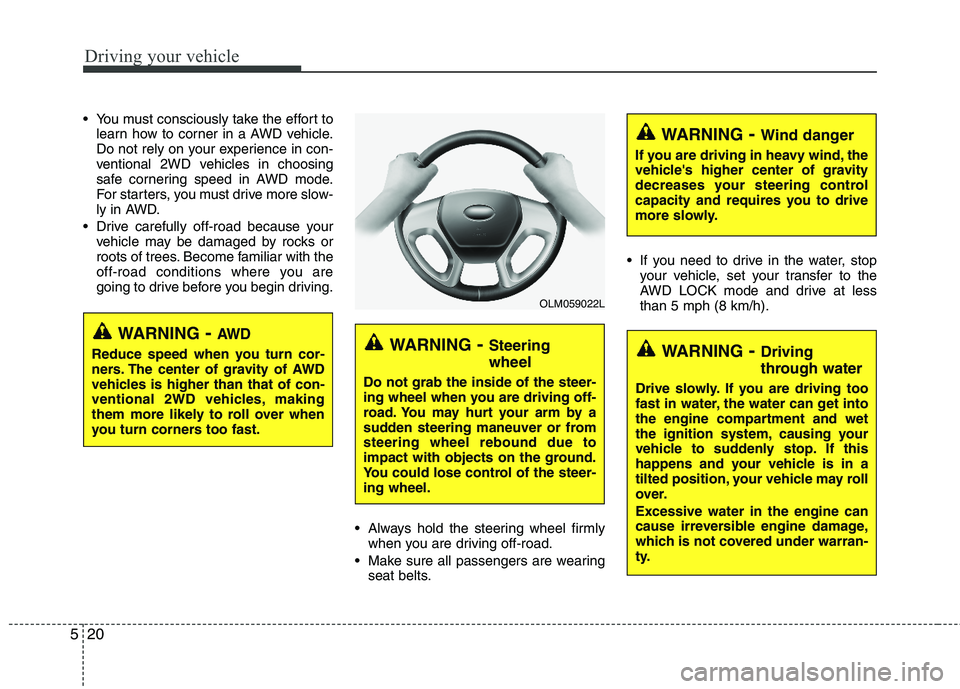
Always hold the steering wheel firmlywhen you are driving off-road.
Make sure all passengers are wearing seat belts. If you need to drive in the water, stop
your vehicle, set your transfer to the
AWD LOCK mode and drive at lessthan 5 mph (8 km/h).
WARNING - Steering wheel
Do not grab the inside of the steer-
ing wheel when you are driving off-
road. You may hurt your arm by a
sudden steering maneuver or fromsteering wheel rebound due to
impact with objects on the ground.
You could lose control of the steer-ing wheel.
WARNING- Wind danger
If you are driving in heavy wind, the
vehicle's higher center of gravity
decreases your steering control
capacity and requires you to drive
more slowly.
WARNING- Driving
through water
Drive slowly. If you are driving too
fast in water, the water can get into
the engine compartment and wet
the ignition system, causing your
vehicle to suddenly stop. If this
happens and your vehicle is in a
tilted position, your vehicle may roll
over. Excessive water in the engine can
cause irreversible engine damage,
which is not covered under warran-
ty.
OLM059022L
WARNING - AW D
Reduce speed when you turn cor-
ners. The center of gravity of AWD
vehicles is higher than that of con-
ventional 2WD vehicles, making
them more likely to roll over when
you turn corners too fast.
Page 228 of 382
527
Driving your vehicle
If the parking brake does not release or
does not release all the way, have the
system checked by an authorized
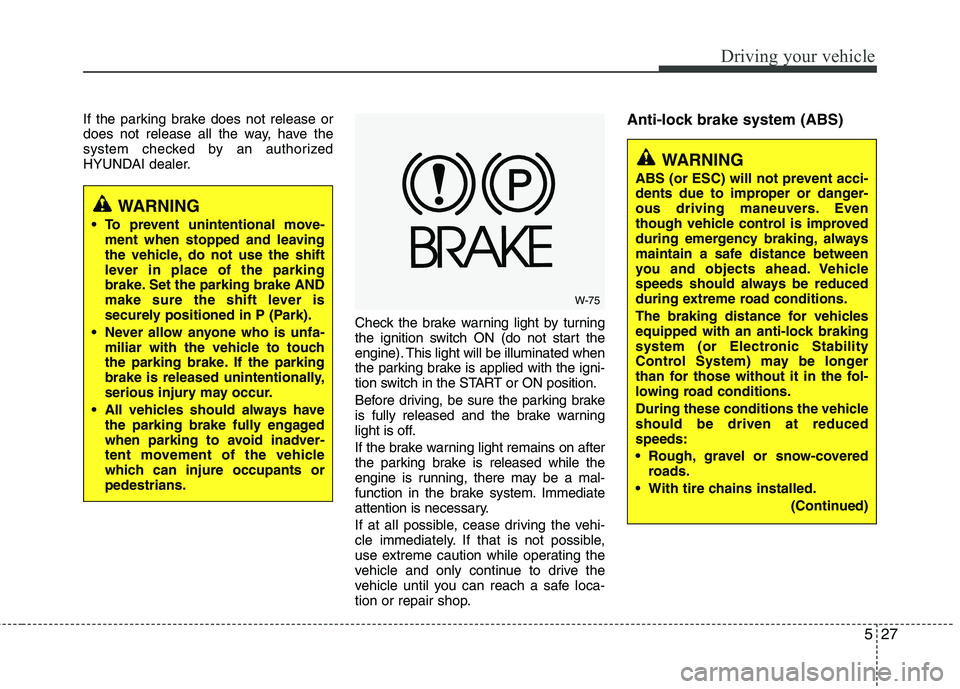
HYUNDAI dealer.Check the brake warning light by turning
the ignition switch ON (do not start the
engine). This light will be illuminated when
the parking brake is applied with the igni-
tion switch in the START or ON position.
Before driving, be sure the parking brake
is fully released and the brake warning
light is off.
If the brake warning light remains on after
the parking brake is released while the
engine is running, there may be a mal-
function in the brake system. Immediate
attention is necessary.
If at all possible, cease driving the vehi-
cle immediately. If that is not possible,
use extreme caution while operating the
vehicle and only continue to drive the
vehicle until you can reach a safe loca-
tion or repair shop.Anti-lock brake system (ABS)
W-75
WARNING
To prevent unintentional move- ment when stopped and leaving
the vehicle, do not use the shift
lever in place of the parking
brake. Set the parking brake AND
make sure the shift lever is
securely positioned in P (Park).
Never allow anyone who is unfa- miliar with the vehicle to touch
the parking brake. If the parking
brake is released unintentionally,
serious injury may occur.
All vehicles should always have the parking brake fully engaged
when parking to avoid inadver-
tent movement of the vehicle
which can injure occupants orpedestrians.
WARNING
ABS (or ESC) will not prevent acci-
dents due to improper or danger-
ous driving maneuvers. Even
though vehicle control is improved
during emergency braking, always
maintain a safe distance between
you and objects ahead. Vehicle
speeds should always be reduced
during extreme road conditions.
The braking distance for vehicles
equipped with an anti-lock braking
system (or Electronic Stability
Control System) may be longer
than for those without it in the fol-
lowing road conditions.
During these conditions the vehicle should be driven at reduced speeds:
Rough, gravel or snow-covered roads.
With tire chains installed.
(Continued)
Page 229 of 382
Driving your vehicle
28
5
The ABS continuously senses the speed
of the wheels. If the wheels are going to
lock, the ABS system repeatedly modu-
lates the hydraulic brake pressure to the
wheels.
When you apply your brakes under con-
ditions which may lock the wheels, you
may hear a “tik-tik’’ sound from the
brakes, or feel a corresponding sensation
in the brake pedal. This is normal and it
means your ABS is active.
In order to obtain the maximum benefit
from your ABS in an emergency situa-
tion, do not attempt to modulate your
brake pressure and do not try to pump
your brakes. Press your brake pedal as
hard as possible or as hard as the situa-
tion allows the ABS to control the force
being delivered to the brakes.✽✽
NOTICE
A click sound may be heard in the
engine compartment when the vehicle
begins to move after the engine is start-
ed. These conditions are normal and
indicate that the anti-lock brake system
is functioning properly.
Even with the anti-lock brake system, your vehicle still requires sufficient
stopping distance. Always maintain a
safe distance from the vehicle in front
of you.
Always slow down when cornering. The anti-lock brake system cannot pre-
vent accidents resulting from exces-
sive speeds.
On loose or uneven road surfaces, operation of the anti-lock brake system
may result in a longer stopping dis-
tance than for vehicles equipped with a
conventional brake system.
(Continued)
On roads where the road surfaceis pitted or has different surface height.
The safety features of an ABS (or
ESC) equipped vehicle should not
be tested by high speed driving or
cornering. This could endanger the
safety of yourself or others.