2011 HYUNDAI TUCSON stop
[x] Cancel search: stopPage 127 of 382
Features of your vehicle
46
4
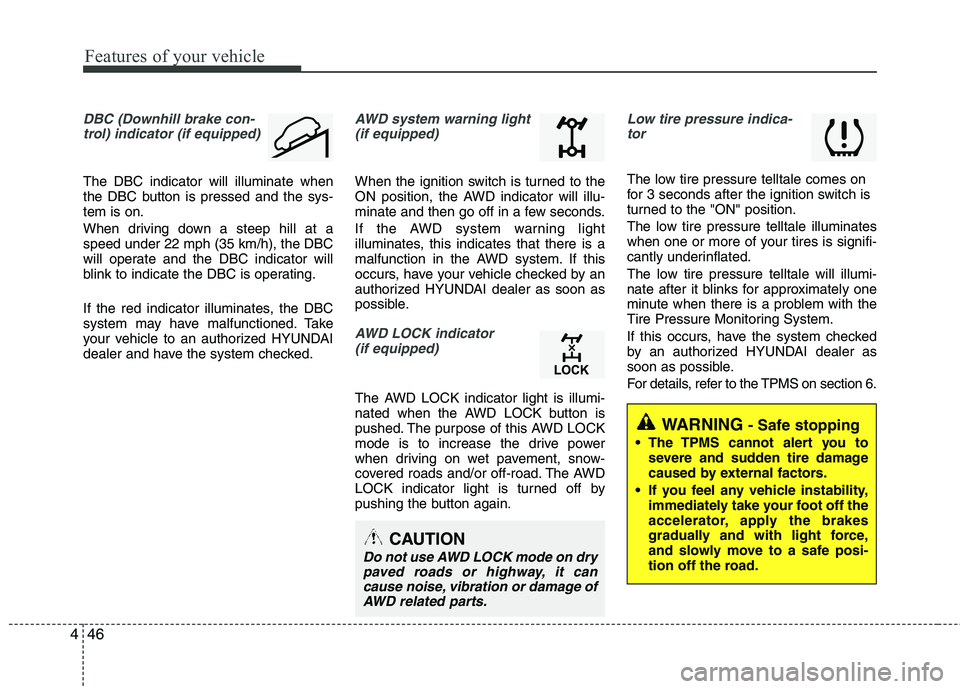
DBC (Downhill brake con-
trol) indicator (if equipped)
The DBC indicator will illuminate when
the DBC button is pressed and the sys-tem is on.
When driving down a steep hill at a speed under 22 mph (35 km/h), the DBC
will operate and the DBC indicator will
blink to indicate the DBC is operating.
If the red indicator illuminates, the DBC
system may have malfunctioned. Take
your vehicle to an authorized HYUNDAI
dealer and have the system checked.
AWD system warning light (if equipped)
When the ignition switch is turned to the
ON position, the AWD indicator will illu-
minate and then go off in a few seconds.
If the AWD system warning light
illuminates, this indicates that there is a
malfunction in the AWD system. If this
occurs, have your vehicle checked by an
authorized HYUNDAI dealer as soon as
possible.
AWD LOCK indicator (if equipped)
The AWD LOCK indicator light is illumi-
nated when the AWD LOCK button is
pushed. The purpose of this AWD LOCK
mode is to increase the drive power
when driving on wet pavement, snow-
covered roads and/or off-road. The AWD
LOCK indicator light is turned off by
pushing the button again.
Low tire pressure indica-tor
The low tire pressure telltale comes on
for 3 seconds after the ignition switch is
turned to the "ON" position.
The low tire pressure telltale illuminates
when one or more of your tires is signifi-
cantly underinflated.
The low tire pressure telltale will illumi-
nate after it blinks for approximately one
minute when there is a problem with the
Tire Pressure Monitoring System.
If this occurs, have the system checked
by an authorized HYUNDAI dealer as
soon as possible.
For details, refer to the TPMS on section 6.
CAUTION
Do not use AWD LOCK mode on drypaved roads or highway, it can
cause noise, vibration or damage ofAWD related parts.
WARNING- Safe stopping
The TPMS cannot alert you to severe and sudden tire damage
caused by external factors.
If you feel any vehicle instability, immediately take your foot off the
accelerator, apply the brakes
gradually and with light force,
and slowly move to a safe posi-
tion off the road.
Page 129 of 382
Features of your vehicle
48
4
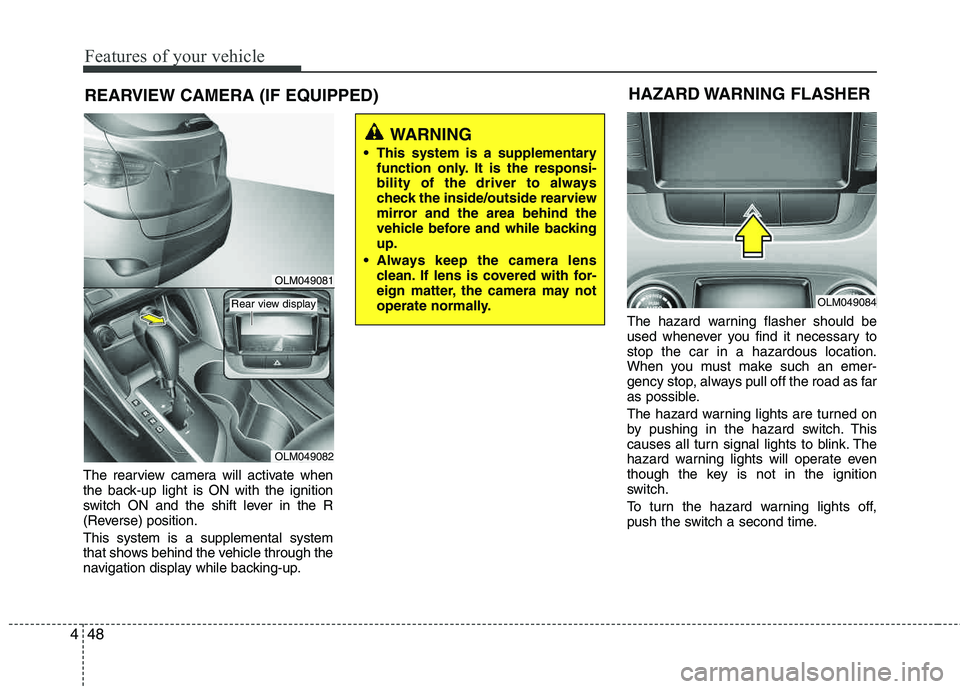
REARVIEW CAMERA (IF EQUIPPED)
The rearview camera will activate when
the back-up light is ON with the ignition
switch ON and the shift lever in the R
(Reverse) position. This system is a supplemental system
that shows behind the vehicle through the
navigation display while backing-up. The hazard warning flasher should be
used whenever you find it necessary to stop the car in a hazardous location.
When you must make such an emer-
gency stop, always pull off the road as far
as possible.
The hazard warning lights are turned on
by pushing in the hazard switch. This
causes all turn signal lights to blink. The
hazard warning lights will operate even
though the key is not in the ignition
switch.
To turn the hazard warning lights off,
push the switch a second time.
WARNING
This system is a supplementary function only. It is the responsi-
bility of the driver to always
check the inside/outside rearview
mirror and the area behind the
vehicle before and while backingup.
Always keep the camera lens clean. If lens is covered with for-
eign matter, the camera may not
operate normally.
HAZARD WARNING FLASHER
OLM049084
OLM049081
OLM049082
Rear view display
Page 161 of 382
Features of your vehicle
80
4
These compartments can be used to
store small items required by the driver
or passengers.
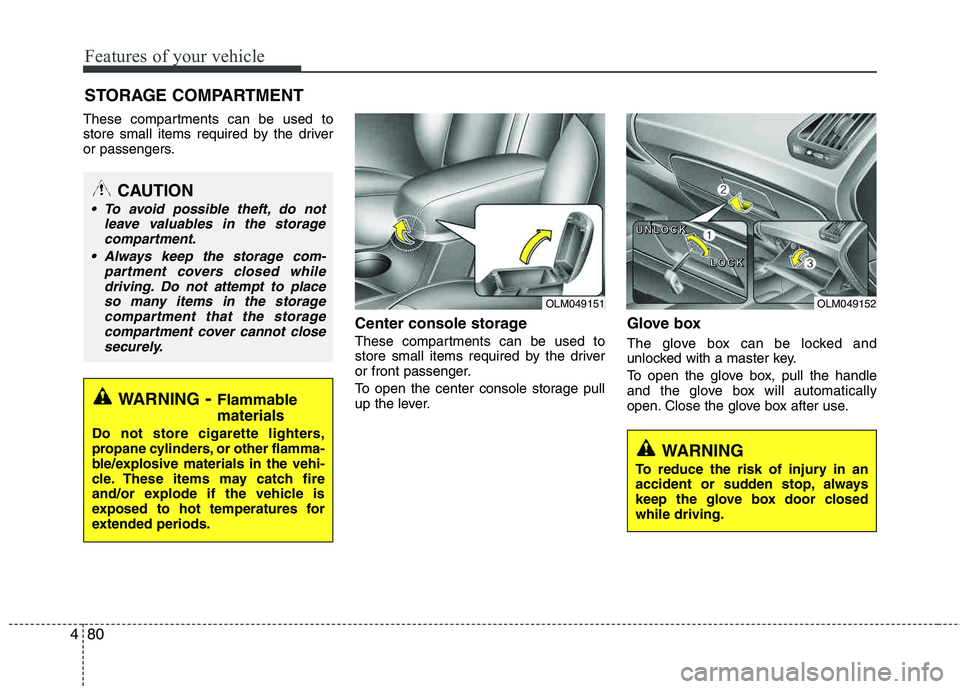
Center console storage
These compartments can be used to
store small items required by the driver
or front passenger.
To open the center console storage pull
up the lever.
Glove box
The glove box can be locked and
unlocked with a master key.
To open the glove box, pull the handle
and the glove box will automatically
open. Close the glove box after use.
STORAGE COMPARTMENT
WARNING
- Flammable
materials
Do not store cigarette lighters,
propane cylinders, or other flamma-
ble/explosive materials in the vehi-
cle. These items may catch fire
and/or explode if the vehicle is
exposed to hot temperatures for
extended periods.
CAUTION
To avoid possible theft, do not leave valuables in the storagecompartment.
Always keep the storage com- partment covers closed whiledriving. Do not attempt to placeso many items in the storage
compartment that the storagecompartment cover cannot closesecurely.
WARNING
To reduce the risk of injury in an
accident or sudden stop, always
keep the glove box door closedwhile driving.
OLM049151OLM049152
U
UUUNNNNLLLLOOOOCCCCKKKK
LLLLOOOOCCCCKKKK
Page 162 of 382
481
Features of your vehicle
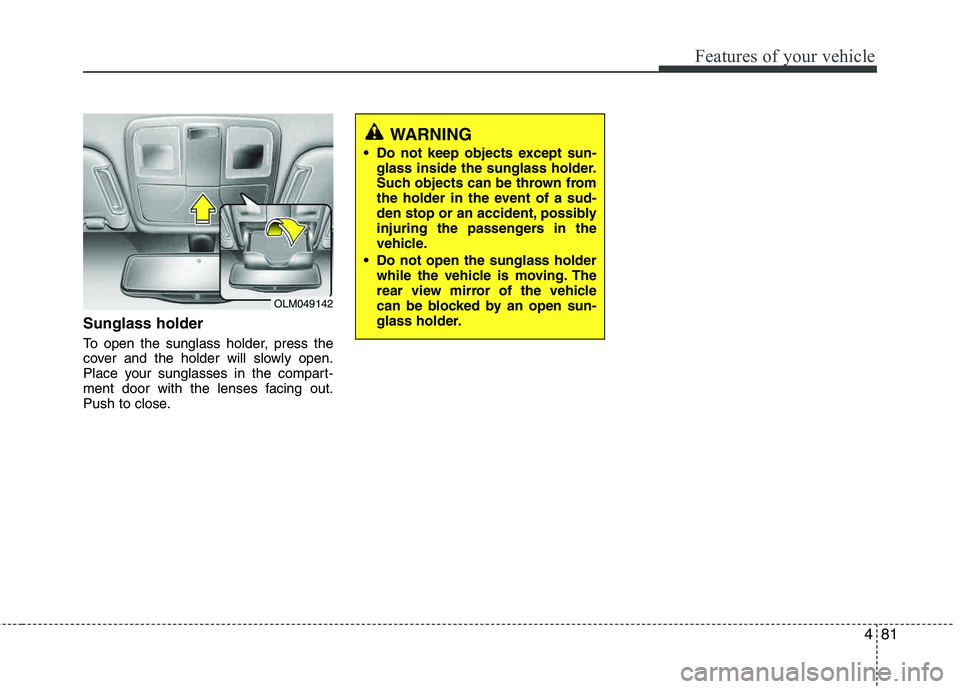
Sunglass holder
To open the sunglass holder, press the
cover and the holder will slowly open.
Place your sunglasses in the compart-
ment door with the lenses facing out.
Push to close.
WARNING
Do not keep objects except sun- glass inside the sunglass holder.
Such objects can be thrown from
the holder in the event of a sud-
den stop or an accident, possibly
injuring the passengers in the
vehicle.
Do not open the sunglass holder while the vehicle is moving. The
rear view mirror of the vehicle
can be blocked by an open sun-
glass holder.
OLM049142
Page 164 of 382
483
Features of your vehicle
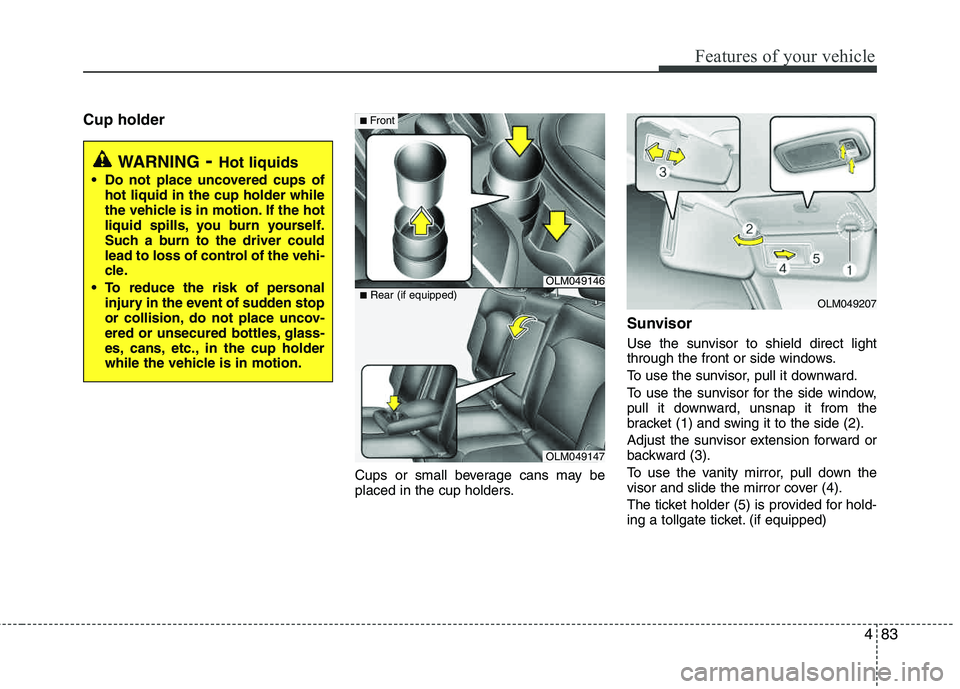
Cup holder
Cups or small beverage cans may be
placed in the cup holders.
Sunvisor
Use the sunvisor to shield direct light
through the front or side windows.
To use the sunvisor, pull it downward.
To use the sunvisor for the side window,
pull it downward, unsnap it from the
bracket (1) and swing it to the side (2).
Adjust the sunvisor extension forward or
backward (3).
To use the vanity mirror, pull down the
visor and slide the mirror cover (4).
The ticket holder (5) is provided for hold-
ing a tollgate ticket. (if equipped)
WARNING- Hot liquids
Do not place uncovered cups of
hot liquid in the cup holder while
the vehicle is in motion. If the hot
liquid spills, you burn yourself.
Such a burn to the driver could
lead to loss of control of the vehi-
cle.
To reduce the risk of personal injury in the event of sudden stop
or collision, do not place uncov-
ered or unsecured bottles, glass-
es, cans, etc., in the cup holder
while the vehicle is in motion.
OLM049146
■Front
OLM049147
■
Rear (if equipped)
OLM049207
Page 175 of 382
Features of your vehicle
94
4
Using a cellular phone or a two-way
radio
When a cellular phone is used inside the
vehicle, noise may be produced from the
audio equipment. This does not mean that something is wrong with the audio
equipment. In such a case, use the cellu-
lar phone at a place as far as possible from the audio equipment.
Care of discs
If the temperature inside the vehicle is too high, open the vehicle windows for
ventilation before using your vehicle
audio.
It is illegal to copy and use MP3/WMA files without permission. Use CDs that
are created only by lawful means.
Do not apply volatile agents such as benzene and thinner, normal cleaners
and magnetic sprays made for ana-
logue disc onto CDs.
To prevent the disc surface from get- ting damaged. Hold and carry CDs by the edges or the edges of the center
hole only.
Clean the disc surface with a piece of soft cloth before playback (wipe it fromthe center to the outside edge).
Do not damage the disc surface or attach pieces of sticky tape or paper onto it.
Make sure objects other than CDs are not inserted into the CD player (Do not
insert more than one CD at a time). Keep CDs in their cases after use to
protect them from scratches or dirt.
Depending on the type of CD-R/CD- RW CDs, certain CDs may not operate
normally according to manufacturing companies or making and recording
methods. In such circumstances, if you
still continue to use those CDs, they
may cause the malfunction of your
vehicle audio system.
✽✽ NOTICE - Playing an
Incompatible Copy
Protected Audio CD
Some copy protected CDs, which do not
comply with the international audio CD
standards (Red Book), may not play on
your vehicle audio. Please note that if
you try to play copy protected CDs and
the CD player does not perform correct-
ly the CDs maybe defective, not the CD
player.
WARNING
Do not use a cellular phone while
driving. Stop at a safe location to
use a cellular phone.
Page 177 of 382
![HYUNDAI TUCSON 2011 Owners Manual Features of your vehicle
96
4
Using RADIO, SETUP, VOLUME
and AUDIO CONTROL
1. AM Selection Button
Pressing the [AM] button selects the AM
band. AM Mode is displayed on the LCD.
2. FM Selection But](/manual-img/35/56206/w960_56206-176.png "HYUNDAI TUCSON 2011 Owners Manual Features of your vehicle
96
4
Using RADIO, SETUP, VOLUME
and AUDIO CONTROL
1. AM Selection Button
Pressing the [AM] button selects the AM
band. AM Mode is displayed on the LCD.
2. FM Selection But")
Features of your vehicle
96
4
Using RADIO, SETUP, VOLUME
and AUDIO CONTROL
1. AM Selection Button
Pressing the [AM] button selects the AM
band. AM Mode is displayed on the LCD.
2. FM Selection Button Turns to FM mode and toggles FM1 and
FM2 when the button is pressed each
time.
3. Automatic Station Seek Button
When the [SEEK ] is pressed, it will
automatically tune to the next lower station.
When the [SEEK ] is pressed, it will automatically tune to the next higher station.
4. Power ON/OFF Button & Volume Control Knob
Turns the audio system on/off whenthe ignition switch is on ACC or ON.
If the knob is turned clockwise/counter- clockwise, the volume will increase
/decrease.
5. Preset Selection Button
Press [1]~[6] buttons less than 0.8 sec-ond to play the station saved in each
button.
Press [1]~[6] b utton more than 0.8 sec-
ond or longer to save the current station
to the respective button with a beep.
6. SCAN Button
When the button is pressed, it auto- matically scans the radio stations
upwards.
The SCAN feature steps through each station, starting from the initial station,
for ten seconds.
Press the [SCAN] button again to stop the scan feature and to listen to the currently selected channel.
7. DISP Button
Turn the LCD Display & Backlight on/off
when [DISP] button press.
8. SETUP Button
Press this Button to enter SETUP mode,
If no action is taken for 8 seconds, it will
return to previous mode.
In “SETUP” mode, rotate the TUNE knob
to move the cursor between items, and
push the TUNE knob to select.
Select whether long file names are
scrolled continuously (“ON”) or just once(“OFF”).
Select this item to turn the SDVC(Speed
Dependent Volume Control) feature ON
or OFF. If it is turned ON, volume level is adjusted automatically according to the
vehicle speed.
This function creates virtual sound
effects and allows adjustments to the
BASS level. HIGH
➟MID ➟LOW ➟OFF
Select default display of XM mode.
“Category/Channel name” or “Artist/Song
Title” can be selected.
Page 200 of 382
4119
Features of your vehicle
■Using the head unit as Bluetooth ®
music
The head unit supports A2DP (Audio
Advanced Distribution Profile) and AVRCP
(Audio Video Remote Control Profile).
Both profiles are available for listening to the
MP3 music via Bluetooth ®
cellular phone
supporting above Bluetooth ®
profiles.
To play MP3 music from the Bluetooth ®
cellular phone, press the [AUX] button
until “MP3 Play” is displayed on the LCD.
Then try playing music by phone.
When playing music from the Bluetooth ®
cellular phone, the head unit displays MP3 MODE.
NOTE:
all the sounds that the phone supports can be
heard by the audio system.
Bluetooth ®
cellular phones shall
feature A2DP and AVRCP functions.
®
cellular phones may not play music
through the head unit on first try.
Please try the below;
i.e : Menu
➟Filemanager➟Music➟
Option➟Play via Bluetooth
phone for more detailed informa-
tions. To stop music, try stop music
by the phone and change audio
mode to different one. (e.g. FM, CD,
iPod, ...)
■ ADVANCED Menu
After pressing the [SETUP] button, press
the PHONE menu. while in PHONE
menu, press the “ADVANCED” menu to
make Bluetooth ®
Phone settings.(The
ADVANCED menu may differ according to
audio specifications.)
(Bluetooth ®
call volume adjustments)
While in ADVANCED menu, press “IN
VOL.” Use the knob key to set the desired
volume and press the [ ENTER] button.
(Automatic Phonebook do wnload setting)
While in ADVANCED menu, press
“CONTACTS”. To automatically save the
contacts and call history in your mobile
phone each time you connect a mobile
device, press Yes. If you do not wish for
automatic download, press No. (Language of Bluetooth
®
voice recognition)
While in ADVANCED menu, press
“LANGUAGE”. To change the language, select the desired language and press
the [ENTER] button. BT OFF
While in ADVANCED menu, press “BT
OFF” to turn off the Bluetooth ®
System.