2011 Hyundai Santa Fe engine
[x] Cancel search: enginePage 153 of 408
Features of your vehicle
74
4
Air conditioning system operation tips
If the vehicle has been parked in direct
sunlight during hot weather, open the
windows for a short time to let the hot
air inside the vehicle escape.
To help reduce moisture inside of the windows on rainy or humid days,
decrease the humidity inside the vehi-
cle by operating the air conditioning
system.
During air conditioning system opera- tion, you may occasionally notice a
slight change in engine speed as the
air conditioning compressor cycles.
This is a normal system operation
characteristic.
Use the air conditioning system every month only for a few minutes to ensure
maximum system performance. When using the air conditioning sys-
tem, you may notice clear water drip-
ping (or even puddling) on the ground
under the passenger side of the vehi-
cle. This is a normal system operation
characteristic.
Operating the air conditioning system in the recirculated air position provides
maximum cooling, however, continual
operation in this mode may cause the
air inside the vehicle to become stale.
During cooling operation, you may occasionally notice a misty air flow
because of rapid cooling and humid air
intake. This is a normal system opera-
tion characteristic.
D230300AFD
Climate control air filter
(if equipped)
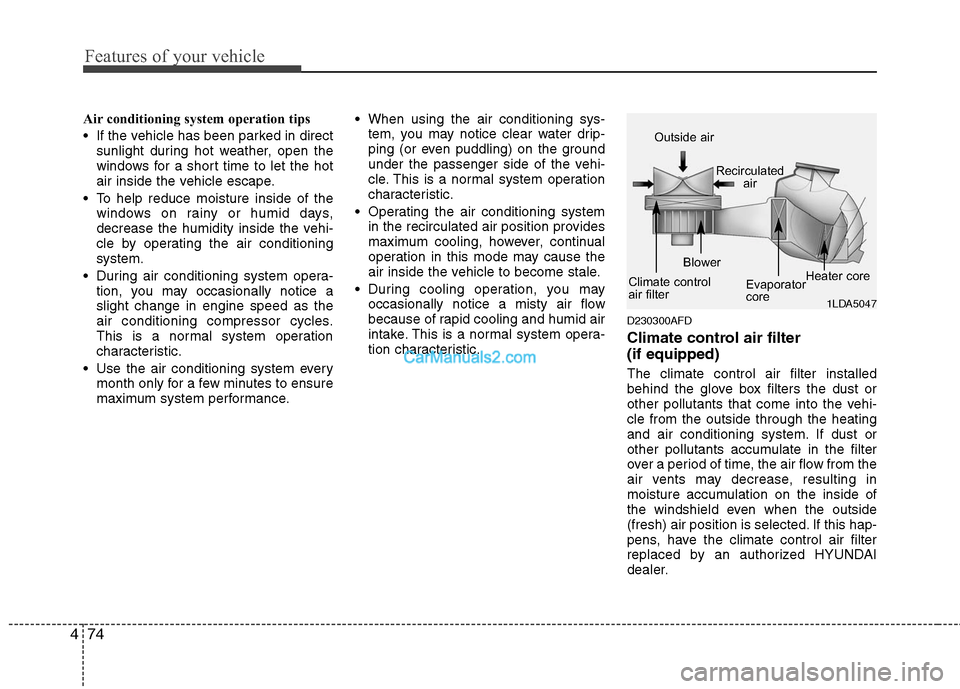
The climate control air filter installed
behind the glove box filters the dust or
other pollutants that come into the vehi-
cle from the outside through the heating
and air conditioning system. If dust or
other pollutants accumulate in the filter
over a period of time, the air flow from the
air vents may decrease, resulting in
moisture accumulation on the inside of
the windshield even when the outside
(fresh) air position is selected. If this hap-
pens, have the climate control air filter
replaced by an authorized HYUNDAI
dealer.
1LDA5047
Outside air
Recirculatedair
Climate control
air filter Blower
Evaporator
coreHeater core
Page 157 of 408
Features of your vehicle
78
4
Manual heating and air condition-
ing
The heating and cooling system can be
controlled manually by pressing buttons
or turning knob(s) other than the AUTO
button. In this case, the system works
sequentially according to the order of
buttons or knob(s) selected.
1. Start the engine.
2. Set the mode to the desired position.
To improve the effectiveness of heat-ing and cooling;
- Heating:
- Cooling:
3. Set the temperature control to the desired position.
4. Set the air intake control to the outside (fresh) air position.
5. Set the fan speed control to the desired speed.
6. If air conditioning is desired, turn the air conditioning system on.
Press the AUTO button in order to con-
vert to full automatic control of the sys-
tem.
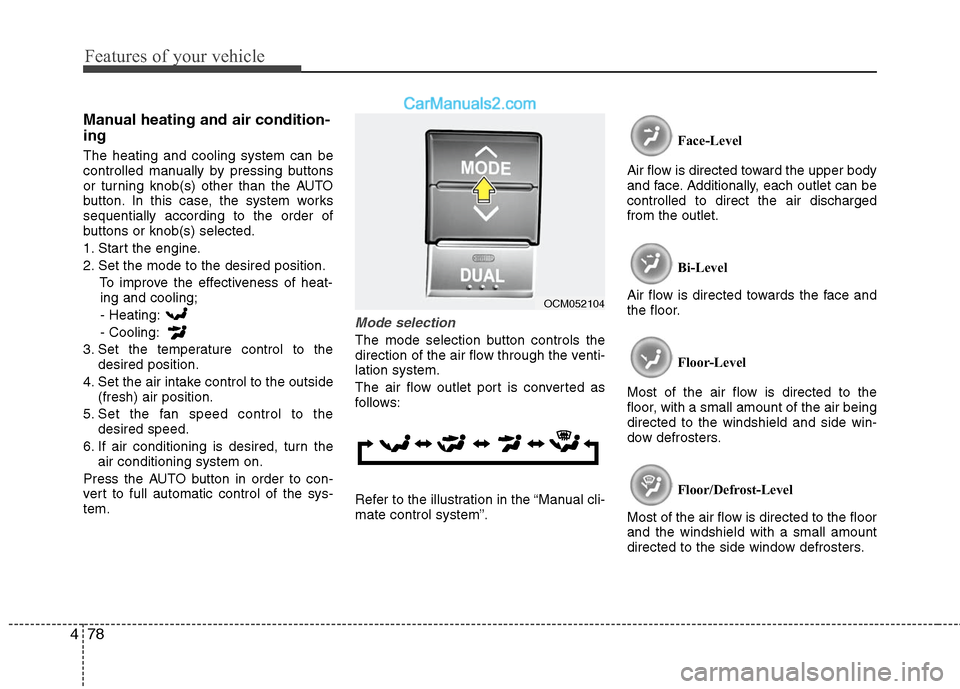
Mode selection
The mode selection button controls the
direction of the air flow through the venti-
lation system.
The air flow outlet port is converted as
follows:
Refer to the illustration in the “Manual cli-
mate control system”. Face-Level
Air flow is directed toward the upper body
and face. Additionally, each outlet can be
controlled to direct the air discharged
from the outlet.
Bi-Level
Air flow is directed towards the face and
the floor.
Floor-Level
Most of the air flow is directed to the
floor, with a small amount of the air being
directed to the windshield and side win-
dow defrosters.
Floor/Defrost-Level
Most of the air flow is directed to the floor
and the windshield with a small amount
directed to the side window defrosters.
OCM052104
Page 171 of 408
Features of your vehicle
92
4
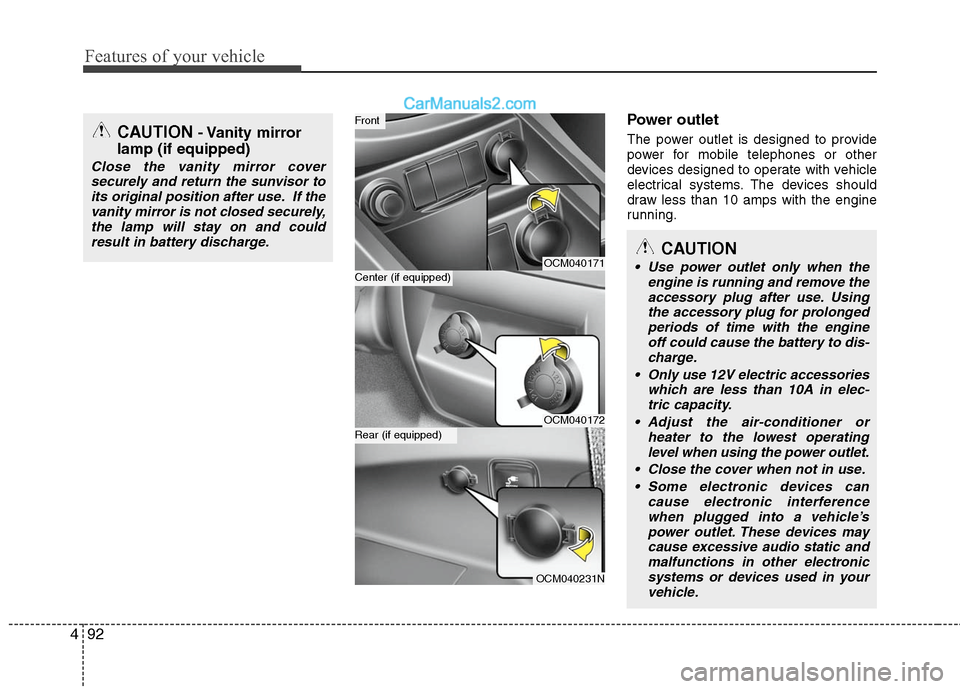
Power outlet
The power outlet is designed to provide
power for mobile telephones or other
devices designed to operate with vehicle
electrical systems. The devices should
draw less than 10 amps with the engine
running.
OCM040171
OCM040172
OCM040231N
Center (if equipped)
Front
Rear (if equipped)
CAUTION
Use power outlet only when the
engine is running and remove theaccessory plug after use. Usingthe accessory plug for prolongedperiods of time with the engineoff could cause the battery to dis-charge.
Only use 12V electric accessories which are less than 10A in elec-tric capacity.
Adjust the air-conditioner or heater to the lowest operatinglevel when using the power outlet.
Close the cover when not in use. Some electronic devices can cause electronic interferencewhen plugged into a vehicle’spower outlet. These devices maycause excessive audio static andmalfunctions in other electronicsystems or devices used in yourvehicle.
CAUTION- Vanity mirror
lamp (if equipped)
Close the vanity mirror cover
securely and return the sunvisor toits original position after use. If thevanity mirror is not closed securely,the lamp will stay on and couldresult in battery discharge.
Page 172 of 408
493
Features of your vehicle
D281300AHM
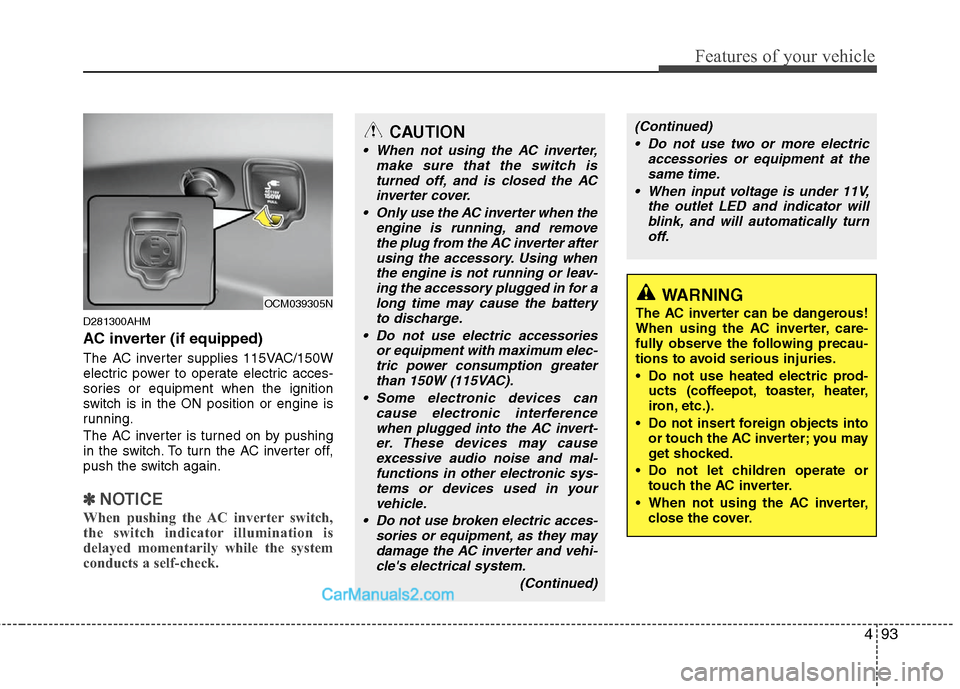
AC inverter (if equipped)
The AC inverter supplies 115VAC/150W
electric power to operate electric acces-
sories or equipment when the ignition
switch is in the ON position or engine is
running.
The AC inverter is turned on by pushing
in the switch. To turn the AC inverter off,
push the switch again.
✽ ✽NOTICE
When pushing the AC inverter switch,
the switch indicator illumination is
delayed momentarily while the system
conducts a self-check.
OCM039305NWARNING
The AC inverter can be dangerous!
When using the AC inverter, care-
fully observe the following precau-
tions to avoid serious injuries.
Do not use heated electric prod-
ucts (coffeepot, toaster, heater,
iron, etc.).
Do not insert foreign objects into or touch the AC inverter; you may
get shocked.
Do not let children operate or touch the AC inverter.
When not using the AC inverter, close the cover.
CAUTION
When not using the AC inverter, make sure that the switch isturned off, and is closed the ACinverter cover.
Only use the AC inverter when the engine is running, and removethe plug from the AC inverter after using the accessory. Using whenthe engine is not running or leav-ing the accessory plugged in for along time may cause the batteryto discharge.
Do not use electric accessories or equipment with maximum elec-tric power consumption greaterthan 150W (115VAC).
Some electronic devices can cause electronic interferencewhen plugged into the AC invert-er. These devices may causeexcessive audio noise and mal-functions in other electronic sys-tems or devices used in yourvehicle.
Do not use broken electric acces- sories or equipment, as they maydamage the AC inverter and vehi-cle's electrical system.
(Continued)
(Continued) Do not use two or more electric accessories or equipment at thesame time.
When input voltage is under 11V, the outlet LED and indicator willblink, and will automatically turn off.
Page 179 of 408
Features of your vehicle
100
4
MODE (1)
Press the button to select Radio, or CD
(compact disc).
SEEK ( / ) (2)
If the SEEK button is pressed for 0.8 sec-
ond or more, it will work as follows in
each mode.
RADIO mode
It will function as the AUTO SEEK select
button.
CD PLAYER (CDP) mode
It will function as the FF/REW button.
CD CHANGER (CDC) mode
It will function as the DISC UP/DOWN
button.
If the SEEK button is pressed for less
than 0.8 second, it will work as follows in
each mode. RADIO mode
It will function as the PRESET STATION
select buttons.
CD PLAYER (CDP) mode
It will function as the TRACK UP/DOWN
button.
CD CHANGER (CDC) mode
It will function as the TRACK UP/DOWN
button.
Detailed information for audio control
buttons is described in the following
pages in this section.
VOL (+/ -) (3)
• Press the up button (+) to increase vol-
ume.
Press the down button (-) to decease volume.
VOICE RECOGNITION (VR) mode (4)
Detailed information is described in the
following pages in this section.
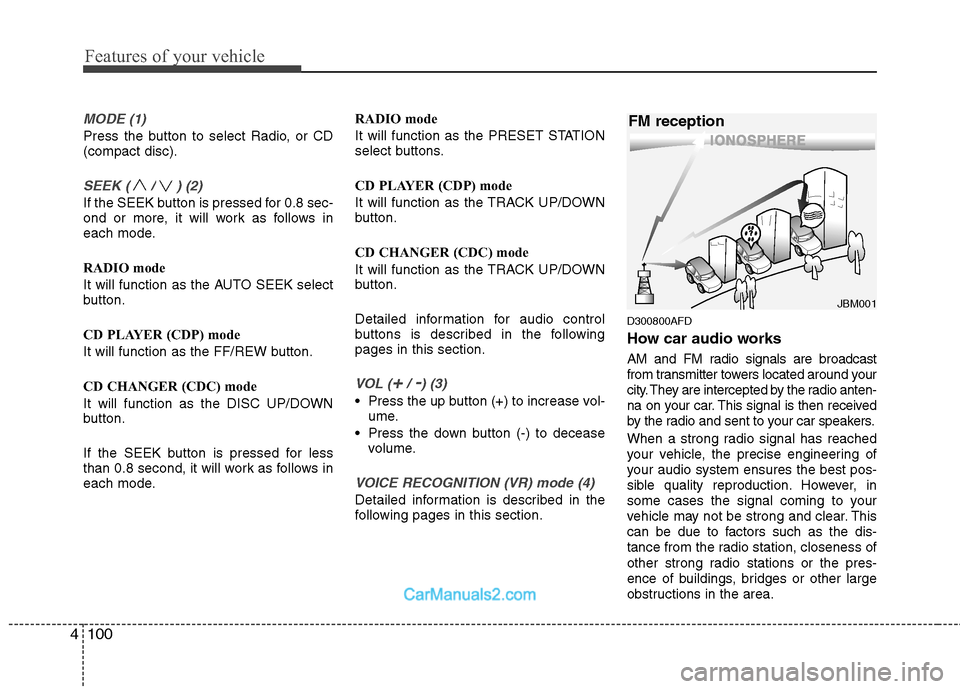
D300800AFD
How car audio works
AM and FM radio signals are broadcast
from transmitter towers located around your
city. They are intercepted by the radio anten-
na on your car. This signal is then received
by the radio and sent to your car speakers.
When a strong radio signal has reached
your vehicle, the precise engineering of
your audio system ensures the best pos-
sible quality reproduction. However, in
some cases the signal coming to your
vehicle may not be strong and clear. This
can be due to factors such as the dis-
tance from the radio station, closeness of
other strong radio stations or the pres-
ence of buildings, bridges or other large
obstructions in the area.
¢¢¢
JBM001
FM reception
Page 191 of 408
Features of your vehicle
112
4
CAUTION IN USING
USB DEVICE
To use the external USB device,
make sure the device is notmounted when starting up the vehicle and mount the deviceafter starting up.
If you start the vehicle when the USB device is mounted, it maydamage the USB device. (USB isnot ESA)
If the vehicle is started up or turned off while the external USBdevice is connected, the externalUSB device may not work.
It may not play inauthentic MP3 or WMA files.
1) It can only play MP3 files with the compression rate between8Kbps~320Kbps.
2) It can only play WMA music files with the compression ratebetween 8Kbps~320Kbps.
Take cautions for static electricity when mounting or dismountingthe external USB device.
Encoded MP3 PLAYER is not rec- ognizable.
(Continued)
(Continued) Depending on the condition of the external USB device, the con-nected external USB device canbe unrecognizable.
When the formatted byte/sector setting of External USB devices isnot either 512BYTE or 2048BYTE,then the device will not be recog-nized.
Only use an USB device format- ted to FAT 12/16/32.
USB device without USB IF authen- tication may not be recognizable.
Make sure the USB connection terminal does not come in contactwith human body or any object.
If you repeat mounting or dis- mounting USB device in a shortperiod of time, it may break thedevice.
You might hear strange noise when mounting or dismounting aUSB device.
(Continued)(Continued) If you dismount the external USB device during playback in USBmode, the external USB device canbe damaged or malfunction.Therefore, mount the external USB device when the engine is turnedoff or in another mode.
Depending on the type and capac- ity of the external USB device orthe type of the files stored in the device, there is a difference in thetime taken for recognition of the device, but this is not a trouble.Please wait for a moment.
Do not use the USB device for other purposes than playing music files.
Use of USB accessories such as the recharger or heater using USBI/F may lower the performance orcause trouble.
If you use devices such as the USB hub you purchased separate-ly, the vehicle’s audio system maynot recognize the USB device.Connect the USB device directlyto the multimedia terminal of thevehicle.
(Continued)
Page 212 of 408
4133
Features of your vehicle
✽
✽NOTICE
The RSE requires a few seconds of set
up time after the ignition switch is
turned ON or to ACC mode.
Your RSE system is already set up and
ready for use, and can be turned on by
pushing the POWER/VOLUME knob on
the RSE control panel or the POWER
ON/OFF button on the remote
controll. The vehicle's ignition must be
turned on or in accessory power mode.
The RSE system can also be turned OFF
by the Audio Unit.
Components
Your RSE consists of several compo-
nents:
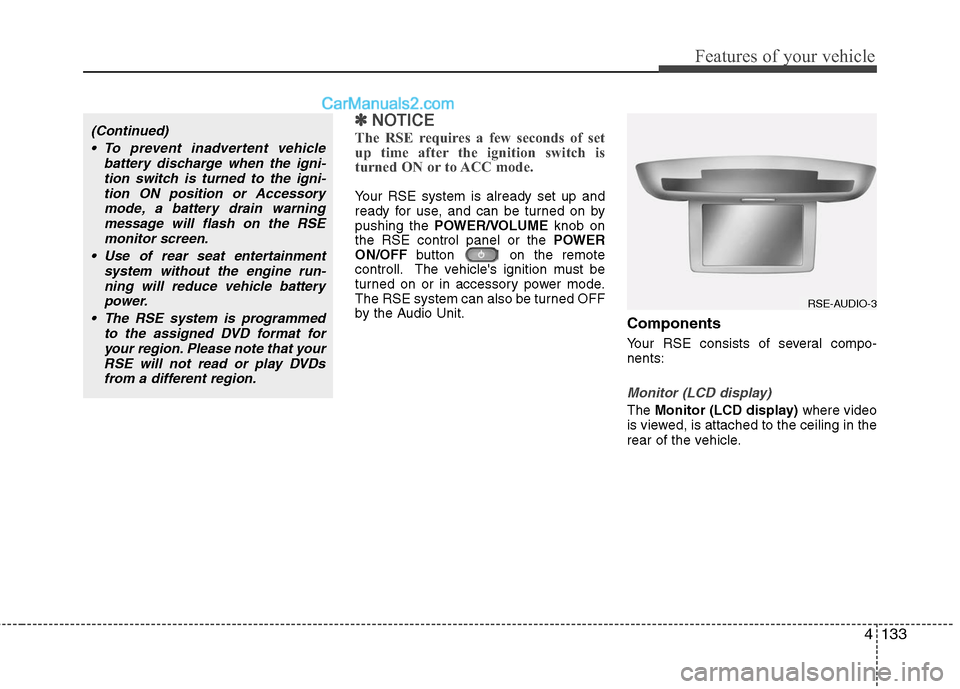
Monitor (LCD display)
The Monitor (LCD display) where video
is viewed, is attached to the ceiling in the
rear of the vehicle.
(Continued)
To prevent inadvertent vehicle battery discharge when the igni-tion switch is turned to the igni-tion ON position or Accessorymode, a battery drain warningmessage will flash on the RSEmonitor screen.
Use of rear seat entertainment system without the engine run-ning will reduce vehicle battery power.
The RSE system is programmed to the assigned DVD format foryour region. Please note that yourRSE will not read or play DVDsfrom a different region.
RSE-AUDIO-3
Page 235 of 408
5
Before driving / 5-3
Key positions / 5-4
Starting the engine / 5-5
Manual transaxle / 5-7
Automatic transaxle / 5-10
All wheel drive (AWD) / 5-16
Brake system / 5-23
Cruise control system / 5-33
Economical operation / 5-37
Special driving conditions / 5-39
Winter driving / 5-43
Trailer towing / 5-47
Vehicle load limit / 5-56
Vehicle weight / 5-60
Driving your vehicle