Page 173 of 312
Features of your vehicle
98
4
D270000AUN
These compartments can be used to
store small items required by the driver
or passengers.
D270100AFD
Centre console storage (if equipped)
These compartments can be used to
store small items required by the driver
or front passenger.
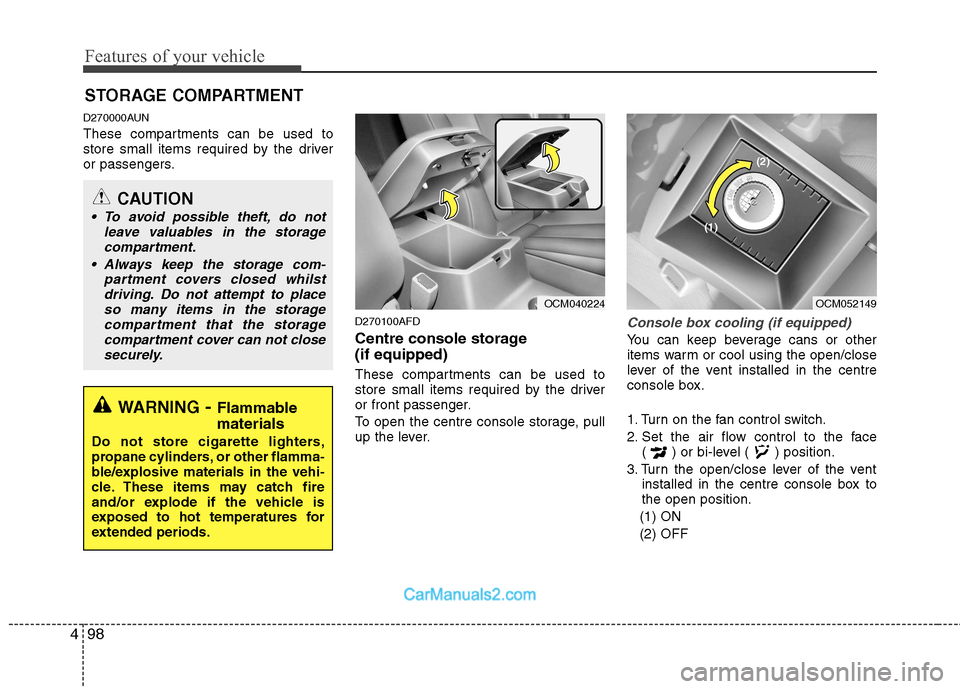
To open the centre console storage, pull
up the lever.
Console box cooling (if equipped)
You can keep beverage cans or other
items warm or cool using the open/close
lever of the vent installed in the centre
console box.
1. Turn on the fan control switch.
2. Set the air flow control to the face( ) or bi-level ( ) position.
3. Turn the open/close lever of the vent installed in the centre console box to the open position.
(1) ON (2) OFF
STORAGE COMPARTMENT
WARNING - Flammable
materials
Do not store cigarette lighters,
propane cylinders, or other flamma-
ble/explosive materials in the vehi-
cle. These items may catch fire
and/or explode if the vehicle is
exposed to hot temperatures for
extended periods.
CAUTION
To avoid possible theft, do not leave valuables in the storage
compartment.
Always keep the storage com- partment covers closed whilstdriving. Do not attempt to place
so many items in the storagecompartment that the storagecompartment cover can not closesecurely.
OCM040224OCM052149
(2)
(1)
Page 176 of 312
4101
Features of your vehicle
INTERIOR FEATURES
D280100AFD Cigarette lighter
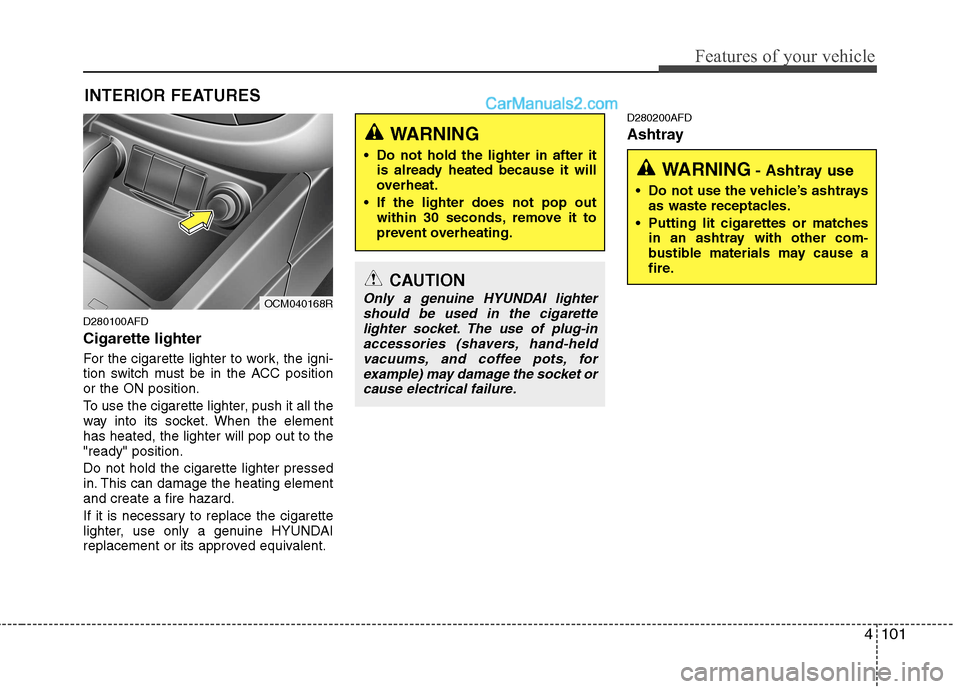
For the cigarette lighter to work, the igni-
tion switch must be in the ACC positionor the ON position.
To use the cigarette lighter, push it all the
way into its socket. When the elementhas heated, the lighter will pop out to the"ready" position. Do not hold the cigarette lighter pressed
in. This can damage the heating elementand create a fire hazard.
If it is necessary to replace the cigarette
lighter, use only a genuine HYUNDAI
replacement or its approved equivalent. D280200AFD
Ashtray
CAUTION
Only a genuine HYUNDAI lighter
should be used in the cigarette
lighter socket. The use of plug-inaccessories (shavers, hand-heldvacuums, and coffee pots, forexample) may damage the socket or
cause electrical failure.
WARNING - Ashtray use
Do not use the vehicle’s ashtrays as waste receptacles.
Putting lit cigarettes or matches in an ashtray with other com-
bustible materials may cause a
fire.
WARNING
Do not hold the lighter in after it is already heated because it will
overheat.
If the lighter does not pop out within 30 seconds, remove it to
prevent overheating.
OCM040168R
Page 181 of 312
Features of your vehicle
106
4
D280604AUN
Display conversion:
Type A
To change the 12 hour format to the 24
hour format, press the “R” button for
more than 4 seconds.
For example, if the “R” button is
pressed for more than 4 seconds whilst
the time is 10:15 p.m., the display willbe changed to 22:15.
Type B To change the 24 hour format to the 12
hours format (if equipped), whilst
pressing the “H” button, press the “M”
button for 3 seconds or more. For
example, if the “H” and “M” buttons are
pressed for more than 3 seconds whilst
the time is 22:15, the display willchange to 10:15. D281400BFD
Aux, USB and iPod (if equipped)
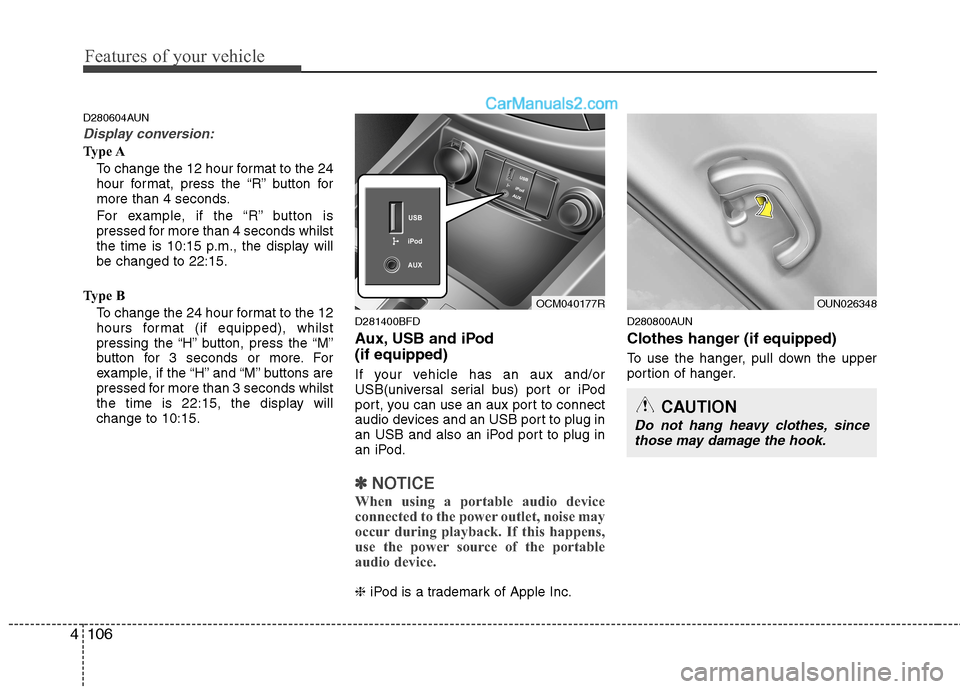
If your vehicle has an aux and/or
USB(universal serial bus) port or iPod
port, you can use an aux port to connect
audio devices and an USB port to plug in
an USB and also an iPod port to plug in
an iPod.
✽✽
NOTICE
When using a portable audio device
connected to the power outlet, noise may
occur during playback. If this happens,
use the power source of the portable
audio device.
❈ iPod is a trademark of Apple Inc. D280800AUN
Clothes hanger (if equipped)
To use the hanger, pull down the upper
portion of hanger.
OCM040177ROUN026348
CAUTION
Do not hang heavy clothes, since
those may damage the hook.
Page 182 of 312
4107
Features of your vehicle
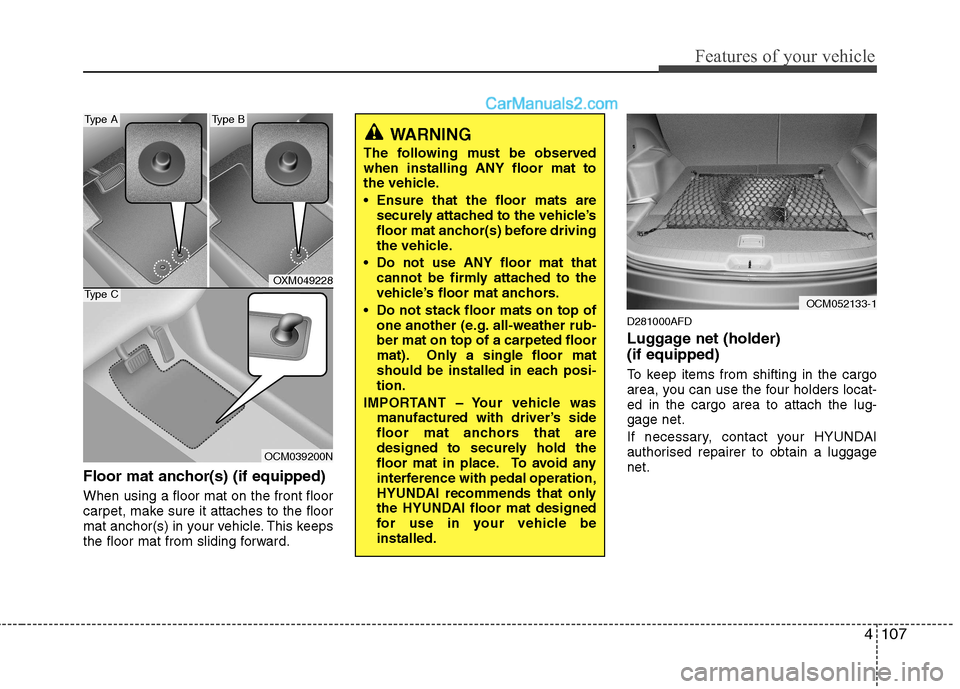
Floor mat anchor(s) (if equipped) When using a floor mat on the front floor
carpet, make sure it attaches to the floor
mat anchor(s) in your vehicle. This keeps
the floor mat from sliding forward.D281000AFD
Luggage net (holder) (if equipped)
To keep items from shifting in the cargo
area, you can use the four holders locat-ed in the cargo area to attach the lug-gage net.
If necessary, contact your HYUNDAI
authorised repairer to obtain a luggagenet.
OCM052133-1
OXM049228
OCM039200N
Type A
Type C
Type B
WARNING
The following must be observed when installing ANY floor mat to
the vehicle.
Ensure that the floor mats are securely attached to the vehicle’s
floor mat anchor(s) before driving
the vehicle.
Do not use ANY floor mat that cannot be firmly attached to the
vehicle’s floor mat anchors.
Do not stack floor mats on top of one another (e.g. all-weather rub-ber mat on top of a carpeted floor
mat). Only a single floor mat
should be installed in each posi-tion.
IMPORTANT – Your vehicle was manufactured with driver’s side
floor mat anchors that are
designed to securely hold the
floor mat in place. To avoid any
interference with pedal operation,
HYUNDAI recommends that only
the HYUNDAI floor mat designed
for use in your vehicle beinstalled.
Page 183 of 312
Features of your vehicle
108
4
D281100AFD
Cargo security screen (if equipped)
Use the cargo security screen to hide items stored in the cargo area. To use the cargo security screen, pull the
handle backward and insert the edges
into the slots.
CAUTION
To prevent damage to the goods or
the vehicle, care should be taken
when carrying fragile or bulkyobjects in the luggage compart-ment.
WARNING
To avoid eye injury, DO NOT over-
stretch the luggage net. ALWAYS
keep your face and body out of the
luggage net’s recoil path. DO NOT
use the luggage net when the strap
has visible signs of wear or dam-
age.
OXM049219OXM049218
Page 187 of 312
Features of your vehicle
112
4
D300200AFD
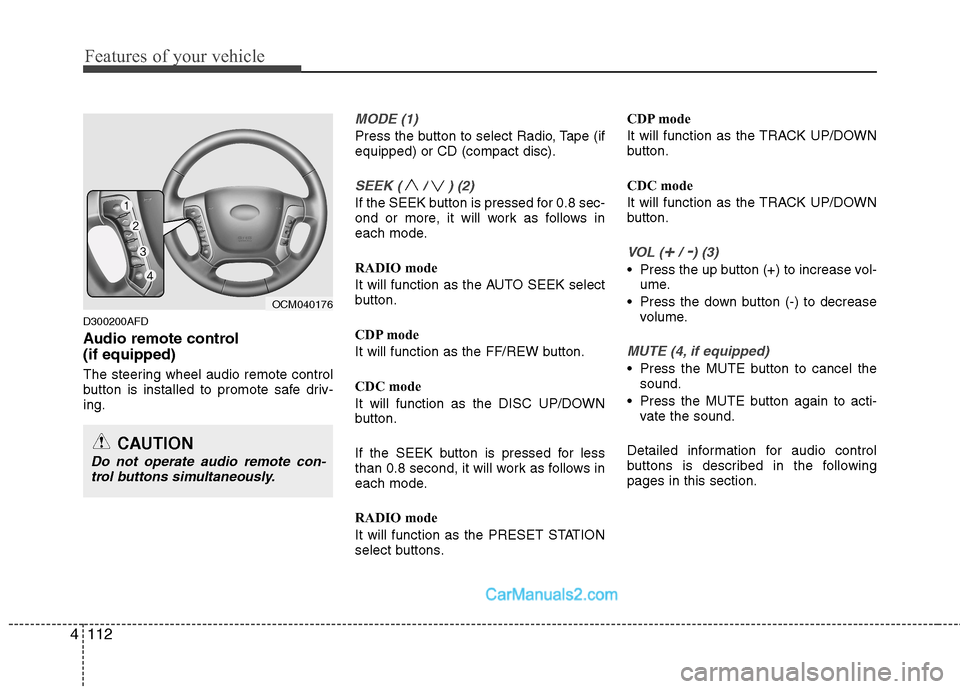
Audio remote control (if equipped)
The steering wheel audio remote control
button is installed to promote safe driv-ing.
MODE (1)
Press the button to select Radio, Tape (if equipped) or CD (compact disc).
SEEK ( / ) (2)
If the SEEK button is pressed for 0.8 sec-
ond or more, it will work as follows in
each mode.
RADIO mode
It will function as the AUTO SEEK select
button.
CDP mode
It will function as the FF/REW button.
CDC mode
It will function as the DISC UP/DOWN
button.
If the SEEK button is pressed for less
than 0.8 second, it will work as follows in
each mode.
RADIO mode
It will function as the PRESET STATION
select buttons. CDP mode
It will function as the TRACK UP/DOWN
button.
CDC mode
It will function as the TRACK UP/DOWN
button.
VOL (+/ -) (3)
• Press the up button (+) to increase vol-
ume.
Press the down button (-) to decrease volume.
MUTE (4, if equipped)
Press the MUTE button to cancel thesound.
Press the MUTE button again to acti- vate the sound.
Detailed information for audio control
buttons is described in the followingpages in this section.
CAUTION
Do not operate audio remote con- trol buttons simultaneously.
OCM040176
Page 190 of 312
4115
Features of your vehicle
Care of disc (if equipped)
If the temperature inside the car is toohigh, open the car windows for ventilation
before using your car audio.
It is illegal to copy and use MP3/WMA/ AAC/WAVE files without permission.
Use CDs that are created only by lawful
means.
Do not apply volatile agents such as benzene and thinner, normal cleaners
and magnetic sprays made for ana-
logue disc onto CDs.
To prevent the disc surface from get- ting damaged. Hold and carry CDs bythe edges or the edges of the centre
hole only.
Clean the disc surface with a piece of soft cloth before playback (wipe it fromthe centre to the outside edge).
Do not damage the disc surface or attach pieces of sticky tape or paperonto it.
Make sure on undesirable matter other than CDs are inserted into the CD
player (Do not insert more than oneCD at a time).
Keep CDs in their cases after use to protect them from scratches or dirt. Depending on the type of CD-R/CD-
RW CDs, certain CDs may not operate
normally according to manufacturingcompanies or making and recording
methods. In such circumstances, if you
still continue to use those CDs, they
may cause the malfunction of your caraudio system.✽✽ NOTICE - Playing an
Incompatible Copy-Protected
Audio CD
Some copy protected CDs, which do not
comply with the international audio CD
standards (Red Book), may not play on
your car audio. Please note that if you
try to play copy protected CDs and the
CD player does not perform correctly
the CDs maybe defective, not the CD
player.
Page 192 of 312
4117
Features of your vehicle
1. Power ON/OFF Button &Volume Control Button
Turns on/off the set when the IGNITION
SWITH is on ACC or ON. If the button is
turned to the right, it increases the vol-
ume and left,decreases the volume.
Press this button to turn the audio sys- tem ON or OFF.
Depending on the model if the ignition switch is not on ACC or ON position.
the “Battery Discharge” warningappears on LCD after 10 seconds of
power-up, and automatically turns off
after 1 hours of operation.
Adjusts the volume of the car audio system. Rotate clockwise to increase
the volume or counterclockwise to
decrease.
2. FM Selection Button
Turns to FM mode and toggles FM1and
FM2 when the button is pressed each
time. ❈ May change in order of FM1 ➟ FM2 ➟
FMA in some models. 3. AM Selection Button
Pressing the [AM] button selects the AM
band. AM Mode is displayed on the LCD. ❈
May change in order of AM1 ➟ AMA in
some models.
4. Automatic Channel Selection Button
When the [SEEK ] button is pressed, it increases the band fre- quency to automatically select chan-
nel. Stops at the previous frequency if
no channel is found.
When the [TRACK ] button is press- ed, it reduces the band frequency to
automatically select channel. Stops at
the previous frequency if no channel is
found.
5. Preset Button
Push [1]~[6] buttons less than 0.8 sec-
ond to play the channel saved in each
button. Push Preset button for 0.8 sec-
ond or longer to save current channel to
the respective button with a beep. 6. AST(AUTO STORE Button)
When the button is pressed, it automati-
cally selects and saves channels with
high reception rate to PRESET buttons
[1]~[6] and plays the channel saved in
PRESET1. If no channel is saved after
AST, it will play the previous channel.
Saves only to the Preset memory
(1)~(6) of FMA or AMA mode in some
models.
7. SETUP Button
Press this button to turn to the SCROLL
option and the other adjustment mode.
If no action is taken for 5 seconds after
pressing the button, it will return to the
play mode. (After entering SETUP
mode, move between items using the
left, right and PUSH functions of the
[TUNE] knob.) ■ PA910
The setup change in the order of
SCROLL ↔SDVC ↔AF ↔NEWS ↔
RETURN ↔P.BASS ↔TA VOL ↔
REGION...