2011 HYUNDAI IX35 steering
[x] Cancel search: steeringPage 446 of 560
Features of your vehicle
34
4
CAUTION
Do not strike the horn severely to
operate it, or hit it with your fist. Donot press on the horn with a sharp-
pointed object.
Tilt steering
A tilt steering wheel allows you to adjust
the steering wheel before you drive. You
can also raise it to give your legs more
room when you exit and enter the vehicle(if equipped).
The steering wheel should be positioned
so that it is comfortable for you to drive,
whilst permitting you to see the instru-
ment panel warning lights and gauges.
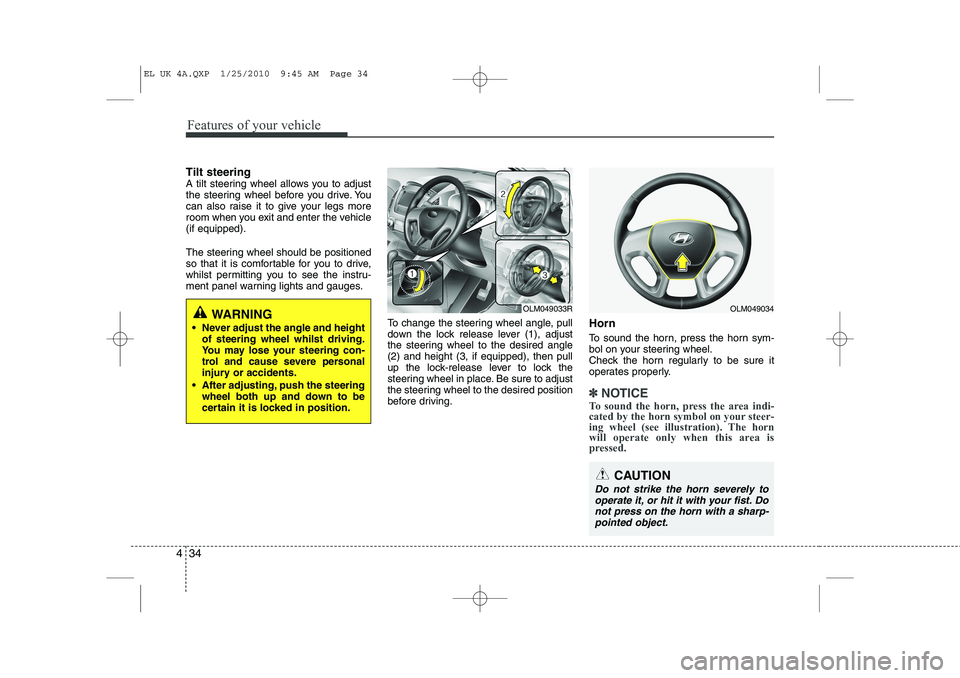
To change the steering wheel angle, pull
down the lock release lever (1), adjust
the steering wheel to the desired angle(2) and height (3, if equipped), then pull
up the lock-release lever to lock the
steering wheel in place. Be sure to adjust
the steering wheel to the desired position
before driving.Horn
To sound the horn, press the horn sym-
bol on your steering wheel.
Check the horn regularly to be sure it
operates properly.
✽✽
NOTICE
To sound the horn, press the area indi-
cated by the horn symbol on your steer-
ing wheel (see illustration). The horn
will operate only when this area is
pressed.
WARNING
Never adjust the angle and height of steering wheel whilst driving.
You may lose your steering con-
trol and cause severe personal
injury or accidents.
After adjusting, push the steering wheel both up and down to be
certain it is locked in position.OLM049034OLM049033R
EL UK 4A.QXP 1/25/2010 9:45 AM Page 34
Page 450 of 560
Features of your vehicle
38
4
3. Setting the compass zone
1. Find your current location and vari-
ance zone number on the zone map.
2. Press and hold the button for more than 6 but less than 9 seconds. The
current zone number will appear in the
display.
3. Press the button until the new zone number appears in the display. After
you stop pressing the button in, the
display will show a compass direction
within a few seconds. 4. Changing Mirror Angle setting
(if equipped):
Due to mirror positions being angled
towards the driver, the compass mirror
can also compensate for drivers seated
on the Left Hand side of the vehicle
(steering wheel on the LH side of the
vehicle) or Right Hand side of the vehicle
(steering wheel on the RH side of the
vehicle).
To adjust the Left Hand, “L” or Right
Hand, “R”, setting:
1. Press and hold the button for more than 12 seconds.
2. Release then press the button to tog- gle between “L” and “R”.
✽✽ NOTICE
This procedure also causes the compass to be de-calibrated.
3. To re-calibrate the compass, drive the vehicle in 2 complete circles at less than 5mph (8km/h).
CAUTION
1. Do not install the ski rack, anten-
na, etc. which are attached to thevehicle by means of a magnet. They affect the operation of thecompass.
2. If the compass deviates from the correct indication soon afterrepeated adjustment, have the compass checked at a HYUNDAI
authorised repairer.
3. The compass may not indicate the correct compass point in tun-nels or whilst driving up or downa steep hill.
(The compass returns to the cor-rect compass point when thevehicle moves to an area wherethe geomagnetism is stabilized.)
4. When cleaning the mirror, use a paper towel or similar materialdampened with glass cleaner. Do not spray glass cleaner directlyon the mirror as that may cause the liquid cleaner to enter the mir-
ror housing.
EL UK 4A.QXP 1/25/2010 9:45 AM Page 38
Page 463 of 560

451
Features of your vehicle
Anti-lock brake system(ABS) warning light (if equipped)
This light illuminates if the ignition switch
is turned to ON and goes off in approxi-
mately 3 seconds if the system is operat-
ing normally.
If the ABS warning light remains on,
comes on whilst driving, or does not
come on when the ignition switch is
turned to the ON position, this indicates
that there may be a problem with the
ABS.
If this occurs, have your vehicle checked
by a HYUNDAI authorised repairer as
soon as possible. The normal braking
system will still be operational, but with-
out the assistance of the anti-lock brakesystem. Electronic brakeforce distribution(EBD) systemwarning light
If two warning lights illuminate at the
same time whilst driving, your vehicle
may have a malfunction with ABS andEBD system.
In this case, your ABS and regular brake
system may not work normally. Have the
vehicle checked by a HYUNDAI autho-
rised repairer as soon as possible.
✽✽
NOTICE
If the ABS warning light or EBD warn- ing light is on and stays on, the
speedometer or odometer/tripmeter
may not work. Also, the EPS warninglight may illuminate and the steering
effort may increase or decrease. In this
case, have your vehicle checked by a
HYUNDAI authorised repairer as soonas possible.
WARNING
If the both ABS and Brake warning
lights are on and stay on, your vehi-
cle’s brake system will not work
normally. So you may experience
an unexpected and dangerous situ-
ation during sudden braking. In this
case, avoid high speed driving andabrupt braking.
Have your vehicle checked by a
HYUNDAI authorised repairer as
soon as possible.
EL UK 4A.QXP 1/25/2010 9:46 AM Page 51
Page 471 of 560
459
Features of your vehicle
ESP (Electronic StabilityProgram) indicator(if equipped)
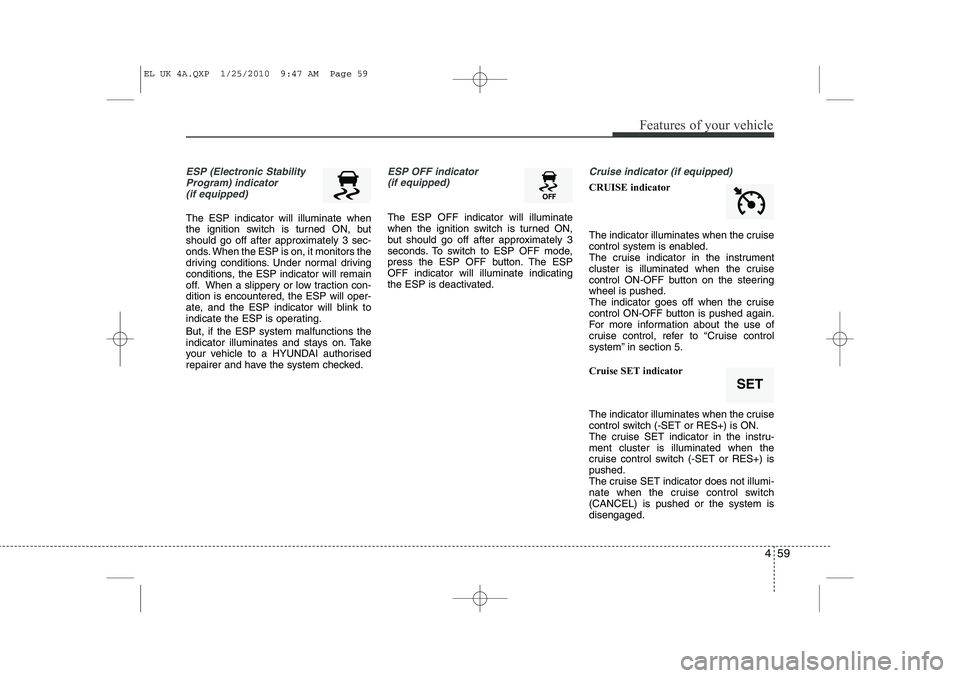
The ESP indicator will illuminate when
the ignition switch is turned ON, but
should go off after approximately 3 sec-
onds. When the ESP is on, it monitors the
driving conditions. Under normal driving
conditions, the ESP indicator will remain
off. When a slippery or low traction con-dition is encountered, the ESP will oper-
ate, and the ESP indicator will blink to
indicate the ESP is operating. But, if the ESP system malfunctions the
indicator illuminates and stays on. Take
your vehicle to a HYUNDAI authorised
repairer and have the system checked.
ESP OFF indicator (if equipped)
The ESP OFF indicator will illuminate
when the ignition switch is turned ON,
but should go off after approximately 3
seconds. To switch to ESP OFF mode,
press the ESP OFF button. The ESPOFF indicator will illuminate indicating
the ESP is deactivated.
Cruise indicator (if equipped)
CRUISE indicator
The indicator illuminates when the cruise
control system is enabled.
The cruise indicator in the instrument
cluster is illuminated when the cruise
control ON-OFF button on the steeringwheel is pushed.
The indicator goes off when the cruise
control ON-OFF button is pushed again.
For more information about the use of
cruise control, refer to “Cruise control
system” in section 5. Cruise SET indicator
The indicator illuminates when the cruise
control switch (-SET or RES+) is ON.
The cruise SET indicator in the instru-ment cluster is illuminated when the
cruise control switch (-SET or RES+) ispushed.
The cruise SET indicator does not illumi-
nate when the cruise control switch(CANCEL) is pushed or the system isdisengaged.
SET
EL UK 4A.QXP 1/25/2010 9:47 AM Page 59
Page 474 of 560
Features of your vehicle
62
4
Engine coolant tempera-
ture warning light (if equipped)
The warning light illuminates if the tem-
perature of the engine coolant is above120±3°C (248±5.4°F).
Do not continue driving with an overheat-
ed engine. If your vehicle overheats, refer
to “Overheating” in section 6.
✽✽ NOTICE
If the engine coolant temperature warn- ing light illuminates, it indicates over-heating that may damage the engine.
Electronic power steering (EPS) system warning light(if equipped)
This indicator light comes on after the
ignition key is turned to the ON positionand then it will go out. This light also comes on when the EPS
has some troubles. If it comes on whilst
driving, have your vehicle inspected by a
HYUNDAI authorised repairer.
EPSCAUTION
Do not use 4WD LOCK mode on drypaved roads or motorway, it can
cause noise, vibration or damage of4WD related parts.
EL UK 4A.QXP 1/25/2010 9:47 AM Page 62
Page 478 of 560
Features of your vehicle
66
4
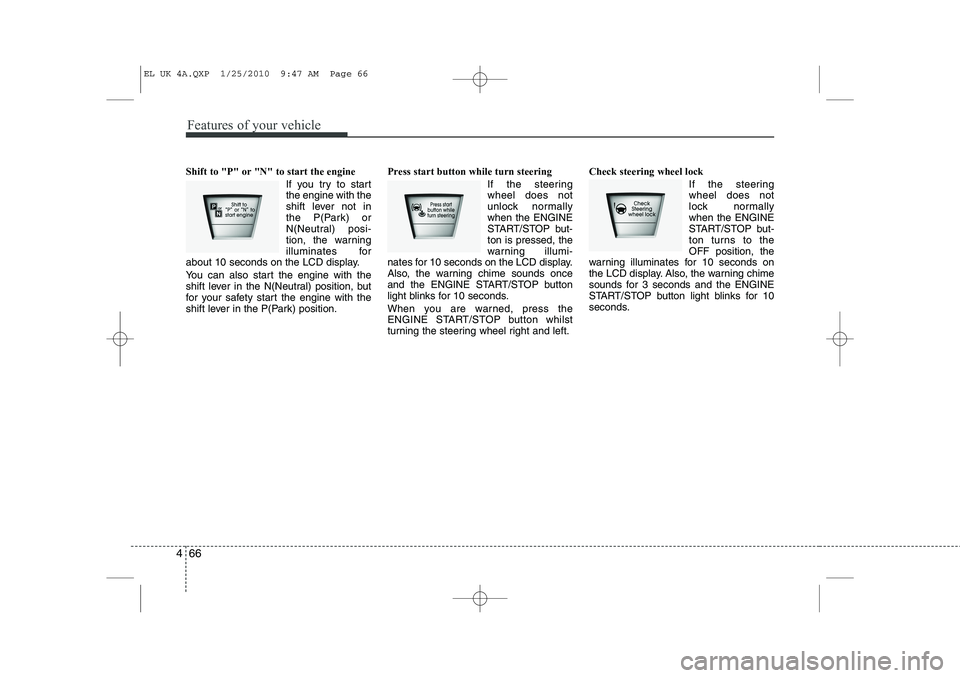
Shift to "P" or "N" to start the engine
If you try to start the engine with the
shift lever not in
the P(Park) or
N(Neutral) posi-
tion, the warning
illuminates for
about 10 seconds on the LCD display.
You can also start the engine with the
shift lever in the N(Neutral) position, but
for your safety start the engine with the
shift lever in the P(Park) position. Press start button while turn steering
If the steeringwheel does not
unlock normallywhen the ENGINE
START/STOP but-ton is pressed, the
warning illumi-
nates for 10 seconds on the LCD display.
Also, the warning chime sounds once
and the ENGINE START/STOP button
light blinks for 10 seconds.
When you are warned, press the
ENGINE START/STOP button whilst
turning the steering wheel right and left. Check steering wheel lock
If the steeringwheel does not
lock normallywhen the ENGINE
START/STOP but-
ton turns to theOFF position, the
warning illuminates for 10 seconds on
the LCD display. Also, the warning chime
sounds for 3 seconds and the ENGINE
START/STOP button light blinks for 10
seconds.
EL UK 4A.QXP 1/25/2010 9:47 AM Page 66
Page 484 of 560
Features of your vehicle
72
4
LIGHTING
Battery saver function
The purpose of this feature is to pre-
vent the battery from being dis-
charged. The system automatically
turns off the parking lights when the
driver removes the ignition key and
opens the driver- side door.
With this feature, the parking lights will be turned off automatically if the driver
parks on the side of road at night.
If necessary, to keep the lights on
when the ignition key is removed, per-
form the following :
1) Open the driver-side door.
2) Turn the parking lights OFF and ON
again using the light switch on the
steering column. Headlight escort function (if equipped)
If you turn the ignition switch to the ACC or OFF position with the headlights ON,the headlights (and/or tail lights) remain
on for about 20 minutes. However, if the
driver’s door is opened and closed, the
headlights are turned off after 30 sec-
onds.
The headlights can be turned off by
pressing the lock button on the transmit-
ter (or smart key) twice or turning the
light switch to the OFF or Auto position.
However, if you turn the light switch to the
Auto position when it is dark outside, the
headlights will not be turned off.
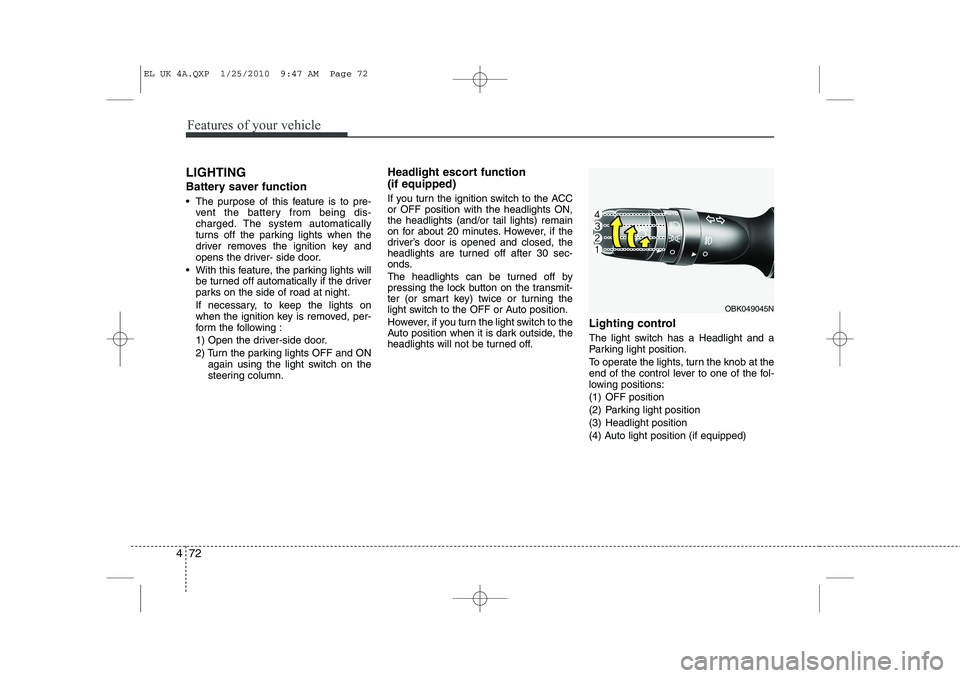
Lighting control
The light switch has a Headlight and a
Parking light position.
To operate the lights, turn the knob at the
end of the control lever to one of the fol-
lowing positions:
(1) OFF position
(2) Parking light position
(3) Headlight position
(4) Auto light position (if equipped)
OBK049045N
EL UK 4A.QXP 1/25/2010 9:47 AM Page 72
Page 523 of 560
4 111
Features of your vehicle
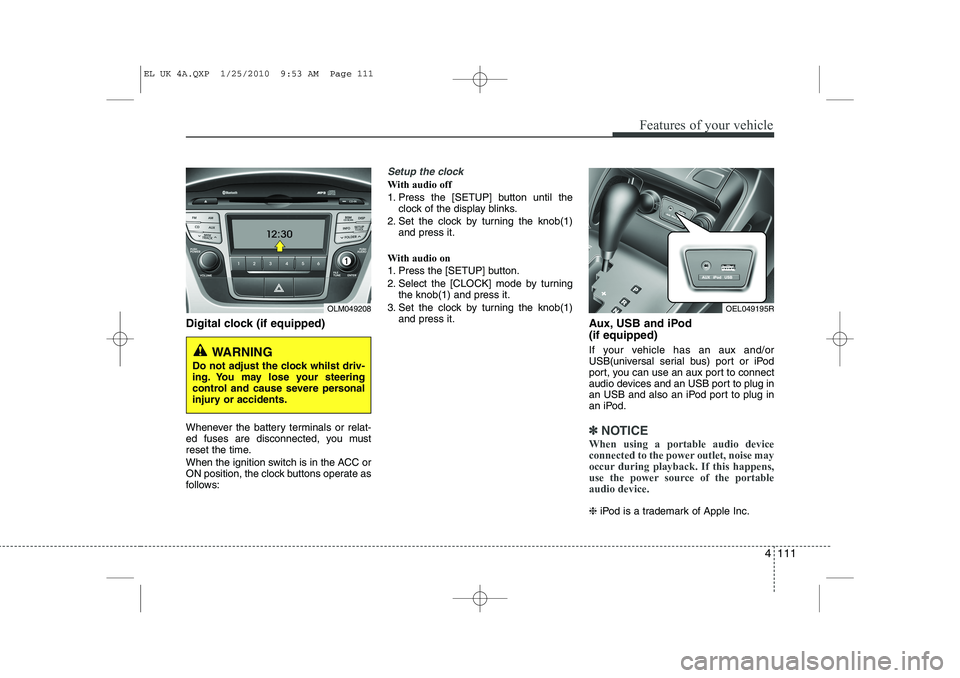
Digital clock (if equipped)
Whenever the battery terminals or relat-
ed fuses are disconnected, you must
reset the time.
When the ignition switch is in the ACC or
ON position, the clock buttons operate as
follows:
Setup the clock
With audio off
1. Press the [SETUP] button until theclock of the display blinks.
2. Set the clock by turning the knob(1) and press it.
With audio on
1. Press the [SETUP] button.
2. Select the [CLOCK] mode by turning the knob(1) and press it.
3. Set the clock by turning the knob(1) and press it. Aux, USB and iPod (if equipped)
If your vehicle has an aux and/or
USB(universal serial bus) port or iPod
port, you can use an aux port to connect
audio devices and an USB port to plug in
an USB and also an iPod port to plug in
an iPod.
✽✽NOTICE
When using a portable audio device
connected to the power outlet, noise may
occur during playback. If this happens,
use the power source of the portableaudio device.
❈ iPod is a trademark of Apple Inc.
OLM049208
WARNING
Do not adjust the clock whilst driv-
ing. You may lose your steering
control and cause severe personal
injury or accidents.
OEL049195R
EL UK 4A.QXP 1/25/2010 9:53 AM Page 111