Page 149 of 560
Features of your vehicle
74
4
High - beam operation
To turn on the high beam headlights,
push the lever away from you. Pull it back
for low beams. The high-beam indicator will light when
the headlight high beams are switchedon.
To prevent the battery from being dis-
charged, do not leave the lights on for aprolonged time while the engine is not
running.Flashing headlights
To flash the headlights, pull the lever
towards you. It will return to the normal
(low-beam) position when released. The
headlight switch does not need to be on
to use this flashing feature.
OBK049049NOBK049050N
CAUTION
Never place anything over the
sensor (1) located on the instru-
ment panel, this will ensure betterauto-light system control.
Don’t clean the sensor using a window cleaner, the cleaner may
leave a light film which could interfere with sensor operation.
If your vehicle has window tint or other types of coating on thefront windshield, the Auto light
system may not work properly.
Page 151 of 560

Features of your vehicle
76
4
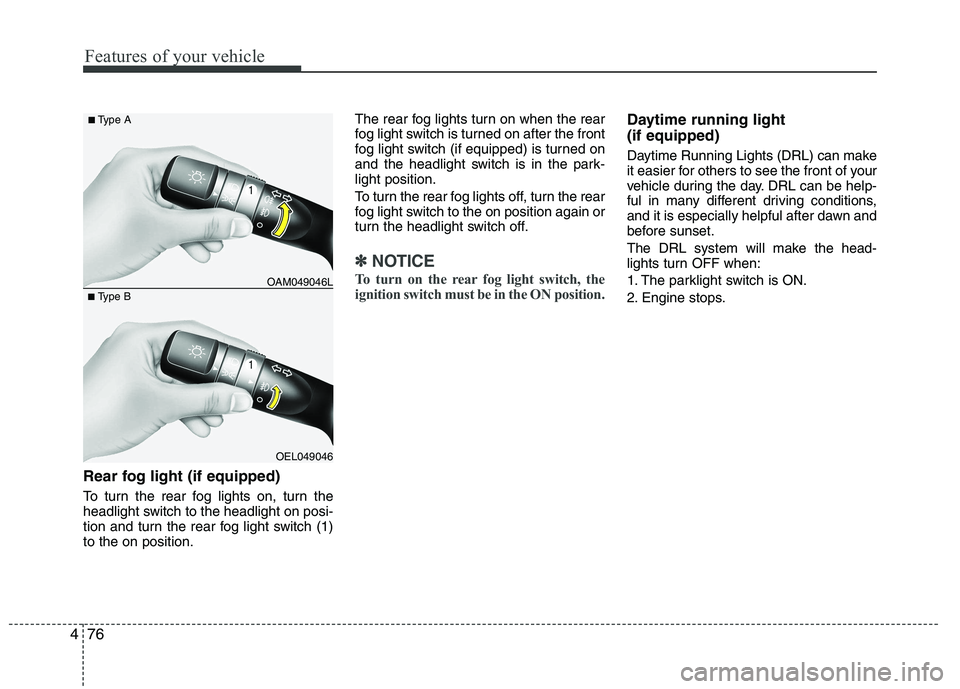
Rear fog light (if equipped)
To turn the rear fog lights on, turn the
headlight switch to the headlight on posi-
tion and turn the rear fog light switch (1)to the on position. The rear fog lights turn on when the rear
fog light switch is turned on after the front
fog light switch (if equipped) is turned on
and the headlight switch is in the park-light position.
To turn the rear fog lights off, turn the rear
fog light switch to the on position again or
turn the headlight switch off.
✽✽
NOTICE
To turn on the rear fog light switch, the
ignition switch must be in the ON position.
Daytime running light (if equipped)
Daytime Running Lights (DRL) can make
it easier for others to see the front of your
vehicle during the day. DRL can be help-
ful in many different driving conditions,
and it is especially helpful after dawn and
before sunset.
The DRL system will make the head-
lights turn OFF when:
1. The parklight switch is ON.
2. Engine stops.
OEL049046
■
Type B OAM049046L
■
Type A
Page 155 of 560

Features of your vehicle
80
4
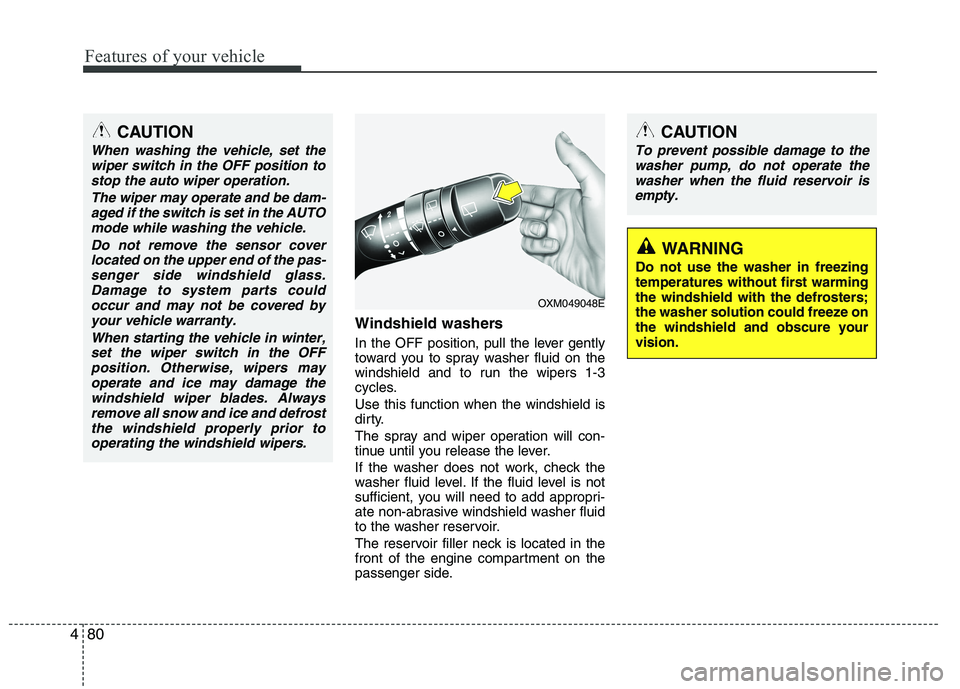
Windshield washers
In the OFF position, pull the lever gently
toward you to spray washer fluid on the
windshield and to run the wipers 1-3
cycles. Use this function when the windshield is
dirty.
The spray and wiper operation will con-
tinue until you release the lever.
If the washer does not work, check the
washer fluid level. If the fluid level is not
sufficient, you will need to add appropri-
ate non-abrasive windshield washer fluid
to the washer reservoir.
The reservoir filler neck is located in the
front of the engine compartment on the
passenger side.
CAUTION
To prevent possible damage to the
washer pump, do not operate the
washer when the fluid reservoir is empty.
WARNING
Do not use the washer in freezing temperatures without first warmingthe windshield with the defrosters;the washer solution could freeze onthe windshield and obscure yourvision.
CAUTION
When washing the vehicle, set the wiper switch in the OFF position to
stop the auto wiper operation.
The wiper may operate and be dam-aged if the switch is set in the AUTOmode while washing the vehicle.
Do not remove the sensor coverlocated on the upper end of the pas-senger side windshield glass.Damage to system parts could occur and may not be covered by
your vehicle warranty.
When starting the vehicle in winter,set the wiper switch in the OFFposition. Otherwise, wipers mayoperate and ice may damage the
windshield wiper blades. Alwaysremove all snow and ice and defrostthe windshield properly prior tooperating the windshield wipers.
OXM049048E
Page 157 of 560

Features of your vehicle
82
4
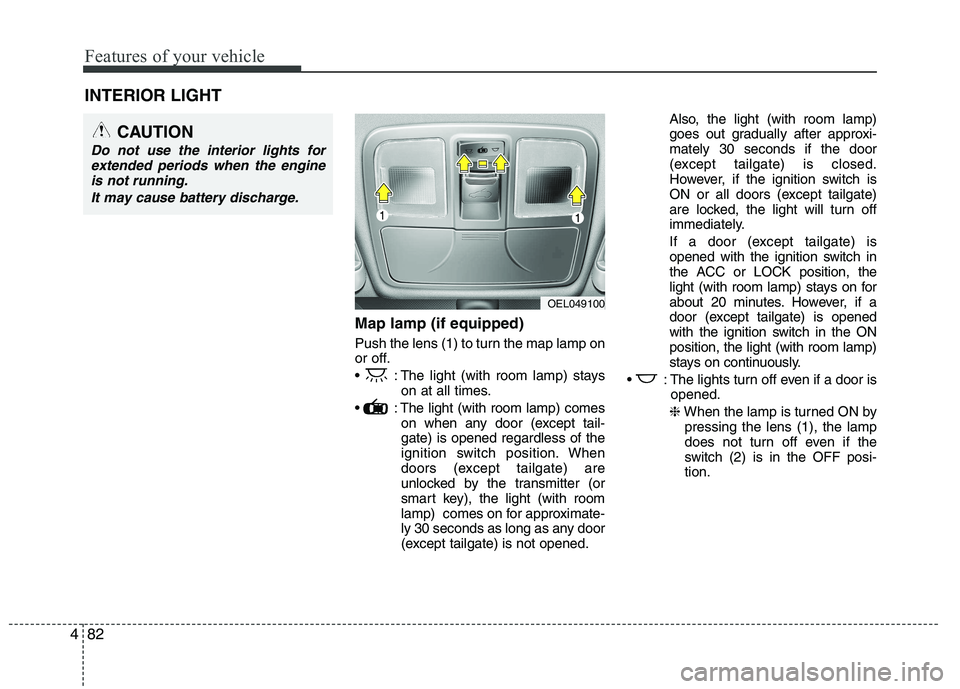
Map lamp (if equipped)
Push the lens (1) to turn the map lamp on
or off.
: The light (with room lamp) stays
on at all times.
: The light (with room lamp) comes on when any door (except tail- gate) is opened regardless of the
ignition switch position. When
doors (except tailgate) are
unlocked by the transmitter (or
smart key), the light (with room
lamp) comes on for approximate-
ly 30 seconds as long as any door
(except tailgate) is not opened. Also, the light (with room lamp)
goes out gradually after approxi-mately 30 seconds if the door
(except tailgate) is closed.
However, if the ignition switch is
ON or all doors (except tailgate)
are locked, the light will turn off
immediately.
If a door (except tailgate) is
opened with the ignition switch in
the ACC or LOCK position, the
light (with room lamp) stays on for
about 20 minutes. However, if a
door (except tailgate) is opened
with the ignition switch in the ONposition, the light (with room lamp)
stays on continuously.
: The lights turn off even if a door is opened.
❈ When the lamp is turned ON by
pressing the lens (1), the lamp
does not turn off even if the
switch (2) is in the OFF posi-tion.
INTERIOR LIGHT
CAUTION
Do not use the interior lights for
extended periods when the engine
is not running.
It may cause battery discharge.
OEL049100
Page 160 of 560

485
Features of your vehicle
✽✽NOTICE
If you want to defrost and defog on the
front windshield, refer to “Windshield
Defrosting and Defogging” in this sec-
tion.
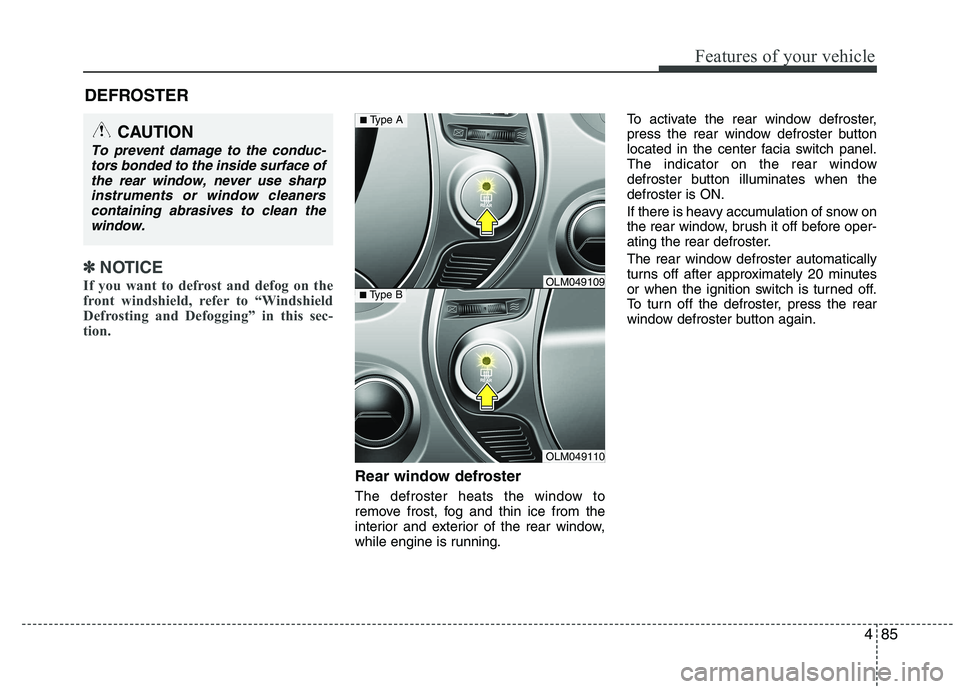
Rear window defroster
The defroster heats the window to
remove frost, fog and thin ice from the
interior and exterior of the rear window,
while engine is running. To activate the rear window defroster,
press the rear window defroster button
located in the center facia switch panel.
The indicator on the rear window
defroster button illuminates when thedefroster is ON.
If there is heavy accumulation of snow on
the rear window, brush it off before oper-
ating the rear defroster.
The rear window defroster automatically
turns off after approximately 20 minutes
or when the ignition switch is turned off.
To turn off the defroster, press the rear
window defroster button again.
DEFROSTER
CAUTION
To prevent damage to the conduc-
tors bonded to the inside surface of
the rear window, never use sharpinstruments or window cleanerscontaining abrasives to clean the window.
OLM049110
■ Type BOLM049109
■Type A
Page 161 of 560
Features of your vehicle
86
4
Outside mirror defroster
(if equipped)
If your vehicle is equipped with the out-
side mirror defrosters, they will operate at
the same time you turn on the rear win-
dow defroster.
Wiper deicer (if equipped)
Without smart key
The engine must be running to enable
this feature. To activate the front wiper
deicer, press the front wiper deicer but-
ton. The indicator on the button illumi-nates when the deicer is ON. The front wiper deicer automatically
turns off after 20 minutes or when the
ignition switch is turned off. To turn off the
deicer, press the front wiper deicer but-ton again.
With smart key
If your vehicle is equipped with the wiper
deicer, it will operate at the same time
you turn on the rear window defroster.
OLM049104
Page 163 of 560
Features of your vehicle
88
4
Heating and air conditioning
1. Start the engine.
2. Set the mode to the desired position.
For improving the effectiveness of heating and cooling;- Heating: - Cooling:
3. Set the temperature control to the desired position.
4. Set the air intake control to the outside (fresh) air position.
5. Set the fan speed control to the desired speed.
6. If air conditioning is desired, turn the air conditioning system (if equipped) on.
OEL049120
Page 168 of 560

493
Features of your vehicle
Operation Tips
To keep dust or unpleasant fumes fromentering the vehicle through the venti-
lation system, temporarily set the air
intake control to the recirculated air
position. Be sure to return the control
to the fresh air position when the irrita-
tion has passed to keep fresh air in the
vehicle. This will help keep the driver
alert and comfortable.
Air for the heating/cooling system is drawn in through the grilles just ahead
of the windshield. Care should be
taken that these are not blocked by
leaves, snow, ice or other obstructions.
To prevent interior fog on the wind- shield, set the air intake control to the
fresh air position and fan speed to the
desired position, turn on the air condi-tioning system, and adjust the temper-
ature control to desired temperature.Air conditioning (if equipped)
All HYUNDAI Air Conditioning Systems
are filled with environmentally friendly
R-134a refrigerant which does not dam-
age to the ozone layer.
1. Start the engine. Push the air condi- tioning button.
2. Set the mode to the position.
3. Set the air intake control to the outside air or recirculated air position.
4. Adjust the fan speed control and tem- perature control to maintain maximum
comfort.
When maximum cooling is desired, set the temperature control to the extremeleft position (press the MAX A/C posi-
tion selection button (if equipped)) then
set the fan speed control to the highestspeed.✽✽ NOTICE
When using the air conditioning sys- tem, monitor the temperature gauge
closely while driving up hills or in
heavy traffic when outside tempera-
tures are high. Air conditioning sys-
tem operation may cause engine over-
heating. Continue to use the blower
fan but turn the air conditioning sys-
tem off if the temperature gauge indi-
cates engine overheating.
When opening the windows in humid weather air conditioning may create
water droplets inside the vehicle.
Since excessive water droplets may
cause damage to electrical equipment,
air conditioning should only be used
with the windows closed.