2011 HYUNDAI IX35 clock
[x] Cancel search: clockPage 348 of 560
Maintenance
28
7
Reset items
Items should be reset after the battery
has been discharged or the battery hasbeen disconnected.
Auto up/down window (See section 4)
Sunroof (See section 4)
Trip computer (See section 4)
Climate control system
(See section 4)
Clock (See section 4)
Audio (See section 4)(Continued)
Disconnect the battery charger in the following order.
1. Turn off the battery charger
main switch.
2. Unhook the negative clamp from the negative battery ter- minal.
3. Unhook the positive clamp from the positive battery termi-nal.
Before performing maintenance or recharging the battery, turn offall accessories and stop the
engine.
The negative battery cable must be removed first and installed
last when the battery is discon-nected.
EL UK 7.QXP 1/25/2010 10:03 AM Page 28
Page 370 of 560
Maintenance
50
7
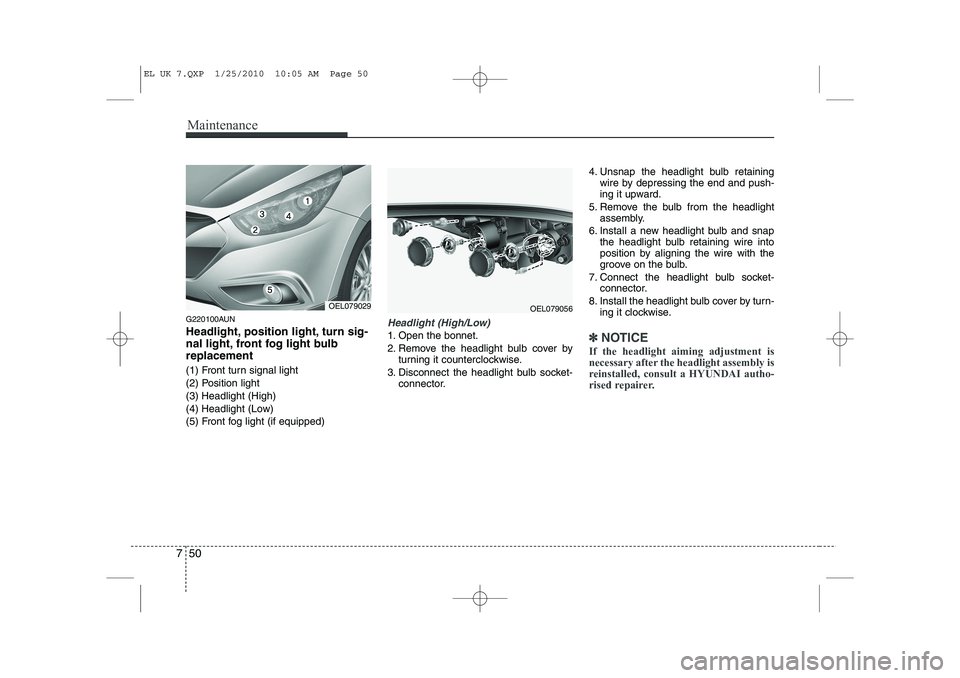
G220100AUN
Headlight, position light, turn sig-
nal light, front fog light bulbreplacement
(1) Front turn signal light
(2) Position light
(3) Headlight (High)
(4) Headlight (Low)
(5) Front fog light (if equipped)Headlight (High/Low)
1. Open the bonnet.
2. Remove the headlight bulb cover by
turning it counterclockwise.
3. Disconnect the headlight bulb socket- connector. 4. Unsnap the headlight bulb retaining
wire by depressing the end and push-
ing it upward.
5. Remove the bulb from the headlight assembly.
6. Install a new headlight bulb and snap the headlight bulb retaining wire into
position by aligning the wire with the
groove on the bulb.
7. Connect the headlight bulb socket- connector.
8. Install the headlight bulb cover by turn- ing it clockwise.✽✽ NOTICE
If the headlight aiming adjustment is
necessary after the headlight assembly is
reinstalled, consult a HYUNDAI autho-
rised repairer.
OEL079056OEL079029
EL UK 7.QXP 1/25/2010 10:05 AM Page 50
Page 371 of 560
751
Maintenance
Turn signal light/Position light
Turn signal light
1. Turn off the engine and open the bon-net.
2. Remove the socket from the assembly by turning the socket counterclockwise
until the tabs on the socket align with
the slots on the assembly.
3. Remove the bulb from the socket by pressing it in and rotating it counter-
clockwise until the tabs on the bulb
align with the slots in the socket. Pull
the bulb out of the socket.
4. Insert a new bulb by inserting it into the socket and rotating it until it locks
into place.
5. Install the socket in the assembly by aligning the tabs on the socket with the
slots in the assembly. Push the socket
into the assembly and turn the socket
clockwise.
OHD076046
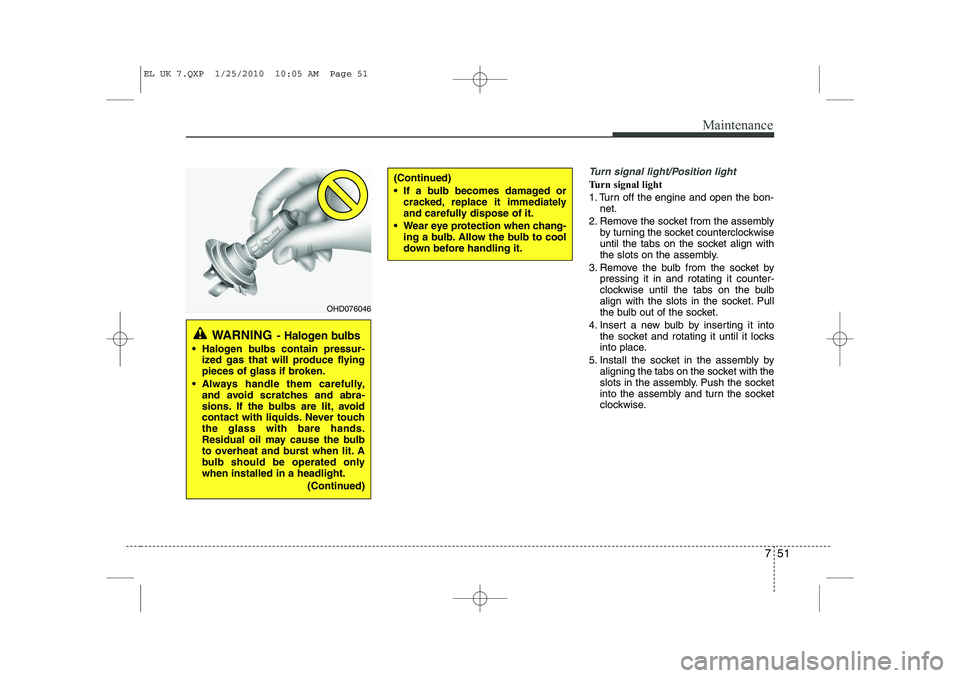
WARNING - Halogen bulbs
Halogen bulbs contain pressur-
ized gas that will produce flying
pieces of glass if broken.
Always handle them carefully, and avoid scratches and abra-
sions. If the bulbs are lit, avoid
contact with liquids. Never touchthe glass with bare hands.
Residual oil may cause the bulb
to overheat and burst when lit. A
bulb should be operated onlywhen installed in a headlight.
(Continued)
(Continued)
If a bulb becomes damaged orcracked, replace it immediately
and carefully dispose of it.
Wear eye protection when chang- ing a bulb. Allow the bulb to cool
down before handling it.
EL UK 7.QXP 1/25/2010 10:05 AM Page 51
Page 372 of 560
Maintenance
52
7
Position light
1. Turn off the engine and open the bon-
net.
2. Remove the headlight bulb cover by turning it counterclockwise.
3. Remove the socket from the assembly by pulling it out.
4. Remove the bulb by pulling it straight out.
5. Insert a new bulb into the socket.
6. Install the socket into the assembly by pushing it in.Front fog light bulbs (if equipped)
1. Remove the front bumper under cover.
2. Reach your hand into the back of thefront bumper.
3. Disconnect the power connector from the socket.
4. Remove the bulb-socket from the housing by turning the socket counter
clockwise until the tabs on the socketalign with the slots on the housing.
5. Install the new bulb-socket into the housing by aligning the tabs on the
socket with the slots in the housing.
Push the socket into the housing and
turn the socket clockwise.
6. Connect the power connector to the socket.
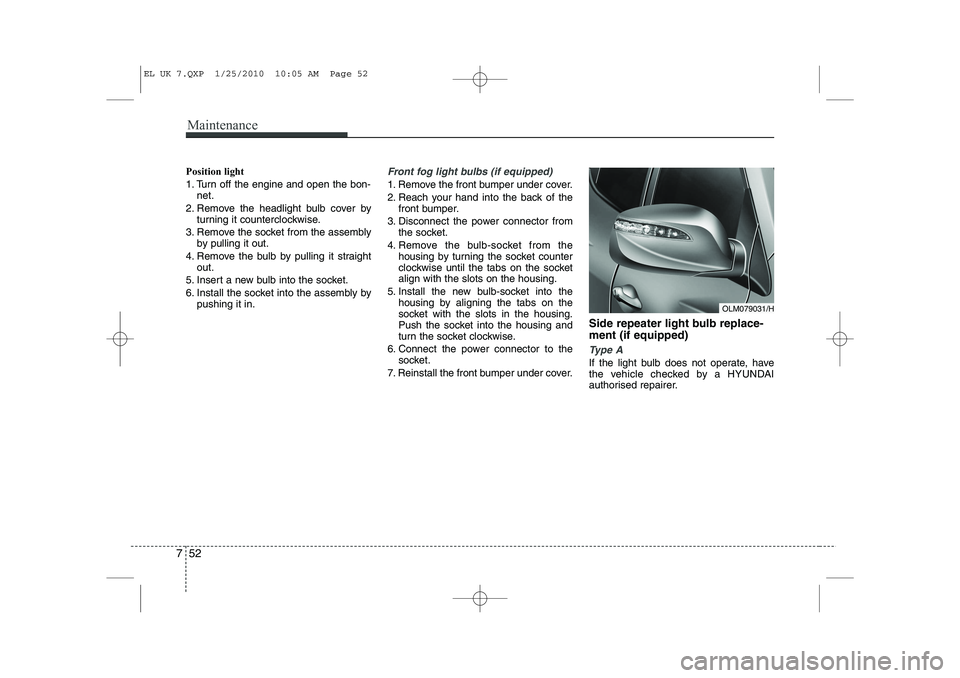
7. Reinstall the front bumper under cover. Side repeater light bulb replace- ment (if equipped)
Type A
If the light bulb does not operate, have
the vehicle checked by a HYUNDAI
authorised repairer.
OLM079031/H
EL UK 7.QXP 1/25/2010 10:05 AM Page 52
Page 374 of 560
Maintenance
54
7
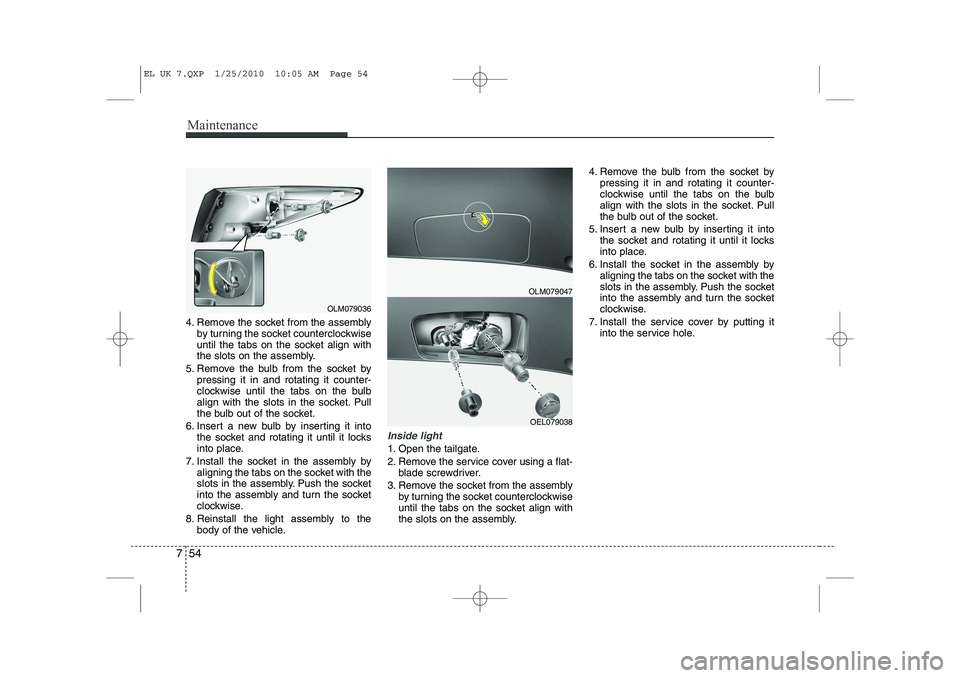
4. Remove the socket from the assembly
by turning the socket counterclockwise
until the tabs on the socket align with
the slots on the assembly.
5. Remove the bulb from the socket by pressing it in and rotating it counter-
clockwise until the tabs on the bulb
align with the slots in the socket. Pull
the bulb out of the socket.
6. Insert a new bulb by inserting it into the socket and rotating it until it locks
into place.
7. Install the socket in the assembly by aligning the tabs on the socket with the
slots in the assembly. Push the socket
into the assembly and turn the socket
clockwise.
8. Reinstall the light assembly to the body of the vehicle.
Inside light
1. Open the tailgate.
2. Remove the service cover using a flat-blade screwdriver.
3. Remove the socket from the assembly by turning the socket counterclockwise
until the tabs on the socket align with
the slots on the assembly. 4. Remove the bulb from the socket by
pressing it in and rotating it counter-
clockwise until the tabs on the bulb
align with the slots in the socket. Pull
the bulb out of the socket.
5. Insert a new bulb by inserting it into the socket and rotating it until it locks
into place.
6. Install the socket in the assembly by aligning the tabs on the socket with the
slots in the assembly. Push the socket
into the assembly and turn the socket
clockwise.
7. Install the service cover by putting it into the service hole.
OLM079047
OEL079038
OLM079036
EL UK 7.QXP 1/25/2010 10:05 AM Page 54
Page 375 of 560
755
Maintenance
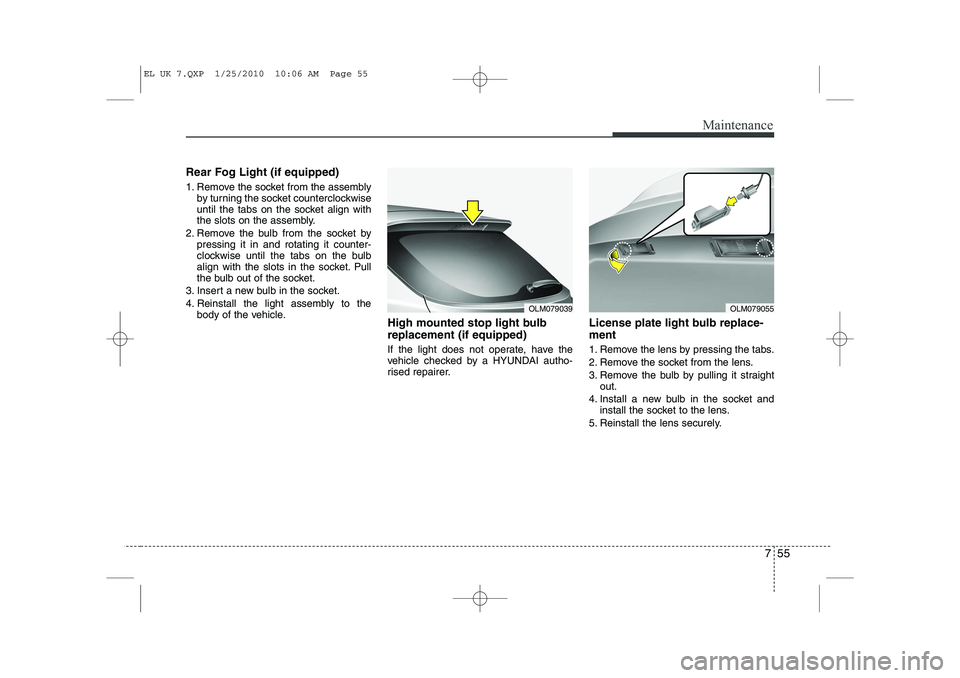
Rear Fog Light (if equipped)
1. Remove the socket from the assemblyby turning the socket counterclockwise
until the tabs on the socket align with
the slots on the assembly.
2. Remove the bulb from the socket by pressing it in and rotating it counter-
clockwise until the tabs on the bulb
align with the slots in the socket. Pull
the bulb out of the socket.
3. Insert a new bulb in the socket.
4. Reinstall the light assembly to the body of the vehicle. High mounted stop light bulb replacement (if equipped)
If the light does not operate, have the
vehicle checked by a HYUNDAI autho-
rised repairer. License plate light bulb replace- ment
1. Remove the lens by pressing the tabs.
2. Remove the socket from the lens.
3. Remove the bulb by pulling it straight
out.
4. Install a new bulb in the socket and install the socket to the lens.
5. Reinstall the lens securely.
OLM079039OLM079055
EL UK 7.QXP 1/25/2010 10:06 AM Page 55
Page 404 of 560
I3
Index
Interior light bulb replacement··································7-56
License plate light bulb replacement ························7-55
Position light bulb replacement ································7-52
Rear combination light bulb replacement ·················7-53
Rear fog light bulb replacement································7-55Side repeater light bulb replacement·························7-52
Turn signal light bulb replacement ···························7-51
Bulb wattage ·····································································8-2
Button start/stop, see engine start/stop button ··················5-8
Capacities (Lubricants) ·····················································8-4 Care Exterior care ······························································7-57
Interior care ·······························································7-62
Tyre care····································································7-29
Cargo security screen····················································4-113
Central door lock switch ·················································4-14
Centre console storage ··················································4-106
Changing tyres ································································6-14Chains Tyre chains ································································5-55
Checking tyre inflation pressure ·····································7-31
Child restraint system ·····················································3-29 Tether anchor system ················································3-33
ISOFIX system ·························································3-35
Child-protector rear door lock ·······································4-16 Cigarette lighter ····························································4-108
Climate control air filter ·················································7-21
Climate control system (Automatic) ·····························4-96
Air conditioning ·····················································4-102Automatic heating and air conditioning ···················4-97
Manual heating and air conditioning ·······················4-98
Climate control system (Manual) ··································4-87 Air conditioning ·······················································4-92
Climate control air filter ··········································4-94
Heating and air conditioning·····································4-88
Clock (Digital) ······························································4-111
Combined instrument, see instrument cluster ················4-42Compass mirror, see the Electric chromic mirror (ECM) with compass ······································4-36
Cool box········································································4-107Coolant ···········································································7-13
Cooling fluid, see engine coolant ··································7-13
Crankcase emission control system ·······························7-63
Cruise control system ····················································5-43
Cup holder ···································································4-109
Curtain air bag ·······························································3-54
C
EL UK INDEX.QXP 1/12/2010 3:27 PM Page 3
Page 405 of 560
Index
4
I
Dashboard, see instrument cluster ·································4-42 Dashboard illumination, see instrument
panel illumination ·······················································4-43
Daytime running light ·····················································4-76
Defogging (Windscreen) ·············································4-103
Defroster ·········································································4-85 Outside mirror defroster ············································4-86
Rear window defroster ··············································4-85
Wiper deicer ······························································4-86
Defrosting (Windscreen) ·············································4-103
Digital clock ·································································4-111Dimensions ······································································8-2
Displays, see instrument cluster ····································4-42Display illumination, see instrument panel illumination ·······················································4-43
Door locks ·······································································4-13 Central door lock switch ··········································4-14
Child-protector rear door lock ·································4-16
Downhill brake control (DBC) ······································5-39
Drinks holders, see cup holders ···································4-109
Driver's air bag ·······························································3-47
Driving at night ······························································5-51
Driving in flooded areas ················································5-52
Driving in the rain ·························································5-52 Economical operation ····················································5-48
ECO ON/OFF mode ·······················································4-49
Electric chromic mirror (ECM) ·····································4-35
Electric chromic mirror (ECM) with compass ··············4-36
Electric power steering ··················································4-33
Emergency starting ··························································6-5
Jump starting ······························································6-5
Push starting ·······························································6-6
Emergency Stop Signal (ESS) ········································5-42Emergency tailgate safety release ··································4-18
Emergency towing ·························································6-26
Emergency whilst driving ················································6-3
Emission control system ················································7-63 Crankcase emission control system ·························7-63
Evaporative emission control system ······················7-63
Exhaust emission control system ·····························7-64
Engine compartment ················································2-6, 7-2
Engine coolant ·······························································7-13
Engine number ·································································8-8
Engine oil ·······································································7-12
Engine overheats ······························································6-7
Engine start/stop button ···················································5-8
Engine temperature gauge ·············································4-44
Engine will not start ·························································6-4
Evaporative emission control system ····························7-63
Exhaust emission control system ···································7-64
ED
EL UK INDEX.QXP 1/12/2010 3:27 PM Page 4