2011 HYUNDAI IX35 battery
[x] Cancel search: batteryPage 158 of 560
483
Features of your vehicle
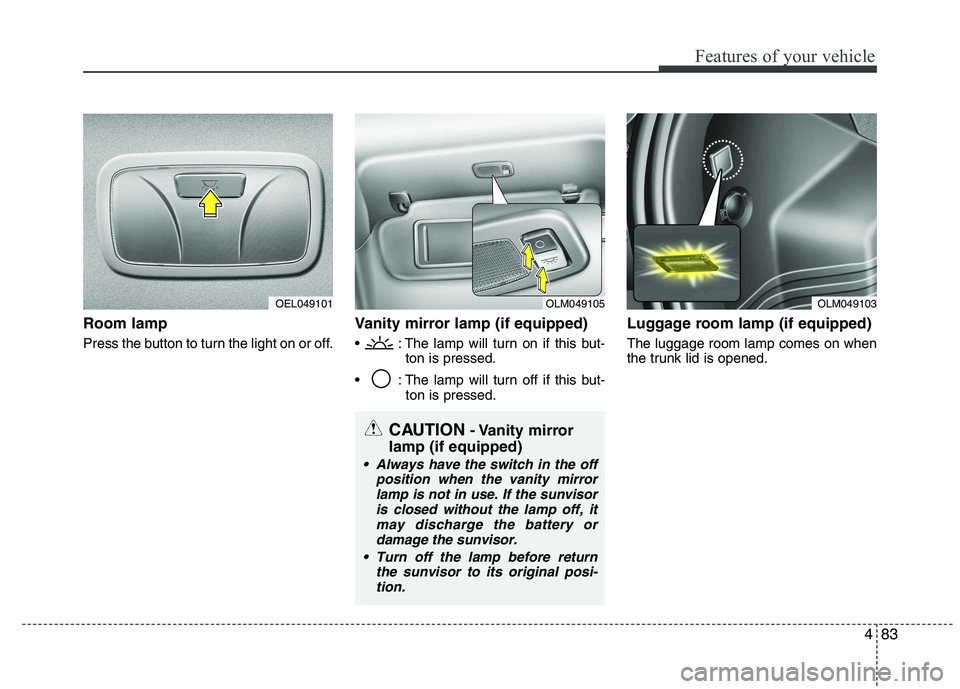
Room lamp
Press the button to turn the light on or off.Vanity mirror lamp (if equipped)
: The lamp will turn on if this but-
ton is pressed.
: The lamp will turn off if this but- ton is pressed. Luggage room lamp (if equipped)The luggage room lamp comes on when
the trunk lid is opened.
OLM049105OLM049103OEL049101
CAUTION
- Vanity mirror
lamp (if equipped)
Always have the switch in the off position when the vanity mirrorlamp is not in use. If the sunvisoris closed without the lamp off, it
may discharge the battery ordamage the sunvisor.
Turn off the lamp before return the sunvisor to its original posi-tion.
Page 176 of 560
4101
Features of your vehicle
Adjusting the driver and passenger side
temperature equally
1. Press the DUAL button again to deac-tivate DUAL mode. The passenger
side temperature will be set to the
same temperature as the driver side.
2. Operate the driver side temperature control button. The driver and passen-
ger side temperature will be adjusted
equally.
Temperature conversion (if equipped)
You can switch the temperature mode
between Centigrade to Fahrenheit as fol-
lows:
While pressing the OFF button, press the
AUTO button for 3 seconds or more.
The display will change from Centigrade
to Fahrenheit, or from Fahrenheit to
Centigrade.
If the battery has been discharged or dis-
connected, the temperature mode dis-
play will reset to Centigrade.
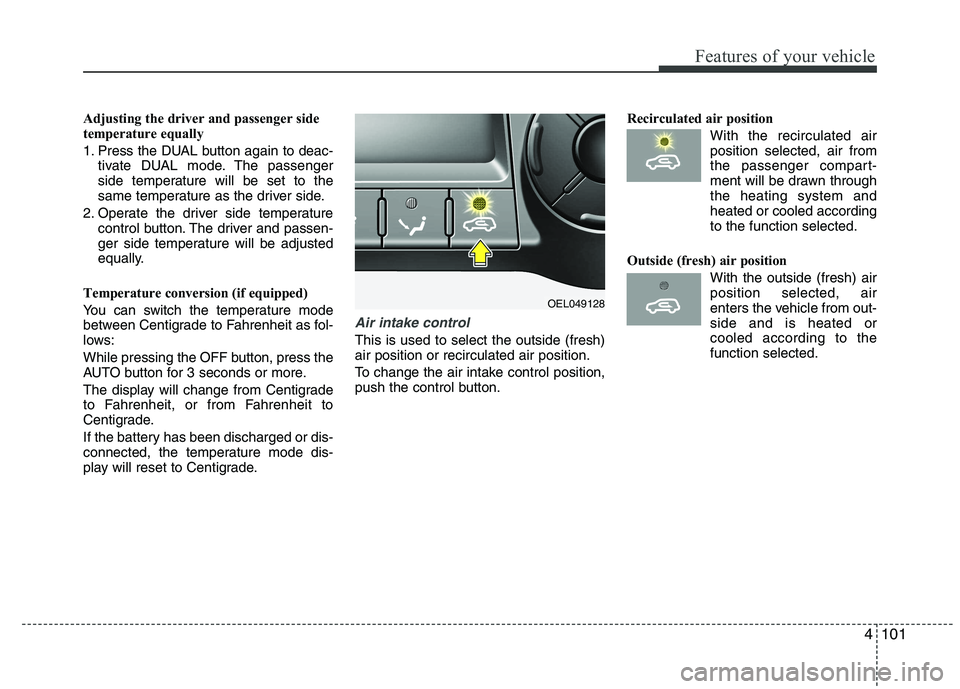
Air intake control
This is used to select the outside (fresh) air position or recirculated air position.
To change the air intake control position,
push the control button. Recirculated air position
With the recirculated airposition selected, air from
the passenger compart-
ment will be drawn throughthe heating system andheated or cooled according
to the function selected.
Outside (fresh) air position With the outside (fresh) airposition selected, air
enters the vehicle from out-side and is heated orcooled according to the
function selected.
OEL049128
Page 187 of 560
Features of your vehicle
112
4
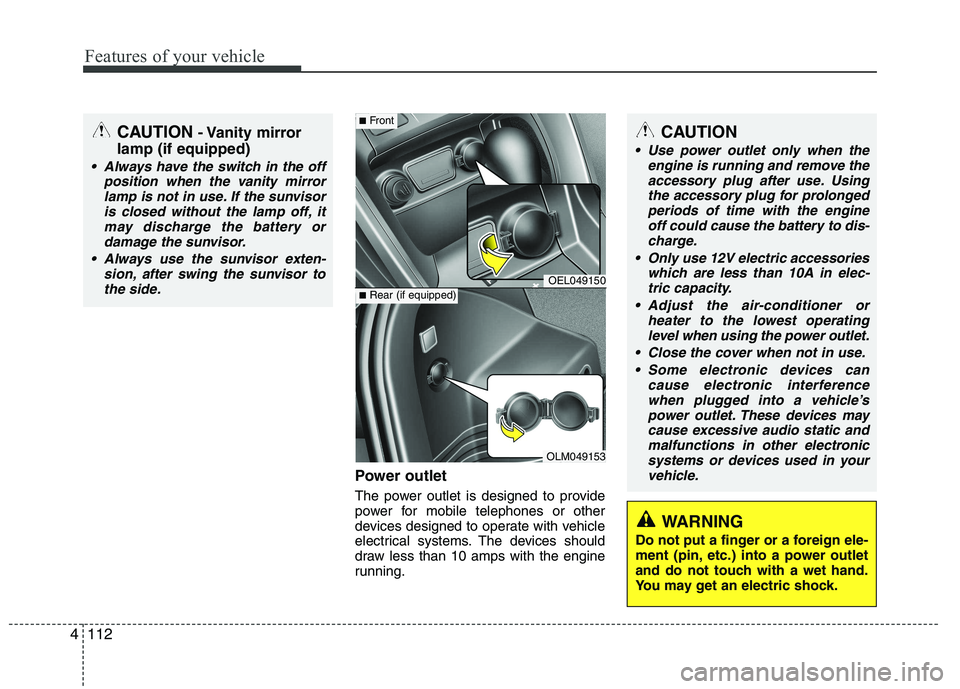
Power outlet
The power outlet is designed to provide
power for mobile telephones or other
devices designed to operate with vehicle
electrical systems. The devices should
draw less than 10 amps with the engine
running.
CAUTION - Vanity mirror
lamp (if equipped)
Always have the switch in the off position when the vanity mirror
lamp is not in use. If the sunvisoris closed without the lamp off, itmay discharge the battery or damage the sunvisor.
Always use the sunvisor exten- sion, after swing the sunvisor tothe side.
OEL049150
OLM049153
■ Front
■Rear (if equipped)
CAUTION
Use power outlet only when the
engine is running and remove the
accessory plug after use. Using the accessory plug for prolongedperiods of time with the engineoff could cause the battery to dis-
charge.
Only use 12V electric accessories which are less than 10A in elec-tric capacity.
Adjust the air-conditioner or heater to the lowest operatinglevel when using the power outlet.
Close the cover when not in use. Some electronic devices can cause electronic interference
when plugged into a vehicle’s power outlet. These devices maycause excessive audio static and malfunctions in other electronic
systems or devices used in yourvehicle.
WARNING
Do not put a finger or a foreign ele-
ment (pin, etc.) into a power outlet
and do not touch with a wet hand.
You may get an electric shock.
Page 188 of 560
4113
Features of your vehicle
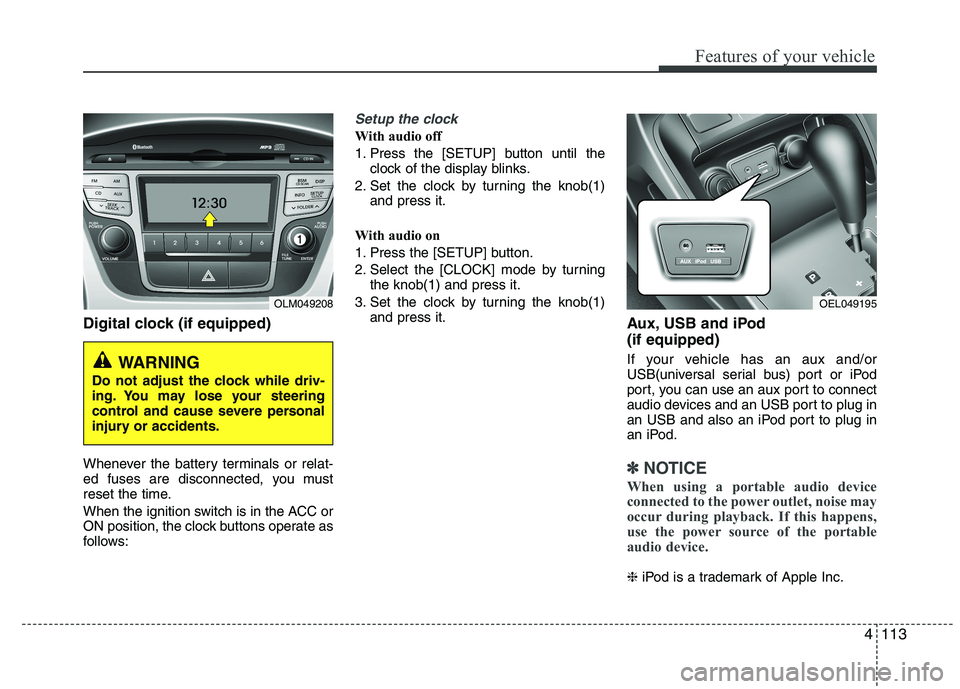
Digital clock (if equipped)
Whenever the battery terminals or relat-
ed fuses are disconnected, you must
reset the time.
When the ignition switch is in the ACC or
ON position, the clock buttons operate as
follows:
Setup the clock
With audio off
1. Press the [SETUP] button until theclock of the display blinks.
2. Set the clock by turning the knob(1) and press it.
With audio on
1. Press the [SETUP] button.
2. Select the [CLOCK] mode by turning the knob(1) and press it.
3. Set the clock by turning the knob(1) and press it. Aux, USB and iPod (if equipped)
If your vehicle has an aux and/or
USB(universal serial bus) port or iPod
port, you can use an aux port to connect
audio devices and an USB port to plug in
an USB and also an iPod port to plug in
an iPod.
✽✽NOTICE
When using a portable audio device
connected to the power outlet, noise may
occur during playback. If this happens,
use the power source of the portable
audio device.
❈ iPod is a trademark of Apple Inc.
OLM049208
WARNING
Do not adjust the clock while driv-
ing. You may lose your steering
control and cause severe personal
injury or accidents.
OEL049195
Page 200 of 560
4125
Features of your vehicle
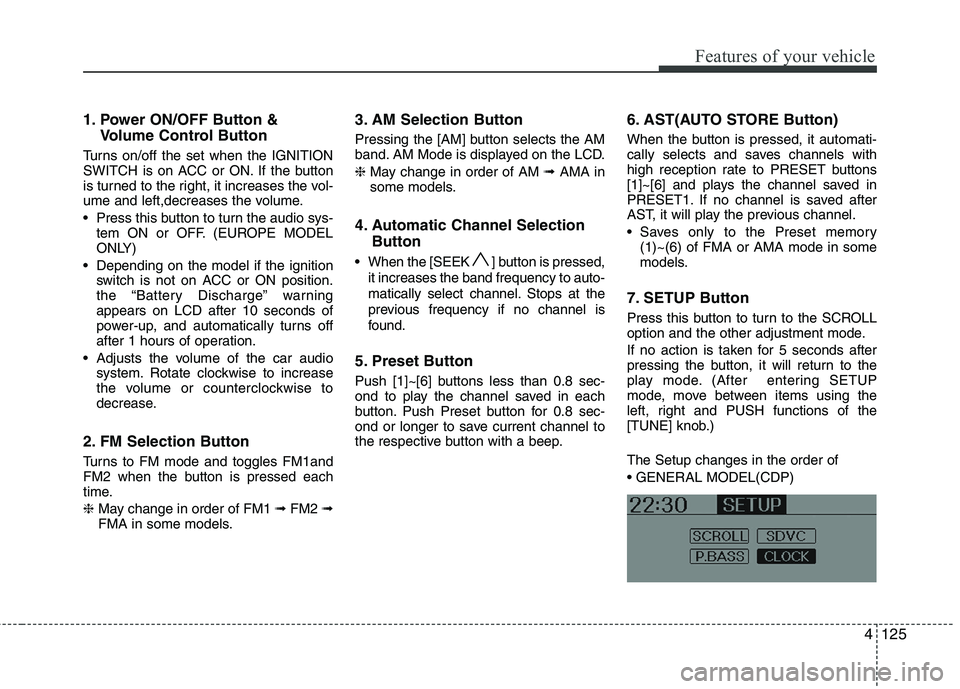
1. Power ON/OFF Button &Volume Control Button
Turns on/off the set when the IGNITION
SWITCH is on ACC or ON. If the button
is turned to the right, it increases the vol-
ume and left,decreases the volume.
Press this button to turn the audio sys- tem ON or OFF. (EUROPE MODEL
ONLY)
Depending on the model if the ignition switch is not on ACC or ON position.
the “Battery Discharge” warningappears on LCD after 10 seconds of
power-up, and automatically turns off
after 1 hours of operation.
Adjusts the volume of the car audio system. Rotate clockwise to increase
the volume or counterclockwise to
decrease.
2. FM Selection Button
Turns to FM mode and toggles FM1and
FM2 when the button is pressed each
time. ❈ May change in order of FM1 ➟FM2 ➟
FMA in some models. 3. AM Selection Button
Pressing the [AM] button selects the AM
band. AM Mode is displayed on the LCD. ❈
May change in order of AM ➟AMA in
some models.
4. Automatic Channel Selection Button
When the [SEEK ] button is pressed, it increases the band frequency to auto-
matically select channel. Stops at the
previous frequency if no channel is
found.
5. Preset Button
Push [1]~[6] buttons less than 0.8 sec-
ond to play the channel saved in each
button. Push Preset button for 0.8 sec-
ond or longer to save current channel to
the respective button with a beep. 6. AST(AUTO STORE Button)
When the button is pressed, it automati-
cally selects and saves channels with
high reception rate to PRESET buttons
[1]~[6] and plays the channel saved in
PRESET1. If no channel is saved after
AST, it will play the previous channel.
Saves only to the Preset memory
(1)~(6) of FMA or AMA mode in some
models.
7. SETUP Button
Press this button to turn to the SCROLL
option and the other adjustment mode.
If no action is taken for 5 seconds after
pressing the button, it will return to the
play mode. (After entering SETUP
mode, move between items using the
left, right and PUSH functions of the
[TUNE] knob.) The Setup changes in the order of
Page 215 of 560
Features of your vehicle
140
4
✽✽
NOTICE FOR USING IPOD DEVICE
Some iPod models might not support
the communication protocol and the
files will not be played. (iPod models
supported: Mini, 4G, Photo, Nano,
5G)
The order of search or playback of songs in the iPod can be different
from the order searched in the audio
system.
If the iPod crashes due to its own trou- ble, reset iPod. (Reset: Refer to iPod
manual)
iPod may not operate normally on low
battery.
(Continued)
When the iPod cable is connect- ed, the system can be switched tothe AUX mode even without theiPod device and can cause noise.
Disconnect iPod cable when youare not using the iPod device.
When the iPod is not used at audio system, iPod cable has to
be separate from iPod device.Origin display of iPod may not bedisplayed.CAUTION IN USING iPod DEVICE
You need the power cable exclu- sive for iPod in order to operate
iPod with the buttons on theaudio system. The PC cable pro-vided by Apple may cause mal- function and do not use it for
vehicle use.
When connecting the device with iPod cable, push in the jack fullynot to interfere with communica-
tion.
When adjusting the sound effects of iPod and the audio system, thesound effects of both devices will overlap each and might cause
reduce or distort the quality of thesound.
Deactivate (turn off) the equalizer function of iPod when adjustingthe audio system’s volume, and
turn off the equalizer of the audio system when using the equalizerof iPod.
(Continued)
Page 229 of 560

Driving your vehicle
4
5
Illuminated ignition switch (if equipped)
Whenever a front door is opened, the
ignition switch will be illuminated for your
convenience, provided the ignition switch
is not in the ON position. The light will go
off immediately when the ignition switch
is turned on or go off after about 30 sec-onds when the door is closed. Ignition switch position
LOCK
The steering wheel locks to protect
against theft. The ignition key can be
removed only in the LOCK position.
When turning the ignition switch to the
LOCK position, push the key inward at
the ACC position and turn the key towardthe LOCK position.
ACC (Accessory)
The steering wheel is unlocked and elec-
trical accessories are operative.
✽✽
NOTICE
If difficulty is experienced turning the
ignition switch to the ACC position, turnthe key whilst turning the steering wheel
right and left to release the tension.
ON
The warning lights can be checked
before the engine is started. This is the
normal running position after the engine
is started.
Do not leave the ignition switch ON if the engine is not running to prevent battery discharge.
START
Turn the ignition key to the START posi-
tion to start the engine. The engine will
crank until you release the key; then it
returns to the ON position. The brake
warning lamp can be checked in thisposition.
KEY POSITIONS
OXM059001OCM059002
EL UK 5.QXP 1/25/2010 9:54 AM Page 4
Page 243 of 560
Driving your vehicle
18
5
Automatic transaxle operation
The highly efficient automatic transaxle
has 6 forward speeds and one reverse
speed. The individual speeds are select-
ed automatically, depending on the posi-
tion of the shift lever.
✽✽
NOTICE
The first few shifts on a new vehicle, if the battery has been disconnected, may
be somewhat abrupt. This is a normalcondition, and the shifting sequence will
adjust after shifts are cycled a few times
by the TCM (Transaxle Control
Module) or PCM (Powertrain ControlModule).
For smooth operation, depress the brake pedal when shifting from N (Neutral) to a forward or reverse gear.
Transaxle ranges
The indicator lights in the instrument
cluster displays the shift lever position
when the ignition switch is in the ONposition.
P (Park)
Always come to a complete stop before
shifting into P (Park). This position locks
the transaxle and prevents the frontwheels from rotating.
WARNING - Automatic
transaxle
Always check the surrounding areas near your vehicle for peo-
ple, especially children, before
shifting a vehicle into D (Drive) or
R (Reverse).
Before leaving the driver’s seat, always make sure the shift lever
is in the P (Park) position; then
set the parking brake fully and
shut the engine off. Unexpected
and sudden vehicle movementcan occur if these precautions
are not followed in the order iden-tified.
CAUTION
To avoid damage to your
transaxle, do not accelerate the
engine in R (Reverse) or any for- ward gear position with thebrakes on.
When stopped on an upgrade, do not hold the vehicle stationarywith engine power. Use the serv-ice brake or the parking brake.
Do not shift from N (Neutral) or P (Park) into D (Drive), or R
(Reverse) when the engine is above idle speed.
EL UK 5.QXP 1/25/2010 9:55 AM Page 18