2011 HYUNDAI IX35 buttons
[x] Cancel search: buttonsPage 224 of 560
4149
Features of your vehicle
A phone call can be made by dialing the
spoken numbers. The system can recog-
nize single digits from zero to nine.
1. Press button.
2. Say “Call”.
3. Say “Number” when prompted.
4. Say desired phone numbers.
5. Say “Dial” to complete the number andmake a call.
✽
✽ TIP
A shortcut to each of the following
functions is available:
1. Say “Dial Number”
2. Say “Dial
■
Receiving a Phone Call
When receiving a phone call, a ringtone
is audible from speakers and the audio
system changes into telephone mode.
When receiving a phone call, “Incoming”
message and incoming phone number
(if available) are displayed on the audio.
- Press button on the steering wheel.
- Press button on the steering wheel.
- Use VOLUME buttons on the steering wheel.
Call):
- Press and hold button on the steer- ing wheel until the audio system trans-
fers a call to the phone. ■■
Talking on the Phone
When talking on the phone, “Active Calls”
message and the other party’s phone
number (if available) are displayed on the
audio.
- Press button on the steering wheel.
- Press button on the steering wheel.
✽
✽ NOTICE
In the following situations, you or the
other party may have difficulty hearing
each other:
1. Speaking at the same time, your voice
may not reach each other parties.
(This is not a malfunction.) Speak
alternately with the other party on the
phone.
2. Keep the Bluetooth(R) volume to a
low level. High-level volume may
result in distortion and echo.
3. When driving on a rough road.
4. When driving at high speeds.
5. When the window is open.
6. When the air conditioning vents are facing the microphone.
7. When the sound of the air condition-
ing fan is loud.
Page 420 of 560

Features of your vehicle
8
4
With a smart key, you can lock or unlock
a door (and tailgate) and even start the
engine without inserting the key.
The functions of the buttons on a smart
key are similar to the remote keyless
entry. (Refer to the “Remote keyless
entry” in this section.) Smart key functions
Carrying the smart key, you may lock and
unlock the vehicle doors (and tailgate).
Also, you may start the engine. Refer to
the following, for more details.
Locking
Pressing the button of the front outside door handles with all doors (and tailgate)
closed and any door unlocked, locks all
the doors (and tailgate). The hazard
warning lights will blink once to indicate
that all doors (and tailgate) are locked.
The button will only operate when the
smart key is within 28~40 in. (0.7~1 m)
from the outside door handle. If you want
to make sure that a door has locked or
not, you should check the door lock but-
ton inside the vehicle or pull the outside
door handle.
SMART KEY (IF EQUIPPED)
OXM049001LOLM049007/H
EL UK 4A.QXP 1/25/2010 9:43 AM Page 8
Page 501 of 560
489
Features of your vehicle
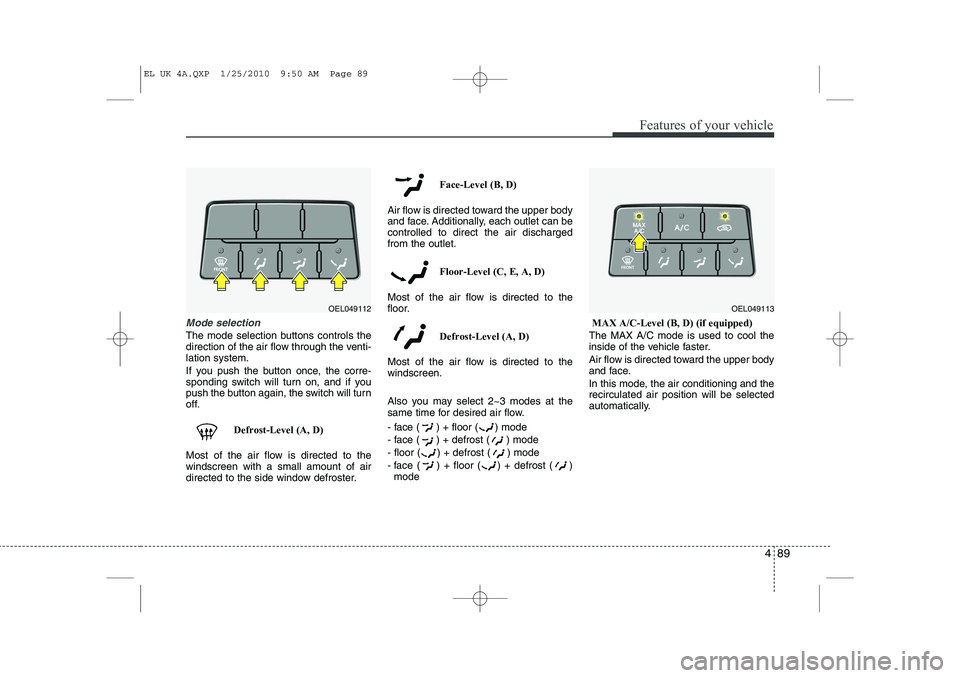
Mode selection
The mode selection buttons controls the
direction of the air flow through the venti-lation system.
If you push the button once, the corre-
sponding switch will turn on, and if you
push the button again, the switch will turn
off.Defrost-Level (A, D)
Most of the air flow is directed to thewindscreen with a small amount of air
directed to the side window defroster. Face-Level (B, D)
Air flow is directed toward the upper body
and face. Additionally, each outlet can becontrolled to direct the air dischargedfrom the outlet.
Floor-Level (C, E, A, D)
Most of the air flow is directed to the
floor.
Defrost-Level (A, D)
Most of the air flow is directed to thewindscreen.
Also you may select 2~3 modes at the
same time for desired air flow.
- face ( ) + floor ( ) mode
- face ( ) + defrost ( ) mode
- floor ( ) + defrost ( ) mode
- face ( ) + floor ( ) + defrost ( ) mode MAX A/C-Level (B, D) (if equipped)
The MAX A/C mode is used to cool the
inside of the vehicle faster.
Air flow is directed toward the upper body
and face.
In this mode, the air conditioning and the recirculated air position will be selected
automatically.
OEL049112OEL049113
EL UK 4A.QXP 1/25/2010 9:50 AM Page 89
Page 510 of 560
Features of your vehicle
98
4
Manual heating and air condition- ing The heating and cooling system can be
controlled manually by pressing buttons
or turning knob(s) other than the AUTO
button. In this case, the system workssequentially according to the order of
buttons or knob(s) selected.
1. Start the engine.
2. Set the mode to the desired position.
For improving the effectiveness of heating and cooling;- Heating: - Cooling:
3. Set the temperature control to the desired position.
4. Set the air intake control to the outside (fresh) air position.
5. Set the fan speed control to the desired speed.
6. If air conditioning is desired, turn the air conditioning system on.
Press the AUTO button in order to con-
vert to full automatic control of the sys-tem.
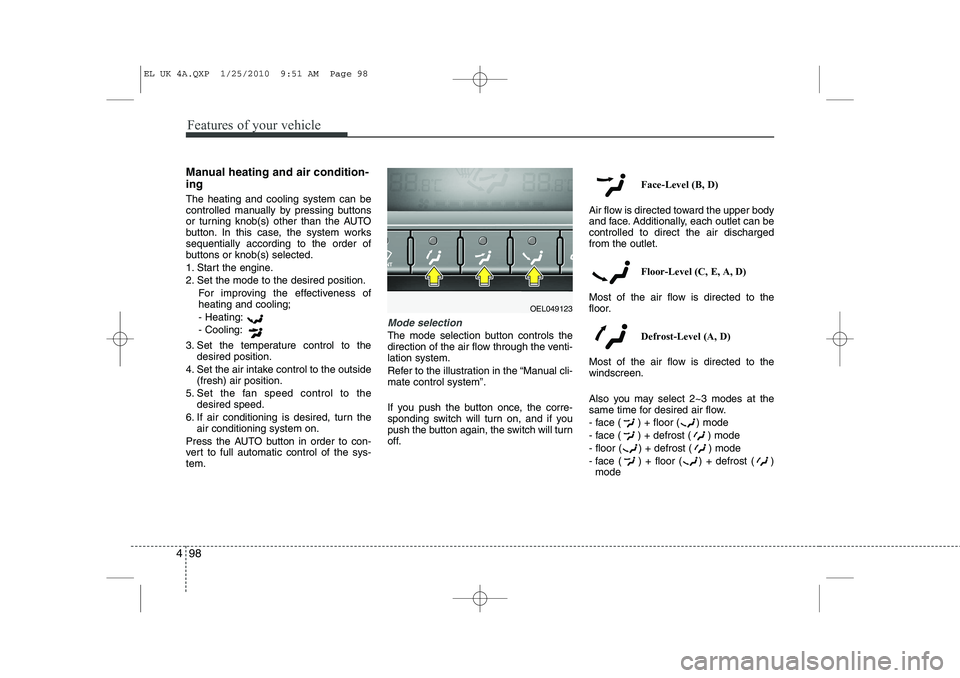
Mode selection
The mode selection button controls the
direction of the air flow through the venti-lation system.
Refer to the illustration in the “Manual cli- mate control system”.
If you push the button once, the corre-
sponding switch will turn on, and if you
push the button again, the switch will turn
off. Face-Level (B, D)
Air flow is directed toward the upper body
and face. Additionally, each outlet can becontrolled to direct the air dischargedfrom the outlet.
Floor-Level (C, E, A, D)
Most of the air flow is directed to the
floor.
Defrost-Level (A, D)
Most of the air flow is directed to thewindscreen.
Also you may select 2~3 modes at the
same time for desired air flow.
- face ( ) + floor ( ) mode
- face ( ) + defrost ( ) mode
- floor ( ) + defrost ( ) mode
- face ( ) + floor ( ) + defrost ( ) mode
OEL049123
EL UK 4A.QXP 1/25/2010 9:51 AM Page 98
Page 514 of 560
Features of your vehicle
102
4
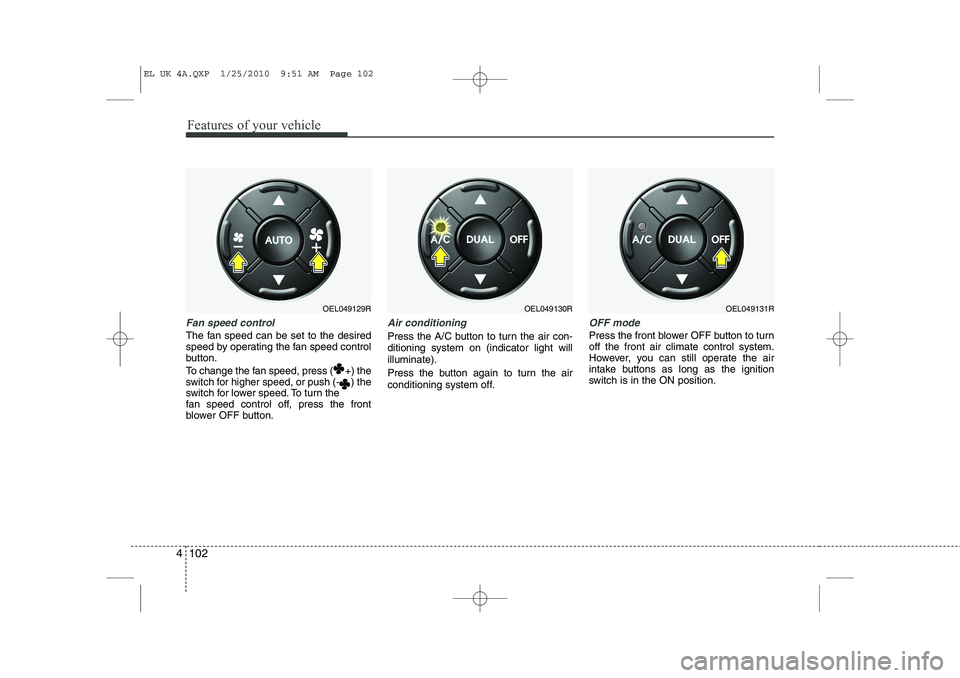
Fan speed control
The fan speed can be set to the desired
speed by operating the fan speed control
button.
To change the fan speed, press ( +) the
switch for higher speed, or push (- ) the
switch for lower speed. To turn the
fan speed control off, press the front
blower OFF button.
Air conditioning
Press the A/C button to turn the air con- ditioning system on (indicator light willilluminate).
Press the button again to turn the air
conditioning system off.
OFF mode
Press the front blower OFF button to turn off the front air climate control system.
However, you can still operate the air
intake buttons as long as the ignition
switch is in the ON position.
OEL049129ROEL049130ROEL049131R
EL UK 4A.QXP 1/25/2010 9:51 AM Page 102
Page 523 of 560
4 111
Features of your vehicle
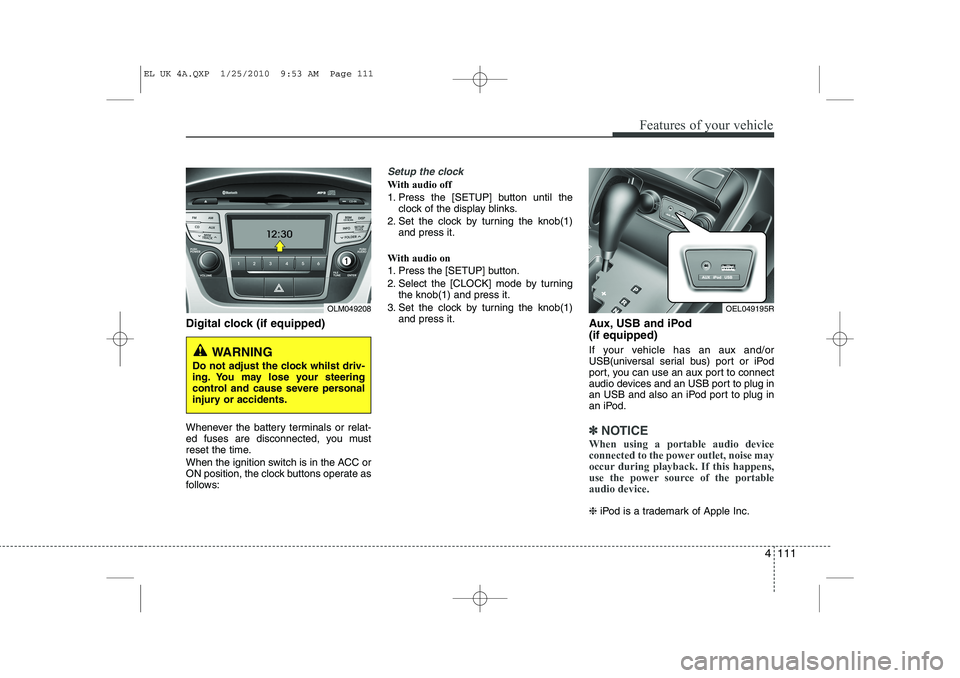
Digital clock (if equipped)
Whenever the battery terminals or relat-
ed fuses are disconnected, you must
reset the time.
When the ignition switch is in the ACC or
ON position, the clock buttons operate as
follows:
Setup the clock
With audio off
1. Press the [SETUP] button until theclock of the display blinks.
2. Set the clock by turning the knob(1) and press it.
With audio on
1. Press the [SETUP] button.
2. Select the [CLOCK] mode by turning the knob(1) and press it.
3. Set the clock by turning the knob(1) and press it. Aux, USB and iPod (if equipped)
If your vehicle has an aux and/or
USB(universal serial bus) port or iPod
port, you can use an aux port to connect
audio devices and an USB port to plug in
an USB and also an iPod port to plug in
an iPod.
✽✽NOTICE
When using a portable audio device
connected to the power outlet, noise may
occur during playback. If this happens,
use the power source of the portableaudio device.
❈ iPod is a trademark of Apple Inc.
OLM049208
WARNING
Do not adjust the clock whilst driv-
ing. You may lose your steering
control and cause severe personal
injury or accidents.
OEL049195R
EL UK 4A.QXP 1/25/2010 9:53 AM Page 111
Page 529 of 560
4 117
Features of your vehicle
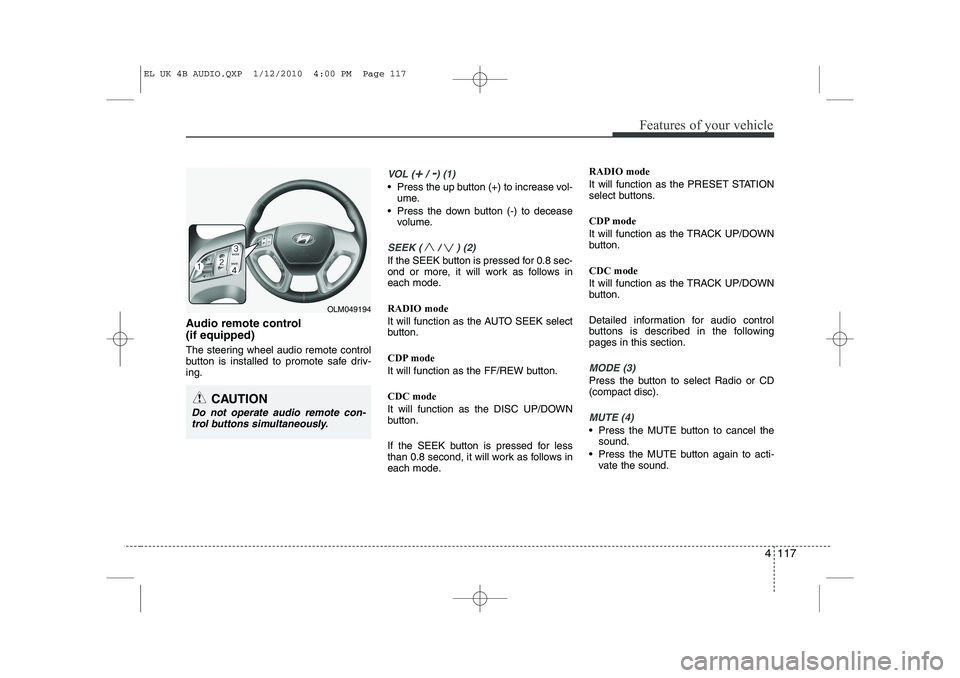
Audio remote control (if equipped)
The steering wheel audio remote control
button is installed to promote safe driv-ing.
VOL (+/ -) (1)
• Press the up button (+) to increase vol-ume.
Press the down button (-) to decease volume.
SEEK ( / ) (2)
If the SEEK button is pressed for 0.8 sec-
ond or more, it will work as follows in
each mode. RADIO mode
It will function as the AUTO SEEK select
button.
CDP mode
It will function as the FF/REW button. CDC mode
It will function as the DISC UP/DOWN
button.
If the SEEK button is pressed for less
than 0.8 second, it will work as follows in
each mode. RADIO mode
It will function as the PRESET STATION
select buttons.
CDP mode
It will function as the TRACK UP/DOWN
button. CDC mode
It will function as the TRACK UP/DOWN
button.
Detailed information for audio control
buttons is described in the followingpages in this section.
MODE (3)
Press the button to select Radio or CD (compact disc).
MUTE (4)
Press the MUTE button to cancel the
sound.
Press the MUTE button again to acti- vate the sound.
CAUTION
Do not operate audio remote con-
trol buttons simultaneously.
OLM049194
EL UK 4B AUDIO.QXP 1/12/2010 4:00 PM Page 117
Page 535 of 560
4 123
Features of your vehicle
1. Power ON/OFF Button &Volume Control Button
Turns on/off the set when the IGNITION
SWITCH is on ACC or ON. If the button
is turned to the right, it increases the vol-
ume and left,decreases the volume.
Press this button to turn the audio sys- tem ON or OFF. (EUROPE MODEL
ONLY)
Depending on the model if the ignition switch is not on ACC or ON position.
the “Battery Discharge” warningappears on LCD after 10 seconds of
power-up, and automatically turns off
after 1 hours of operation.
Adjusts the volume of the car audio system. Rotate clockwise to increase
the volume or counterclockwise to
decrease.
2. FM Selection Button
Turns to FM mode and toggles FM1and
FM2 when the button is pressed each
time. ❈ May change in order of FM1 ➟FM2 ➟
FMA in some models. 3. AM Selection Button
Pressing the [AM] button selects the AM
band. AM Mode is displayed on the LCD. ❈
May change in order of AM ➟AMA in
some models.
4. Automatic Channel Selection Button
When the [SEEK ] button is pressed, it increases the band frequency to auto-
matically select channel. Stops at the
previous frequency if no channel is
found.
5. Preset Button
Push [1]~[6] buttons less than 0.8 sec-
ond to play the channel saved in each
button. Push Preset button for 0.8 sec-
ond or longer to save current channel to
the respective button with a beep. 6. AST(AUTO STORE Button)
When the button is pressed, it automati-
cally selects and saves channels with
high reception rate to PRESET buttons
[1]~[6] and plays the channel saved in
PRESET1. If no channel is saved after
AST, it will play the previous channel.
Saves only to the Preset memory
(1)~(6) of FMA or AMA mode in some
models.
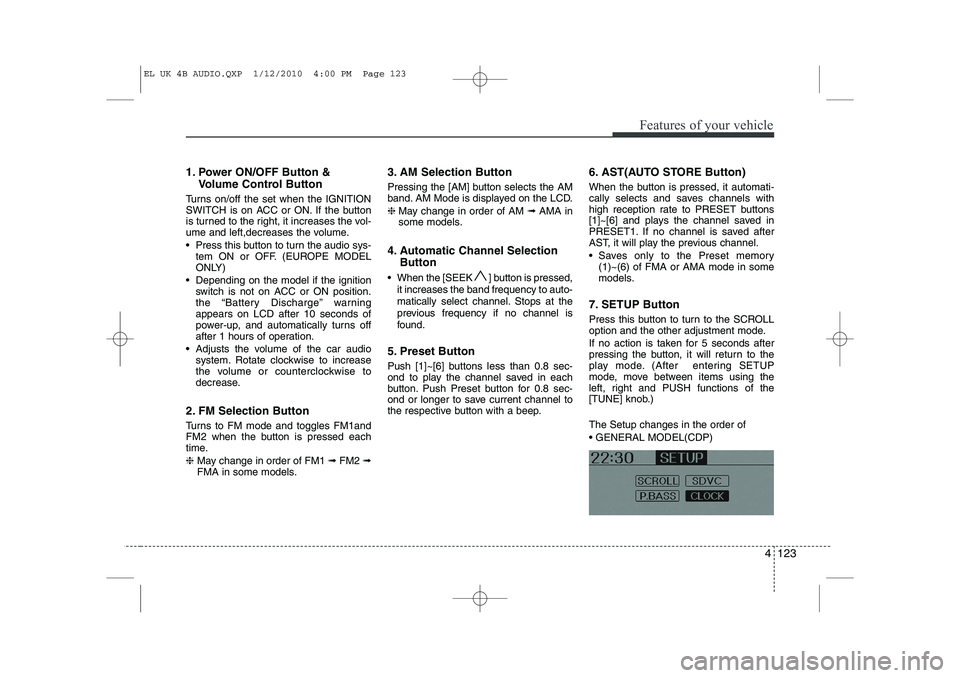
7. SETUP Button
Press this button to turn to the SCROLL
option and the other adjustment mode.
If no action is taken for 5 seconds after
pressing the button, it will return to the
play mode. (After entering SETUP
mode, move between items using the
left, right and PUSH functions of the
[TUNE] knob.) The Setup changes in the order of GENERAL MODEL(CDP)
EL UK 4B AUDIO.QXP 1/12/2010 4:00 PM Page 123