2011 HYUNDAI IX35 ECO mode
[x] Cancel search: ECO modePage 169 of 560
Features of your vehicle
94
4
Air conditioning system operation tips
If the vehicle has been parked in direct
sunlight during hot weather, open the
windows for a short time to let the hot
air inside the vehicle escape.
To help reduce moisture inside of the windows on rainy or humid days,
decrease the humidity inside the vehi-
cle by operating the air conditioningsystem.
During air conditioning system opera- tion, you may occasionally notice aslight change in engine speed as the
air conditioning compressor cycles.
This is a normal system operation
characteristic.
Use the air conditioning system every month only for a few minutes to ensure
maximum system performance. When using the air conditioning sys-
tem, you may notice clear water drip-
ping (or even puddling) on the ground
under the passenger side of the vehi-
cle. This is a normal system operation
characteristic.
Operating the air conditioning system in the recirculated air position provides
maximum cooling, however, continual
operation in this mode may cause the
air inside the vehicle to become stale.
During cooling operation, you may occasionally notice a misty air flow
because of rapid cooling and humid air
intake. This is a normal system opera-
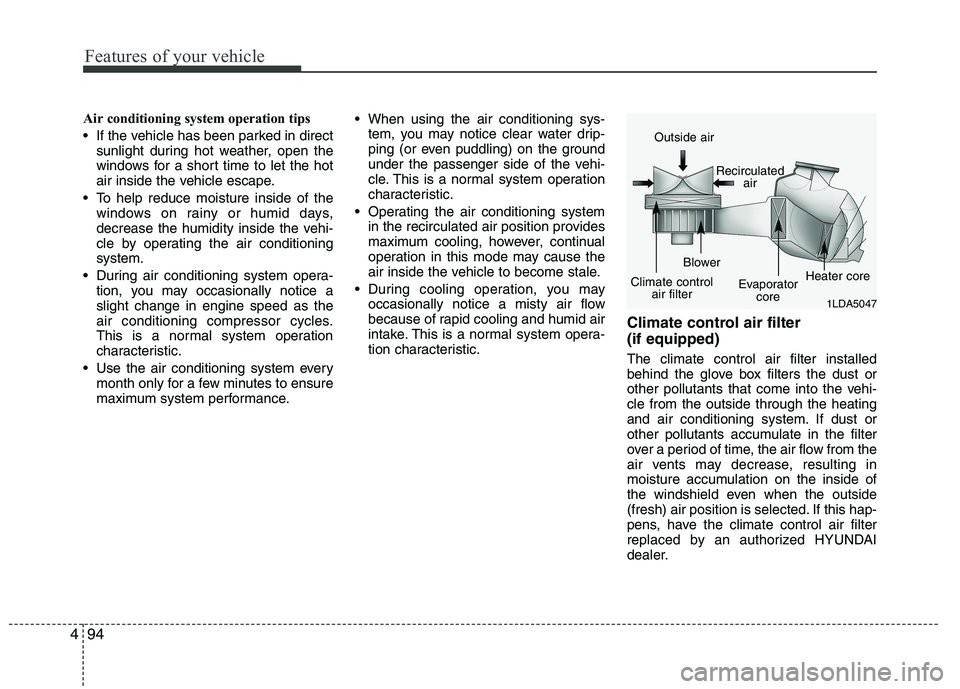
tion characteristic. Climate control air filter (if equipped) The climate control air filter installed
behind the glove box filters the dust or
other pollutants that come into the vehi-cle from the outside through the heating
and air conditioning system. If dust or
other pollutants accumulate in the filter
over a period of time, the air flow from the
air vents may decrease, resulting in
moisture accumulation on the inside of
the windshield even when the outside
(fresh) air position is selected. If this hap-
pens, have the climate control air filter
replaced by an authorized HYUNDAI
dealer.
1LDA5047
Outside air
Recirculatedair
Climate control air filter Blower
Evaporatorcore Heater core
Page 173 of 560

Features of your vehicle
98
4
Manual heating and air condition- ing The heating and cooling system can be
controlled manually by pressing buttons
or turning knob(s) other than the AUTO
button. In this case, the system workssequentially according to the order of
buttons or knob(s) selected.
1. Start the engine.
2. Set the mode to the desired position.
For improving the effectiveness of heating and cooling;- Heating: - Cooling:
3. Set the temperature control to the desired position.
4. Set the air intake control to the outside (fresh) air position.
5. Set the fan speed control to the desired speed.
6. If air conditioning is desired, turn the air conditioning system on.
Press the AUTO button in order to con-
vert to full automatic control of the sys-tem.
Mode selection
The mode selection button controls the
direction of the air flow through the venti-lation system.
Refer to the illustration in the “Manual cli- mate control system”.
If you push the button once, the corre-
sponding switch will turn on, and if you
push the button again, the switch will turn
off. Face-Level (B, D)
Air flow is directed toward the upper body
and face. Additionally, each outlet can becontrolled to direct the air dischargedfrom the outlet.
Floor-Level (C, E, A, D)
Most of the air flow is directed to the
floor.
Defrost-Level (A, D)
Most of the air flow is directed to thewindshield.
Also you may select 2~3 modes at the
same time for desired air flow.
- face ( ) + floor ( ) mode
- face ( ) + defrost ( ) mode
- floor ( ) + defrost ( ) mode
- face ( ) + floor ( ) + defrost ( ) mode
OEL049123
Page 176 of 560
4101
Features of your vehicle
Adjusting the driver and passenger side
temperature equally
1. Press the DUAL button again to deac-tivate DUAL mode. The passenger
side temperature will be set to the
same temperature as the driver side.
2. Operate the driver side temperature control button. The driver and passen-
ger side temperature will be adjusted
equally.
Temperature conversion (if equipped)
You can switch the temperature mode
between Centigrade to Fahrenheit as fol-
lows:
While pressing the OFF button, press the
AUTO button for 3 seconds or more.
The display will change from Centigrade
to Fahrenheit, or from Fahrenheit to
Centigrade.
If the battery has been discharged or dis-
connected, the temperature mode dis-
play will reset to Centigrade.
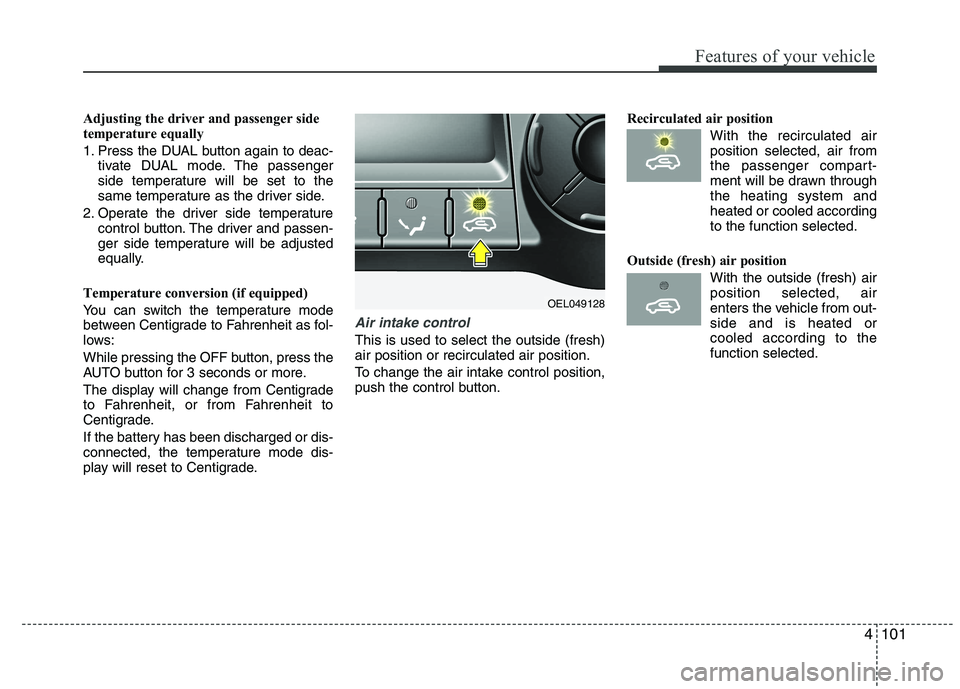
Air intake control
This is used to select the outside (fresh) air position or recirculated air position.
To change the air intake control position,
push the control button. Recirculated air position
With the recirculated airposition selected, air from
the passenger compart-
ment will be drawn throughthe heating system andheated or cooled according
to the function selected.
Outside (fresh) air position With the outside (fresh) airposition selected, air
enters the vehicle from out-side and is heated orcooled according to the
function selected.
OEL049128
Page 194 of 560
4119
Features of your vehicle
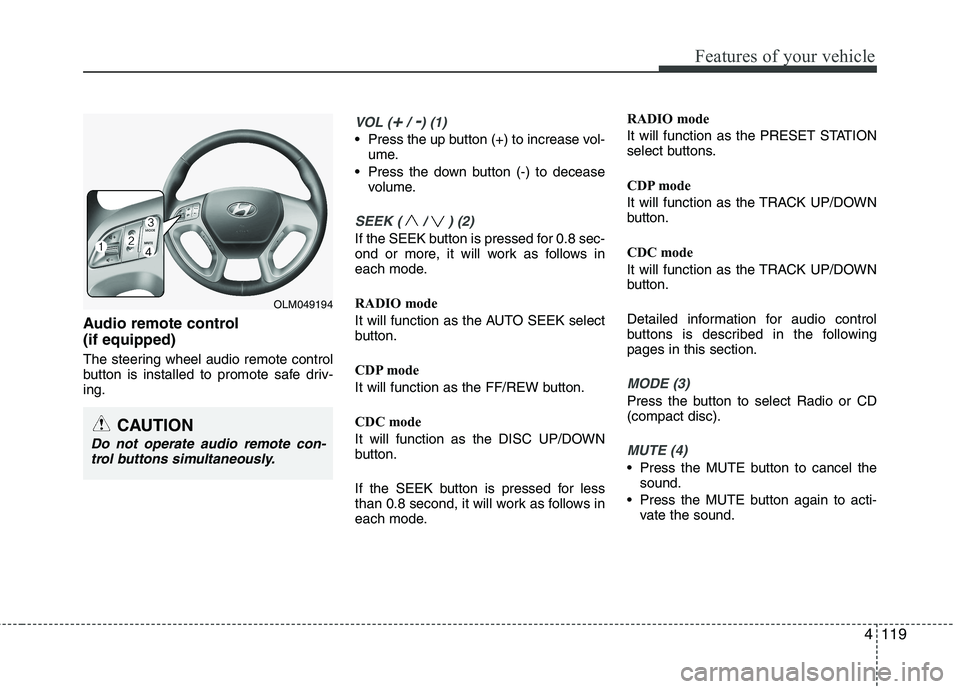
Audio remote control (if equipped)
The steering wheel audio remote control
button is installed to promote safe driv-ing.
VOL (+/ -) (1)
• Press the up button (+) to increase vol-ume.
Press the down button (-) to decease volume.
SEEK ( / ) (2)
If the SEEK button is pressed for 0.8 sec-
ond or more, it will work as follows in
each mode.
RADIO mode
It will function as the AUTO SEEK select
button.
CDP mode
It will function as the FF/REW button.
CDC mode
It will function as the DISC UP/DOWN
button.
If the SEEK button is pressed for less
than 0.8 second, it will work as follows in
each mode. RADIO mode
It will function as the PRESET STATION
select buttons.
CDP mode
It will function as the TRACK UP/DOWN
button.
CDC mode
It will function as the TRACK UP/DOWN
button.
Detailed information for audio control
buttons is described in the followingpages in this section.
MODE (3)
Press the button to select Radio or CD (compact disc).
MUTE (4)
Press the MUTE button to cancel the
sound.
Press the MUTE button again to acti- vate the sound.
CAUTION
Do not operate audio remote con-
trol buttons simultaneously.
OLM049194
Page 200 of 560
4125
Features of your vehicle
1. Power ON/OFF Button &Volume Control Button
Turns on/off the set when the IGNITION
SWITCH is on ACC or ON. If the button
is turned to the right, it increases the vol-
ume and left,decreases the volume.
Press this button to turn the audio sys- tem ON or OFF. (EUROPE MODEL
ONLY)
Depending on the model if the ignition switch is not on ACC or ON position.
the “Battery Discharge” warningappears on LCD after 10 seconds of
power-up, and automatically turns off
after 1 hours of operation.
Adjusts the volume of the car audio system. Rotate clockwise to increase
the volume or counterclockwise to
decrease.
2. FM Selection Button
Turns to FM mode and toggles FM1and
FM2 when the button is pressed each
time. ❈ May change in order of FM1 ➟FM2 ➟
FMA in some models. 3. AM Selection Button
Pressing the [AM] button selects the AM
band. AM Mode is displayed on the LCD. ❈
May change in order of AM ➟AMA in
some models.
4. Automatic Channel Selection Button
When the [SEEK ] button is pressed, it increases the band frequency to auto-
matically select channel. Stops at the
previous frequency if no channel is
found.
5. Preset Button
Push [1]~[6] buttons less than 0.8 sec-
ond to play the channel saved in each
button. Push Preset button for 0.8 sec-
ond or longer to save current channel to
the respective button with a beep. 6. AST(AUTO STORE Button)
When the button is pressed, it automati-
cally selects and saves channels with
high reception rate to PRESET buttons
[1]~[6] and plays the channel saved in
PRESET1. If no channel is saved after
AST, it will play the previous channel.
Saves only to the Preset memory
(1)~(6) of FMA or AMA mode in some
models.
7. SETUP Button
Press this button to turn to the SCROLL
option and the other adjustment mode.
If no action is taken for 5 seconds after
pressing the button, it will return to the
play mode. (After entering SETUP
mode, move between items using the
left, right and PUSH functions of the
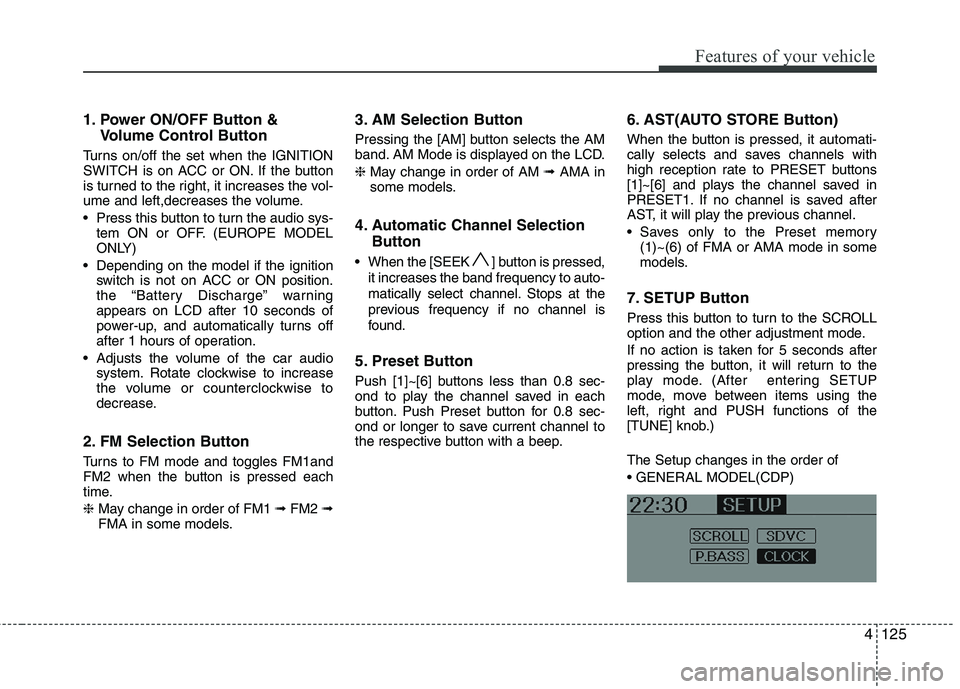
[TUNE] knob.) The Setup changes in the order of
Page 205 of 560

Features of your vehicle
130
4
1. CD Loading Slot
Please face printed side upward and
gently push in. When the ignition switch
is on ACC or ON and power is off, power
is automatically turned on if the CD is
loaded. This CDP supports only 12cm
CD. If VCD, Data CD are loaded,"Reading Error" message will appearand CD will be ejected.
2. CD Eject Button
Push button for less than 0.8 seconds
to eject the CD during CD playback. This
button is enabled when ignition switch is
off.
Press this button for more than 0.8 sec-
onds to eject all discs inside the deck in
respective order.
3. INFO Button
Displays the information of the current
CD TRACK(FILE) as below when the
button is pressed each time.
CDDA : Disc Title ➟ Disc Artist ➟ Tr a c k
Title ➟ Track Artist ➟ Total Track...
MP3/WMA : File Name ➟ Title ➟ Artist
➟ Album ➟ Folder ➟ Total File... (not
displayed if the information is not avail-
able on the DISC.) 4. Automatic Track Selection
Button
Push [ SEEK(TRACK)] button for less than 0.8 second to play from thebeginning of current song.
Push [ SEEK(TRACK)] button for less than 0.8 second and press again
within 1 seconds to play the previoussong.
Push [ SEEK(TRACK)] button for 0.8 or longer to initiate reverse direc-tion high speed sound search of cur-rent song.
Push [SEEK(TRACK)] ] button for less than 0.8 second to play the nextsong.
Push [SEEK(TRACK)] ] button for 0.8 or longer to initiate high speedsound search of current song.
5. RANDOM Play Button
Press this button for less than 0.8 second
to activate ‘RDM’ mode and more than
0.8 seconds to activate ‘ALL RDM’ mode.
RDM : Only files/tracks in a folder/disc are played back in a random
sequence.
ALL RDM(MP3/WMA Only) : All files in a disc are played back in the random
sequence. 6. REPEAT Button
Press this button for less than 0.8 second
to activate ‘RPT’ mode and more than 0.8
seconds to activate ‘FLD RPT’ mode.
RPT : Only a track(file) is repeatedly
played back.
FOLDER RPT(MP3/WMA Only) : Only files in a folder are repeatedly played
back.
ALL RPT(AUDIO CD Only) : Only files in a DISC are repeatedly played back.
7. CD or CD/AUX Selection Button If the CD is loaded, turns to CD mode.
If no CD, it displays "NO Disc" for 3 sec-
onds and returns to th previous mode.
If the auxiliary device is connected, it
switches to the AUX mode from the
other mode to play the sound from the
auxiliary player. If the CD is loaded,
turns to CD mode, and if a device is
connected to AUX then it toggles.
CDßAUXßCD... when the button is
pressed each time.(It will not turn to
AUX if the auxiliary device is not con-nected)
Page 206 of 560
4131
Features of your vehicle
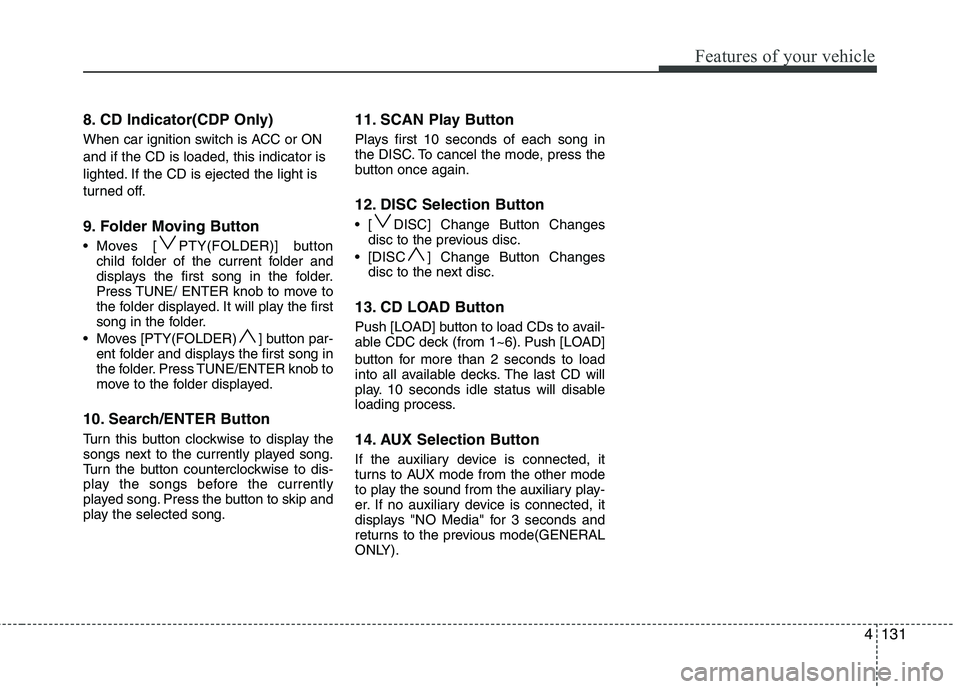
8. CD Indicator(CDP Only)
When car ignition switch is ACC or ON and if the CD is loaded, this indicator is
lighted. If the CD is ejected the light is
turned off.
9. Folder Moving Button
Moves [ PTY(FOLDER)] buttonchild folder of the current folder and
displays the first song in the folder.
Press TUNE/ ENTER knob to move to
the folder displayed. It will play the first
song in the folder.
Moves [PTY(FOLDER) ] button par- ent folder and displays the first song in
the folder. Press TUNE/ENTER knob to
move to the folder displayed.
10. Search/ENTER Button
Turn this button clockwise to display the
songs next to the currently played song.
Turn the button counterclockwise to dis-
play the songs before the currently
played song. Press the button to skip and
play the selected song. 11. SCAN Play Button
Plays first 10 seconds of each song in
the DISC. To cancel the mode, press the
button once again.
12. DISC Selection Button
[ DISC] Change Button Changes
disc to the previous disc.
[DISC ] Change Button Changes disc to the next disc.
13. CD LOAD Button
Push [LOAD] button to load CDs to avail-
able CDC deck (from 1~6). Push [LOAD]
button for more than 2 seconds to load
into all available decks. The last CD will
play. 10 seconds idle status will disable
loading process.
14. AUX Selection Button
If the auxiliary device is connected, it
turns to AUX mode from the other mode
to play the sound from the auxiliary play-
er. If no auxiliary device is connected, it
displays "NO Media" for 3 seconds and
returns to the previous mode(GENERAL
ONLY).
Page 207 of 560

Features of your vehicle
132
4
CAUTION IN USING USB DEVICE
To use the external USB device,
make sure the device is not
mounted when starting up thevehicle and mount the deviceafter starting up.
If you start the vehicle when the USB device is mounted, it maydamage the USB device. (USB isnot ESA)
If the vehicle is started up or turned off while the external USB
device is connected, the externalUSB device may not work.
It may not play inauthentic MP3 or WMA files.
1) It can only play MP3 files with the compression rate between8Kbps~320Kbps.
2) It can only play WMA music files with the compression ratebetween 8Kbps~320Kbps.
Take cautions for static electricity when mounting or dismountingthe external USB device.
Encoded MP3 PLAYER is not rec- ognizable.
(Continued)
(Continued) Depending on the condition of the external USB device, the con-nected external USB device canbe unrecognizable.
When the formatted byte/sector setting of External USB devices isnot either 512BYTE or 2048BYTE,then the device will not be recog-
nized.
Only the USB device formatted to FAT 12/16/32.
USB device without USB IF authentication may not be recog-nizable.
Make sure the USB connection terminal does not come in con-tact with human body or anyobject.
If you repeat mounting or dis- mounting USB device in a shortperiod of time, it may break the device.
You might hear strange noise when mounting or dismounting a
USB device.
(Continued)(Continued) If you dismount the external USB device during playback in USBmode, the external USB device
can be damaged or malfunction.Therefore, mount the external USB device when the engine isturned off or in another mode.
Depending on the type and capacity of the external USBdevice or the type of the files stored in the device, there is a dif-ference in the time taken for
recognition of the device, but thisis not a trouble Please wait for amoment.
Do not use the USB device for other purposes than playingmusic files.
Use of USB accessories such as the recharger or heater usingUSB I/F may lower the perform-
ance or cause trouble.
If you use devices such as the USB hub you purchased sepa-rately, the vehicle’s audio system may not recognize the USB
device. Connect the USB device directly to the multimedia termi-nal of the vehicle.
(Continued)