Page 491 of 560
479
Features of your vehicle
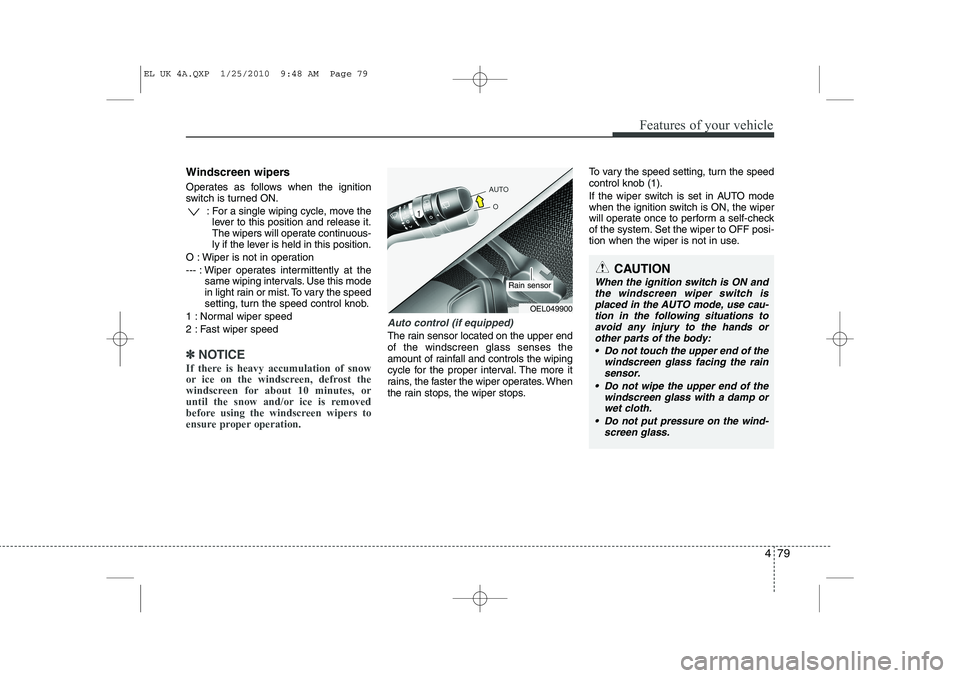
Windscreen wipers
Operates as follows when the ignition
switch is turned ON.: For a single wiping cycle, move thelever to this position and release it.
The wipers will operate continuous-
ly if the lever is held in this position.
O : Wiper is not in operation
--- : Wiper operates intermittently at the same wiping intervals. Use this mode
in light rain or mist. To vary the speed
setting, turn the speed control knob.
1 : Normal wiper speed
2 : Fast wiper speed
✽✽ NOTICE
If there is heavy accumulation of snow
or ice on the windscreen, defrost the
windscreen for about 10 minutes, or
until the snow and/or ice is removed
before using the windscreen wipers to
ensure proper operation.
Auto control (if equipped)
The rain sensor located on the upper end of the windscreen glass senses the
amount of rainfall and controls the wiping
cycle for the proper interval. The more it
rains, the faster the wiper operates. When
the rain stops, the wiper stops. To vary the speed setting, turn the speedcontrol knob (1).
If the wiper switch is set in AUTO mode
when the ignition switch is ON, the wiper
will operate once to perform a self-check
of the system. Set the wiper to OFF posi-
tion when the wiper is not in use.
CAUTION
When the ignition switch is ON and
the windscreen wiper switch is placed in the AUTO mode, use cau-
tion in the following situations to avoid any injury to the hands orother parts of the body:
Do not touch the upper end of the windscreen glass facing the rain
sensor.
Do not wipe the upper end of the windscreen glass with a damp orwet cloth.
Do not put pressure on the wind- screen glass.
OEL049900
Rain sensor
EL UK 4A.QXP 1/25/2010 9:48 AM Page 79
Page 494 of 560
Features of your vehicle
82
4
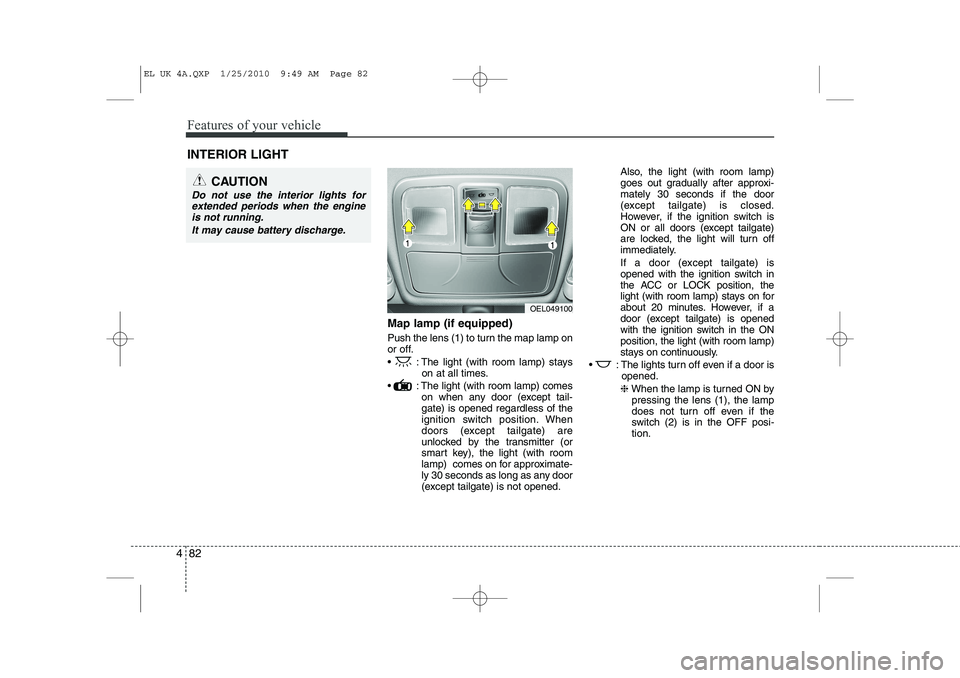
Map lamp (if equipped)
Push the lens (1) to turn the map lamp on
or off.
: The light (with room lamp) stays
on at all times.
: The light (with room lamp) comes on when any door (except tail- gate) is opened regardless of the
ignition switch position. When
doors (except tailgate) are
unlocked by the transmitter (or
smart key), the light (with room
lamp) comes on for approximate-
ly 30 seconds as long as any door
(except tailgate) is not opened. Also, the light (with room lamp)
goes out gradually after approxi-mately 30 seconds if the door
(except tailgate) is closed.
However, if the ignition switch is
ON or all doors (except tailgate)
are locked, the light will turn off
immediately.
If a door (except tailgate) is
opened with the ignition switch in
the ACC or LOCK position, the
light (with room lamp) stays on for
about 20 minutes. However, if a
door (except tailgate) is opened
with the ignition switch in the ONposition, the light (with room lamp)
stays on continuously.
: The lights turn off even if a door is opened.
❈ When the lamp is turned ON by
pressing the lens (1), the lamp
does not turn off even if the
switch (2) is in the OFF posi-tion.
INTERIOR LIGHT
CAUTION
Do not use the interior lights for
extended periods when the engine
is not running.
It may cause battery discharge.
OEL049100
EL UK 4A.QXP 1/25/2010 9:49 AM Page 82
Page 497 of 560
485
Features of your vehicle
✽✽NOTICE
If you want to defrost and defog on the
front windscreen, refer to “Windscreen
Defrosting and Defogging” in this sec-tion.
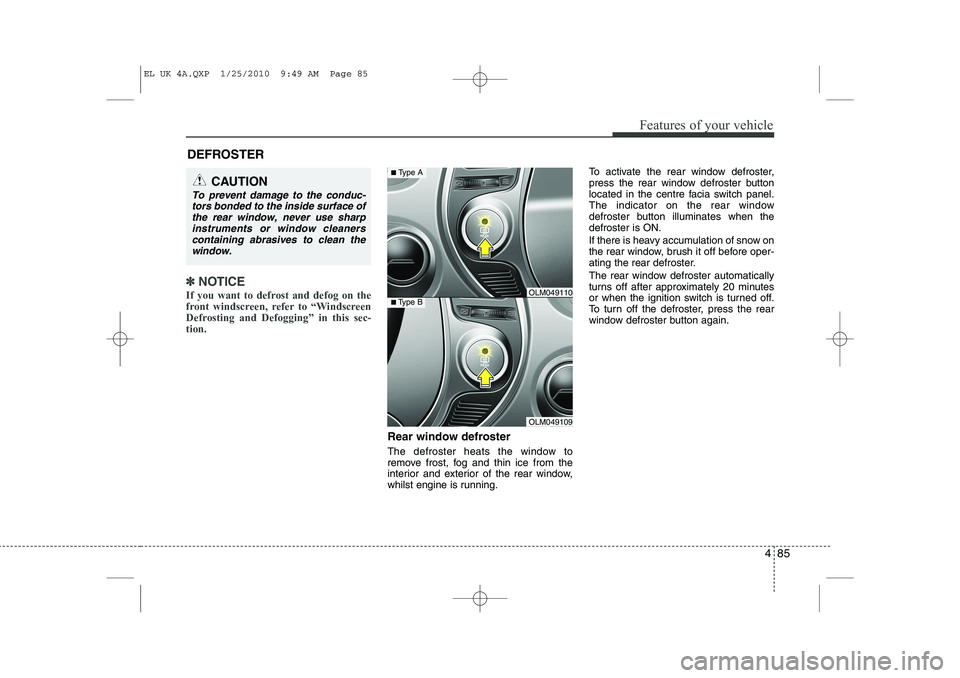
Rear window defroster
The defroster heats the window to
remove frost, fog and thin ice from the
interior and exterior of the rear window,
whilst engine is running. To activate the rear window defroster,
press the rear window defroster button
located in the centre facia switch panel.
The indicator on the rear window
defroster button illuminates when thedefroster is ON.
If there is heavy accumulation of snow on
the rear window, brush it off before oper-
ating the rear defroster.
The rear window defroster automatically
turns off after approximately 20 minutes
or when the ignition switch is turned off.
To turn off the defroster, press the rear
window defroster button again.
DEFROSTER
CAUTION
To prevent damage to the conduc-
tors bonded to the inside surface of
the rear window, never use sharpinstruments or window cleanerscontaining abrasives to clean the window.
OLM049109
■ Type BOLM049110
■Type A
EL UK 4A.QXP 1/25/2010 9:49 AM Page 85
Page 498 of 560
Features of your vehicle
86
4
Outside mirror defroster
(if equipped)
If your vehicle is equipped with the out-
side mirror defrosters, they will operate at
the same time you turn on the rear win-
dow defroster.
Wiper deicer (if equipped)
Without smart key
The engine must be running to enable
this feature. To activate the front wiper
deicer, press the front wiper deicer but-
ton. The indicator on the button illumi-nates when the deicer is ON. The front wiper deicer automatically
turns off after 20 minutes or when the
ignition switch is turned off. To turn off the
deicer, press the front wiper deicer but-ton again. With smart key
If your vehicle is equipped with the wiper
deicer, it will operate at the same time
you turn on the rear window defroster.
OLM049104R
EL UK 4A.QXP 1/25/2010 9:49 AM Page 86
Page 504 of 560
Features of your vehicle
92
4
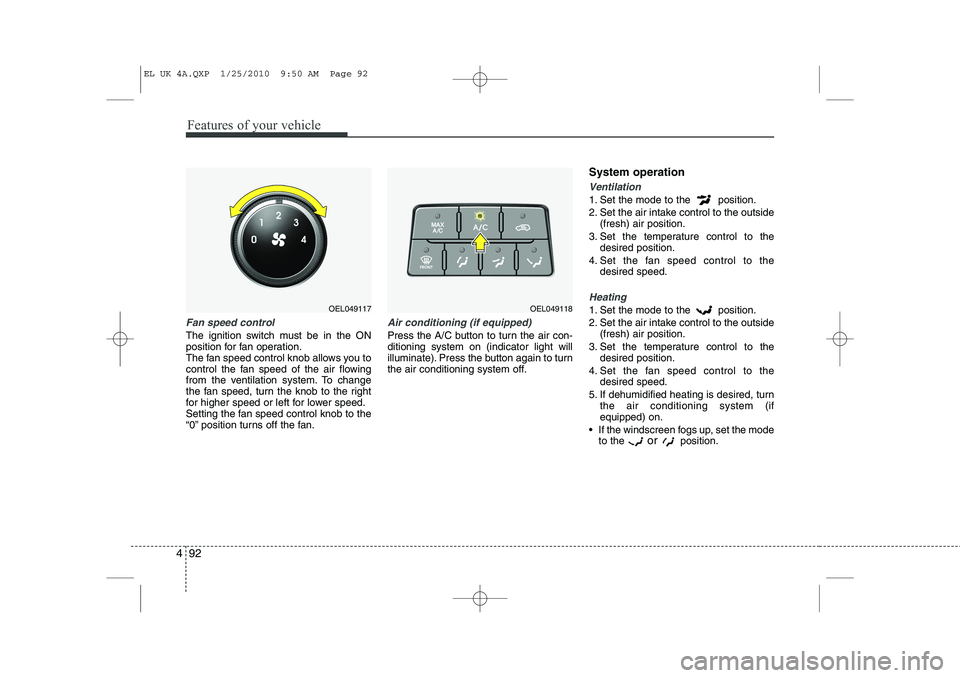
Fan speed control
The ignition switch must be in the ON
position for fan operation.
The fan speed control knob allows you to
control the fan speed of the air flowing
from the ventilation system. To change
the fan speed, turn the knob to the right
for higher speed or left for lower speed.
Setting the fan speed control knob to the
“0” position turns off the fan.
Air conditioning (if equipped)
Press the A/C button to turn the air con- ditioning system on (indicator light will
illuminate). Press the button again to turn
the air conditioning system off. System operation
Ventilation
1. Set the mode to the position.
2. Set the air intake control to the outside
(fresh) air position.
3. Set the temperature control to the desired position.
4. Set the fan speed control to the desired speed.
Heating
1. Set the mode to the position.
2. Set the air intake control to the outside(fresh) air position.
3. Set the temperature control to the desired position.
4. Set the fan speed control to the desired speed.
5. If dehumidified heating is desired, turn the air conditioning system (if equipped) on.
If the windscreen fogs up, set the mode to the or
position.OEL049118OEL049117
EL UK 4A.QXP 1/25/2010 9:50 AM Page 92
Page 514 of 560
Features of your vehicle
102
4
Fan speed control
The fan speed can be set to the desired
speed by operating the fan speed control
button.
To change the fan speed, press ( +) the
switch for higher speed, or push (- ) the
switch for lower speed. To turn the
fan speed control off, press the front
blower OFF button.
Air conditioning
Press the A/C button to turn the air con- ditioning system on (indicator light willilluminate).
Press the button again to turn the air
conditioning system off.
OFF mode
Press the front blower OFF button to turn off the front air climate control system.
However, you can still operate the air
intake buttons as long as the ignition
switch is in the ON position.
OEL049129ROEL049130ROEL049131R
EL UK 4A.QXP 1/25/2010 9:51 AM Page 102
Page 523 of 560
4 111
Features of your vehicle
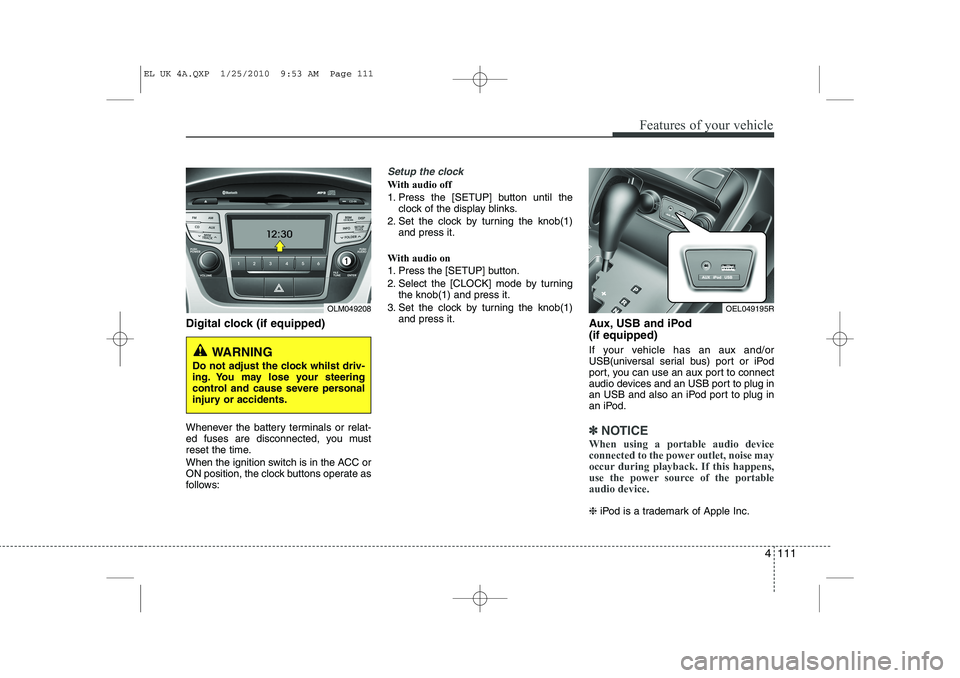
Digital clock (if equipped)
Whenever the battery terminals or relat-
ed fuses are disconnected, you must
reset the time.
When the ignition switch is in the ACC or
ON position, the clock buttons operate as
follows:
Setup the clock
With audio off
1. Press the [SETUP] button until theclock of the display blinks.
2. Set the clock by turning the knob(1) and press it.
With audio on
1. Press the [SETUP] button.
2. Select the [CLOCK] mode by turning the knob(1) and press it.
3. Set the clock by turning the knob(1) and press it. Aux, USB and iPod (if equipped)
If your vehicle has an aux and/or
USB(universal serial bus) port or iPod
port, you can use an aux port to connect
audio devices and an USB port to plug in
an USB and also an iPod port to plug in
an iPod.
✽✽NOTICE
When using a portable audio device
connected to the power outlet, noise may
occur during playback. If this happens,
use the power source of the portableaudio device.
❈ iPod is a trademark of Apple Inc.
OLM049208
WARNING
Do not adjust the clock whilst driv-
ing. You may lose your steering
control and cause severe personal
injury or accidents.
OEL049195R
EL UK 4A.QXP 1/25/2010 9:53 AM Page 111
Page 535 of 560
4 123
Features of your vehicle
1. Power ON/OFF Button &Volume Control Button
Turns on/off the set when the IGNITION
SWITCH is on ACC or ON. If the button
is turned to the right, it increases the vol-
ume and left,decreases the volume.
Press this button to turn the audio sys- tem ON or OFF. (EUROPE MODEL
ONLY)
Depending on the model if the ignition switch is not on ACC or ON position.
the “Battery Discharge” warningappears on LCD after 10 seconds of
power-up, and automatically turns off
after 1 hours of operation.
Adjusts the volume of the car audio system. Rotate clockwise to increase
the volume or counterclockwise to
decrease.
2. FM Selection Button
Turns to FM mode and toggles FM1and
FM2 when the button is pressed each
time. ❈ May change in order of FM1 ➟FM2 ➟
FMA in some models. 3. AM Selection Button
Pressing the [AM] button selects the AM
band. AM Mode is displayed on the LCD. ❈
May change in order of AM ➟AMA in
some models.
4. Automatic Channel Selection Button
When the [SEEK ] button is pressed, it increases the band frequency to auto-
matically select channel. Stops at the
previous frequency if no channel is
found.
5. Preset Button
Push [1]~[6] buttons less than 0.8 sec-
ond to play the channel saved in each
button. Push Preset button for 0.8 sec-
ond or longer to save current channel to
the respective button with a beep. 6. AST(AUTO STORE Button)
When the button is pressed, it automati-
cally selects and saves channels with
high reception rate to PRESET buttons
[1]~[6] and plays the channel saved in
PRESET1. If no channel is saved after
AST, it will play the previous channel.
Saves only to the Preset memory
(1)~(6) of FMA or AMA mode in some
models.
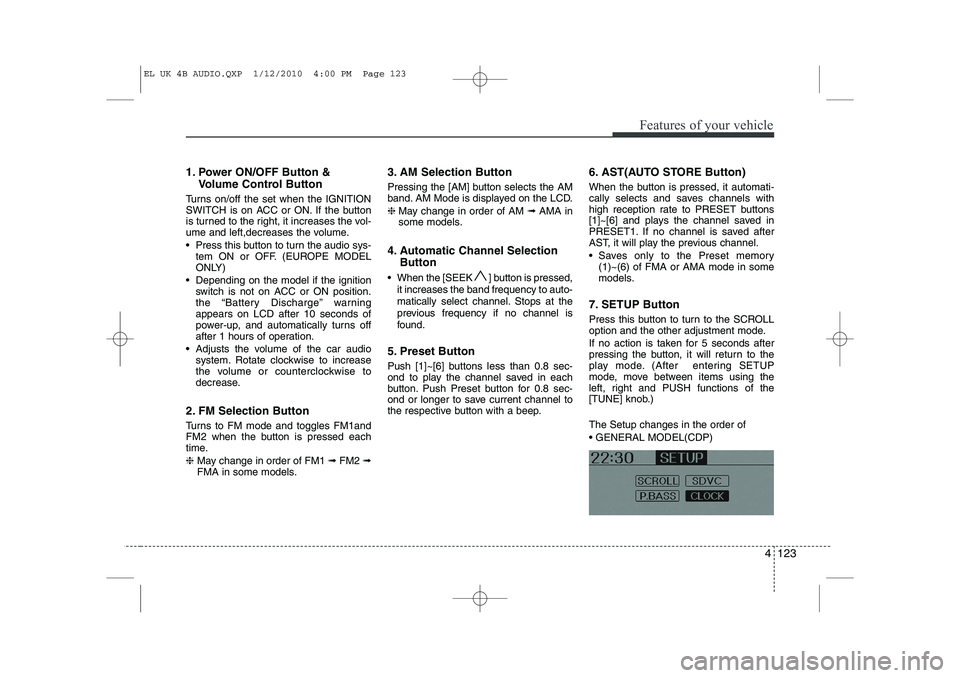
7. SETUP Button
Press this button to turn to the SCROLL
option and the other adjustment mode.
If no action is taken for 5 seconds after
pressing the button, it will return to the
play mode. (After entering SETUP
mode, move between items using the
left, right and PUSH functions of the
[TUNE] knob.) The Setup changes in the order of GENERAL MODEL(CDP)
EL UK 4B AUDIO.QXP 1/12/2010 4:00 PM Page 123