Page 313 of 560

621
What to do in an emergency
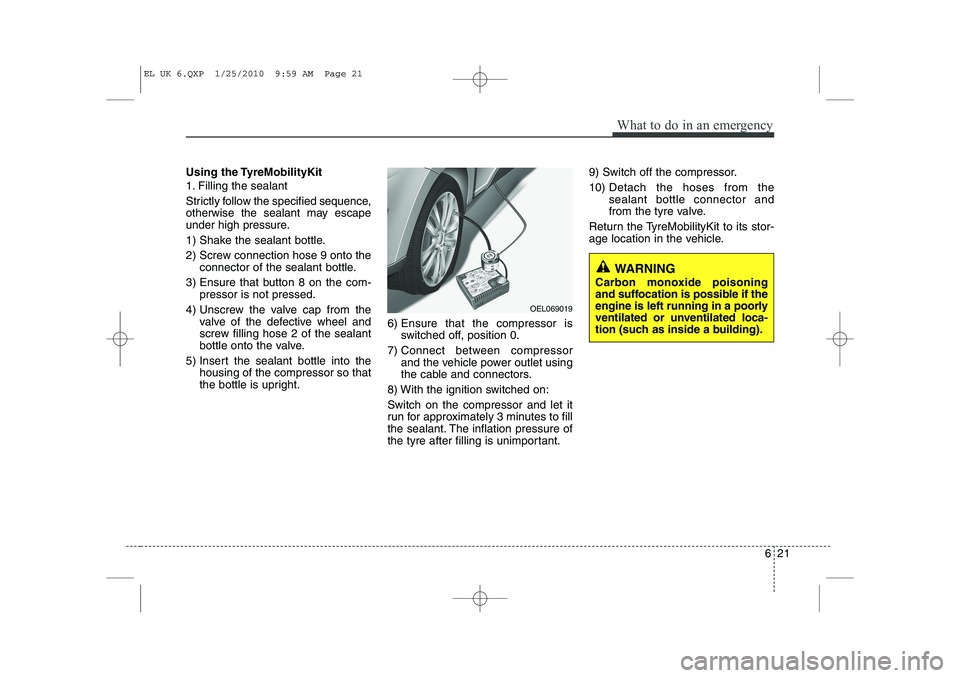
Using the TyreMobilityKit
1. Filling the sealant
Strictly follow the specified sequence,
otherwise the sealant may escape
under high pressure.
1) Shake the sealant bottle.
2) Screw connection hose 9 onto theconnector of the sealant bottle.
3) Ensure that button 8 on the com- pressor is not pressed.
4) Unscrew the valve cap from the valve of the defective wheel and
screw filling hose 2 of the sealant
bottle onto the valve.
5) Insert the sealant bottle into the housing of the compressor so that
the bottle is upright. 6) Ensure that the compressor is
switched off, position 0.
7) Connect between compressor and the vehicle power outlet using
the cable and connectors.
8) With the ignition switched on: Switch on the compressor and let it
run for approximately 3 minutes to fill
the sealant. The inflation pressure of
the tyre after filling is unimportant. 9) Switch off the compressor. 10)
Detach the hoses from the sealant bottle connector and
from the tyre valve.
Return the TyreMobilityKit to its stor-
age location in the vehicle.
WARNING
Carbon monoxide poisoning
and suffocation is possible if the
engine is left running in a poorly
ventilated or unventilated loca-
tion (such as inside a building).
OEL069019
EL UK 6.QXP 1/25/2010 9:59 AM Page 21
Page 317 of 560
625
What to do in an emergency
When towing your vehicle in an emer- gency without wheel dollies :
1. Set the ignition switch in the ACC posi-tion.
2. Place the transaxle shift lever in N (Neutral).
3. Release the parking brake.
Removable towing hook (if equipped)
1. Open the tailgate, and remove the tow-ing hook from the tool case.
2. Remove the hole cover pressing the lower part of the cover on the front or
rear bumper. 3. Install the towing hook by turning it
clockwise into the hole until it is fullysecured.
4. Remove the towing hook and install the cover after use.
CAUTION
Failure to place the transaxle shift
lever in N (Neutral) may cause inter-
nal damage to the transaxle.OLM069013
OLM069016L
■ Front
■Rear (if equipped)
EL UK 6.QXP 1/25/2010 10:00 AM Page 25
Page 319 of 560

627
What to do in an emergency
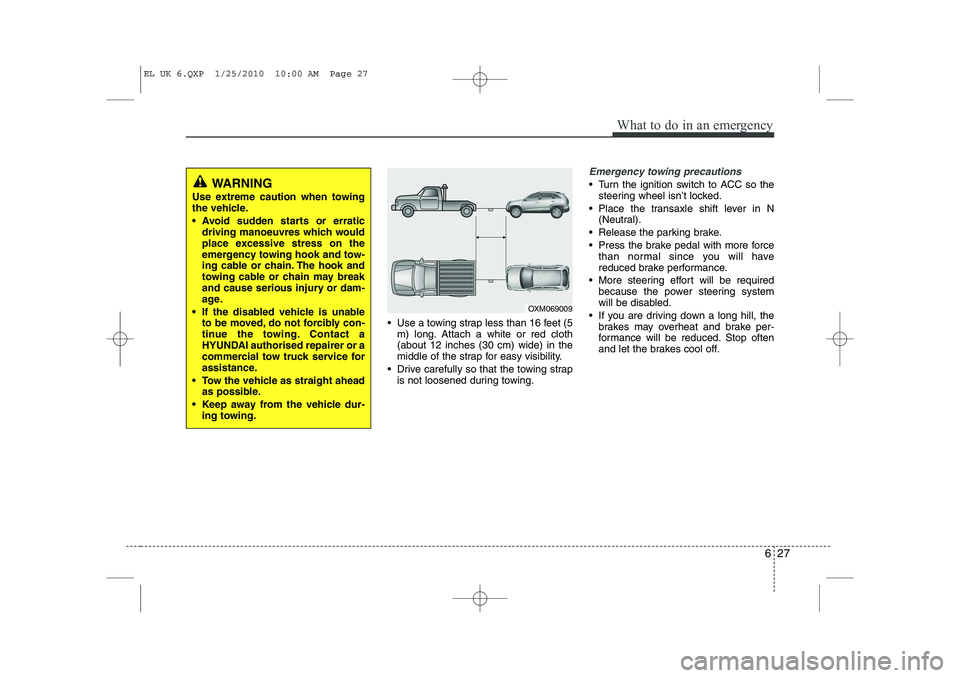
Use a towing strap less than 16 feet (5m) long. Attach a white or red cloth (about 12 inches (30 cm) wide) in the
middle of the strap for easy visibility.
Drive carefully so that the towing strap is not loosened during towing.
Emergency towing precautions
Turn the ignition switch to ACC so thesteering wheel isn’t locked.
Place the transaxle shift lever in N (Neutral).
Release the parking brake.
Press the brake pedal with more force than normal since you will have
reduced brake performance.
More steering effort will be required because the power steering system
will be disabled.
If you are driving down a long hill, the brakes may overheat and brake per-
formance will be reduced. Stop often
and let the brakes cool off.WARNING
Use extreme caution when towing
the vehicle.
Avoid sudden starts or erratic driving manoeuvres which would
place excessive stress on the
emergency towing hook and tow-
ing cable or chain. The hook and
towing cable or chain may break
and cause serious injury or dam-
age.
If the disabled vehicle is unable to be moved, do not forcibly con-
tinue the towing. Contact a
HYUNDAI authorised repairer or a
commercial tow truck service for
assistance.
Tow the vehicle as straight ahead as possible.
Keep away from the vehicle dur- ing towing.
OXM069009
EL UK 6.QXP 1/25/2010 10:00 AM Page 27
Page 320 of 560
What to do in an emergency
28
6
CAUTION - Automatic
transaxle
If the car is being towed with allfour wheels on the ground, it can
be towed only from the front. Besure that the transaxle is in neu-tral. Be sure the steering is unlocked by placing the ignition
switch in the ACC position. Adriver must be in the towed vehi- cle to operate the steering and
brakes.
To avoid serious damage to the automatic transaxle, limit thevehicle speed to 10 mph (15 km/h) and drive less than 1 mile (1.5
km) when towing.
Before towing, check the auto- matic transaxle fluid leak underyour vehicle. If the automatic
transaxle fluid is leaking, aflatbed equipment or towing dollymust be used.
EL UK 6.QXP 1/25/2010 10:00 AM Page 28
Page 338 of 560
Maintenance
18
7
FUEL FILTER (FOR DIESEL)
Draining water from fuel filter
The fuel filter for diesel engine plays an
important role of separating water from
fuel and accumulating the water in itsbottom.
If water accumulates in the fuel filter, the
warning light comes on when the ignition
switch is in the ON position. If this warning light illuminates,
take your car to a HYUNDAI
authorised repairer and have
drain the water and checkedthe system. Fuel filter cartridge replacement
✽✽NOTICE
When replacing the fuel filter cartridge, use HYUNDAI genuine parts.
OLM079011
CAUTION
If the water accumulated in the fuel filter is not drained at proper times,
damages to the major parts such asthe fuel system can be caused by water permeation in the fuel filter.
EL UK 7.QXP 1/25/2010 10:02 AM Page 18
Page 347 of 560

727
Maintenance
Battery recharging
Your vehicle has a maintenance-free,
calcium-based battery.
If the battery becomes discharged in ashort time (because, for example, the
headlights or interior lights were left on
whilst the vehicle was not in use),
recharge it by slow charging (trickle)
for 10 hours.
If the battery gradually discharges because of high electric load whilst the
vehicle is being used, recharge it at 20-
30A for two hours.(Continued)
When lifting a plastic-cased bat-tery, excessive pressure on the
case may cause battery acid to
leak, resulting in personal injury.
Lift with a battery carrier or with
your hands on opposite corners.
Never attempt to recharge the battery when the battery cablesare connected.
The electrical ignition system works with high voltage. Never
touch these components with theengine running or the ignition
switched on.
Failure to follow the above warn-
ings can result in serious bodily
injury or death.WARNING - Recharging
battery
When recharging the battery,
observe the following precautions:
The battery must be removed from the vehicle and placed in an area with good ventilation.
Do not allow cigarettes, sparks, or flame near the battery.
Watch the battery during charg- ing, and stop or reduce the charg-
ing rate if the battery cells begin
gassing (boiling) violently or if
the temperature of the electrolyte
of any cell exceeds 49°C (120°F).
Wear eye protection when check- ing the battery during charging.
(Continued)
EL UK 7.QXP 1/25/2010 10:03 AM Page 27
Page 360 of 560
Maintenance
40
7
Inner panel fuse replacement
1. Turn the ignition switch and all other
switches off.
2. Open the fuse panel cover. 3. Pull the suspected fuse straight out.
Use the removal tool provided in the
engine compartment fuse panel.
4. Check the removed fuse; replace it if it is blown.
5. Push in a new fuse of the same rating, and make sure it fits tightly in the clips.
If it fits loosely, consult a HYUNDAI
authorised repairer.
If you do not have a spare, use a fuse of the same rating from a circuit you may
not need for operating the vehicle, such as the cigar lighter fuse.
If the headlights or other electrical com-
ponents do not work and the fuses are
OK, check the fuse block in the engine
compartment. If a fuse is blown, it mustbe replaced.
OLM079020ROLM079021N
EL UK 7.QXP 1/25/2010 10:03 AM Page 40
Page 364 of 560

Maintenance
44
7
Inner fuse panel (Instrument panel)
No.Fuse ratingSymbolFuse NameCircuit Protected
110A
AUDIO 1
Audio, A/V & Navigation Head Unit
210A
ROOM LPIPS Control Module (B+), BCM, A/C Control Module, Data Link Connector,
Instrument Cluster(IND), RF Receiver, Ignition Key ILL. & Door Warning Switch,
Auto Light & Photo Sensor, MAP Lamp, Room Lamp,
Luggage Lamp, Driver/Passenger Vanity Lamp
310AMODULE 2IPS Control Module (ON Input), Electro Chromic Mirror, BCM, PDM,
Head Lamp Levelling Device Switch, Head Lamp Levelling Device Actuator LH/RH,
ICM Relay Box (Rear Seat Warmer Relay LH/RH)
410ASTARTE/R Fuse & Relay Box (RLY. 4 / 11 - Start / ATM P/N),
Burglar Alarm Relay
510AAIR BAG IND.Instrument Cluster (IND.)
610ACLUSTERInstrument Cluster (IND.), SBR Switch, Alternator,
Console Switch, BCM, Smart Key Control Module,
Smart Parking Assist Contorl Module, Audio, A/V & Navigation Head Unit
710AMODULE 4E/R Fuse & Relay Box (RLY. 1 - Blower), Rain Sensor,
Diesel Box (RLY. 2, 3 - PTC Heater Relay #2, #3),
A/C Control Module, Cluster Ionizer, Sunroof Motor
825APOWER OUTLET
2Cigarette Lighter & Front Power Outlet,
Rear Power Outlet
910AAUDIO 2Audio, A/V & Navigation Head Unit, AMP, PDM, BCM, Power Outside Mirror Switch,
Smart Key Control Module
POWER
CONNECTOR
POWER
CONNECTOR
EL UK 7.QXP 1/25/2010 10:04 AM Page 44