2011 Hyundai H-1 (Grand Starex) clock reset
[x] Cancel search: clock resetPage 89 of 346
419
Features of your vehicle
If the power window is not operated cor-
rectly, the automatic power window sys-
tem must be reset as follows:
1. Turn the ignition switch to the ON posi-tion.
2. Close driver’s window and continue pulling up on driver’s power window
switch for at least 1 second after the
window is completely closed.
Automatic reversal
If the upward movement of the window is
blocked by an object or part of the body,
the window will detect the resistance and
will stop upward movement. The window
will then lower approximately 30 cm (11.8
in.) to allow the object to be cleared.
If the window detects the resistance
while the power window switch is pulled
up continuously, the window will stop
upward movement then lower approxi-
mately 2.5 cm (1 in.). And if the power
window switch is pulled up continuously
again within 5 seconds after the window
is lowered by the automatic window
reversal feature, the automatic window
reversal will not operate.✽✽ NOTICE
The automatic reverse feature for the
driver’s window is only active when the
“auto up” feature is used by fully
pulling up the switch. The automatic
reverse feature will not operate if the
window is raised using the halfway posi-
tion on the power window switch.
D080200AFD
Manual windows (if equipped)
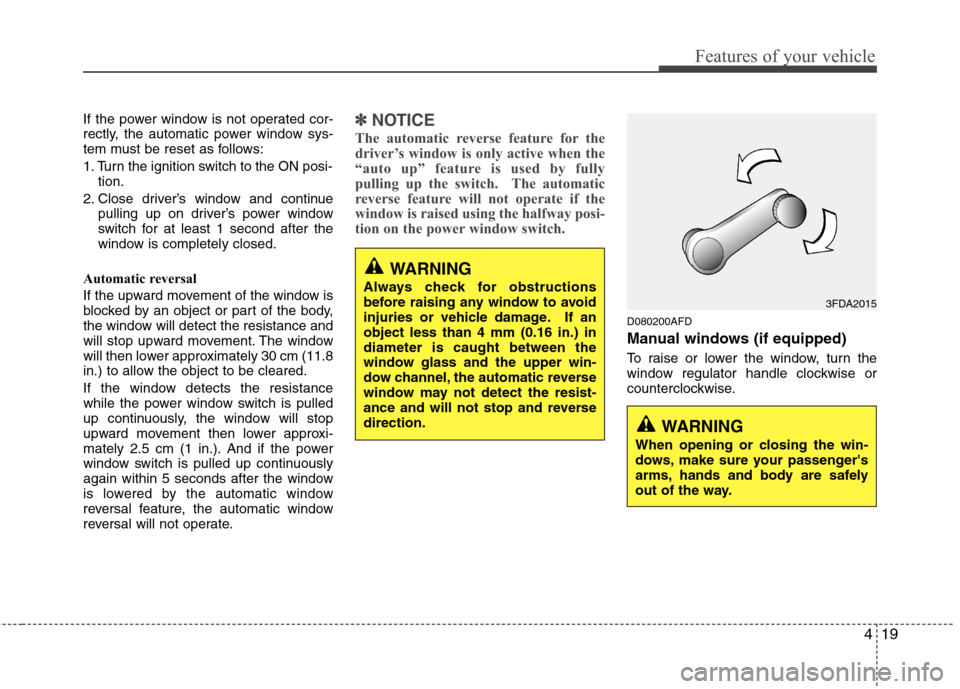
To raise or lower the window, turn the
window regulator handle clockwise or
counterclockwise.
WARNING
When opening or closing the win-
dows, make sure your passenger's
arms, hands and body are safely
out of the way.
3FDA2015
WARNING
Always check for obstructions
before raising any window to avoid
injuries or vehicle damage. If anobject less than 4 mm (0.16 in.) indiameter is caught between the
window glass and the upper win-
dow channel, the automatic reverse
window may not detect the resist-
ance and will not stop and reversedirection.
Page 147 of 346
477
Features of your vehicle
D280600AEN
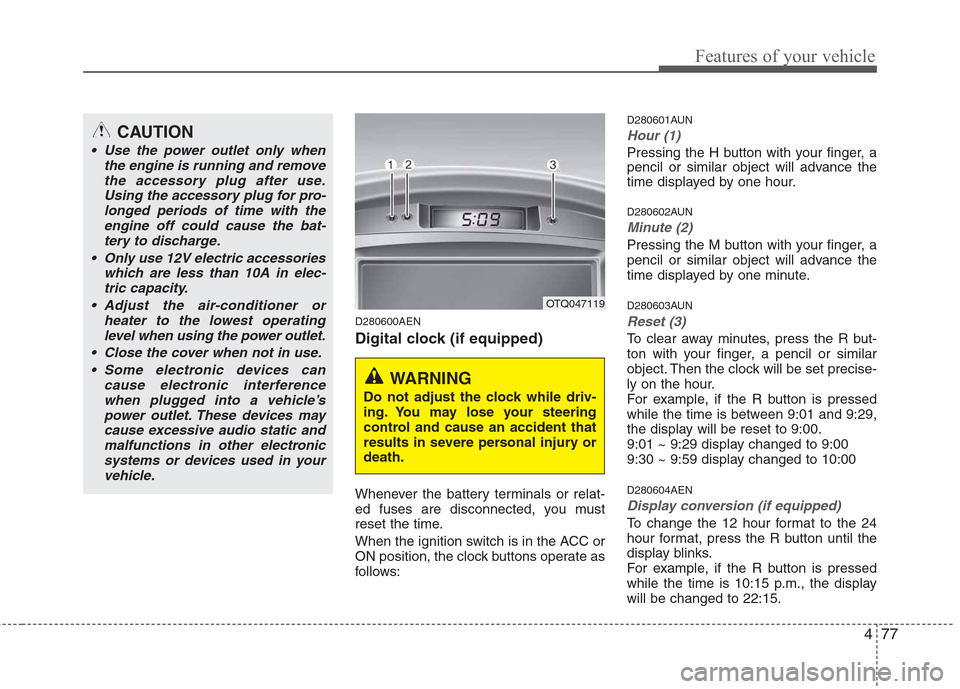
Digital clock (if equipped)
Whenever the battery terminals or relat-
ed fuses are disconnected, you must
reset the time.
When the ignition switch is in the ACC or
ON position, the clock buttons operate as
follows:D280601AUN
Hour (1)
Pressing the H button with your finger, a
pencil or similar object will advance the
time displayed by one hour.
D280602AUN
Minute (2)
Pressing the M button with your finger, a
pencil or similar object will advance the
time displayed by one minute.
D280603AUN
Reset (3)
To clear away minutes, press the R but-
ton with your finger, a pencil or similar
object. Then the clock will be set precise-
ly on the hour.
For example, if the R button is pressed
while the time is between 9:01 and 9:29,
the display will be reset to 9:00.
9:01 ~ 9:29 display changed to 9:00
9:30 ~ 9:59 display changed to 10:00 D280604AEN
Display conversion (if equipped)
To change the 12 hour format to the 24
hour format, press the R button until the
display blinks.
For example, if the R button is pressed
while the time is 10:15 p.m., the displaywill be changed to 22:15.
OTQ047119
WARNING
Do not adjust the clock while driv-
ing. You may lose your steering
control and cause an accident that
results in severe personal injury ordeath.
CAUTION
Use the power outlet only when the engine is running and remove
the accessory plug after use.Using the accessory plug for pro-longed periods of time with the engine off could cause the bat-
tery to discharge.
Only use 12V electric accessories which are less than 10A in elec-tric capacity.
Adjust the air-conditioner or heater to the lowest operatinglevel when using the power outlet.
Close the cover when not in use. Some electronic devices can cause electronic interference
when plugged into a vehicle’spower outlet. These devices may cause excessive audio static andmalfunctions in other electronic
systems or devices used in yourvehicle.
Page 161 of 346
491
Features of your vehicle
5. Best Station Memory (BSM)Button
When the BSM button is pressed, the six channels from the highest field intensity
are selected next and stored in memory.The stations selected are stored in thesequence frequency from the first preset
key.
6. EQ Button
Press the EQ button to select the CLAS-
SIC, POP, ROCK, JAZZ and OFF MODE
for the desired tone quality. Each press of
the button changes the display as fol-
lows;
7. PRESET STATION Select Buttons
Six stations for AM(MW, LW), FM1 and
FM2 respectively can be preset in the
electronic memory circuit. HOW TO PRESET STATIONS
Six AM(MW, LW) and twelve FM stations
may be programmed into the memory of
the radio. Then, by simply pressing the
AM(MW, LW) / FM select button and/or
one of the six station select buttons, you
may recall any of these stations instantly.
To program the stations, follow thesesteps:
Press AM(MW, LW)/FM selector to set
the band for AM(MW, LW), FM1 and FM2.
Select the desired station to be stored by seek or manual tuning.
Determine the preset station select button you wish to use to access thatstation.
Press the station select button for more than two seconds. A select button indi-
cator will show in the display indicating
which select button you have
depressed. The frequency display willflash after it has been stored into the
memory. You should then release the
button, and proceed to program the
next desired station. A total of 24 sta-
tions can be programmed by selecting
one AM(MW, LW) and two FM station
per button. When completed, any preset station
may be recalled by selecting AM(MW,
LW), FM1 or FM2 band and the appro-
priate station button.
8. AUDIO Mode select Button
Pressing the AUDIO Mode select button
changes the BASS, MIDDLE, TREBLE,
FADER and BALANCE mode. The mode
selected is shown on the display.
After selecting the each mode, rotate the
TUNE knob clockwise or counterclock-
wise.
CLASSIC ➟POP ➟ROCK ➟JAZZ ➟DEFEATCAUTION
Do not place beverages close to
the audio system. The audio sys-tem mechanism may be damaged if you spill them.
Do not strike or allow anything to impact the audio system, damage
to the system mechanisms couldoccur.
Page 167 of 346
497
Features of your vehicle
Using RADIO, SETUP, VOLUME
and AUDIO CONTROL
1. Power ON/OFF Button & VolumeControl Button
Turns on/off the set when the IGNITION
SWITCH is on ACC or ON. If the button
is turned to the right, it increases the vol-
ume and left,decreases the volume.
Press this button to turn the audio sys- tem ON or OFF. (EUROPE MODEL
ONLY)
Depending on the model if the ignition switch is not on ACC or ON position.
The “Battery Discharge” warningappears on LCD after 10 seconds of
power-up, and automatically turns off
after 1 hours of operation.
Adjusts the volume of the car audio system. Rotate clockwise to increase
the volume or counterclockwise to
decrease.
2. FM Button
Turns to FM mode and toggles FM1and
FM2 when the button is pressed each
time. 3. AM Button
Pressing the [AM] button selects the AM
band. AM Mode is displayed on the LCD.
4. SEEK Button
When the [SEEK ] button is
pressed, it increases the band fre- quency to automatically select a chan-
nel. Stops at the previous frequency if
no channel is found.
When the [TRACK ] button is press- ed, it reduces the band frequency to
automatically select a channel. Stops
at the previous frequency if no channel
is found.
5. Preset Button
Push [1]~[6] buttons less than 0.8 sec-
ond to play the channel saved in each
button. Push Preset button for 0.8 sec-
ond or longer to save current channel to
the respective button with a beep. 6. AST (AUTO STORE) Button
When the button is pressed, it automati-
cally selects and saves channels with
high reception rate to PRESET buttons
[1]~[6] and plays the channel saved in
PRESET1. If no channel is saved after
AST, it will play the previous channel.
7. TUNE & Audio Control Button
Manual Channel Selection knob
Turn this control while listening to a radio
channel to manually adjust frequency.
Turn clockwise to increase frequency
and counterclockwise to reduce frequen-
cy. SETUP Button
Press this button to turn to the SCROLL
adjustment mode. If no action is taken for
5 seconds after pressing the button, it will
return to the play mode. (After entering
SETUP mode, PUSH functions of the
[TUNE] button to adjust SCROLL.)
Page 181 of 346
![Hyundai H-1 (Grand Starex) 2011 Owners Manual - RHD (UK, Australia) 4111
Features of your vehicle
RADIO, SET UP, VOLUME CON-
TROL
1. FM/AM Button
Pressing the [FM/AM] button selects the FM/AM band and toggles in the order ofFM1 ➟ FM2 ➟ AM ➟ ... ➟ FM1... w Hyundai H-1 (Grand Starex) 2011 Owners Manual - RHD (UK, Australia) 4111
Features of your vehicle
RADIO, SET UP, VOLUME CON-
TROL
1. FM/AM Button
Pressing the [FM/AM] button selects the FM/AM band and toggles in the order ofFM1 ➟ FM2 ➟ AM ➟ ... ➟ FM1... w](/manual-img/35/14840/w960_14840-180.png)
4111
Features of your vehicle
RADIO, SET UP, VOLUME CON-
TROL
1. FM/AM Button
Pressing the [FM/AM] button selects the FM/AM band and toggles in the order ofFM1 ➟ FM2 ➟ AM ➟ ... ➟ FM1... when
the button is pressed each time. FM/AM
Mode is displayed on the LCD.
2. POWER Button & Volume Knob
Turns the set on/off when the IGNITION
SWITCH is on ACC or ON.
If the button is turned to the right, it
increases the volume and left, decreases
the volume.
3. SEEK Button
When the [SEEK ] button is pressed, it increases the band fre- quency to automatically select a chan-
nel. Stops at the previous frequency if
no channel is found.
When the [TRACK ] button is pressed, it reduces the band frequencyto automatically select a channel.
Stops at the previous frequency if no
channel is found. 4. Preset Buttons
Push [1]~[6] buttons less than 0.8 sec-
ond to play the channel saved in each
button. Push Preset button for 0.8 sec-
ond or longer to save current channel to
the respective button with a beep.
5. BSM Button
When the button is pressed, it automati-
cally selects and saves channels with
high reception rate to [PRESET] buttons
[1]~[6] and plays the channel saved in
PRESET1. If no channel is saved after
BSM, it will play the previous channel.
6. TUNE & AUDIO Control Knob
Turn this control while listening to a radio
channel to manually adjust frequency.
Turn clockwise to increase frequency
and counterclockwise to reduce frequen-
cy.
Pressing the button changes the BASS,
TREBLE, FADER and BALANCE TUNE
mode. The mode selected is shown on
the display.
After selecting each mode, rotate the
Audio control knob clockwise or counter-
clockwise. BASS Control
To increase the BASS, rotate the knob
clockwise, while to decrease the BASS,
rotate the knob counterclockwise.
TREBLE Control
To increase the TREBLE, rotate the knob
clockwise, while to decrease the TRE-
BLE, rotate the knob counterclockwise.
FADER Control
Turn the control knob clockwise to
emphasize rear speaker sound (front
speaker sound will be attenuated).
When the control knob is turned counter-
clockwise, front speaker sound will be
emphasized (rear speaker sound will be
attenuated).
BALANCE Control
Rotate the knob clockwise to emphasize
right speaker sound (left speaker sound
will be attenuated). When the control
knob is turned counter clockwise, left
speaker sound will be emphasized (right
speaker sound will be attenuated).
Page 187 of 346
4117
Features of your vehicle
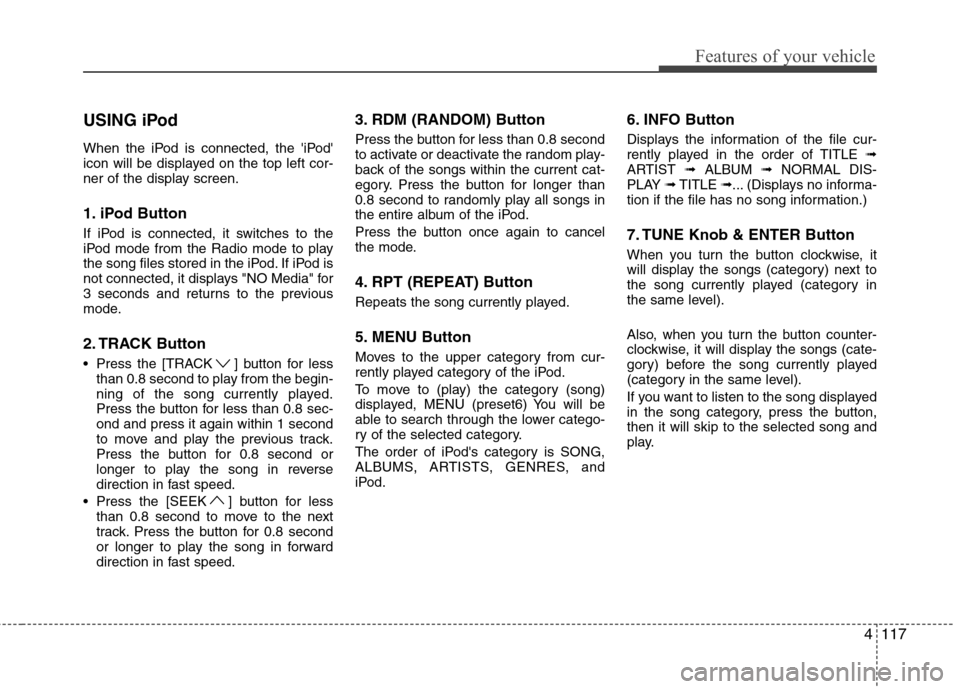
USING iPod
When the iPod is connected, the 'iPod'
icon will be displayed on the top left cor-
ner of the display screen.
1. iPod Button
If iPod is connected, it switches to the
iPod mode from the Radio mode to play
the song files stored in the iPod. If iPod is
not connected, it displays "NO Media" for
3 seconds and returns to the previous
mode.
2. TRACK Button
Press the [TRACK ] button for lessthan 0.8 second to play from the begin-
ning of the song currently played.
Press the button for less than 0.8 sec-ond and press it again within 1 second
to move and play the previous track.
Press the button for 0.8 second or
longer to play the song in reverse
direction in fast speed.
Press the [SEEK ] button for less than 0.8 second to move to the next
track. Press the button for 0.8 second
or longer to play the song in forward
direction in fast speed. 3. RDM (RANDOM) Button
Press the button for less than 0.8 second
to activate or deactivate the random play-
back of the songs within the current cat-
egory. Press the button for longer than
0.8 second to randomly play all songs in
the entire album of the iPod.
Press the button once again to cancel
the mode.
4. RPT (REPEAT) Button
Repeats the song currently played.
5. MENU Button
Moves to the upper category from cur-
rently played category of the iPod.
To move to (play) the category (song)
displayed, MENU (preset6) You will be
able to search through the lower catego-
ry of the selected category.
The order of iPod's category is SONG,
ALBUMS, ARTISTS, GENRES, and
iPod.
6. INFO Button
Displays the information of the file cur-
rently played in the order of TITLE
➟
ARTIST ➟ALBUM ➟NORMAL DIS-
PLAY ➟TITLE ➟... (Displays no informa-
tion if the file has no song information.)
7. TUNE Knob & ENTER Button
When you turn the button clockwise, it
will display the songs (category) next to
the song currently played (category in
the same level).
Also, when you turn the button counter-
clockwise, it will display the songs (cate-
gory) before the song currently played
(category in the same level).
If you want to listen to the song displayed
in the song category, press the button,then it will skip to the selected song and
play.
Page 292 of 346
Maintenance
38
7
G190200AUN
Battery recharging
Your vehicle has a maintenance-free,
calcium-based battery.
If the battery becomes discharged in a
short time (because, for example, the
headlights or interior lights were left on
while the vehicle was not in use),
recharge it by slow charging (trickle)
for 10 hours.
If the battery gradually discharges because of high electric load while the
vehicle is being used, recharge it at 20-
30A for two hours. G190300ATQ Reset items
Items should be reset after the battery
has been discharged or the battery hasbeen disconnected.
Climate control system
(See section 4)
Clock (See section 4)
Audio (See section 4)
WARNING
Before performing maintenance or recharging the battery, turn off all accessories and stop the
engine.
The negative battery cable must be removed first and installed
last when the battery is discon-nected.WARNING - Recharging
battery
When recharging the battery,
observe the following precautions:
The battery must be removed from the vehicle and placed in an area with good ventilation.
Do not allow cigarettes, sparks, or flame near the battery.
Watch the battery during charg- ing, and stop or reduce the charg-
ing rate if the battery cells begin
gassing (boiling) violently or if
the temperature of the electrolyte
of any cell exceeds 49°C (120°F).
Wear eye protection when check- ing the battery during charging.
Disconnect the battery charger in the following order.
1. Turn off the battery charger main switch.
2. Unhook the negative clamp from the negative battery terminal.
3. Unhook the positive clamp from the positive battery terminal.
Page 304 of 346
Maintenance
50
7
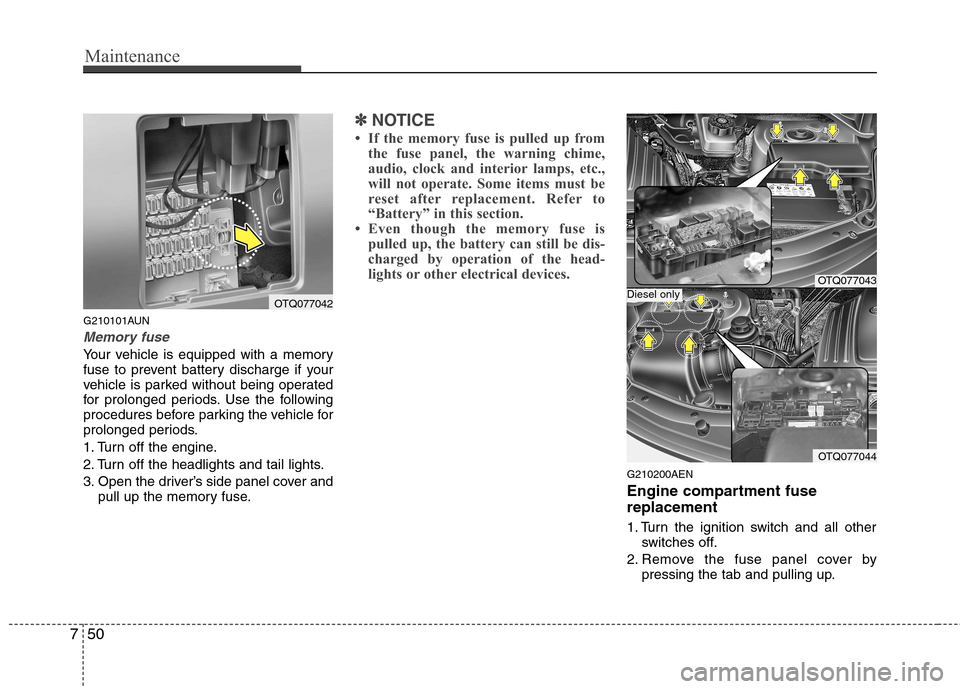
G210101AUN
Memory fuse
Your vehicle is equipped with a memory
fuse to prevent battery discharge if your
vehicle is parked without being operated
for prolonged periods. Use the following
procedures before parking the vehicle for
prolonged periods.
1. Turn off the engine.
2. Turn off the headlights and tail lights.
3. Open the driver’s side panel cover and
pull up the memory fuse.
✽✽ NOTICE
If the memory fuse is pulled up from the fuse panel, the warning chime,
audio, clock and interior lamps, etc.,
will not operate. Some items must be
reset after replacement. Refer to
“Battery” in this section.
Even though the memory fuse is
pulled up, the battery can still be dis-
charged by operation of the head-
lights or other electrical devices.
G210200AEN
Engine compartment fuse replacement
1. Turn the ignition switch and all other switches off.
2. Remove the fuse panel cover by pressing the tab and pulling up.
OTQ077042
OTQ077043
OTQ077044
Diesel only