2011 Hyundai Azera LATCH
[x] Cancel search: LATCHPage 34 of 403

319
Safety features of your vehicle
Seat belt warning
As a reminder to the driver and passen-
ger, the seatbelt warning light will blink
and warning chime will sound as follows:Driver's side (1)
Warning light
• The seat belt warning light will blink for
approximately 6 seconds each time
you turn the ignition switch ON regard-
less of belt fastening.
• The seat belt warning light will blink for
approximately 6 seconds if the belt is
unfastened after the ignition switch is
ON.
• The seat belt warning light will blink for
approximately 6 seconds if the belt is
unfastened when the ignition switch is
ON.
• The seat belt warning light will blink if
the seat belt is unfastened when the
vehicle speed is over 9km/h(6mph).
The warning light will immediately stop
blinking if the vehicle speed is below
6km/h(3mph).
WARNING
• No modifications or additions
should be made by the user
which will either prevent the seat
belt adjusting devices from oper-
ating to remove slack, or prevent
the seat belt assembly from being
adjusted to remove slack.
• When you fasten the seat belt, be
careful not to latch the seat belt in
buckles of other seat. It's very dan-
gerous and you may not be pro-
tected by the seat belt properly.
• Do not unfasten the seat belt and
do not fasten and unfasten the
seat belt repeatedly while driving.
This could result in loss of con-
trol, and an accident causing
death, serious injury, or property
damage.
• When fastening the seat belt,
make sure that the seat belt does
not pass over objects that are
hard or can break easily.
• Make sure there is nothing in the
buckle. The seat belt may not be
fastened securely.
OHG030029
Page 47 of 403

Safety features of your vehicle
32 3
Installing a child restraint system by
lap/shoulder belt
To install a child restraint system on the
outboard or center rear seats, do the fol-
lowing:
1. Place the child restraint system in the
seat and route the lap/shoulder belt
around or through the restraint, follow-
ing the restraint manufacturer’s
instructions. Be sure the seat belt web-
bing is not twisted.2. Fasten the lap/shoulder belt latch into
the buckle. Listen for the distinct “click”
sound.Position the release button so that it is
easy to access in case of an emergency.
3. Buckle the seat belt and allow the seat
belt to take up any slack. After installa-
tion of the child restraint system, try to
move it in all directions to be sure the
child restraint system is securely
installed.
If you need to tighten the belt, pull more
webbing toward the retractor. When you
unbuckle the seat belt and allow it to
retract, the retractor will automatically
revert back to its normal seated passen-
ger emergency locking usage condition.
E2MS103005OEN036101OEN036104
Page 51 of 403

Safety features of your vehicle
36 3
WARNING
• Do not install a child restraint
seat at the center of the rear seat
using the vehicle's ISOFIX
anchors. The ISOFIX anchors are
only provided for the left and
right outboard rear seating posi-
tions. Do not misuse the ISOFIX
anchors by attempting to attach a
child restraint seat in the middle
of the rear seat to the ISOFIX
anchors.
In a crash, the child restraint seat
ISOFIX attachments may not be
strong enough to secure the child
restraint seat properly in the cen-
ter of the rear seat and may
break, causing serious injury or
death.
(Continued)
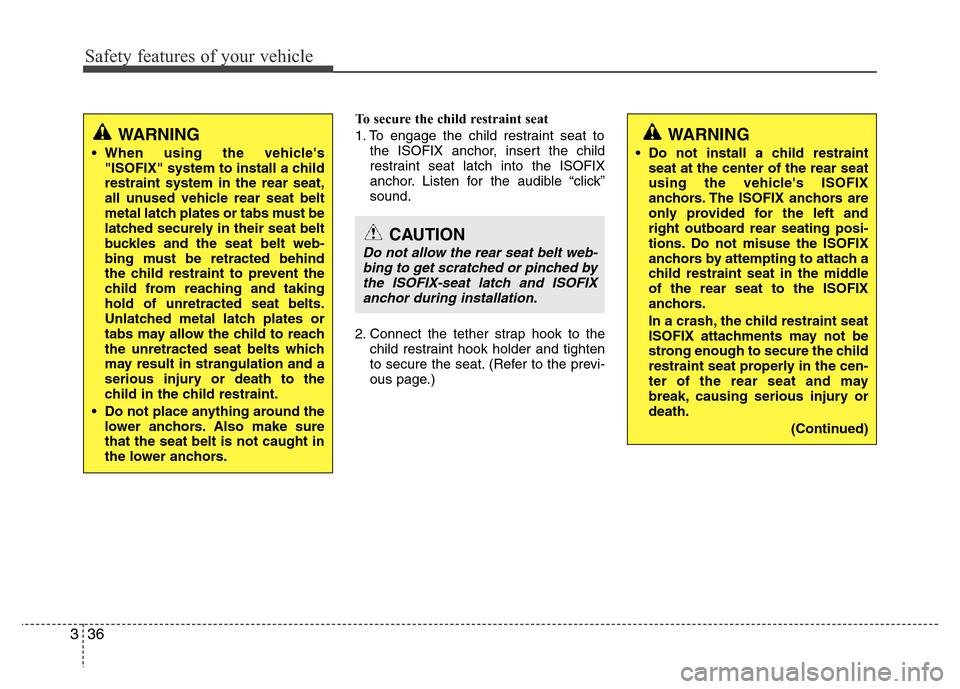
To secure the child restraint seat
1. To engage the child restraint seat to
the ISOFIX anchor, insert the child
restraint seat latch into the ISOFIX
anchor. Listen for the audible “click”
sound.
2. Connect the tether strap hook to the
child restraint hook holder and tighten
to secure the seat. (Refer to the previ-
ous page.)
CAUTION
Do not allow the rear seat belt web-
bing to get scratched or pinched by
the ISOFIX-seat latch and ISOFIX
anchor during installation.
WARNING
• When using the vehicle's
"ISOFIX" system to install a child
restraint system in the rear seat,
all unused vehicle rear seat belt
metal latch plates or tabs must be
latched securely in their seat belt
buckles and the seat belt web-
bing must be retracted behind
the child restraint to prevent the
child from reaching and taking
hold of unretracted seat belts.
Unlatched metal latch plates or
tabs may allow the child to reach
the unretracted seat belts which
may result in strangulation and a
serious injury or death to the
child in the child restraint.
• Do not place anything around the
lower anchors. Also make sure
that the seat belt is not caught in
the lower anchors.
Page 89 of 403

413
Features of your vehicle
THEFT-ALARM SYSTEM (IF EQUIPPED)
Vehicles equipped with a theft alarm sys-
tem will have a label attached to the vehi-
cle with the following words:
1. WARNING
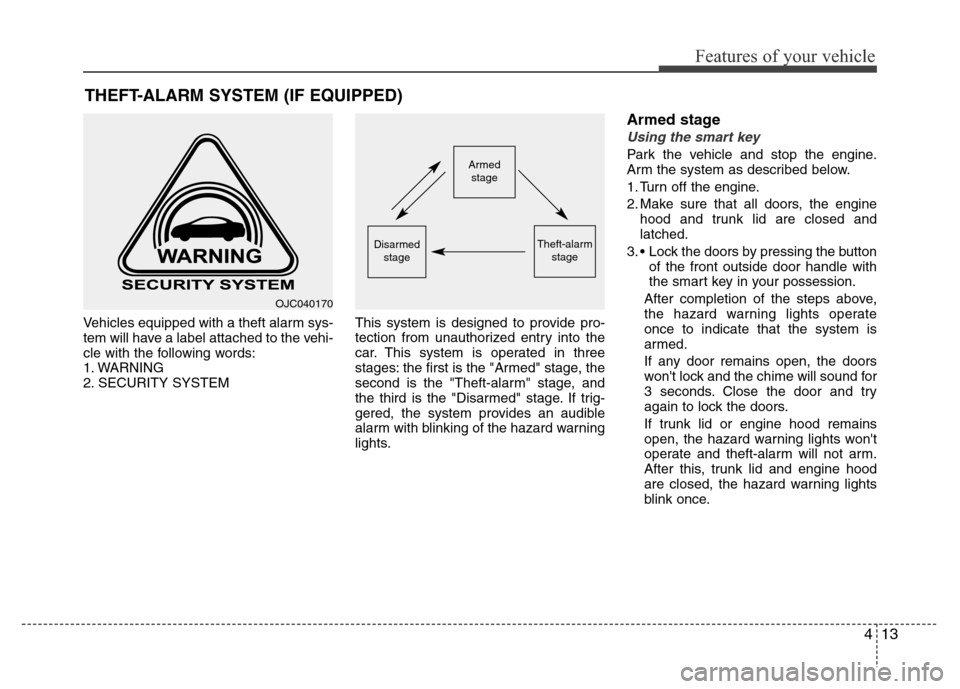
2. SECURITY SYSTEMThis system is designed to provide pro-
tection from unauthorized entry into the
car. This system is operated in three
stages: the first is the "Armed" stage, the
second is the "Theft-alarm" stage, and
the third is the "Disarmed" stage. If trig-
gered, the system provides an audible
alarm with blinking of the hazard warning
lights.
Armed stage
Using the smart key
Park the vehicle and stop the engine.
Arm the system as described below.
1. Turn off the engine.
2. Make sure that all doors, the engine
hood and trunk lid are closed and
latched.
3. • Lock the doors by pressing the button
of the front outside door handle with
the smart key in your possession.
After completion of the steps above,
the hazard warning lights operate
once to indicate that the system is
armed.
If any door remains open, the doors
won't lock and the chime will sound for
3 seconds. Close the door and try
again to lock the doors.
If trunk lid or engine hood remains
open, the hazard warning lights won't
operate and theft-alarm will not arm.
After this, trunk lid and engine hood
are closed, the hazard warning lights
blink once.Armed
stage
Theft-alarm
stageDisarmed
stage
OJC040170
Page 90 of 403

Features of your vehicle
14 4
• Lock the doors by pressing the lock
button on the smart key.
After completion of the steps above,
the hazard warning lights will operate
once to indicate that the system is
armed.
If any door, trunk lid or engine hood
remains open, the hazard warning
lights won't operate and theft-alarm
will not arm. After this, if all doors,
trunk lid and engine hood are closed,
the hazard warning lights will blink
once.Using the transmitter
Park the vehicle and stop the engine.
Arm the system as described below.
1. Turn off the engine and remove the
ignition key from the ignition switch.
2. Make sure that all doors, the engine
hood and trunk lid are closed and
latched.
3. Lock the doors by pressing the lock
button on the transmitter.
After completion of the steps above,
the hazard warning lights will blink
once to indicate that the system is
armed.
If any door, trunk lid or engine hood
remains opened, the hazard warning
lights won't operate and theft-alarm will
not arm. After this, if all doors, trunk lid
and engine hood are closed, the haz-
ard warning lights will blink once.
• Do not arm the system until all pas-
sengers have left the vehicle. If the
system is armed while a passen-
ger(s) remains in the vehicle, the
alarm may be activated when the
remaining passenger(s) leave the
vehicle. If any door, trunk lid or
engine hood is opened within 30
seconds after entering the armed
stage, the system is disarmed to
prevent unnecessary alarm.
Theft-alarm stage
The alarm will be activated if any of the
following occurs while the system is
armed.
• A door is opened without using the
transmitter (or smart key).
• The trunk is opened without using the
transmitter (or smart key).
• The engine hood is opened.
The horn will sound and the hazard
warning lights will blink continuously for
approximately 30 seconds. To turn off the
system, unlock the doors with the trans-
mitter (or smart key).
Page 97 of 403

421
Features of your vehicle
Closing the trunk
To close, lower the trunk lid, then press
down on it until it locks. To be sure the
trunk lid is securely fastened, always
check by trying to pull it up again.
✽NOTICE
If the trunk is closed with the smart key
in it, the chime will sound for approxi-
mately 3 seconds and the trunk will
reopen.
Emergency trunk safety release
Your vehicle is equipped with an emer-
gency trunk release cable located inside
the trunk. If someone is inadvertently
locked in the trunk, moving the handle in
the direction of the arrow will release the
trunk latch mechanism and open the
trunk.
WARNING
The trunk lid should be always kept
completely closed while the vehicle
is in motion. If it is left open or ajar,
poisonous exhaust gases may
enter the car and serious illness or
death may result.
WARNING
• For emergencies, be fully aware
of the location of the emergency
trunk safety release lever in this
vehicle and how to open the
trunk if you are accidentally
locked in the trunk.
• No one should be allowed to
occupy the trunk at any time. The
trunk is a very dangerous loca-
tion in the event of a crash.
• Use the release lever for emer-
gencies only. Use extreme cau-
tion, especially while the vehicle
is in motion.
OHG040019
Page 102 of 403

Features of your vehicle
26 4
Opening the hood
1. Pull the release lever to unlatch the
hood. The hood should pop open
slightly.2. Go to the front of the vehicle, raise the
hood slightly, pull the secondary latch
(1) inside of the hood center and lift
the hood (2).
3. Raise the hood. It will raise completely
by itself after it has been raised about
halfway.
Closing the hood
1. Before closing the hood, check the fol-
lowing:
• All filler caps in engine compartment
must be correctly installed.
• Gloves, rags or any other com-
bustible material must be removed
from the engine compartment.
2. Lower the hood halfway and push
down to securely lock in place.
HOOD
OHG040024OHG040025WARNING
• Before closing the hood, ensure
that all obstructions are removed
from the hood opening. Closing
the hood with an obstruction
present in the hood opening may
result in property damage or
severe personal injury.
• Do not leave gloves, rags or any
other combustible material in the
engine compartment. Doing so
may cause a heat-induced fire.
WARNING
Open the hood after turning off the
engine on a flat surface, shift the
shift lever to the P(Park) position
and set the parking brake.
Page 103 of 403

427
Features of your vehicle
WARNING
• Always double check to be sure
that the hood is firmly latched
before driving away. If it is not
latched, the hood could fly open
while the vehicle is being driven,
causing a total loss of visibility,
which might result in an accident.
• Do not move the vehicle with the
hood raised. The view will be
blocked and the hood could fall
or be damaged.