Page 164 of 403
Features of your vehicle
88 4
Door courtesy lamp
(if equipped)
The door courtesy lamp comes ON when
the door is opened to assist entering or
exiting the vehicle. It also serves as a
warning to passing vehicles that the vehi-
cle door is open.
Glove box lamp
The glove box lamp comes on when the
glove box is opened.
The parking lights or headlights must be
ON for the glove box lamp to function.
Vanity mirror lamp
Opening the lid of the vanity mirror will
automatically turn on the mirror light.
OHG040127OHG040128
CAUTION
To prevent unnecessary charging
system drain, close the glove box
securely after using the glove box.
OHG040126
Page 165 of 403

489
Features of your vehicle
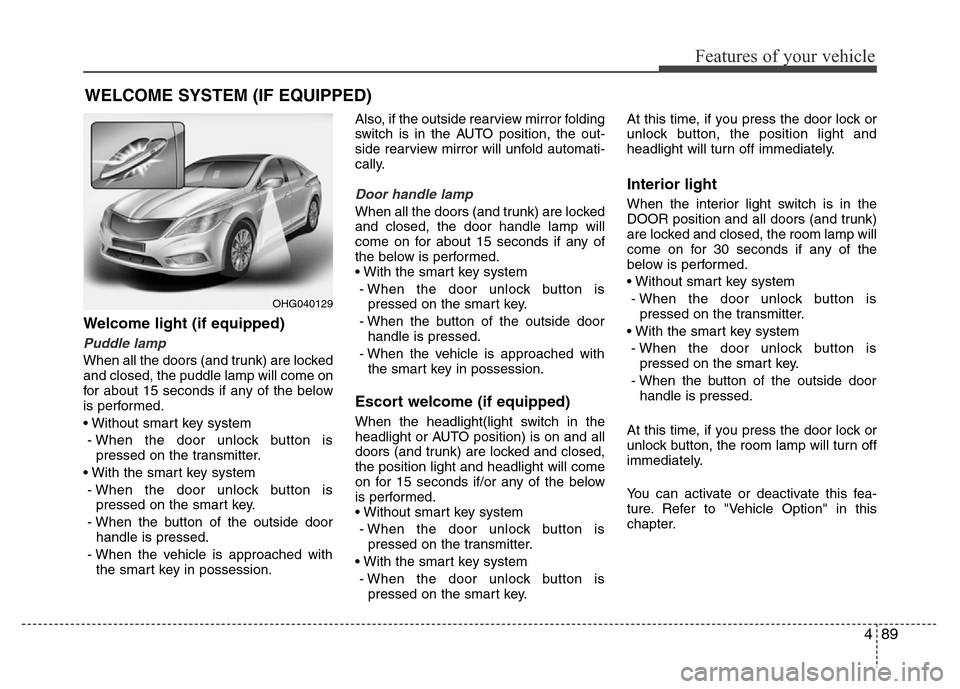
Welcome light (if equipped)
Puddle lamp
When all the doors (and trunk) are locked
and closed, the puddle lamp will come on
for about 15 seconds if any of the below
is performed.
• Without smart key system
- When the door unlock button is
pressed on the transmitter.
• With the smart key system
- When the door unlock button is
pressed on the smart key.
- When the button of the outside door
handle is pressed.
- When the vehicle is approached with
the smart key in possession.Also, if the outside rearview mirror folding
switch is in the AUTO position, the out-
side rearview mirror will unfold automati-
cally.
Door handle lamp
When all the doors (and trunk) are locked
and closed, the door handle lamp will
come on for about 15 seconds if any of
the below is performed.
• With the smart key system
- When the door unlock button is
pressed on the smart key.
- When the button of the outside door
handle is pressed.
- When the vehicle is approached with
the smart key in possession.
Escort welcome (if equipped)
When the headlight(light switch in the
headlight or AUTO position) is on and all
doors (and trunk) are locked and closed,
the position light and headlight will come
on for 15 seconds if/or any of the below
is performed.
• Without smart key system
- When the door unlock button is
pressed on the transmitter.
• With the smart key system
- When the door unlock button is
pressed on the smart key.At this time, if you press the door lock or
unlock button, the position light and
headlight will turn off immediately.
Interior light
When the interior light switch is in the
DOOR position and all doors (and trunk)
are locked and closed, the room lamp will
come on for 30 seconds if any of the
below is performed.
• Without smart key system
- When the door unlock button is
pressed on the transmitter.
• With the smart key system
- When the door unlock button is
pressed on the smart key.
- When the button of the outside door
handle is pressed.
At this time, if you press the door lock or
unlock button, the room lamp will turn off
immediately.
You can activate or deactivate this fea-
ture. Refer to "Vehicle Option" in this
chapter.
WELCOME SYSTEM (IF EQUIPPED)
OHG040129
Page 166 of 403

Features of your vehicle
90 4
DEFROSTER
✽NOTICE
If you want to defrost and defog the
front windshield, refer to “Windshield
defrosting and defogging” in this sec-
tion.
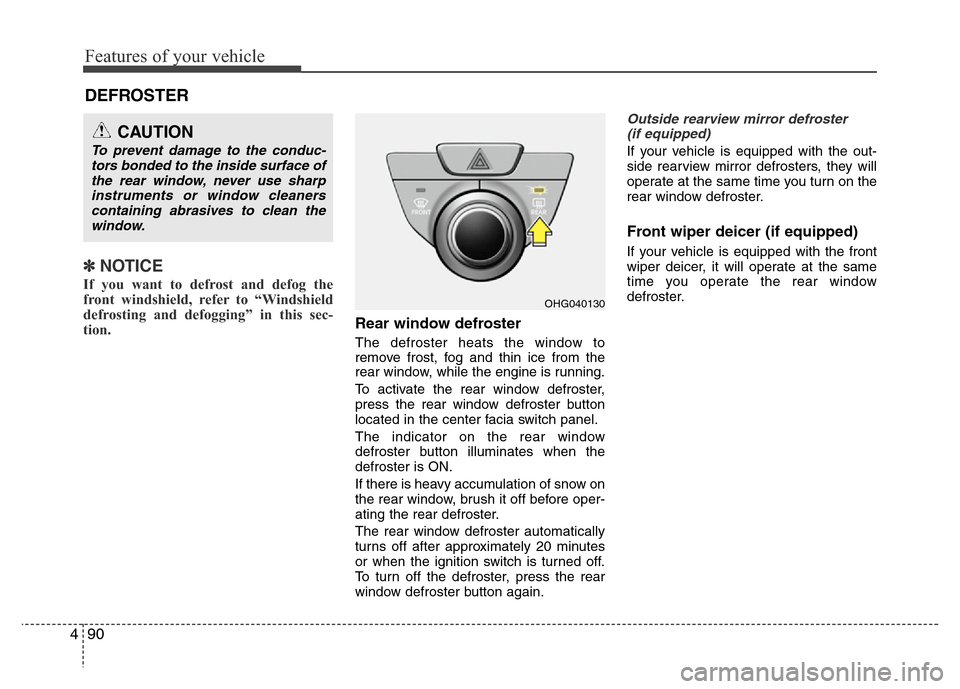
Rear window defroster
The defroster heats the window to
remove frost, fog and thin ice from the
rear window, while the engine is running.
To activate the rear window defroster,
press the rear window defroster button
located in the center facia switch panel.
The indicator on the rear window
defroster button illuminates when the
defroster is ON.
If there is heavy accumulation of snow on
the rear window, brush it off before oper-
ating the rear defroster.
The rear window defroster automatically
turns off after approximately 20 minutes
or when the ignition switch is turned off.
To turn off the defroster, press the rear
window defroster button again.
Outside rearview mirror defroster
(if equipped)
If your vehicle is equipped with the out-
side rearview mirror defrosters, they will
operate at the same time you turn on the
rear window defroster.
Front wiper deicer (if equipped)
If your vehicle is equipped with the front
wiper deicer, it will operate at the same
time you operate the rear window
defroster.
CAUTION
To prevent damage to the conduc-
tors bonded to the inside surface of
the rear window, never use sharp
instruments or window cleaners
containing abrasives to clean the
window.
OHG040130
Page 170 of 403
Features of your vehicle
94 4
MAX A/C-Level (B, C, D, E, F)
To select the MAX A/C, turn the temper-
ature knob to the extreme left.
Air flow is directed toward the upper body
and face.
In this mode, the air conditioning and the
recirculated air position will be selected
automatically.Instrument panel vents
The outlet vents can be opened or closed
separately using the thumbwheel.
Also, you can adjust the direction of air
delivery from these vents using the vent
control lever as shown.Temperature control
The temperature control knob allows you
to control the temperature of the air flow-
ing from the ventilation system. To
change the air temperature in the pas-
senger compartment, turn the knob to
the right position for warm and hot air or
left position for cooler air.
OHG040134OHG040136OHG040135
Page 177 of 403
4101
Features of your vehicle
AUTOMATIC CLIMATE CONTROL SYSTEM (IF EQUIPPED)
1. Front windshield defroster button
2. Fan speed control knob
3. OFF button
4. Rear window defroster button
5. Dual temperature control selection button
6. Mode selection button
7. Passenger's temperature control switch
8. Air intake control button
9. Climate information screen selection
button
10. Driver’s temperature control switch
11. AUTO (automatic control) button
12. Air conditioning button
■■Type A
■Type B
OHG040140/OHG040141
CAUTION
Operating the blower when the igni-
tion switch is in the ON position
could cause the battery to dis-
charge. Operate the blower when
the engine is running.
Page 178 of 403
Features of your vehicle
102 4
Automatic heating and air condi-
tioning
1. Push the AUTO button.
The modes, fan speeds, air intake and
air-conditioning will be controlled auto-
matically by setting the temperature.2. Set the temperature to the desired
temperature.
✽NOTICE
• To turn the automatic operation off,
select any button or switch of the fol-
lowing:
- Mode selection switch
- Air conditioning button
- Front windshield defroster button
- Air intake control button
- Fan speed control knob
The selected function will be con-
trolled manually while other functions
operate automatically.
• For your convenience and to improve
the effectiveness of the climate con-
trol, use the AUTO button and set the
temperature to 23°C (73°F).
✽NOTICE
Never place anything over the sensor
located on the instrument panel to
ensure better control of the heating and
cooling system.
OHG040143OHG040142OHG042184
Page 179 of 403
4103
Features of your vehicle
Manual heating and air condition-
ing
The heating and cooling system can be
controlled manually by pushing buttons
other than the AUTO button. In this case,
the system works sequentially according
to the order of buttons selected.
When pressing any button except the
AUTO button while using automatic oper-
ation, the functions not selected will be
controlled automatically.
1. Start the engine.
2. Set the mode to the desired position.
To improve the effectiveness of heating
and cooling;
- Heating:
- Cooling:
3. Set the temperature control to the
desired position.
4. Set the air intake control to the outside
(fresh) air position.
5. Set the fan speed control to the
desired speed.
6. If air conditioning is desired, turn the
air conditioning system on.
Press the AUTO button in order to con-
vert to full automatic control of the sys-
tem.
OHG040133
Page 181 of 403

4105
Features of your vehicle
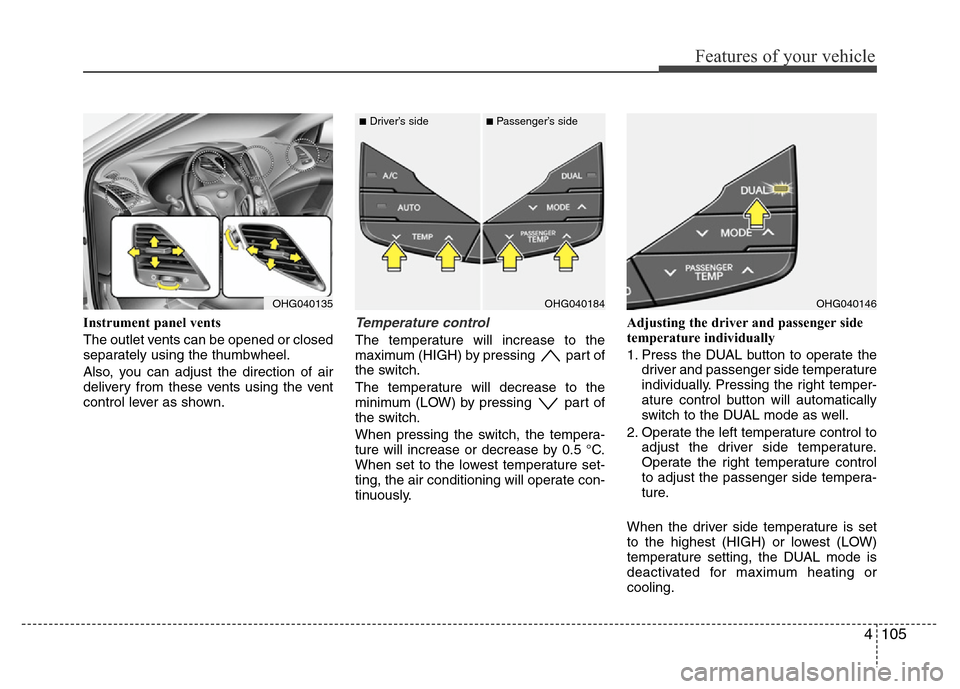
Instrument panel vents
The outlet vents can be opened or closed
separately using the thumbwheel.
Also, you can adjust the direction of air
delivery from these vents using the vent
control lever as shown.Temperature control
The temperature will increase to the
maximum (HIGH) by pressing part of
the switch.
The temperature will decrease to the
minimum (LOW) by pressing part of
the switch.
When pressing the switch, the tempera-
ture will increase or decrease by 0.5 °C.
When set to the lowest temperature set-
ting, the air conditioning will operate con-
tinuously.Adjusting the driver and passenger side
temperature individually
1. Press the DUAL button to operate the
driver and passenger side temperature
individually. Pressing the right temper-
ature control button will automatically
switch to the DUAL mode as well.
2. Operate the left temperature control to
adjust the driver side temperature.
Operate the right temperature control
to adjust the passenger side tempera-
ture.
When the driver side temperature is set
to the highest (HIGH) or lowest (LOW)
temperature setting, the DUAL mode is
deactivated for maximum heating or
cooling.
OHG040135OHG040146OHG040184
■Driver’s side■Passenger’s side