Page 177 of 232

5
VEHICLE MAINTENANCE REQUIREMENTS
5
1 23456789
101112131415
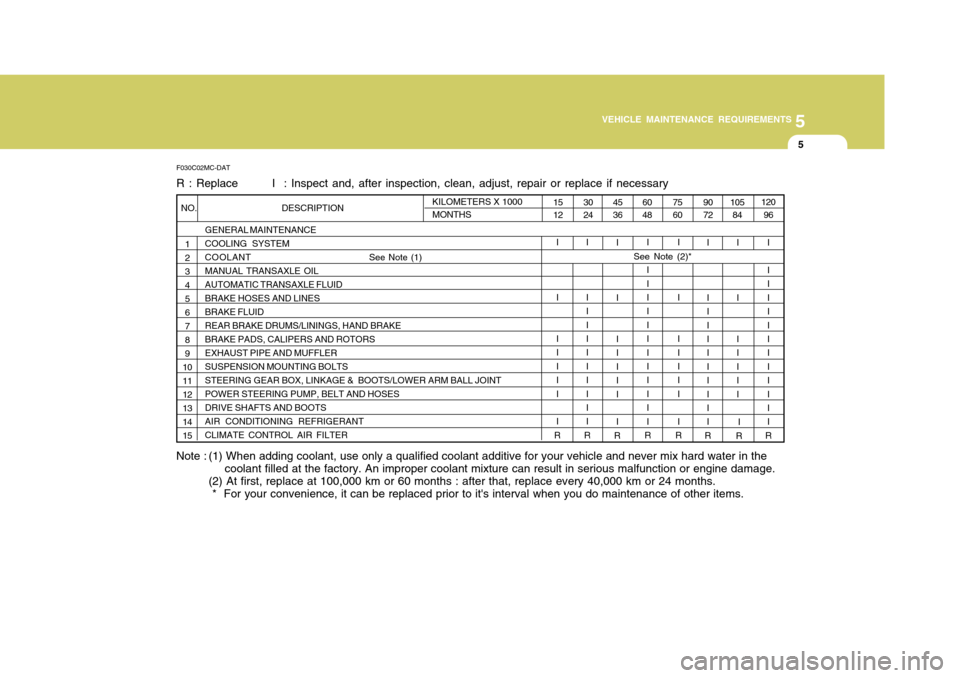
Note : (1) When adding coolant, use only a qualified coolant additive for your vehicle and never mix hard water in the coolant filled at the factory. An improper coolant mixture can result in serious malfunction or engine damage.
(2) At first, replace at 100,000 km or 60 months : after that, replace every 40,000 km or 24 months. * For your convenience, it can be replaced prior to it's interval when you do maintenance of other items.
F030C02MC-DAT R : Replace I : Inspect and, after inspection, clean, adjust, repair or replace if necessary
GENERAL MAINTENANCE COOLING SYSTEMCOOLANT
See Note (1)
MANUAL TRANSAXLE OILAUTOMATIC TRANSAXLE FLUIDBRAKE HOSES AND LINESBRAKE FLUIDREAR BRAKE DRUMS/LININGS, HAND BRAKEBRAKE PADS, CALIPERS AND ROTORSEXHAUST PIPE AND MUFFLERSUSPENSION MOUNTING BOLTSSTEERING GEAR BOX, LINKAGE & BOOTS/LOWER ARM BALL JOINTPOWER STEERING PUMP, BELT AND HOSESDRIVE SHAFTS AND BOOTSAIR CONDITIONING REFRIGERANTCLIMATE CONTROL AIR FILTER
120 96
I I IIII I IIIII I
R
105
84
I I I IIII
90 72
7560
6048
I I II I IIIII I
R
I I I I I II I
R
II I I IIII I IIII
R
45 36
3024
I I I IIII I
R
I I II I IIIII I
R
15 12
I I I IIII I
R
KILOMETERS X 1000 MONTHS
NO. DESCRIPTION
See Note (2)*
I
R
Page 181 of 232

5
VEHICLE MAINTENANCE REQUIREMENTS
9
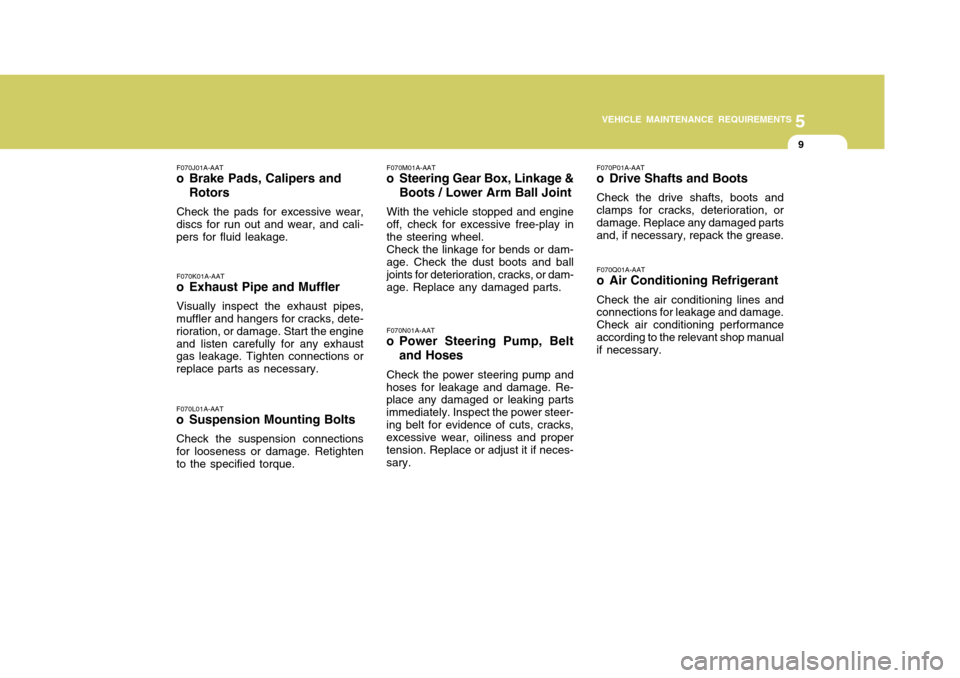
F070L01A-AAT
o Suspension Mounting Bolts
Check the suspension connections for looseness or damage. Retighten to the specified torque. F070M01A-AAT
o Steering Gear Box, Linkage &
Boots / Lower Arm Ball Joint
With the vehicle stopped and engineoff, check for excessive free-play in the steering wheel. Check the linkage for bends or dam- age. Check the dust boots and ball joints for deterioration, cracks, or dam- age. Replace any damaged parts. F070N01A-AAT
o Power Steering Pump, Belt
and Hoses
Check the power steering pump and
hoses for leakage and damage. Re- place any damaged or leaking parts immediately. Inspect the power steer-ing belt for evidence of cuts, cracks, excessive wear, oiliness and proper tension. Replace or adjust it if neces-sary. F070P01A-AAT
o Drive Shafts and Boots
Check the drive shafts, boots andclamps for cracks, deterioration, or damage. Replace any damaged parts and, if necessary, repack the grease. F070Q01A-AAT
o Air Conditioning Refrigerant Check the air conditioning lines and connections for leakage and damage. Check air conditioning performanceaccording to the relevant shop manual if necessary.
F070J01A-AAT
o Brake Pads, Calipers and
Rotors
Check the pads for excessive wear,
discs for run out and wear, and cali-pers for fluid leakage.
F070K01A-AAT
o Exhaust Pipe and Muffler
Visually inspect the exhaust pipes,
muffler and hangers for cracks, dete- rioration, or damage. Start the engineand listen carefully for any exhaust gas leakage. Tighten connections or replace parts as necessary.
Page 203 of 232

6 DO-IT-YOURSELF MAINTENANCE
22
Horizontal
aimingVertical
aiming
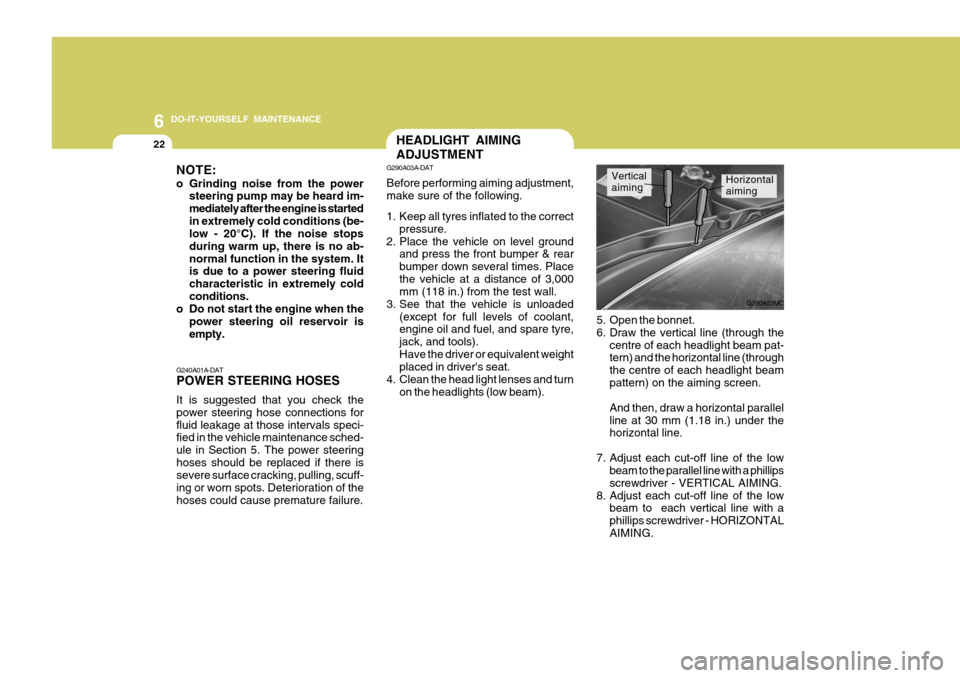
5. Open the bonnet.
6. Draw the vertical line (through the centre of each headlight beam pat- tern) and the horizontal line (through the centre of each headlight beampattern) on the aiming screen. And then, draw a horizontal parallel line at 30 mm (1.18 in.) under the horizontal line.
7. Adjust each cut-off line of the low beam to the parallel line with a phillips screwdriver - VERTICAL AIMING.
8. Adjust each cut-off line of the low beam to each vertical line with aphillips screwdriver - HORIZONTALAIMING.
HEADLIGHT AIMING ADJUSTMENT
G290A03A-DAT Before performing aiming adjustment, make sure of the following.
1. Keep all tyres inflated to the correct
pressure.
2. Place the vehicle on level ground and press the front bumper & rear bumper down several times. Placethe vehicle at a distance of 3,000 mm (118 in.) from the test wall.
3. See that the vehicle is unloaded (except for full levels of coolant,engine oil and fuel, and spare tyre, jack, and tools).Have the driver or equivalent weight placed in driver's seat.
4. Clean the head light lenses and turn on the headlights (low beam). G290A03MC
NOTE:
o Grinding noise from the power
steering pump may be heard im- mediately after the engine is startedin extremely cold conditions (be- low - 20°C). If the noise stops during warm up, there is no ab-normal function in the system. It is due to a power steering fluid characteristic in extremely coldconditions.
o Do not start the engine when the
power steering oil reservoir isempty.
G240A01A-DAT POWER STEERING HOSES It is suggested that you check the power steering hose connections forfluid leakage at those intervals speci- fied in the vehicle maintenance sched- ule in Section 5. The power steeringhoses should be replaced if there is severe surface cracking, pulling, scuff- ing or worn spots. Deterioration of thehoses could cause premature failure.
Page 225 of 232
9 VEHICLE SPECIFICATIONS
2
Type Wheel free play Rackstroke Oil pump type J030A01MC-DAT TYRE
Dual hydraulic with brake booster Ventilated disc DrumDisc (If Installed) Cable operated on rear wheel
J060A01A-DAT FUEL SYSTEM
Rack and pinion 0 ~ 30 mm (0 ~ 1.18 in.) 142 mm (5.59 in.)138 mm (5.43 in.) Vane type
175/70 R14, 185/65 R14, 195/55 R15 175/70 R14, 185/65 R14, 205/45 R16 Full size
4 Door3 Door Spare
J020A01MC-DAT POWER STEERING Fuel tank capacity 45 litres
J050A02MC-DATBRAKE Type Front brake type Rear brake typeHand brake
175 Tyre only Except 175 Tyre
4 Door
4300 (169.3)
1695 (66.7)
1470 (57.9)/1475 (58)* 2500 (98.4)
1470 (57.9)/1485 (58.5)*
1460 (57.5)/1475 (58)*
Item Overall length Overall width Overall heightWheel base Wheel tread
J010A02MC-DAT MEASUREMENT
Front Rear
mm (in.)
3 Door
4045 (159.3)
* with 175/70R14 Tyre