2011 Hyundai Accent bonnet
[x] Cancel search: bonnetPage 156 of 232
3 WHAT TO DO IN AN EMERGENCY
4IF THE ENGINE OVERHEATS
D030A01A-DAT If your temperature gauge indicates overheating, you experience a loss of power, or hear loud pinging or knock- ing, the engine is probably too hot. Ifthis happens, you should:
1. Pull off the road and stop as soon as it is safe to do so.
2. Place the gear selector lever in "P"
(automatic), or neutral (manual transaxle) and set the hand brake. If the air conditioning is on, turn it off.
3. If coolant is running out under the car or steam is coming out from under-neath the bonnet, stop the engine. Do not open the bonnet until thecoolant has stopped running or the steaming has stopped. If there is no visible loss of coolant and no steam,leave the engine running and check to be sure the engine cooling fan is operating. If the fan is not running,turn the engine off.
4. Check to see if the water pump drive
belt is missing. If it is not missing,check to see that it is tight. If the drive belt seems to be satisfactory, check for coolant leaking from theradiator, hoses or under the car.
6. Carefully remove the jumper cables
in the reverse order of attachment.
If you do not know why your batterybecame discharged (because the lightswere left on, etc.), have the charging system checked by your Hyundai dealer.
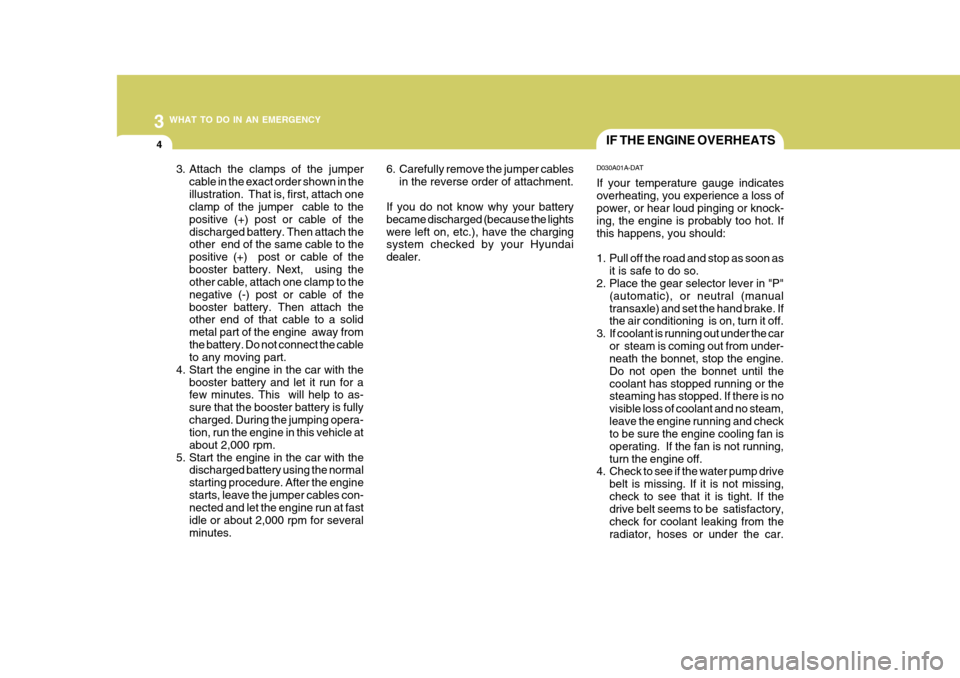
3. Attach the clamps of the jumper
cable in the exact order shown in theillustration. That is, first, attach one clamp of the jumper cable to the positive (+) post or cable of thedischarged battery. Then attach the other end of the same cable to the positive (+) post or cable of thebooster battery. Next, using the other cable, attach one clamp to the negative (-) post or cable of thebooster battery. Then attach the other end of that cable to a solid metal part of the engine away fromthe battery. Do not connect the cable to any moving part.
4. Start the engine in the car with the booster battery and let it run for afew minutes. This will help to as- sure that the booster battery is fullycharged. During the jumping opera- tion, run the engine in this vehicle at about 2,000 rpm.
5. Start the engine in the car with the discharged battery using the normalstarting procedure. After the enginestarts, leave the jumper cables con- nected and let the engine run at fast idle or about 2,000 rpm for severalminutes.
Page 184 of 232
6
DO-IT-YOURSELF MAINTENANCE
3GENERAL CHECKS
G020A01A-AAT Engine Compartment The following should be checked regu- larly:
o Engine oil level and condition
o Transaxle fluid level and condition
o Brake fluid level
o Clutch fluid level
o Engine coolant level
o Windshield washer fluid level
o Accessory drive belt condition
o Engine coolant hose condition
o Fluid leaks (on or below compo- nents)
o Power steering fluid level
o Battery condition
o Air cleaner filter condition G020C01A-DAT Vehicle Interior The following should be checked each time when the vehicle is driven:
o Lights operation
o Windshield wiper operation
o Horn operation
o Demister, heating system operation
(and air conditioning, if installed)
o Steering operation and condition
o Mirror condition and operation
o Turn signal light operation
o Accelerator pedal operation
o Brake operation, including hand
brake
o Manual transaxle operation, includ- ing clutch operation
o Automatic transaxle operation, in- cluding "Park" mechanism opera-tion
o Seat control condition and opera- tion
o Seat belt condition and operation
o Sunvisor operation If you notice anything that does not operate correctly or appears to befunctioning incorrectly, inspect it care- fully and seek assistance from your Hyundai dealer if service is needed.
G020B01A-DAT Vehicle Exterior The following should be checked monthly:
o Overall appearance and condition
o Wheel condition and wheel nut torque
o Exhaust system condition
o Light condition and operation
o Windshield glass condition
o Wiper blade condition
o Paint condition and body corrosion
o Fluid leaks
o Door and bonnet lock condition
o Tyre pressure and condition (includ-
ing spare tyre)
Page 185 of 232
6 DO-IT-YOURSELF MAINTENANCE
4CHECKING THE ENGINE OIL
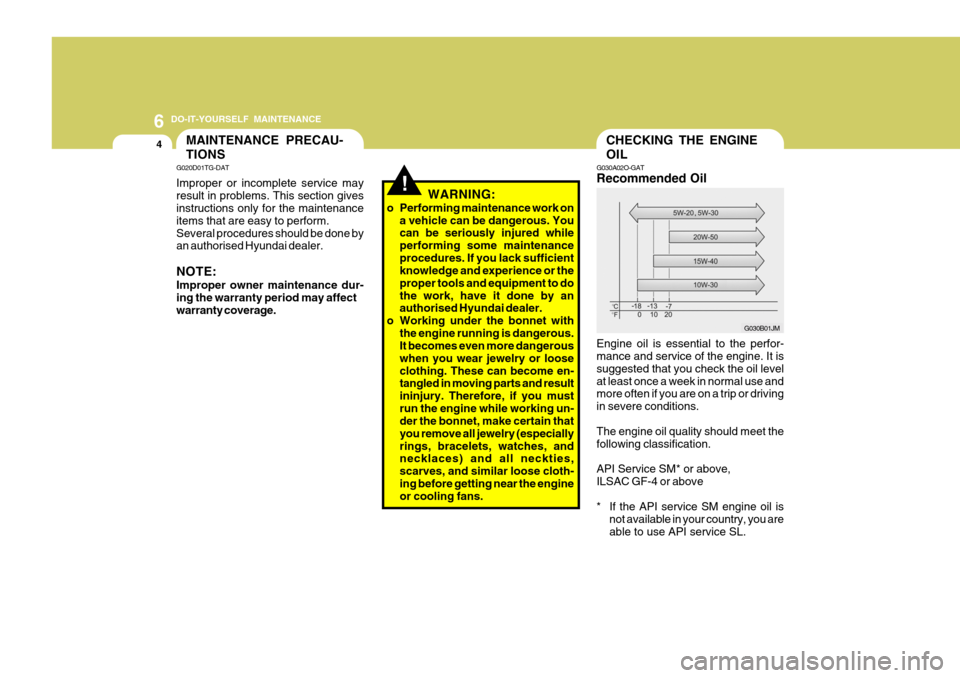
G030A02O-GAT Recommended Oil Engine oil is essential to the perfor- mance and service of the engine. It is suggested that you check the oil levelat least once a week in normal use and more often if you are on a trip or driving in severe conditions. The engine oil quality should meet the following classification. API Service SM* or above, ILSAC GF-4 or above
* If the API service SM engine oil is
not available in your country, you are able to use API service SL.
G030B01JM
MAINTENANCE PRECAU- TIONS
!
G020D01TG-DAT Improper or incomplete service may result in problems. This section gives instructions only for the maintenance items that are easy to perform.Several procedures should be done by an authorised Hyundai dealer. NOTE: Improper owner maintenance dur- ing the warranty period may affect warranty coverage. WARNING:
o Performing maintenance work on a vehicle can be dangerous. Youcan be seriously injured while performing some maintenanceprocedures. If you lack sufficient knowledge and experience or the proper tools and equipment to dothe work, have it done by an authorised Hyundai dealer.
o Working under the bonnet with the engine running is dangerous.It becomes even more dangerous when you wear jewelry or looseclothing. These can become en- tangled in moving parts and result ininjury. Therefore, if you mustrun the engine while working un- der the bonnet, make certain that you remove all jewelry (especiallyrings, bracelets, watches, and necklaces) and all neckties, scarves, and similar loose cloth-ing before getting near the engine or cooling fans.
Page 195 of 232
6 DO-IT-YOURSELF MAINTENANCE
14
!
CHECKING THE CLUTCH FLUID
G120E02A-AAT Adding Brake Fluid
WARNING:
Handle brake fluid carefully. It can damage your vision if it gets into your eyes. Use only DOT 3 or DOT4 specification fluid from a sealed container. Do not allow the fluid can or reservoir to remain open anylonger than required. This will pre- vent entry of dirt and moisture which can damage the brake system and cause improper operation. To add brake fluid, first wipe away any dirt then unscrew the fluid reservoircap. Slowly pour the recommended fluid into the reservoir. Do not overfill. Carefully replace the cap on the reser-voir and tighten. G130A01A-DAT (If Installed) To Check the Clutch Fluid The clutch fluid level in the master cylinder should be checked when per- forming other under bonnet services. The system should be checked forleakage at the same time. Check to make certain that the clutch fluid level is between the "MAX" and"MIN" level markings on the fluid reser- voir. Fill as required. Fluid loss indi- cates a leak in the clutch system whichshould be inspected and repaired im- mediately. Consult your Hyundai dealer.
G120D01A-AAT To Check the Fluid Level
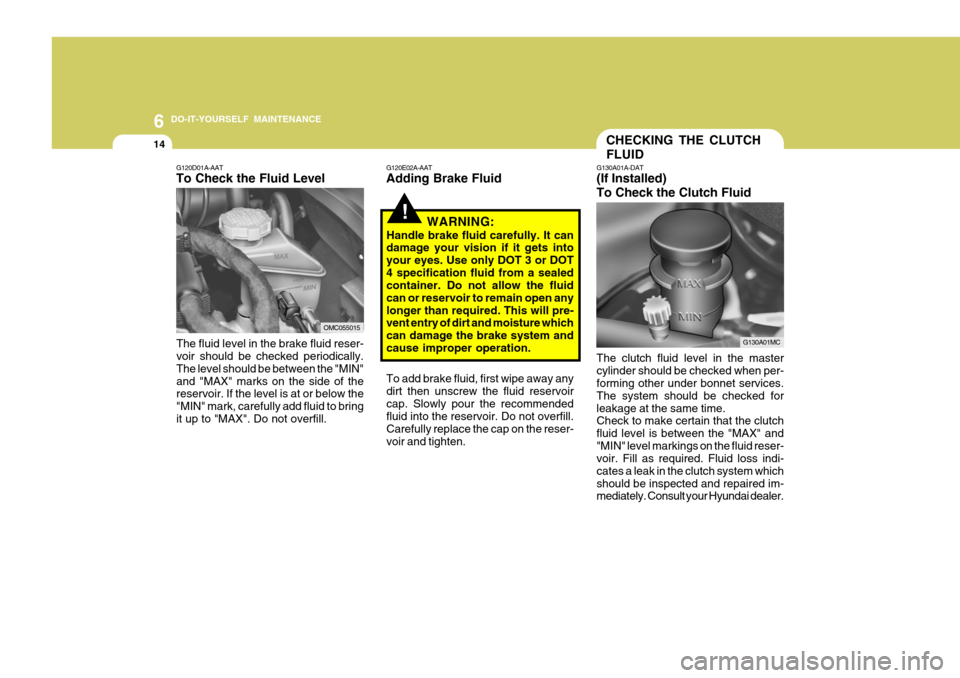
The fluid level in the brake fluid reser- voir should be checked periodically. The level should be between the "MIN"and "MAX" marks on the side of the reservoir. If the level is at or below the "MIN" mark, carefully add fluid to bringit up to "MAX". Do not overfill.
OMC055015
G130A01MC
Page 203 of 232
6 DO-IT-YOURSELF MAINTENANCE
22
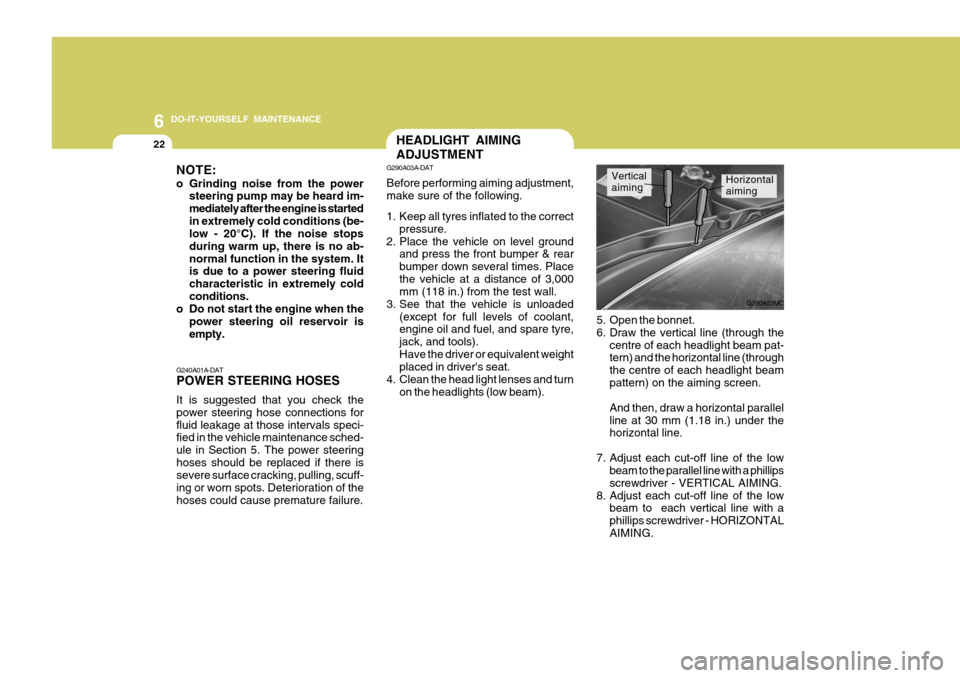
Horizontal
aimingVertical
aiming
5. Open the bonnet.
6. Draw the vertical line (through the centre of each headlight beam pat- tern) and the horizontal line (through the centre of each headlight beampattern) on the aiming screen. And then, draw a horizontal parallel line at 30 mm (1.18 in.) under the horizontal line.
7. Adjust each cut-off line of the low beam to the parallel line with a phillips screwdriver - VERTICAL AIMING.
8. Adjust each cut-off line of the low beam to each vertical line with aphillips screwdriver - HORIZONTALAIMING.
HEADLIGHT AIMING ADJUSTMENT
G290A03A-DAT Before performing aiming adjustment, make sure of the following.
1. Keep all tyres inflated to the correct
pressure.
2. Place the vehicle on level ground and press the front bumper & rear bumper down several times. Placethe vehicle at a distance of 3,000 mm (118 in.) from the test wall.
3. See that the vehicle is unloaded (except for full levels of coolant,engine oil and fuel, and spare tyre, jack, and tools).Have the driver or equivalent weight placed in driver's seat.
4. Clean the head light lenses and turn on the headlights (low beam). G290A03MC
NOTE:
o Grinding noise from the power
steering pump may be heard im- mediately after the engine is startedin extremely cold conditions (be- low - 20°C). If the noise stops during warm up, there is no ab-normal function in the system. It is due to a power steering fluid characteristic in extremely coldconditions.
o Do not start the engine when the
power steering oil reservoir isempty.
G240A01A-DAT POWER STEERING HOSES It is suggested that you check the power steering hose connections forfluid leakage at those intervals speci- fied in the vehicle maintenance sched- ule in Section 5. The power steeringhoses should be replaced if there is severe surface cracking, pulling, scuff- ing or worn spots. Deterioration of thehoses could cause premature failure.
Page 205 of 232
6 DO-IT-YOURSELF MAINTENANCE
24
Headlight
1. Allow the bulb to cool. Wear eye protection.
2. Open the engine bonnet and discon- nect the negative (-) post of the battery.
3. Always grasp the bulb by its plastic base, avoid touching the glass.
4. Disconnect the power cord from the
back of the headlight.
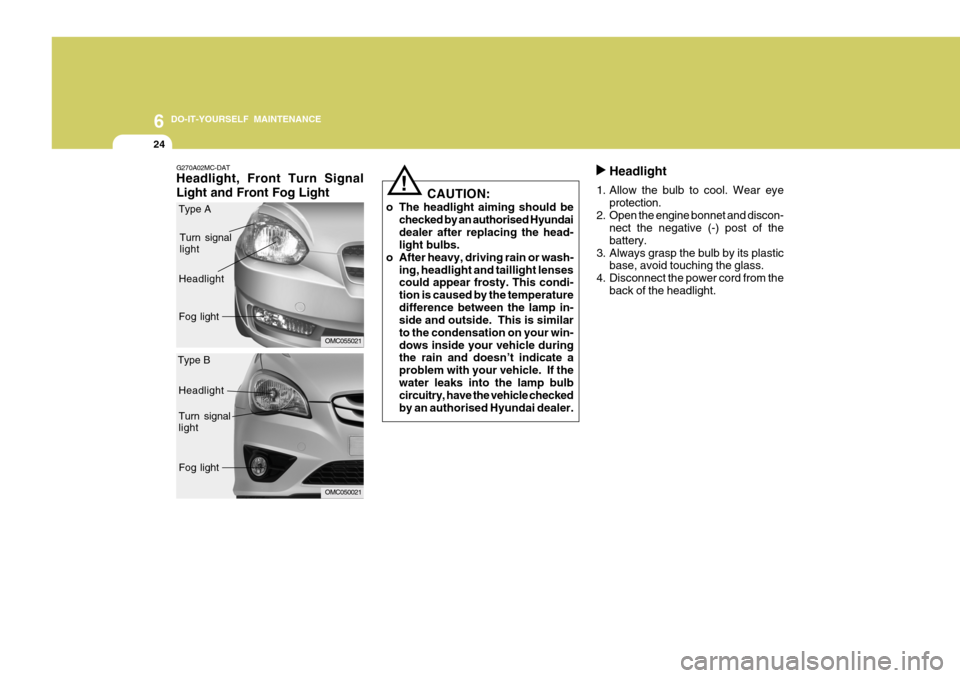
G270A02MC-DAT Headlight, Front Turn Signal Light and Front Fog Light CAUTION:
o The headlight aiming should be checked by an authorised Hyundai dealer after replacing the head- light bulbs.
o After heavy, driving rain or wash- ing, headlight and taillight lensescould appear frosty. This condi- tion is caused by the temperaturedifference between the lamp in- side and outside. This is similar to the condensation on your win-dows inside your vehicle during the rain and doesn’t indicate a problem with your vehicle. If thewater leaks into the lamp bulb circuitry, have the vehicle checked by an authorised Hyundai dealer.
!
OMC055021
Turn signal light
Headlight Fog light
OMC050021
Headlight Turn signal light
Fog light
Type A
Type B
Page 206 of 232
6
DO-IT-YOURSELF MAINTENANCE
25
Front Turn Signal light
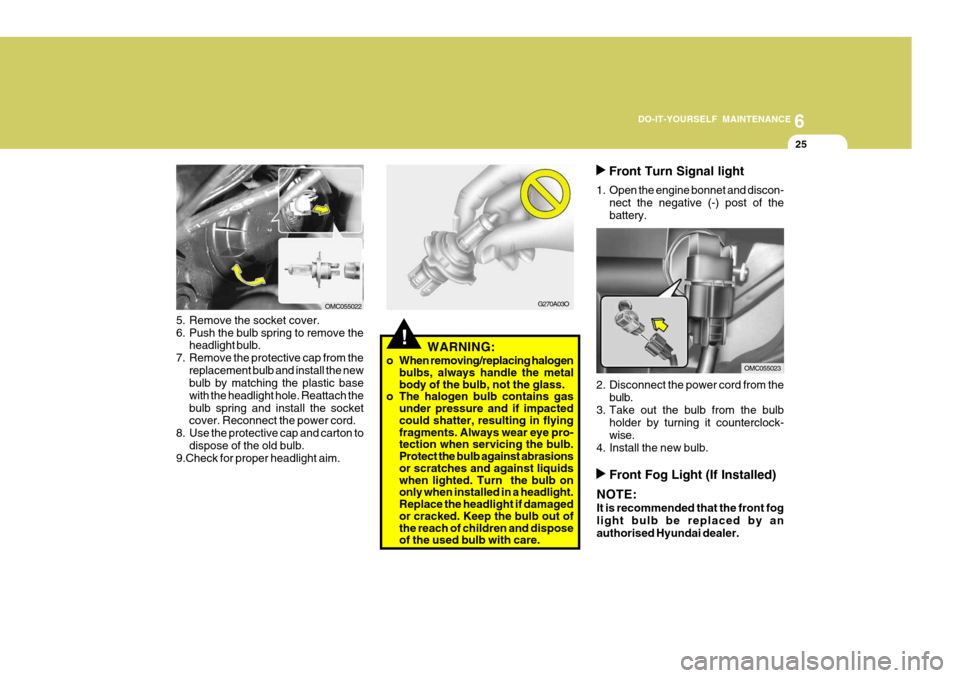
1. Open the engine bonnet and discon- nect the negative (-) post of the battery.
2. Disconnect the power cord from the bulb.
3. Take out the bulb from the bulb holder by turning it counterclock-wise.
4. Install the new bulb.
G270A03O
!WARNING:
o When removing/replacing halogen bulbs, always handle the metal body of the bulb, not the glass.
o The halogen bulb contains gas
under pressure and if impacted could shatter, resulting in flying fragments. Always wear eye pro- tection when servicing the bulb. Protect the bulb against abrasions or scratches and against liquids when lighted. Turn the bulb on only when installed in a headlight. Replace the headlight if damaged or cracked. Keep the bulb out of the reach of children and dispose of the used bulb with care.
5. Remove the socket cover.
6. Push the bulb spring to remove the
headlight bulb.
7. Remove the protective cap from the replacement bulb and install the new bulb by matching the plastic base with the headlight hole. Reattach thebulb spring and install the socket cover. Reconnect the power cord.
8. Use the protective cap and carton to dispose of the old bulb.
9.Check for proper headlight aim.
OMC055022
OMC055023
Front Fog Light (If Installed)
NOTE: It is recommended that the front fog light bulb be replaced by anauthorised Hyundai dealer.
Page 229 of 232
10INDEX
2
A Airbag ........................................................................ 1-37
Curtain airbag ......................................................... 1-42
Driver's and passenger's front airbag ...................... 1-38
Side impact airbag .................................................. 1-41
Air Cleaner Filter .......................................................... 6-8
Air Conditioning
Care ........................................................................ 6-15
Operation ................................................................ 1-96
Switch ..................................................................... 1-96
Antenna ................................................................... 1-103
Ashtray ...................................................................... 1-69
Audio System .......................................................... 1-104
Audio remote control switch ................................... 1-87
B Battery ....................................................................... 6-19
Boot Lid ..................................................................... 1-82
Bonnet Release ......................................................... 1-79
Brake Anti-lock system ..................................................... 2-12
Checking the brakes ............................................... 6-13
Fluid ........................................................................ 6-13
Pad wear warning sound ......................................... 1-55
Bulbs Replacem ent .................................................... 6-23
Bulbs W attage ........................................................... 6-29C
Care of Cassette Tapes ..........................................
1-101
Care of Discs .......................................................... 1-101
Cargo Area Cover ...................................................... 1-84
Catalytic Converter ...................................................... 7-3
Child-Protector Rear Door Lock ................................... 1-6
Child Restraint System .............................................. 1-28
Cigarette Lighter ........................................................ 1-68
Climate Control Air Filter .................................. 1-98, 6-16
Clock ......................................................................... 1-68
Clutch
Checking the cluch fluid ......................................... 6-14
Cooling Fans ............................................................. 6-21
Corrosion Protection .................................................... 4-2
Cleaning the interior .................................................. 4-6
Protecting your Hyundai from corrosion ................... 4-2
Washing and waxing ................................................. 4-4
DDoor Central door locks .................................................... 1-7
Door locks ................................................................ 1-5 Locking, unlocking front doors with a key ................ 1-5
Drink Holder ............................................................... 1-70
Driving
Economical driving ................................................. 2-17
Smooth corneri ng .................................................... 2-18
Winter driving .......................................................... 2-19