Page 104 of 427

These keys contain electronic
circuits that are activated by the
immobilizer system. They will not
work to start the engine if the
circuits are damaged.Protect the keys f rom direct
sunlight, high temperature, and
high humidity.
Donotdropthekeysorsetheavy
objects on them.
The master key fits all the locks on
your vehicle. The valet key works
only in the ignition and the driver’s
door lock. You can keep the glove
boxlockedwhenyouleaveyour
vehicle and the valet key at a parking
f acility.
You can also keep the In-Bed Trunk
locked by using the main switch in
theglovebox(seepage ). Youshouldhavereceivedakey
number tag with your keys. You will
need this key number if you ever
have to get a lost key replaced. Use
only Honda-approved key blanks.
Keep the keys away f rom liquids.
If they get wet, dry them
immediately with a sof t cloth.
The valet key does not contain a
battery. Do not try to take it apart.
118
Keys
100
VALET KEY
(LIGHT GRAY)
MASTER KEY
WITH REMOTE
TRANSMITTER
KEY
NUMBERTAG
Main MenuTable of ContentsTable of Contents
Page 106 of 427

�µ�µ
�µ �µ
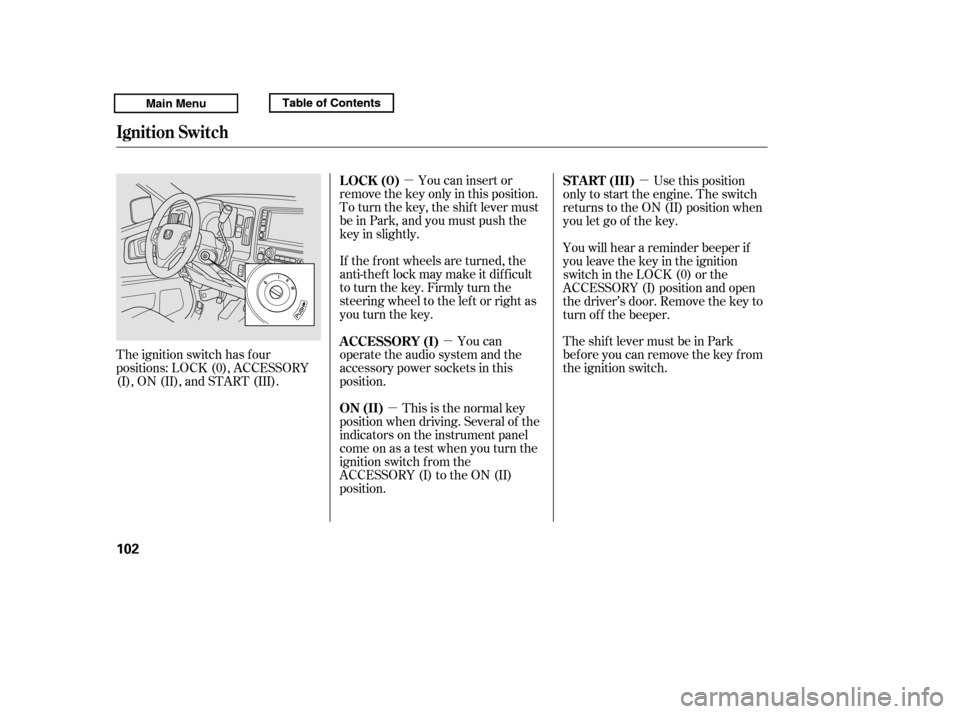
The ignition switch has f our
positions: LOCK (0), ACCESSORY
(I), ON (II), and START (III). You can insert or
remove the key only in this position.
To turn the key, the shift lever must
be in Park, and you must push the
key in slightly.
If the f ront wheels are turned, the
anti-theft lock may make it difficult
to turn the key. Firmly turn the
steering wheel to the lef t or right as
you turn the key.
You can
operate the audio system and the
accessory power sockets in this
position.
This is the normal key
position when driving. Several of the
indicators on the instrument panel
come on as a test when you turn the
ignition switch f rom the
ACCESSORY (I) to the ON (II)
position. Use this position
only to start the engine. The switch
returns to the ON (II) position when
you let go of the key.
You will hear a reminder beeper if
you leave the key in the ignition
switch in the LOCK (0) or the
ACCESSORY (I) position and open
the driver’s door. Remove the key to
turn of f the beeper.
TheshiftlevermustbeinPark
bef ore you can remove the key f rom
the ignition switch.
LOCK (0)
A CCESSORY (I)
ON (II) ST A RT (III)
Ignition Switch
102
Main MenuTable of ContentsTable of Contents
Page 114 of 427

�µ
�µ �µ
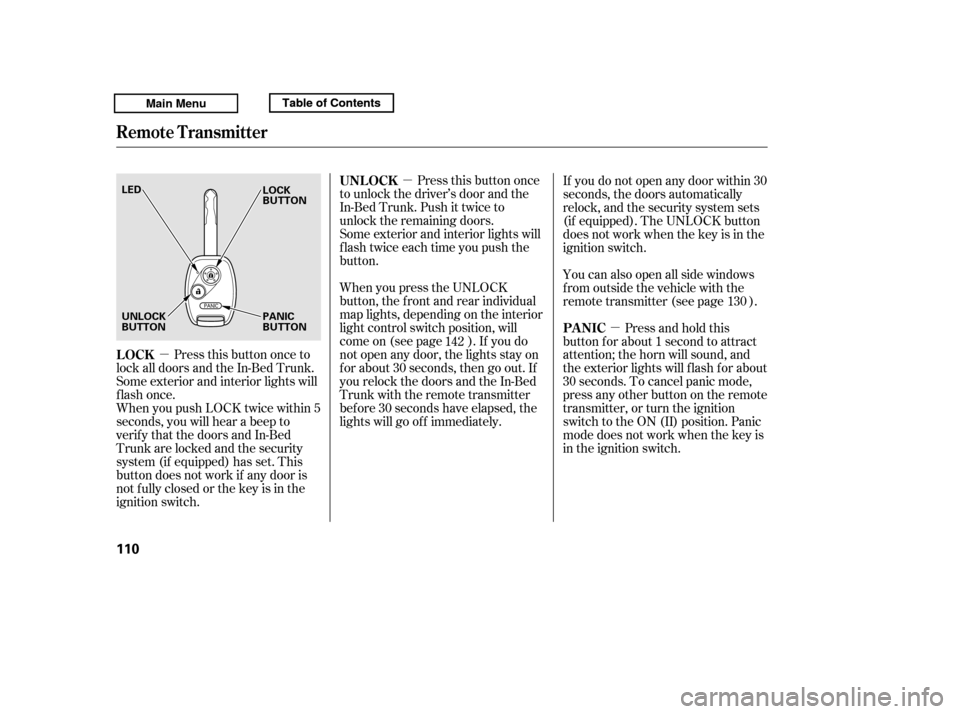
Press this button once
to unlock the driver’s door and the
In-Bed Trunk. Push it twice to
unlock the remaining doors.
Some exterior and interior lights will
f lash twice each time you push the
button.
When you press the UNLOCK
button, the f ront and rear individual
map lights, depending on the interior
light control switch position, will
come on (see page ). If you do
not open any door, the lights stay on
f or about 30 seconds, then go out. If
you relock the doors and the In-Bed
Trunk with the remote transmitter
bef ore 30 seconds have elapsed, the
lights will go of f immediately.
Press this button once to
lock all doors and the In-Bed Trunk.
Some exterior and interior lights will
flash once.
When you push LOCK twice within 5
seconds, you will hear a beep to
verify that the doors and In-Bed
Trunk are locked and the security
system (if equipped) has set. This
button does not work if any door is
not f ully closed or the key is in the
ignition switch. Press and hold this
button for about 1 second to attract
attention; the horn will sound, and
the exterior lights will f lash f or about
30 seconds. To cancel panic mode,
press any other button on the remote
transmitter, or turn the ignition
switch to the ON (II) position. Panic
mode does not work when the key is
in the ignition switch.
If you do not open any door within 30
seconds, the doors automatically
relock, and the security system sets
(if equipped). The UNLOCK button
does not work when the key is in the
ignition switch.
You can also open all side windows
f rom outside the vehicle with the
remote transmitter (see page ).
142 130
UNL OCK
LOCK PA NIC
Remote Transmitter
110
LED UNLOCK
BUTTON
PANIC
BUTTON
LOCK
BUTTON
Main MenuTable of ContentsTable of Contents
Page 118 of 427
To swing open the tailgate, f irst
make sure it is f ully closed, then pull
up the right lower handle, and swing
the tailgate to the lef t.
To close, swing the tailgate back,
and push it f irmly until it is latched.
The dropped open tailgate can be
used as an extended pickup bed.
Make sure to secure the items in the
pickup bed, and do not exceed the
maximum allowable weight on the
tailgate(seepage ).
To turn the bed lights on or off, use
the bed light switch on the
dashboard (see page ).
Bef ore opening or closing the
tailgate, check that passengers,
especially children, are not in the
tailgate’s path.
263
144 T o Swing Open the T ailgate
Dual-Action Tailgate
114
HANDLESwinging the tailgate open or
closed while anyone is in its
path can cause serious injury.
Make sure all passengers are
clear of the tailgate’s path
before opening or closing it.
Do not drive with the tailgate swung
open. This could damage the tailgate.
Main MenuTable of ContentsTable of Contents
Page 119 of 427

See page for information on
cargo loading and weight limits.
You can also store and lock items in
the In-Bed Trunk (see page ).
If you do not f asten the seat belt, you
f irst hear the seat belt reminder
alarm, then the tailgate reminder
beeper sounds.
The indicator does not monitor the
tailgate when it is dropped open.
Do not allow anyone to hang on the
swung open tailgate. This could
damage the tailgate.
Do not leave the tailgate swung open.
The tailgate may swing and shut
accidentally. This could cause
serious injuries.
Thebedlightscomeonwhenyou
swing open the tailgate. You can also
turn the bed lights on or off by
pushing the bed light switch on the
dashboard (see page ).
If the tailgate is swung open or not
closed tightly when the ignition
switch is in the ON (II) position, you
will hear six beeps and see the
indicator blinking. The indicator
stays on until you close the tailgate.
The beeper also sounds and the
indicator blinks when you move the
shif t lever out of the Park or neutral
position.
This indicator is in the door and
tailgate open monitor on the
instrument panel. It comes on when
the tailgate is swung open or it is not
completely closed. This indicator
worksevenif thekeyisnotinthe
ignition switch.
The tailgate open indicator appears
on the multi-information display (see
page ).
11
144
259
116
On models without navigation system
On models with navigation system
Loading Cargo
T ailgat e Open Indicat or
Dual-Action Tailgate
Inst rument s and Cont rols
115
Main MenuTable of ContentsTable of Contents
Page 120 of 427

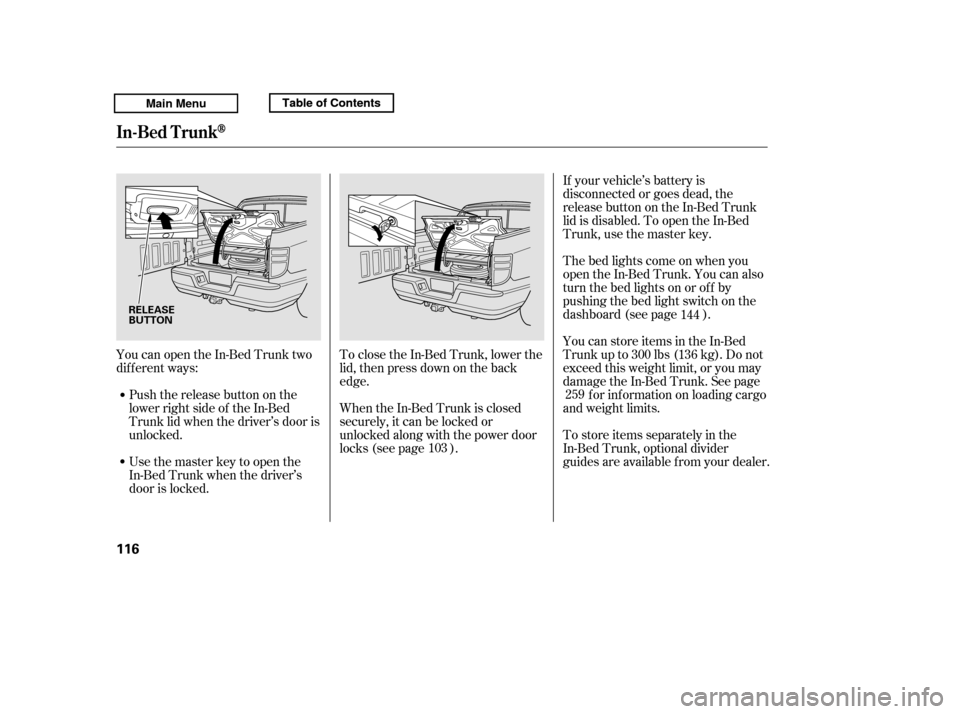
YoucanopentheIn-BedTrunktwo
dif f erent ways:Push the release button on the
lower right side of the In-Bed
Trunk lid when the driver’s door is
unlocked. To close the In-Bed Trunk, lower the
lid, then press down on the back
edge. If your vehicle’s battery is
disconnected or goes dead, the
release button on the In-Bed Trunk
lid is disabled. To open the In-Bed
Trunk, use the master key.
Usethemasterkeytoopenthe
In-Bed Trunk when the driver’s
door is locked. Thebedlightscomeonwhenyou
open the In-Bed Trunk. You can also
turn the bed lights on or off by
pushing the bed light switch on the
dashboard (see page ).
You can store items in the In-Bed
Trunk up to 300 lbs (136 kg). Do not
exceed this weight limit, or you may
damage the In-Bed Trunk. See page
f or inf ormation on loading cargo
and weight limits.
To store items separately in the
In-Bed Trunk, optional divider
guides are available f rom your dealer.
When the In-Bed Trunk is closed
securely, it can be locked or
unlocked along with the power door
locks (see page ). 144
259
103
In-Bed Trunk
116
RELEASE
BUTTON
Main MenuTable of ContentsTable of Contents
Page 122 of 427
There are two cargo hooks f or
plastic grocery bags at the back of
the In-Bed Trunk. They are designed
to hold light items. Heavy objects
may damage the hooks.
To protect items in the In-Bed Trunk,
you can disable its release button by
turning off the main switch in the
glove box and locking the glove box
with the master key.
Even if the main switch is in the OFF
position, you can open the In-Bed
Trunk with the master key.
When you are f inished washing the
In-Bed Trunk, dry it with a sof t cloth,
and reinstall the drain plug.
Youcanwashtheinsideof the
In-Bed Trunk with a water and mild
detergent solution, and a sof t brush
or cloth.
To drain water from the In-Bed
Trunk, remove the drain plug by
turning it counterclockwise. Cargo Hooks
Washing the In-Bed T runk
In-Bed T runk Main Switch
In-Bed Trunk
118
DRAIN PLUG CARGO HOOKS
MAIN SWITCH
Main MenuTable of ContentsTable of Contents
Page 137 of 427
Keeptheinsideandoutsidemirrors
clean and adjusted f or best visibility.
Be sure to adjust the mirrors bef ore
you start driving.
The inside mirror has day and night
positions. The night position reduces
glare f rom headlights behind you.
Flip the tab on the bottom edge of
the mirror to select the day or night
position.Therearviewmirrorhasacompass
function to indicate the vehicle’s
direction.
Refer to on page .
You will also see a ‘‘RELEASE
PARKING BRAKE’’ message on the
multi-inf ormation display (see page ).
90 213
If equipped
On models with navigation system
CONT INUED
Mirrors Compass
Parking Brake, Mirrors
Inst rument s and Cont rols
133
TAB
Driving the vehicle with the parking
brake applied can damage the rear
brakes and hubs. A beeper will sound if
the vehicle is driven with the parking
brake on.
Main MenuTable of ContentsTable of Contents