Page 303 of 427

Always use saf ety chains when you
tow a trailer. Make sure the chains
are secured to the trailer and hitch,
and that they cross under the tongue
and can catch the trailer if it
becomes unhitched. Leave enough
slack to allow the trailer to turn
corners easily, but do not let the
chains drag on the ground.When towing a trailer, we
recommend that you carry a f ull-size
spare wheel and tire for your vehicle
and trailer. See page f or proper
tire size, page f or how to store a
full size wheel and tire, and page
f or inf ormation on changing a
flat tire.
Remember to unhitch the trailer
bef ore changing a f lat. Ask your
trailer sales or rental agency where
and how to store the trailer’s spare
tire.
This device is recommended if your
trailer tends to sway. Your trailer
dealer or rental agency can tell you
what kind of sway control you need
and how to install it.
Many states and provinces require
special exterior mirrors when towing
a trailer. Even if they don’t, you
should install special mirrors if you
cannot clearly see behind you, or if
the trailer creates a blind spot. 366
353
361
Saf et y Chains
Sway Cont rol Spare Tires
Trailer Mirrors
Towing a Trailer
Driving
299
Main MenuTable of Contents
Page 352 of 427

Slide the new wiper blade into the
holder until the tabs lock.
Slide the wiper blade assembly
onto the wiper arm. Make sure it
locks in place.
Lower the wiper arm against the
window.
Turn the ignition switch to the ON
(II) position, and turn the wiper
switch of f to return the wiper arms
to the parked position.Clean the wheels as you would the
rest of the exterior. Wash them with
thesamesolution,andrinsethem
thoroughly.
Aluminum alloy wheels have a
protective clear-coat that keeps
the aluminum f rom corroding and
tarnishing. Cleaning the wheels
with harsh chemicals (including
some commercial wheel cleaners)
or a stif f brush can damage the
clear-coat. To clean the wheels,
use a mild detergent and a sof t
brush or sponge. To saf ely operate your vehicle, your
tires must be the proper type and
size, in good condition with adequate
tread, and correctly inf lated.
The f ollowing pages give more
detailed inf ormation on how to take
care of your tires and what to do
when they need to be replaced.
6. 7. 8. 9.
If equipped
Wiper Blades, Wheels, Tires
Wheels T ires
348
Using tires that are excessively
worn or improperly inflated can
cause a crash in which you can
be seriously hurt or killed.
Follow all instructions in this
owner’s manual regarding tire
inflation and maintenance.
Main MenuTable of Contents
Page 354 of 427

Never use a puncture-repairing agent
in a f lat tire. If used, you will have to
replace the tire pressure sensor.
Havetheflattirerepairedbyyour
dealer as soon as possible.
The following chart shows the
recommended cold tire pressures f or
most normal and high-speed driving
conditions.Your tires have wear indicators
molded into the tread. When the
tread wears down, you will see a 1/2
inch (12.7 mm) wide band across the
tread. This shows there is less than
1/16 inch (1.6 mm) of tread lef t on
the tire.
A tire this worn gives very little
traction on wet roads. You should
replace the tire if you can see three
or more tread wear indicators.
Thecompactsparetirepressureis:
Excessive tread wear.
Cuts, splits, or cracks in the side
of the tire. Replace the tire if you
can see f abric or cord.
Bumps or bulges in the tread or
side of the tire. Replace the tire if
youfindeitherof theseconditions.
Every time you check inf lation, you
should also examine the tires f or
damage, f oreign objects, and wear.
Youshouldlookfor:
For additional inf ormation about
your tires, see page .
For convenience, the recommended
tire sizes and cold tire pressures are
on a label on the driver’s doorjamb.
392
Tire Size Cold Tire Pressure
Tire Size Cold Tire PressureFront/Rear:
Front/Rear:
RT, RTS models, and Canadian DX, VP
models
RTL models, and Canadian EX-L models
Tires
Recommended Tire Pressures Tire Inspection
350
INDICATOR LOCATION MARKS
TREAD WEAR INDICATORS
32 psi (220 kPa , 2.2 kgf/cm
)
P245/65R17 105T
P245/60R18 104T 32 psi (220 kPa ,
2.2 kgf/cm
)
60 psi (420 kPa , 4.2 kgf/cm)
Main MenuTable of Contents
Page 363 of 427

This section covers the more
common problems that motorists
experience with their vehicles. It
gives you inf ormation about how to
safely evaluate the problem and what
to do to correct it. If the problem has
stranded you on the side of the road,
you may be able to get going again.
If not, you will also f ind instructions
on getting your vehicle towed.......................
Compact Spare Tire . 360
....................
Changing a Flat Tire . 361
.............
If the Engine Won’t Start . 369
................................
Jump Starting . 370
..............
If the Engine Overheats . 372
.........
Low Oil Pressure Indicator . 374
..........
Charging System Indicator . 374
.......
Malf unction Indicator Lamp . 375
...............
Brake System Indicator . 376
..............................................
Fuses . 378
..............................
Fuse Locations . 381
......................
Emergency Towing . 383
..........
If Your Vehicle Gets Stuck . 383
Taking Care of the Unexpected
T aking Care of t he Unexpect ed
359
Main Menu
Page 364 of 427

Use the compact spare tire as a
temporary replacement only. Get
your regular tire repaired or replaced,
and put it back on your vehicle as
soon as you can.
Check the air pressure of the
compact spare tire every time you
check the other tires. It should be
inf lated to:
Follow these precautions:Replace the tire when you can see
the tread wear indicator bars. The
replacement should be the same size
and design tire, mounted on the
same wheel. The spare tire is not
designed to be mounted on a regular
wheel, and the spare wheel is not
designed f or mounting a regular tire.
Never exceed 50 mph (80 km/h).
This tire gives a harsher ride and
less traction on some road
surf aces. Use greater caution
while driving.
Do not mount snow chains on a
compact spare. Do not use your compact spare
tire on another vehicle unless it is
thesamemakeandmodel.
The low tire pressure indicator
comes on and stays on af ter you
replace the flat tire with the compact
spare tire. Af ter several miles
(kilometers) driving with the
compact spare tire, the TPMS
indicator comes on and the low tire
pressure indicator goes of f .
After the flat tire is replaced with the
spare tire, the low tire pressure/
TPMS indicator stays on. After
several miles (kilometers) driving
with the spare, this indicator begins
to f lash, then stays on again. You will
also see a ‘‘CHECK TPMS
SYSTEM’’ message on the multi-
inf ormation display (see page ). 284
On models without navigation system
On models with navigation system
Compact Spare Tire
360
INDICATOR LOCATION MARK
TREAD WEAR INDICATOR BAR
60 psi (420 kPa , 4.2 kgf/cm)
Main MenuTable of Contents
Page 365 of 427

Turn on the hazard warning lights,
and turn the ignition switch to the
LOCK (0) position. Have all
passengers get out of the vehicle
while you change the tire.
Park the vehicle on f irm, level, and
non-slippery ground. Put the
transmission in Park. Apply the
parking brake.
If you are towing a trailer, unhitch
it.
If you have a f lat tire while driving,
stop in a saf e place to change it.
Drive slowly along the shoulder until
you get to an exit or an area to stop
that is far away from the traffic lanes.
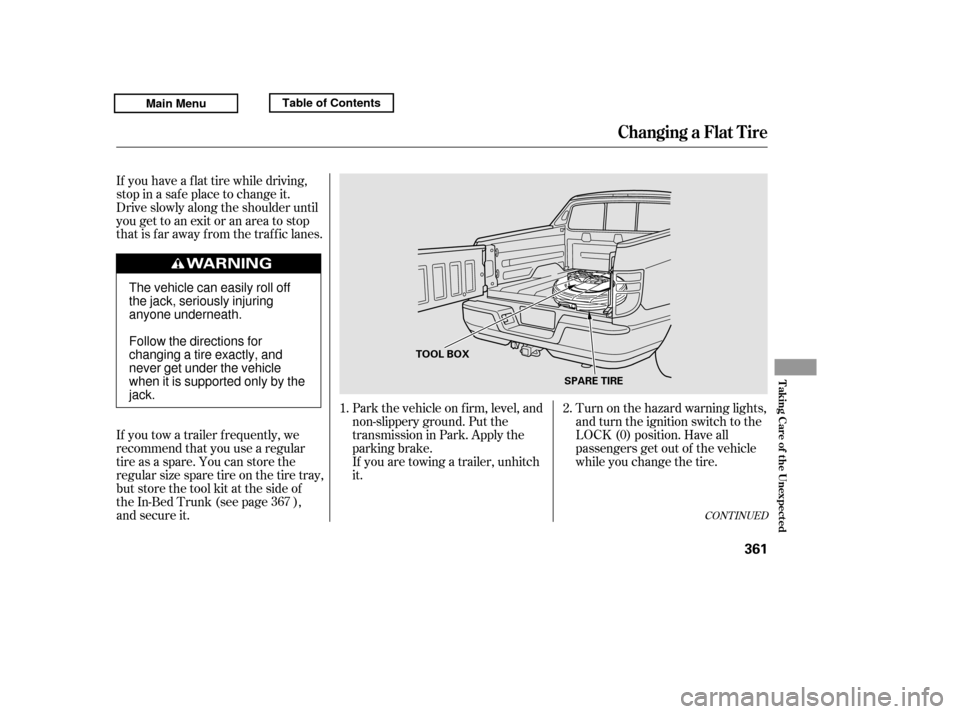
If you tow a trailer f requently, we
recommend that you use a regular
tire as a spare. You can store the
regular size spare tire on the tire tray,
but store the tool kit at the side of
the In-Bed Trunk (see page ),
and secure it.
2.
1.
367
CONT INUED
Changing a Flat T ire
T aking Care of t he Unexpect ed
361
TOOL BOX SPARE TIRE
The vehicle can easily roll off
the jack, seriously injuring
anyone underneath.
Follow the directions for
changing a tire exactly, and
never get under the vehicle
when it is supported only by thejack.
Main MenuTable of Contents
Page 366 of 427
Open the In-Bed Trunk.
Remove the two tire tray holding
bolts.Pull out the tire tray with the
handle, and hook the rear of the
tire tray to the guides on the back
edge of the In-Bed Trunk.Unfasten the strap to remove the
tool box, and unscrew the wing
bolt.
Takeoutthecompactsparetire.
If you are using a cargo net or a
cargo cover in the In-Bed Trunk,
remove it bef ore pulling out the tire
tray.
4.
3.
5.6.
7.
Changing a Flat T ire
362
WING BOLT
TOOL BOX STRAP
TIRE
TRAY
TIRE TRAY HOLDING BOLTS
Main MenuTable of Contents
Page 367 of 427
CONT INUED
Loosen each wheel nut 1/2 turn
with the wheel nut wrench.Place the jack under the jacking
point nearest the tire you need to
change.Turn the dial at the bottom of the
jack clockwise until the top of the
jack contacts the jacking point.
Make sure the jacking point tab is
restinginthejacknotch.
8.
9.10.
Changing a Flat T ire
T aking Care of t he Unexpect ed
363
JACKING POINTDIAL
Main MenuTable of Contents