Page 597 of 722
When preparing to tow, and bef ore
driving away, be sure to check the
f ollowing:All items in or on the trailer are
properly secured and cannot shif t
while you drive.
Your vehicle tires and spare are
properly inf lated, and the trailer
tires and spare are inflated as
recommended by the trailer
maker.The added weight, length, and
height of a trailer will af f ect your
vehicle’s handling and perf ormance,
so driving with a trailer requires
some special driving skills and
techniques.
Foryoursafetyandthesafetyof
others,taketimetopracticedriving
maneuvers bef ore heading f or the
open road, and f ollow the guidelines
below.
Drive slower than normal in all
driving situations, and obey posted
speed limits f or vehicles with trailers.
Use the D position when towing a
trailer on level roads. Do not exceed
55 mph (88 km/h). At higher speeds,
the trailer may sway or affect vehicle
handling.
The vehicle has been properly
serviced, and the suspension,
cooling system, and lights are in
good operating condition.
The trailer has been properly
serviced and is in good condition.
All weights and loads are within
limits.
Thehitch,safetychains,andany
other attachments are secure.
The lights and brakes on your
vehicle and the trailer are working
properly.
Pre-T ow Checklist
Driving Saf ely With a T railer
T owing Speeds and Gears
Towing a Trailer594
10/07/17 10:54:00 31TK8600_599
2011 Odyssey
Page 646 of 722
CONT INUED
Even though your vehicle is
equipped with TPMS, we
recommend that you visually check
your tires every day. If you think a
tire might be low, check it
immediately with a tire gauge.
Use a gauge to measure the air
pressure in each tire at least once a
month. Even tires that are in good
condition may lose 1 to 2 psi (10 to
20 kPa, 0.1 to 0.2 kgf /cm ) per
month. Remember to check the
sparetireatthesametime.
Check the air pressures when the
tires are cold. This means the
vehicle has been parked f or at least 3
hours, or driven less than 1 mile (1.6
km). Add or release air, if needed, to
match the recommended cold tire
pressures.If you check air pressures when the
tires are hot (driven f or several
miles/kilometers), you will see
readings 4 to 6 psi (30 to 40 kPa, 0.3
to 0.4 kgf/cm ) higher than the cold
readings. This is normal. Do not let
air out to match the recommended
cold air pressure. The tire will be
underinf lated.
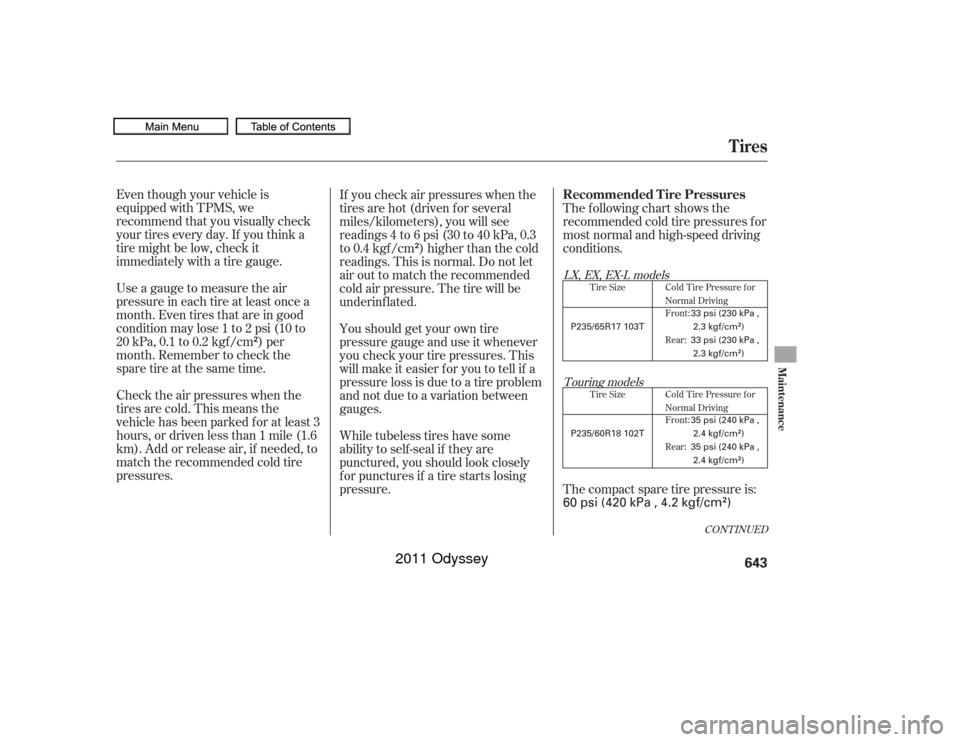
The following chart shows the
recommended cold tire pressures f or
most normal and high-speed driving
conditions.
Youshouldgetyourowntire
pressure gauge and use it whenever
you check your tire pressures. This
will make it easier f or you to tell if a
pressure loss is due to a tire problem
and not due to a variation between
gauges.
While tubeless tires have some
ability to self -seal if they are
punctured, you should look closely
for punctures if a tire starts losing
pressure. The compact spare tire pressure is:
Tire Size Cold Tire Pressure for
Normal Driving
Tire Size Cold Tire Pressure for Normal Driving
Front:
Rear: Front:
Rear:
Touring models
LX, EX, EX-L models
Tires
Recommended T ire Pressures
Maint enance
643
60 psi (420 kPa , 4.2 kgf/cm
)
33 psi (230 kPa ,
2.3 kgf/cm
)
33 psi (230 kPa ,
2.3 kgf/cm)
P235/60R18 102T 35 psi (240 kPa ,
2.4 kgf/cm)
35 psi (240 kPa ,
2.4 kgf/cm)
P235/65R17 103T
10/07/17 11:00:28 31TK8600_648
2011 Odyssey
Page 648 of 722
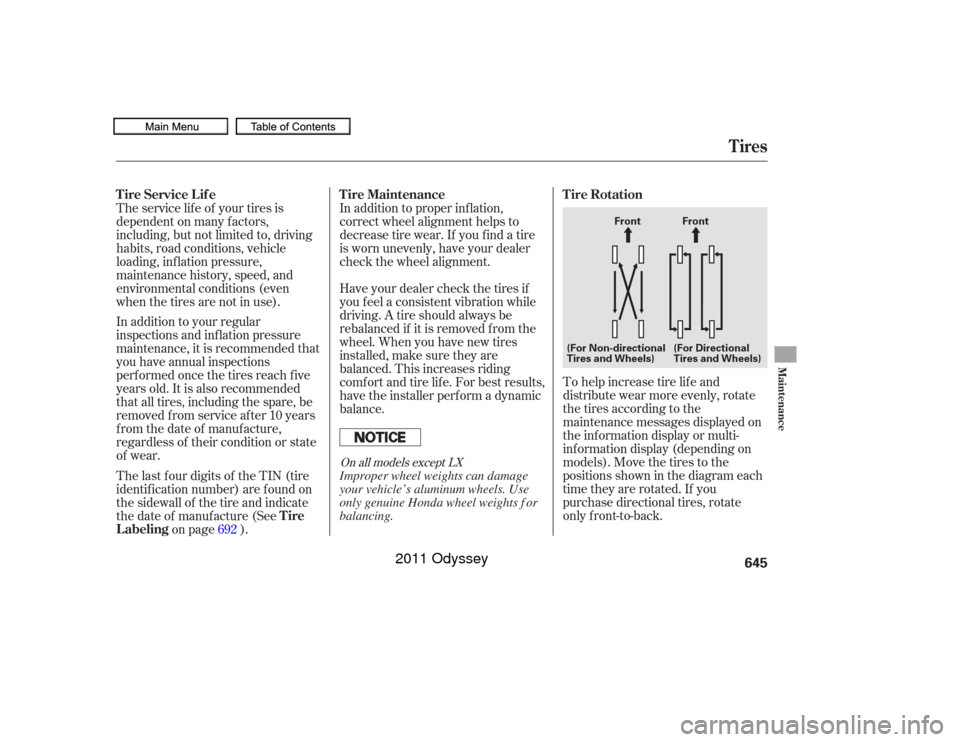
To help increase tire lif e and
distribute wear more evenly, rotate
the tires according to the
maintenance messages displayed on
the inf ormation display or multi-
inf ormation display (depending on
models). Move the tires to the
positions shown in the diagram each
time they are rotated. If you
purchase directional tires, rotate
only f ront-to-back.
In addition to proper inf lation,
correct wheel alignment helps to
decrease tire wear. If you f ind a tire
is worn unevenly, have your dealer
check the wheel alignment.
Have your dealer check the tires if
you f eel a consistent vibration while
driving. A tire should always be
rebalanced if it is removed f rom the
wheel. When you have new tires
installed, make sure they are
balanced. This increases riding
comf ort and tire lif e. For best results,
have the installer perform a dynamic
balance.
The service lif e of your tires is
dependent on many f actors,
including, but not limited to, driving
habits, road conditions, vehicle
loading, inf lation pressure,
maintenance history, speed, and
environmental conditions (even
when the tires are not in use).
The last f our digits of the TIN (tire
identif ication number) are f ound on
the sidewall of the tire and indicate
the date of manufacture (See
on page ).
In addition to your regular
inspections and inf lation pressure
maintenance, it is recommended that
you have annual inspections
perf ormed once the tires reach f ive
years old. It is also recommended
that all tires, including the spare, be
removed from service after 10 years
from the date of manufacture,
regardless of their condition or state
of wear.
692
On all models except LX
Tires
Tire Rotation
T ire Maintenance
Tire Service Lif e
Tire
Labeling
Maint enance
645
Front
(For Non-directional
Tires and Wheels) (For Directional
Tires and Wheels)Front
Improper wheel weights can damage
your vehicle’s aluminum wheels. Use
only genuine Honda wheel weights f or
balancing.
10/07/17 11:00:50 31TK8600_650
2011 Odyssey
Page 656 of 722
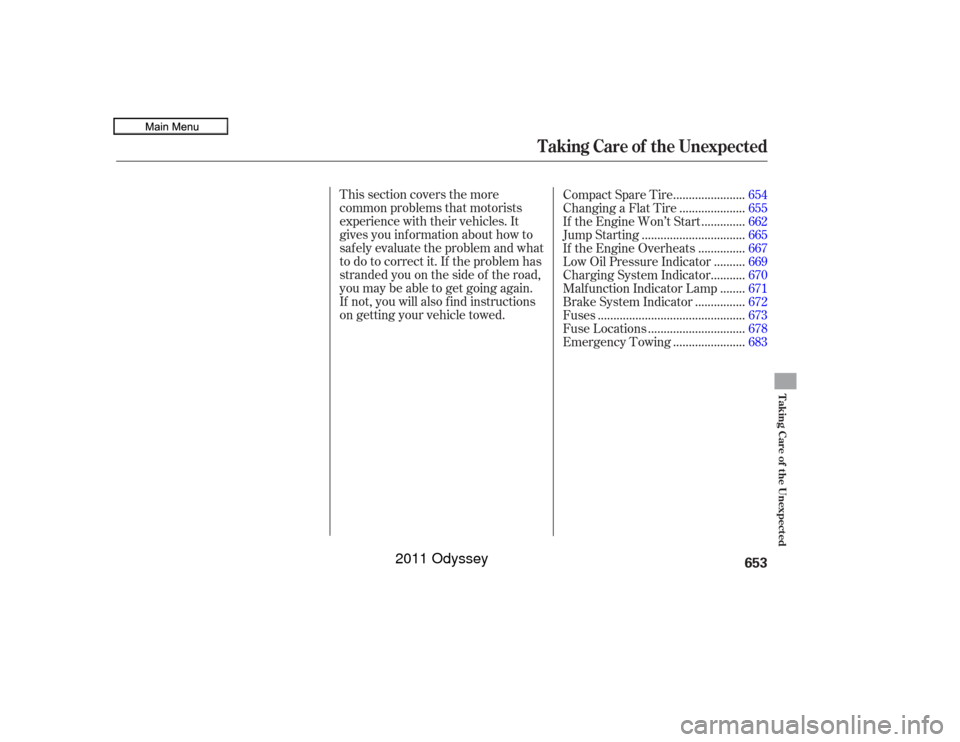
This section covers the more
common problems that motorists
experience with their vehicles. It
gives you inf ormation about how to
safely evaluate the problem and what
to do to correct it. If the problem has
stranded you on the side of the road,
you may be able to get going again.
If not, you will also f ind instructions
on getting your vehicle towed.......................
Compact Spare Tire .654
....................
Changing a Flat Tire .655
.............
If the Engine Won’t Start . 662
................................
Jump Starting .665
..............
If the Engine Overheats . 667
.........
Low Oil Pressure Indicator . 669
..........
Charging System Indicator . 670
.......
Malf unction Indicator Lamp . 671
...............
Brake System Indicator . 672
..............................................
Fuses .673
..............................
Fuse Locations .678
......................
Emergency Towing .683
Taking Care of the Unexpected
Taking Care of the Unexpected
653
10/07/17 11:01:44 31TK8600_658
2011 Odyssey
Page 657 of 722
Use the compact spare tire as a
temporary replacement only. Get
your regular tire repaired or replaced,
and put it back on your vehicle as
soon as you can.The low tire pressure indicator
comes on and stays on af ter you
replace the flat tire with the
compact spare tire. Af ter several
miles (kilometers) driving with the
compact spare tire, the TPMS
indicator comes on and the low
tire pressure indicator goes of f .
After the flat tire is replaced with
the spare tire, the low tire
pressure/TPMS indicator stays on.
Af ter several miles (kilometers)
driving with the spare, this
indicator begins to f lash, then
stays on again. You will also see a
‘‘CHECK TPMS SYSTEM’’
message on the multi-information
display (see page ).
Follow these precautions:
Do not use your compact spare
tire on another vehicle unless it is
thesamemakeandmodel. Do not mount snow chains on the
compact spare tire. This tire gives a harsher ride and
less traction on some road
surf aces. Use greater caution
while driving. Never exceed 50 mph (80 km/h).
Check the air pressure of the
compact spare tire every time you
check the other tires. It should be
inf lated to:
577
Except Touring modelsTouring models
Compact Spare Tire65460 psi (420 kPa , 4.2 kgf/cm
)
10/07/17 11:01:51 31TK8600_659
2011 Odyssey
Page 658 of 722
CONT INUED
Park the vehicle on f irm, level, and
non-slippery ground. Put the
transmission in Park. Apply the
parking brake.
If you are towing a trailer,
Turn on the hazard warning lights,
and turn the ignition switch to the
LOCK (0) position. Have all
passengers get out of the vehicle
while you change the tire.
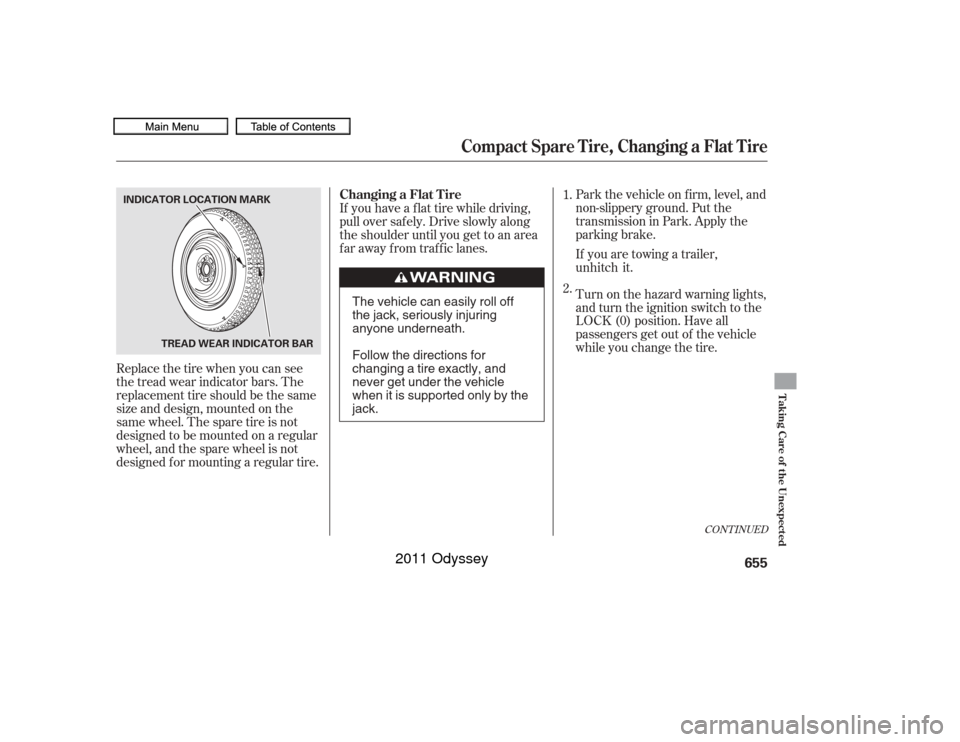
Replace the tire when you can see
the tread wear indicator bars. The
replacement tire should be the same
size and design, mounted on the
same wheel. The spare tire is not
designed to be mounted on a regular
wheel, and the spare wheel is not
designed f or mounting a regular tire. If you have a f lat tire while driving,
pull over saf ely. Drive slowly along
the shoulder until you get to an area
far away from traffic lanes.
2. 1.
Compact Spare Tire, Changing a Flat Tire
Changing a Flat T ire
Taking Care of the Unexpected
655
TREAD WEAR INDICATOR BAR
INDICATOR LOCATION MARK
The vehicle can easily roll off
the jack, seriously injuring
anyone underneath.
Follow the directions for
changing a tire exactly, and
never get under the vehicle
when it is supported only by the
jack.
10/07/17 11:01:59 31TK8600_660
unhitch it.
2011 Odyssey
Page 659 of 722
Move the second row seats to the
rear-most position (see page ).
Remove the f loor mat under the
second row seats (see page ).
Pull up the floor carpet. Raise the
f loor lid by lif ting up with the
handle, then remove it.Take the tool kit case out of the
spare tire well.
Take the jack, vinyl storage bag,
bracket, bracket mounting wing
bolt, and the tire mounting wing
bolt out of the tool kit case.
6.
7.
5. 4.
3. 637176
Changing a Flat Tire656
HANDLE FLOOR LID
FLOOR CARPET
TOOL KIT CASEBRACKET
VINYL STORAGE BAG
TIRE
MOUNTING
WING BOLT
BRACKET
MOUNTING
WING BOLT JACK
WING BOLT
10/07/17 11:02:07 31TK8600_661
2011 Odyssey
Page 660 of 722
CONT INUED
Unscrew the wing bolt and take
the spare tire out of its well.
Place blocks in front and back of
the wheel diagonally opposite the
tire you are changing.Loosen each wheel nut 1/2 turn
with the wheel nut wrench.Placethejackunderthejacking
point nearest the tire you need to
change. Turn the end bracket
clockwise until the top of the jack
contacts the jacking point. Make
sure the jacking point tab is
restinginthejacknotch.
8.
9.
10. 11.
Changing a Flat Tire
Taking Care of the Unexpected
657
WHEEL NUT WRENCH
JACKING POINT
The wheel nut wrench supplied with
your vehicle is specially adapted to f it
the hoist shaf t. Do not use any other
tool.
10/07/17 11:02:15 31TK8600_662
2011 Odyssey