Page 48 of 356
Other LATCH-compatible seats
have a flexible-type connector as
shown above.
4. Whatever type you have, follow the child seat maker's instructions for
adjusting or tightening the fit.5. Lift the head restraint (see page94), then route the tether strap
through the legs of the head
restraint and over the seat-back,
making sure the strap is nottwisted.6. Attach the tether strap hook to theanchor, then tighten the strap as
instructed by the child seat maker.
If the tether strap is too long and
cannot be tightened firmly, find a
route where the strap can be
tightened securely.
7. Push and pull the child seat forward and from side-to-side to
verify that it is secure.
Flexible type
ANCHOR
TETHER STRAP HOOK
Installing a Child Seat
44
Main MenuTable of Contents
Page 49 of 356

Installing a Child Seat with a Lap/
Shoulder Belt
When not using the LATCH system,
all child seats must be secured to the
vehicle with the lap part of a lap/
shoulder belt.
In addition, the lap/shoulder belts in
all seating positions except the
driver's have a lockable retractor that
must be activated to secure a childseat.
If you intend to install a child seat in
the center seating position of the rear
seat, make sure to push down the
head restraint to the lowest position,
and make sure the detachable seat
belt is securely latched (see page99).
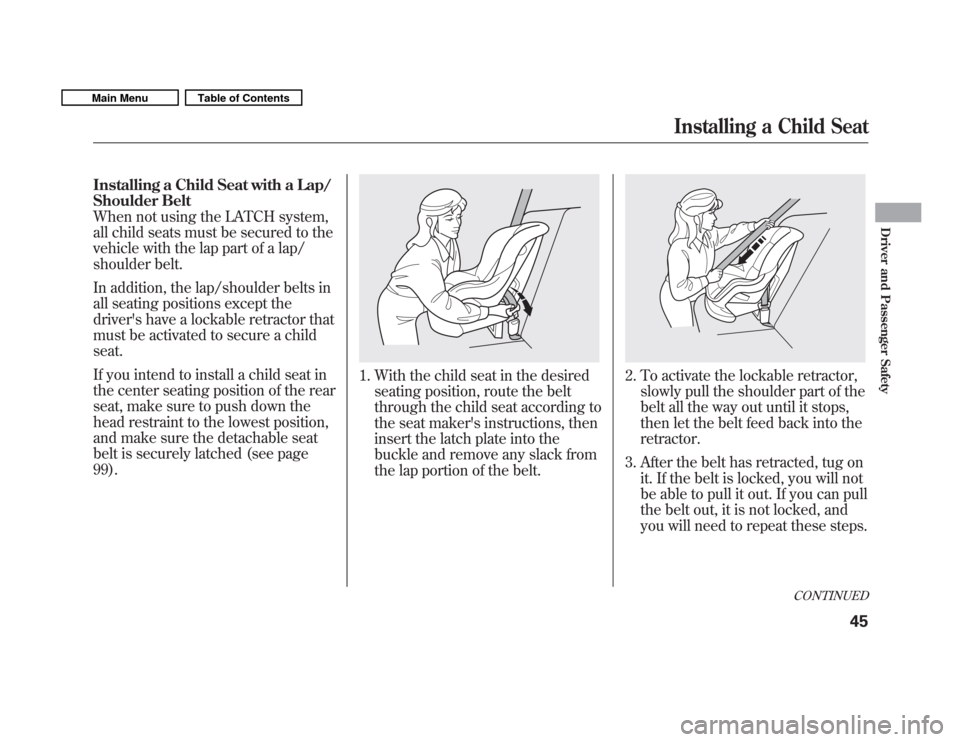
1. With the child seat in the desiredseating position, route the belt
through the child seat according to
the seat maker's instructions, then
insert the latch plate into the
buckle and remove any slack from
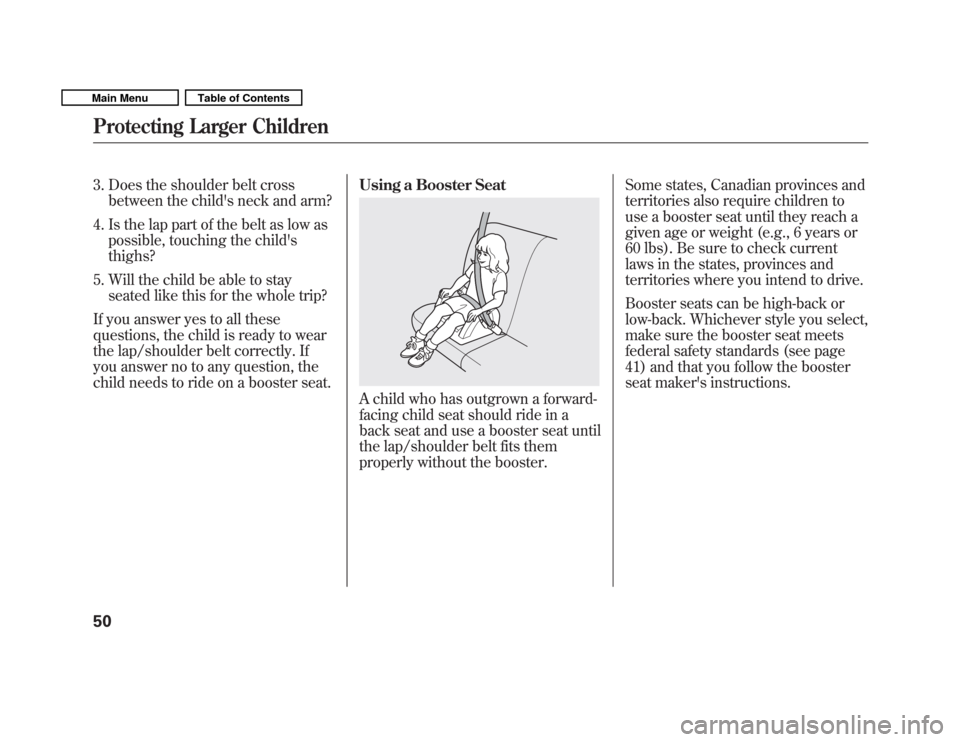
the lap portion of the belt.2. To activate the lockable retractor,slowly pull the shoulder part of the
belt all the way out until it stops,
then let the belt feed back into theretractor.
3. After the belt has retracted, tug on it. If the belt is locked, you will not
be able to pull it out. If you can pull
the belt out, it is not locked, and
you will need to repeat these steps.
CONTINUED
Installing a Child Seat
45
Driver and Passenger Safety
Main MenuTable of Contents
Page 54 of 356

3. Does the shoulder belt crossbetween the child's neck and arm?
4. Is the lap part of the belt as low as possible, touching the child's thighs?
5. Will the child be able to stay seated like this for the whole trip?
If you answer yes to all these
questions, the child is ready to wear
the lap/shoulder belt correctly. If
you answer no to any question, the
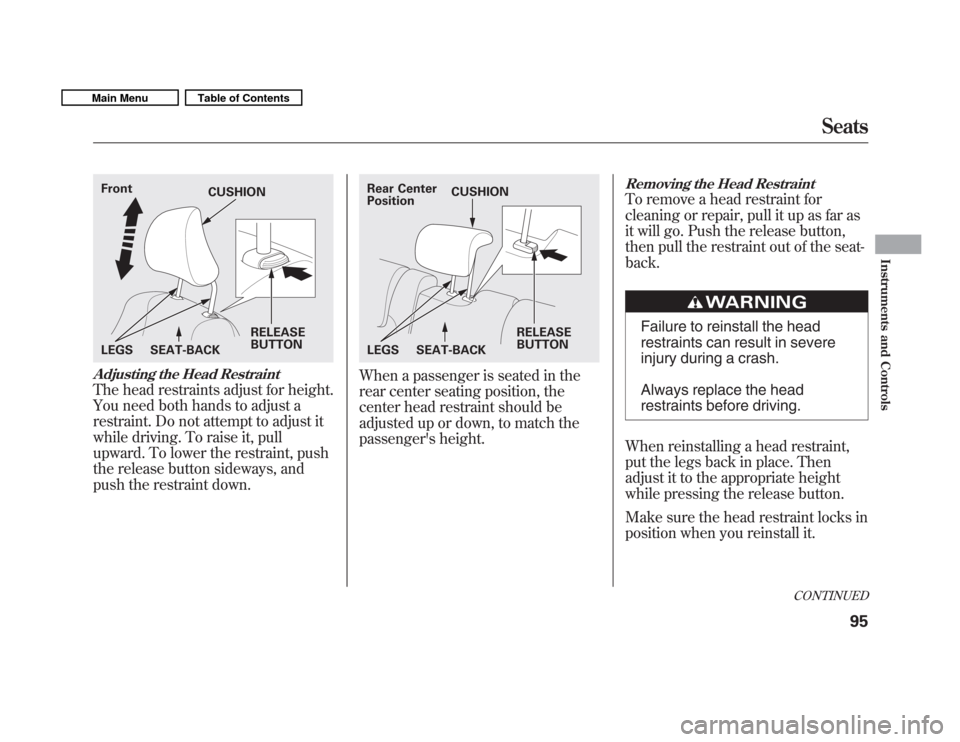
child needs to ride on a booster seat. Using a Booster Seat
A child who has outgrown a forward-
facing child seat should ride in a
back seat and use a booster seat until
the lap/shoulder belt fits them
properly without the booster.Some states, Canadian provinces and
territories also require children to
use a booster seat until they reach a
given age or weight (e.g., 6 years or
60 lbs). Be sure to check current
laws in the states, provinces and
territories where you intend to drive.
Booster seats can be high-back or
low-back. Whichever style you select,
make sure the booster seat meets
federal safety standards (see page
41) and that you follow the booster
seat maker's instructions.
Protecting Larger Children
50
Main MenuTable of Contents
Page 61 of 356

This section gives information about
the controls and displays that
contribute to the daily operation of
your vehicle. All the essential
controls are within easy reach.Control Locations
..........................58
Instrument Panel ..........................59
Instrument Panel Indicators ..........60
Gauges .......................................... 68
Trip Meter ................................ 69
Instant Fuel Economy ...............70
Average Fuel Economy .............70
Odometer .................................. 70
Fuel Gauge ............................... 70
Check Fuel Cap Indicator .........70
Maintenance Minder ™.............. 71
Controls Near the Steering
Wheel ....................................... 72
Windshield Wipers and Washers ................................ 73
Windshield Wipers ...................73
Rear Window Wiper and
Washer ................................. 73
Turn Signal and Headlights ..........74
Instrument Panel Brightness ........76
Hazard Warning Button ................76
Rear Window Defogger .................76
Steering Wheel Adjustments .........77
Keys and Locks .............................
78Immobilizer System
......................
79
Ignition Switch .............................. 80
Door Locks ................................... 81
Power Door Locks ....................82
Childproof Door Locks ..............83
Auto Door Locking/
Unlocking ............................. 83
Auto Door Locking ...................83
Auto Door Unlocking ................86
Tailgate ......................................... 88
Remote Transmitter ......................90
Seats ............................................. 93
Power Windows .......................... 100
Mirrors ....................................... 101
Parking Brake ............................. 103
Interior Convenience Items .........104
Lower Glove Box ....................105
Upper Glove Box .....................105
Beverage Holders ...................106
Seat Under Box .......................106
Accessory Power Socket .........106
Sun Visor ................................ 106
Interior Lights ............................. 107
Instruments and Controls
57
Instruments and Controls
Main MenuTable of Contents
Page 97 of 356
Front Seat Adjustments
See pages 11�12 for important safety
information and warnings about how to properly position the seats and seat-
backs.
Make all seat adjustments before you
start driving.
To adjust the seat forward or
backward, pull up on the bar under
the seat cushion's front edge. Move
the seat to the desired position, and
release the bar. Try to move the seat
to make sure it is locked in position.To change the seat-back angle, pull
up the lever on the outside of the
seat bottom.
Once a seat is adjusted correctly,
rock it back and forth to make sure it
is locked in position.
CONTINUED
Seats
93
Instruments and Controls
Main MenuTable of Contents
Page 98 of 356
Armrest
On Sport model and Canadian LX model
The driver's seat has an armrest on
the side of the seat-back. To use,
pivot it down.Rear Seat Adjustments
You can adjust the angle of the rear
seat-backs separately. To change the
seat-back angle, pull up the release
lever on the outer side of the seat-back.Head Restraints
See page 13 for important safety
information and a warning aboutimproperly positioning head restraints.
Your vehicle is equipped with head
restraints in all seating positions to
help protect you and your
passengers from the likelihood of
whiplash and other injuries.
They are most effective when you
adjust them so the center of the back
of the occupant's head rests against
the center of the restraint.
RELEASE LEVER
Seats
94
Main MenuTable of Contents
Page 99 of 356

Adjusting the Head Restraint
The head restraints adjust for height.
You need both hands to adjust a
restraint. Do not attempt to adjust it
while driving. To raise it, pull
upward. To lower the restraint, push
the release button sideways, and
push the restraint down.
When a passenger is seated in the
rear center seating position, the
center head restraint should be
adjusted up or down, to match the
passenger's height.
Removing the Head Restraint
To remove a head restraint for
cleaning or repair, pull it up as far as
it will go. Push the release button,
then pull the restraint out of the seat-back.
Failure to reinstall the head
restraints can result in severe
injury during a crash.
Always replace the head
restraints before driving.
When reinstalling a head restraint,
put the legs back in place. Then
adjust it to the appropriate height
while pressing the release button.
Make sure the head restraint locks in
position when you reinstall it.
Front
RELEASE BUTTON
CUSHION
LEGS SEAT-BACKRear Center Position RELEASE BUTTON
CUSHION
LEGS SEAT-BACK
CONTINUED
Seats
95
Instruments and Controls
Main MenuTable of Contents
Page 100 of 356

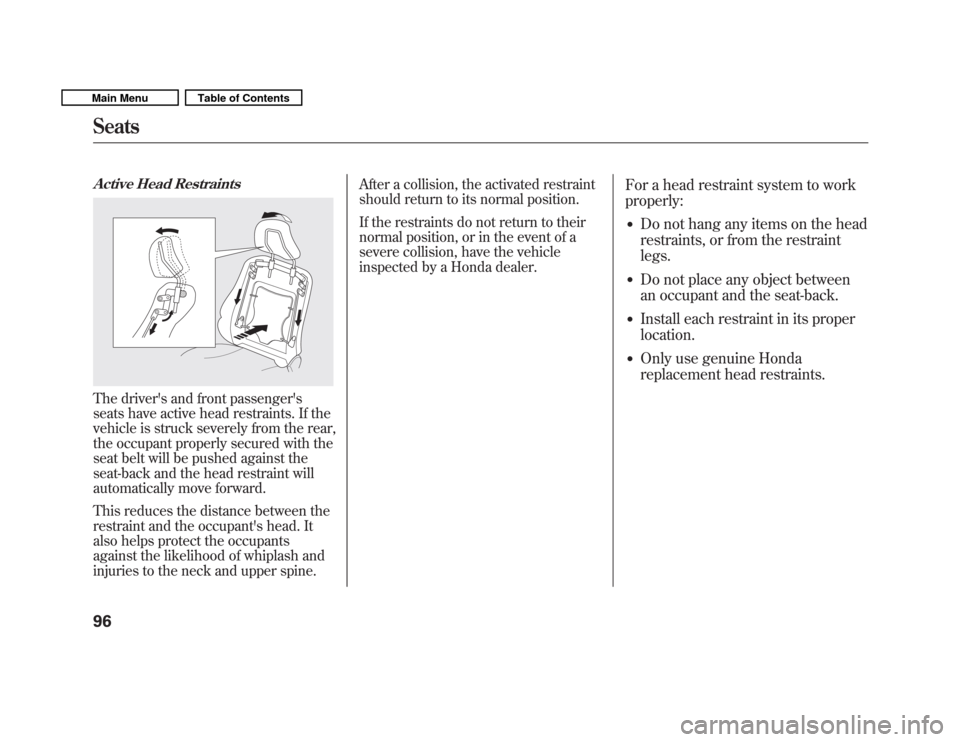
Active Head Restraints
The driver's and front passenger's
seats have active head restraints. If the
vehicle is struck severely from the rear,
the occupant properly secured with the
seat belt will be pushed against the
seat-back and the head restraint will
automatically move forward.
This reduces the distance between the
restraint and the occupant's head. It
also helps protect the occupants
against the likelihood of whiplash and
injuries to the neck and upper spine.After a collision, the activated restraint
should return to its normal position.
If the restraints do not return to their
normal position, or in the event of a
severe collision, have the vehicle
inspected by a Honda dealer.
For a head restraint system to work properly:
� Do not hang any items on the head
restraints, or from the restraint legs.
� Do not place any object between
an occupant and the seat-back.
� Install each restraint in its properlocation.
� Only use genuine Honda
replacement head restraints.
Seats
96
Main MenuTable of Contents