2011 HONDA FIT window
[x] Cancel search: windowPage 6 of 152

Navigation System5
Introduction
The navigation system applies this location, direction, and speed information to the maps and calculates a route to the destination you enter. As you drive to that destination, the system provides map and voice guidance.
The navigation system is easy to use. The locations of many places of business and entertainment are already entered in the syst em. You can select any of them as a destination by using the touch screen, joystick, or voice control.
There are several ways to enter a destination, such as by point of interest (POI), by address, by phone number, and by selecting it from the map. The last 50 destinations are saved for reuse at a later date. The system also allows you to store a home address to simplify returning home from your destination.
Accessories Precautions
If you have front or side window tinting installed, be aware that if the tint has metallic properties, it can seriously degrade or prevent GPS reception. This is because the GPS antenna is located under the dashboard.
If you plan to install electronic components, such as radar detectors, vehicle tracking devices, remote starters, additional amplifiers, or other audio components, ensure that they are not located near the navigation control unit under the dashboard, near the navigation screen in the dash, or near the GPS antenna under the dashboard. Signal noise emanating from these devices can cause intermittent disruption of the navigation system.
Important Safety Information
The navigation system can distract your attention from the road if you focus on the screen or operate the system’s controls while driving.
Enter as much information as possible into the system before you begin driving, or when the vehicle is stopped. Then, as you drive, listen to the audio instructions and use voice commands when possible.
Page 14 of 152
Navigation System13
Getting Started
Using the Voice Control System
You should use the voice control system as much as possible, and consider manual entry using the joystick as a backup method of entry.
Most of the system’s functions can be controlled by voice commands activated with the NAVI TALK button. To control the navigation system by voice:
• Press and release the NAVI TALK button.
• Wait for the beep.
• Give a voice command.
Once the microphone picks up your command, the system changes the display in response to the command and prompts you for the next command. Using the NAVI TALK button, answer the prompts as required.
If the system does not understand a command or you wait too long to give a command, it responds with “Pardon,” “Please repeat,” or “Would you say again.” If the system cannot perform a command or the command is not appropriate for the screen you are on, it sounds a beep.
Anytime you are unsure of what voice commands are available on a screen, you can always say “Help.” The system will then read the list of available commands to you.
When you give a command, the system generally either repeats the command as a confirmation or asks you for further information. If you do not wish to hear this feedback, you can turn it off. However, hearing the feedback will familiarize you with the way the system expects commands to be phrased. See the Voice Recognition Feedback setting in Setup.
If you hear a prompt such as “Please use the touch screen to...” or “Please choose an area with the joystick,” the system is asking for input that cannot be performed using the voice control system.
Improving Voice Recognition
To achieve optimum voice recognition, the following guide lines should be followed:
NOTE:
Make sure the correct screen is displayed for the vo ice command that you are using. See Voice Command Index on page 138.
• Adjust the dashboard and side vents so air does not blow against the microphone on the ceiling.
• Close the windows.
Page 50 of 152
Navigation System49
Guidance Prompts
As you get near the maneuver, you will hear a voice reminder and see a pop-up window showing you the maneuver. The number of reminders that you will hear before a maneuver is determined by Guidance Prompts in Setup on page 75.
With the factory default (Max), typically you will hear two prompts:
• The first is about 1/4 mile from the maneuver.
• The final maneuver is close to your actual turn.
If the distance between the next two driving maneuvers is very small, both maneuvers are displayed on the screen in a single window, and the voice will remind you of both of them at the same time.
NOTE:
You can say “Voice” or select VOICE on the screen at any time to be reminded of the next maneuver. Typically, a pop-up guidance window shows your next turn, and a voice guidance prompt is heard. The timing of these prompts varies, depending on the type of road you are on, and the distance to your next maneuver.
When given guidance in unverified areas, the words “if possible” are inserted before each guidance prompt. See Unverified Area Routing on page 83 for more details about unverified routing.
Driving to Your Destination
Page 54 of 152
Navigation System53
Exit Info. (Freeway Exit
Information)
You can search freeway exit information and add new destinations or waypoints to the calculated route as a new destination or waypoint. The exit info icon ( ) on the right end of the items in the direction list indicates that there is freeway exit information available. Say or select Exit Info., and choose the exit and place to set as a new destination or waypoint.
On the map screen, you can display freeway exit information using the joystick. The exit info icon will only be displayed on the map screen if there is any freeway exit information available. Choose the 1/4, 1/2, or 1 mile scale, then move the crosshairs to the desired exit info icon and click on it. Choose a place from the list and set it as a new destination or waypoint.
NOTE:
To turn on “Freeway exit information” on the map screen, display the icon bar and select the icon (see page 58).
Guidance Mode
When en route to a destination, you have two display options: single-screen mode (the factory default) and split-screen mode.
Single-screen mode – A map is displayed with occasional guidance pop-up windows as you approach a maneuver.
Split-screen mode – The map is always displayed on the left of the screen, and the maneuver or direction list is displayed on the right-hand side of the screen.
Guidance mode can be changed in either Setup (see Guidance Mode on page 90), or by accessing the icon bar (see Guidance Mode on page 58) .
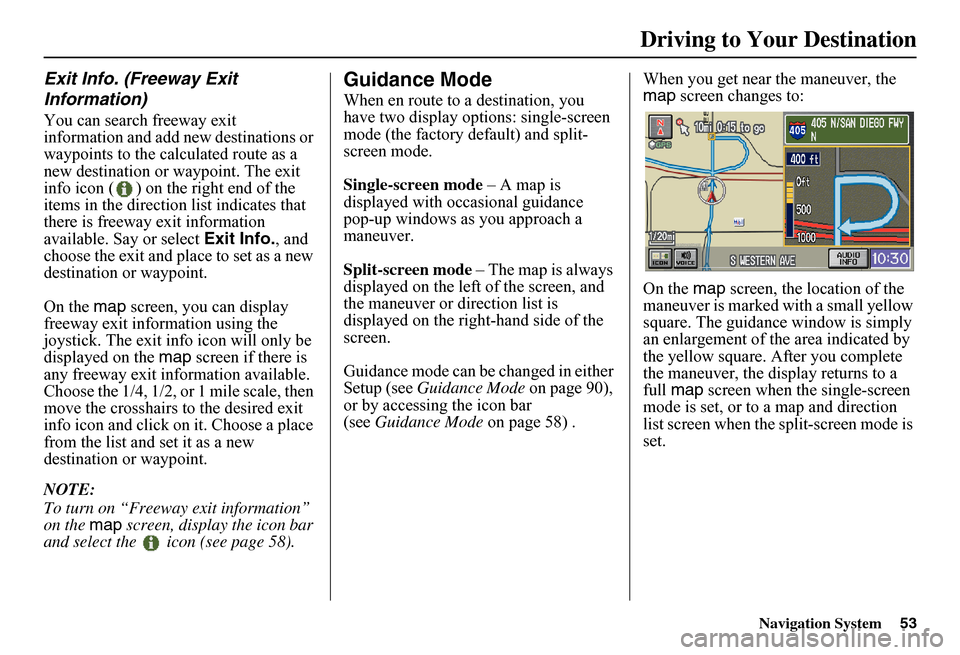
When you get near the maneuver, the map screen changes to:
On the map screen, the location of the maneuver is marked with a small yellow square. The guidance window is simply an enlargement of th e area indicated by the yellow square. After you complete the maneuver, the display returns to a full map screen when the single-screen mode is set, or to a map and direction list screen when the split-screen mode is set.
Driving to Your Destination
Page 59 of 152
58Navigation System
Driving to Your Destination
Showing Icons on the Map
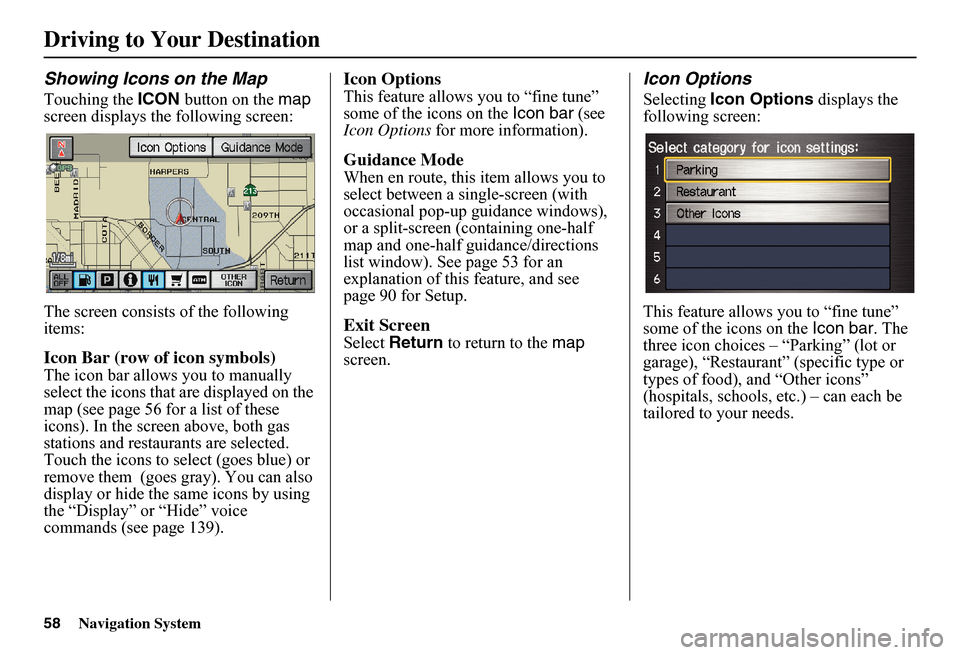
Touching the ICON button on the map screen displays the following screen:
The screen consists of the following items:
Icon Bar (row of icon symbols)
The icon bar allows you to manually select the icons that are displayed on the map (see page 56 for a list of these icons). In the screen above, both gas stations and restaurants are selected. Touch the icons to select (goes blue) or remove them (goes gray). You can also display or hide the same icons by using the “Display” or “Hide” voice commands (see page 139).
Icon Options
This feature allows you to “fine tune” some of the icons on the Icon bar (see Icon Options for more information).
Guidance Mode
When en route, this item allows you to select between a single-screen (with occasional pop-up guidance windows), or a split-screen (containing one-half map and one-half guidance/directions list window). See page 53 for an explanation of this feature, and see page 90 for Setup.
Exit Screen
Select Return to return to the map screen.
Icon Options
Selecting Icon Options displays the following screen:
This feature allows you to “fine tune” some of the icons on the Icon bar. The three icon choices – “Parking” (lot or garage), “Restaurant” (specific type or types of food), and “Other icons” (hospitals, schools, etc.) – can each be tailored to your needs.
Page 87 of 152

86Navigation System
System Setup
With Unverified Area Routing Off, you are presented with a blue “vector line” that always points to the destination. You must manually choose streets from the map that will lead to your destination. No guidance is provided, and there ar e no directions to the destination.
With Unverified Area Routing On, a blue/pink route line is shown for unverified segments. Voice guidance commands in unverified areas always end with “if possible.” This is your signal that you should use additional caution, and obey all traffic restrictions. The maneuver window “arrow” shows any portions of unverified turns in blue/pink dashes.
These guidance maneuvers are only a suggestion. You should always confirm that the maneuver is possible. A direction list is also provided that shows any unverified roads in a blue color, with pink arrows pointing to the next maneuver.
Unverified Area Routing “Off”
NOTE:
There is no VOICE button shown on the screen. With Unverified Area Routing “Off,” no Direction List is provided.
Unverified Area Routing “On”
Page 96 of 152

Navigation System95
System Setup
Color
From the Setup screen (second), say or select Color and the following screen appears:
Map Color
Allows you to choose the map color from one of four colors for the Day and Night modes.
Say or select Return to return to the previous screen.
NOTE:
Choose White (factory default is Beige) as the Day color to obtain the best daytime display contrast. Choose Black (factory default) as the Night color to obtain the best nighttime display contrast.
Menu Color
Allows you to choose the menu color from one of five colors for the Base and Window.
Say or select Return to return to the previous screen.
NOTE:
Choose Black (factory default) as the Base color to obtain the best display contrast. Choose White (factory default) as the Window color to obtain the best display contrast.
Page 98 of 152
Navigation System97
System Initialization
GPS Initialization
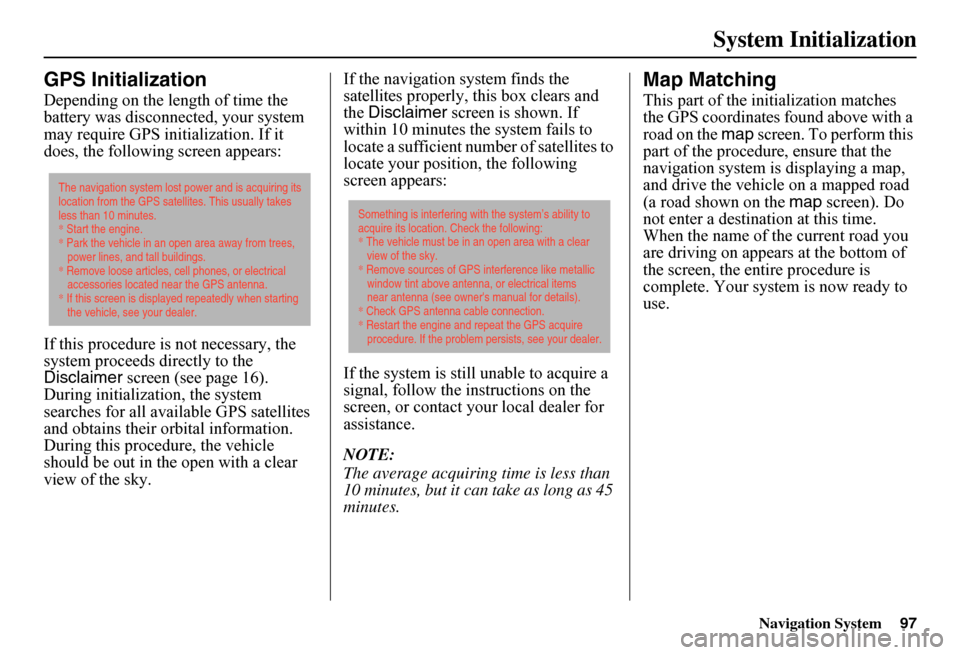
Depending on the length of time the battery was disconnected, your system may require GPS initialization. If it does, the following screen appears:
If this procedure is not necessary, the system proceeds directly to the Disclaimer screen (see page 16). During initialization, the system searches for all available GPS satellites and obtains their orbital information. During this procedure, the vehicle should be out in th e open with a clear view of the sky.
If the navigation system finds the satellites properly, this box clears and the Disclaimer screen is shown. If within 10 minutes the system fails to locate a sufficient number of satellites to locate your position, the following screen appears:
If the system is still unable to acquire a signal, follow the in structions on the screen, or contact you r local dealer for assistance.
NOTE:
The average acquiring time is less than 10 minutes, but it can take as long as 45 minutes.
Map Matching
This part of the initialization matches the GPS coordinates found above with a road on the map screen. To perform this part of the procedure, ensure that the navigation system is displaying a map, and drive the vehicle on a mapped road (a road shown on the map screen). Do not enter a destina tion at this time. When the name of the current road you are driving on appears at the bottom of the screen, the entire procedure is complete. Your system is now ready to use.
The navigation system lost power and is acquiring its location from the GPS satellites. This usually takes less than 10 minutes.* Start the engine. * Park the vehicle in an open area away from trees, power lines, and tall buildings.* Remove loose articles, cell phones, or electrical accessories located near the GPS antenna.* If this screen is displayed repeatedly when starting the vehicle, see your dealer.
Something is interfering with the system’s ability to acquire its location. Check the following:* The vehicle must be in an open area with a clear view of the sky.* Remove sources of GPS interference like metallic window tint above antenna, or electrical items near antenna (see owner's manual for details).* Check GPS antenna cable connection. * Restart the engine and repeat the GPS acquire procedure. If the problem persists, see your dealer.