Page 205 of 369

�µ�µ �Î�Î�Î
�Î
This feature
samples all tracks/f iles in the
selected f older in the order they are
stored. To activate track scan, press
and release the SCAN button. You
will see TRACK SCAN in the display.
You will get a 10 second sampling of
each track/f ile in the f older.
This feature
samples the f irst track/f ile in each
f older in the order they are stored.
To activate f older scan, press and
hold the SCAN button until you see
FOLDER SCAN in the display. You
will get a 10 second sampling of each
f irst track/f ile in the f older(s). Press and hold the button until you
hear a beep to turn off either scan
mode. Pressing either SKIP button
also turns off this feature.
To play the radio, press the AM/FM
button or touch the FM1, FM2, AM,
XM1 , or XM2 icon. Press the CD
icon to switch to the disc mode (if a
disc is loaded). Each time you press
the CD/XM button, the audio mode
switches between the USB, disc and
XM Radio .
U.S. models only
If a PC card is in the audio unit,
touch the CARD icon to play the PC
card. :
CONT INUED
Playing a USB Flash Memory Device (Models wit h navigation system)
TRACK SCAN
FOLDER-SCAN To Stop Playing a USB Flash
Memory Device
Features
201
Main Menu
Page 206 of 369
You can disconnect the USB f lash
memory device at any time even if
the USB mode is selected on the
audio system. Make sure to f ollow
the USB f lash memory device’s
instructions when you remove it.
When you disconnect the USB f lash
memory device while it is playing,
the audio display (if selected) shows
NO DATA.
If you reconnect the same USB f lash
memory device, the system will
begin playing where it lef t of f .If you see an error message in the
screen, see page .
203
Playing a USB Flash Memory Device (Models wit h navigation system)
Disconnect ing a USB Flash Memory
DeviceUSB Flash Memory Device Error
Messages
202
Main Menu
Page 207 of 369

If you see an error message on the
screen while playing a USB f lash
memory device, f ind the solution in
the chart to the right. If you cannot
clear the error message, take your
vehicle to your dealer.Error
Message Cause Solution
USB ROM Error
Appears when an
incompatible device is
connected
Use of unsupported files
No files in USB flash
memory device
Use of unsupported USB
flash memory device There is a problem with the USB adapter unit.
Disconnect the device. Then, turn the audio
systemoff,andturnitonagain.Donot
reconnect the device that caused the error.
Appears when the files in the USB flash
memory device are DRM or an unsupported
format. This error message appears for about 3
seconds, then plays the next song.
Appears when the USB flash memory device is
emptyortherearenoMP3,WMA,orAACfiles
in the USB flash memory device. Save some
MP3, WMA, or AAC files in the USB flash
memory device.
Appears when an unsupported device is
connected. See page 194 for the specification
information for the USB flash memory device.
If it appears when the supported device is
connected, reconnect the device.
USB Flash Memory Device Error Messages (Models with navigation syst em)
Features
203
USB ERROR
BAD USB
DEVICE
PLEASE CHECK OWNERS
MANUAL
UNPLAYABLE FILE
USB NO SONG
UNSUPPORTED
Main Menu
Page 214 of 369

�Û�Ý �´ �µ�´
�µ
�´ �µ
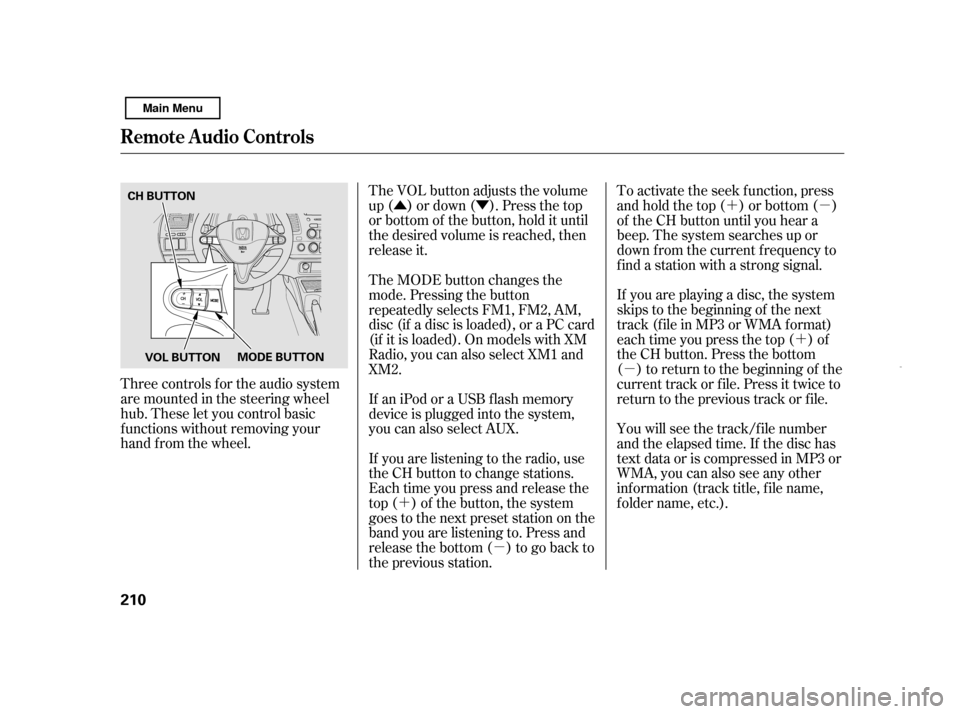
The VOL button adjusts the volume
up ( ) or down ( ). Press the top
or bottom of the button, hold it until
the desired volume is reached, then
release it.
Three controls f or the audio system
are mounted in the steering wheel
hub. These let you control basic
f unctions without removing your
hand f rom the wheel. To activate the seek function, press
and hold the top ( ) or bottom ( )
of the CH button until you hear a
beep. The system searches up or
down f rom the current f requency to
find a station with a strong signal.
If you are playing a disc, the system
skips to the beginning of the next
track (f ile in MP3 or WMA f ormat)
each time you press the top ( ) of
the CH button. Press the bottom
( ) to return to the beginning of the
current track or f ile. Press it twice to
return to the previous track or f ile.
You will see the track/f ile number
and the elapsed time. If the disc has
text data or is compressed in MP3 or
WMA, you can also see any other
inf ormation (track title, f ile name,
f older name, etc.).
If you are listening to the radio, use
the CH button to change stations.
Each time you press and release the
top ( ) of the button, the system
goes to the next preset station on the
band you are listening to. Press and
releasethebottom( )togobackto
the previous station.
If an iPod or a USB f lash memory
device is plugged into the system,
you can also select AUX.
The MODE button changes the
mode. Pressing the button
repeatedly selects FM1, FM2, AM,
disc (if a disc is loaded), or a PC card
(if it is loaded). On models with XM
Radio, you can also select XM1 and
XM2.
Remote Audio Controls
210 CH BUTTON
MODE BUTTON
VOL BUTTON
Main Menu
Page 215 of 369

�´�µ
�´�µ
�´
�µ
If you are playing a PC card, press
the top ( ) of the CH button to
advance to the next file. Press the
bottom( )togobacktothe
previous f ile.
In MP3 or WMA mode, you can use
the seek function to select folders.
Press and hold the top ( ) of the
CH button until you hear a beep to
skip f orward to the f irst f ile of the
next folder. Press the bottom ( ) to
skip backward to the previous f older.
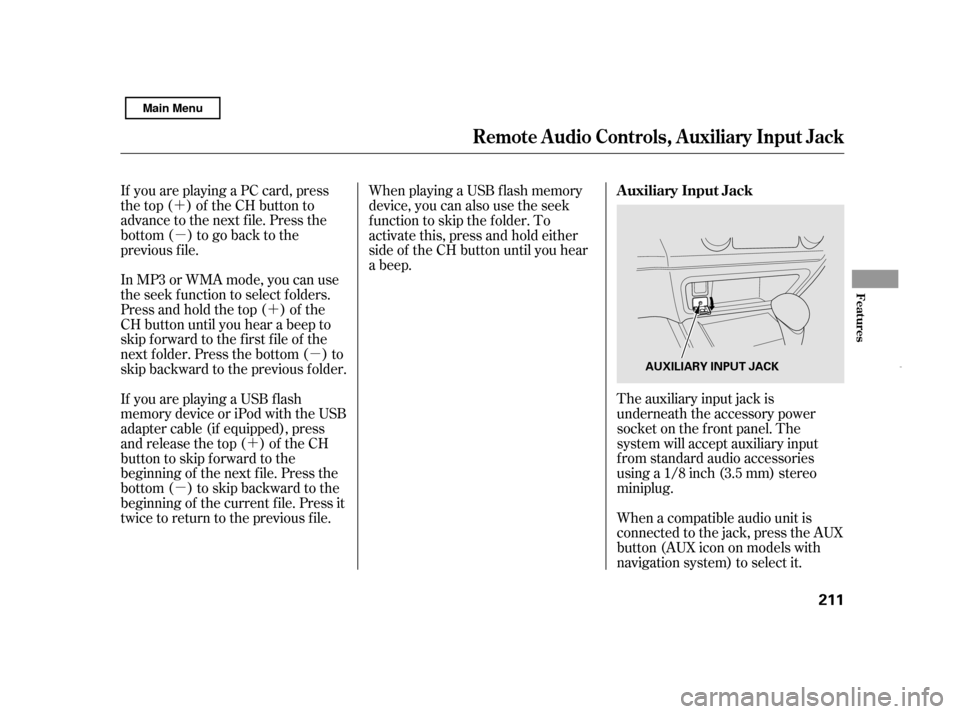
The auxiliary input jack is
underneath the accessory power
socket on the f ront panel. The
system will accept auxiliary input
f rom standard audio accessories
using a 1/8 inch (3.5 mm) stereominiplug.
When playing a USB f lash memory
device, you can also use the seek
function to skip the folder. To
activate this, press and hold either
side of the CH button until you hear
a beep.
If youareplayingaUSBflash
memory device or iPod with the USB
adapter cable (if equipped), press
and release the top ( ) of the CH
button to skip forward to the
beginning of the next f ile. Press the
bottom( )toskipbackwardtothe
beginning of the current f ile. Press it
twice to return to the previous f ile. When a compatible audio unit is
connected to the jack, press the AUX
button(AUXicononmodelswith
navigation system) to select it.
Remote Audio Controls, Auxiliary Input Jack
Auxiliary Input Jack
Features
211
AUXILIARY INPUT JACK
Main Menu
Page 368 of 369

Towing.....................................
A Trailer . 274
..................
Emergency Towing . 333
...........................
Traction Devices . 308
Transmission
Checking Fluid Level, ..............................
Automatic . 291
...........................
Fluid Selection . 291
..............
Identif ication Number . 337
.............
Shif ting the Automatic . 261
.....................................
Treadwear . 340
.......................................
Trip Meter . 67
................................................
Trunk . 88
........................................
Opening . 88
...................
Open Monitor Light . 60
....................................
Turn Signals . 74 ................................
Vanity Mirror . 100
.................
Vehicle Capacity Load . 253
......................
Vehicle Dimensions . 338
....
Vehicle Identif ication Number . 336
Vehicle Stability Assist (VSA
)
....................................
System . 270
...
VSA Activation Indicator . 64, 270
.........................
VSA Of f Switch . 271
........
VSA System Indicator . 64, 270
.............................
Vehicle Storage . 309
.....................................
Ventilation . 106
.................................................
VIN . 336
..................................
Viscosity, Oil . 285
Unexpected, Taking Care ..........................................
of the . 311
....
Unif orm Tire Quality Grading . 340
........................
Unleaded Gasoline . 242
......................
USB Adapter Cable . 141
.
USB Flash Memory Device . 140, 194
.......
Used Oil, How to Dispose of . 288 ............
WARNING, Explanation of . iii
.........
Warning Labels, Location of . 53
....................
Warranty Coverages . 353
Washer, Windshield
........
Checking the Fluid Level . 290
.......................................
Indicator . 61
.....................................
Operation . 73 Wheels
...............
Adjusting the Steering . 77
............
Alignment and Balance . 306
.....................................
Cleaning . 303
..........................
Compact Spare . 312
...............................
Nut Wrench . 313
Windows ..................
Operating the Power . 97
...........................
Rear, Def ogger . 76
Windshield .......................................
Cleaning . 73
...................................
Def roster . 108
.......................................
Washers . 73
Wipers, Windshield .......................
Changing Blades . 300
.....................................
Operation . 73
....................................
Worn Tires . 305
.....
Wrecker, Emergency Towing . 333
Index
V W
U
VIII
Main Menu