Page 46 of 400

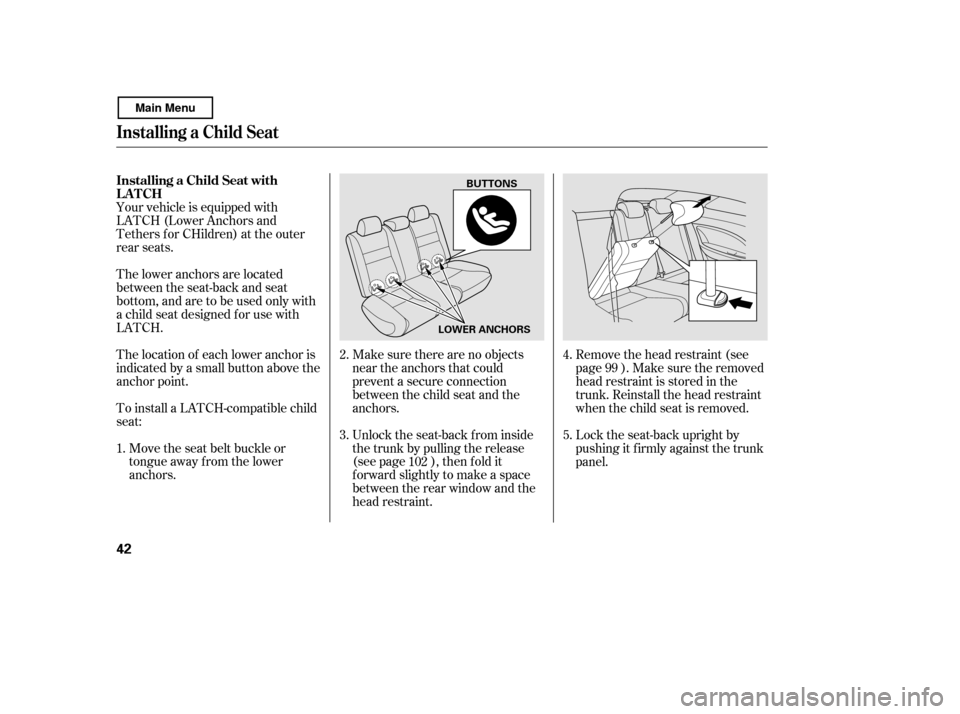
Your vehicle is equipped with
LATCH (Lower Anchors and
Tethers for CHildren) at the outer
rear seats.
The location of each lower anchor is
indicated by a small button above the
anchor point.
The lower anchors are located
between the seat-back and seat
bottom, and are to be used only with
a child seat designed f or use with
LATCH.
To install a LATCH-compatible child
seat:
Move the seat belt buckle or
tongue away f rom the lower
anchors. Make sure there are no objects
near the anchors that could
prevent a secure connection
between the child seat and the
anchors.
Unlock the seat-back from inside
the trunk by pulling the release
(see page ), then f old it
f orward slightly to make a space
between the rear window and the
head restraint.Remove the head restraint (see
page ). Make sure the removed
head restraint is stored in the
trunk. Reinstall the head restraint
when the child seat is removed.
Lock the seat-back upright by
pushing it f irmly against the trunk
panel.
1. 2. 3.
4.5.
99
102
Installing a Child Seat with
LATCH
Installing a Child Seat
42
LOWER ANCHORS
BUTTONS
Main Menu
Page 48 of 400

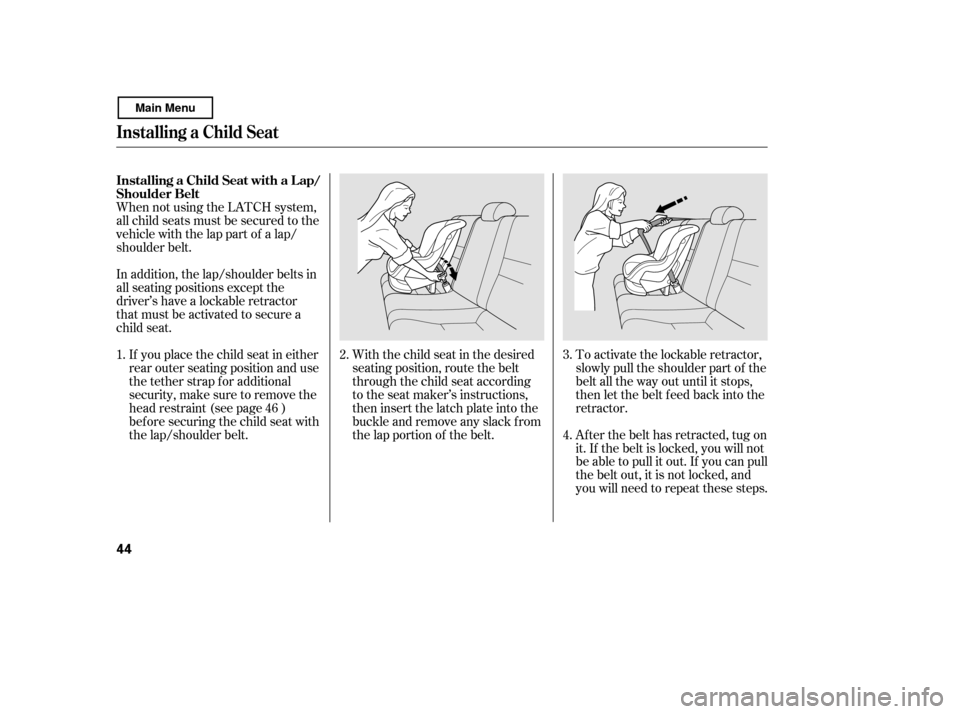
To activate the lockable retractor,
slowly pull the shoulder part of the
belt all the way out until it stops,
then let the belt f eed back into the
retractor.
Af ter the belt has retracted, tug on
it. If the belt is locked, you will not
be able to pull it out. If you can pull
thebeltout,itisnotlocked,and
you will need to repeat these steps.
When not using the LATCH system,
all child seats must be secured to the
vehicle with the lap part of a lap/
shoulder belt.
With the child seat in the desired
seating position, route the belt
through the child seat according
to the seat maker’s instructions,
then insert the latch plate into the
buckle and remove any slack f rom
the lap portion of the belt.
In addition, the lap/shoulder belts in
all seating positions except the
driver’s have a lockable retractor
that must be activated to secure a
child seat.
If you place the child seat in either
rear outer seating position and use
the tether strap for additional
security,makesuretoremovethe
head restraint (see page )
bef ore securing the child seat with
the lap/shoulder belt. 2.
3.
1.
4.
46
Installing a Child Seat with a L ap/
Shoulder Belt
Installing a Child Seat
44
Main Menu
Page 103 of 400

When a passenger is seated in the
rear center seating position, the
center head restraint should be
adjusted up or down, to match the
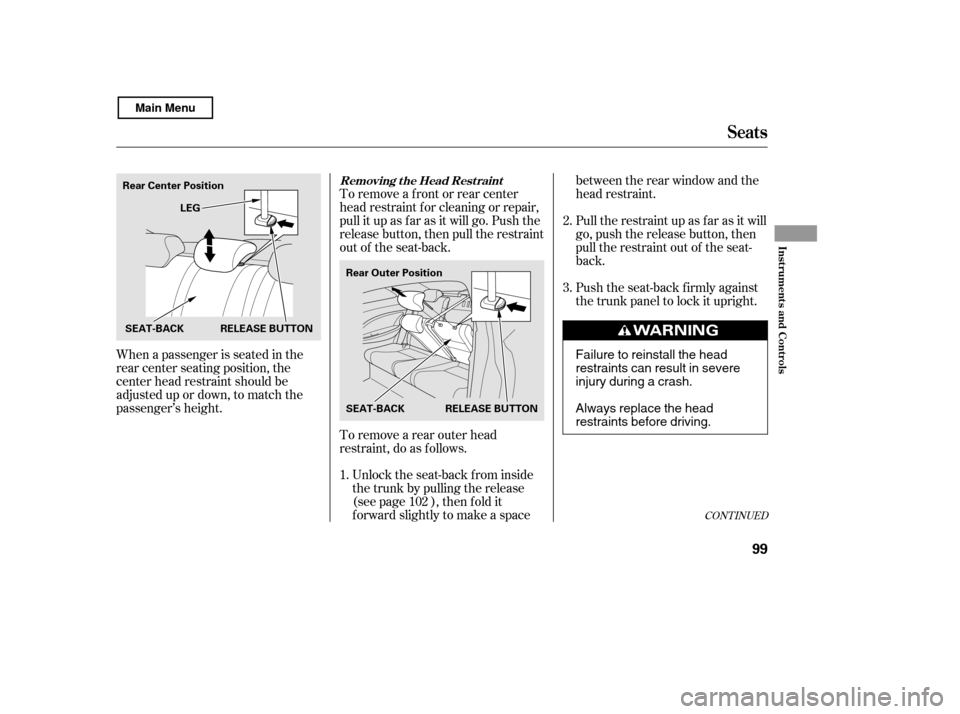
passenger’s height.To remove a f ront or rear center
head restraint f or cleaning or repair,
pull it up as f ar as it will go. Push the
release button, then pull the restraint
out of the seat-back.
To remove a rear outer head
restraint, do as f ollows.
Unlock the seat-back from inside
the trunk by pulling the release
(see page ), then f old it
f orward slightly to make a space between the rear window and the
head restraint.
Pull the restraint up as f ar as it will
go, push the release button, then
pull the restraint out of the seat-
back.
Push the seat-back firmly against
the trunk panel to lock it upright.
1. 2. 3.
102
CONT INUED
Removing t he Head Rest raint
Seats
Inst rument s and Cont rols
99
Rear Center Position LEG
SEAT-BACK Rear Outer Position
SEAT-BACK RELEASE BUTTON
RELEASE BUTTON
Failure to reinstall the head
restraints can result in severe
injury during a crash.
Always replace the head
restraints before driving.
Main Menu
Page 105 of 400
CONT INUED
Remove any items from the seat
beforeyoufolddowntheseat-back.
When storing cargo, you can move
therearcentershoulderbeltoutof
the way by removing the belt f rom
the guide.
The left and right halves can be
f olded separately.
The back of the rear seat folds down
to give you direct access to the trunk.
The seat-back can be released f rom
inside the trunk.
For a head restraint system to work
properly:
Do not hang any items on the head
restraints, or f rom the restraint
legs.
Do not place any object between
an occupant and the seat-back.
Install each restraint in its proper
location.
Only use genuine Honda
replacement head restraints.On all models except DX, CanadianDX-G and U.S. LX
Seats
Folding Rear Seat
Inst rument s and Cont rols
101
GUIDE
Main Menu
Page 106 of 400

Make sure all rear shoulder belts are
positioned in f ront of the rear seat-
back, and the center shoulder belt is
re-positioned in the guide whenever
the seat-back is in its upright position.
Be sure there are no twists in any
shoulder belt.
Do not put any heavy items on the
seat-back when it is folded down.
Make sure all items in the trunk, or
items extending through the opening
into the back seat, are secured.
Looseitemscanflyforwardand
cause injury if you have to brake
hard. See on page.
Never drive with the seat-back
f olded down and the trunk lid open.
See on
page .
Make sure that the folded seat-back
does not press against the f ront
passenger’s seat, as this could cause
the weight sensors to work
improperly.
If the rear head restraints get caught
on the f ront seat backs and you
cannot fold down the rear seat-back
f ully, you can remove the head
restraints (see page ).
Make sure the removed head
restraints are securely stored.
To lock the seat-back upright, push it
f irmly against the trunk panel. Make
sure it is latched in place by pulling
on the top of the seat.
To release the seat-back, pull the
release under the trunk panel. Push
the seat-back down, then let go of
the release.
For 60/40 split rear f old-down seat
models, a release is located on each
side of the trunk.
For f ull rear f old-down seat models,
the release is located on the driver’s
side of the trunk. 99
26352
Seats
Carrying Cargo
Carbon Monoxide Hazard
102
RELEASE
Main Menu