Page 12 of 295
These are some of the symbols you may see on your vehicle.
Vehicle Symbol Glossary
Safety Alert
See Owner’s Guide
Fasten Safety BeltAirbag - Front
Airbag - SideChild Seat Lower
Anchor
Child Seat Tether
AnchorBrake System
Anti-Lock Brake SystemParking Brake System
Brake Fluid -
Non-Petroleum BasedParking Aid System
Stability Control SystemSpeed Control
Master Lighting SwitchHazard Warning Flasher
Fog Lamps-FrontFuse Compartment
Fuel Pump ResetWindshield Wash/Wipe
Windshield
Defrost/DemistRear Window
Defrost/Demist
Introduction
12
2011 Transit Connect(tst)
Owners Guide, 2nd Printing
USA(fus)
Page 15 of 295

WARNING:Under engine misfire conditions, excessive exhaust
temperatures could damage the catalytic converter, the fuel
system, interior floor coverings or other vehicle components, possibly
causing a fire.
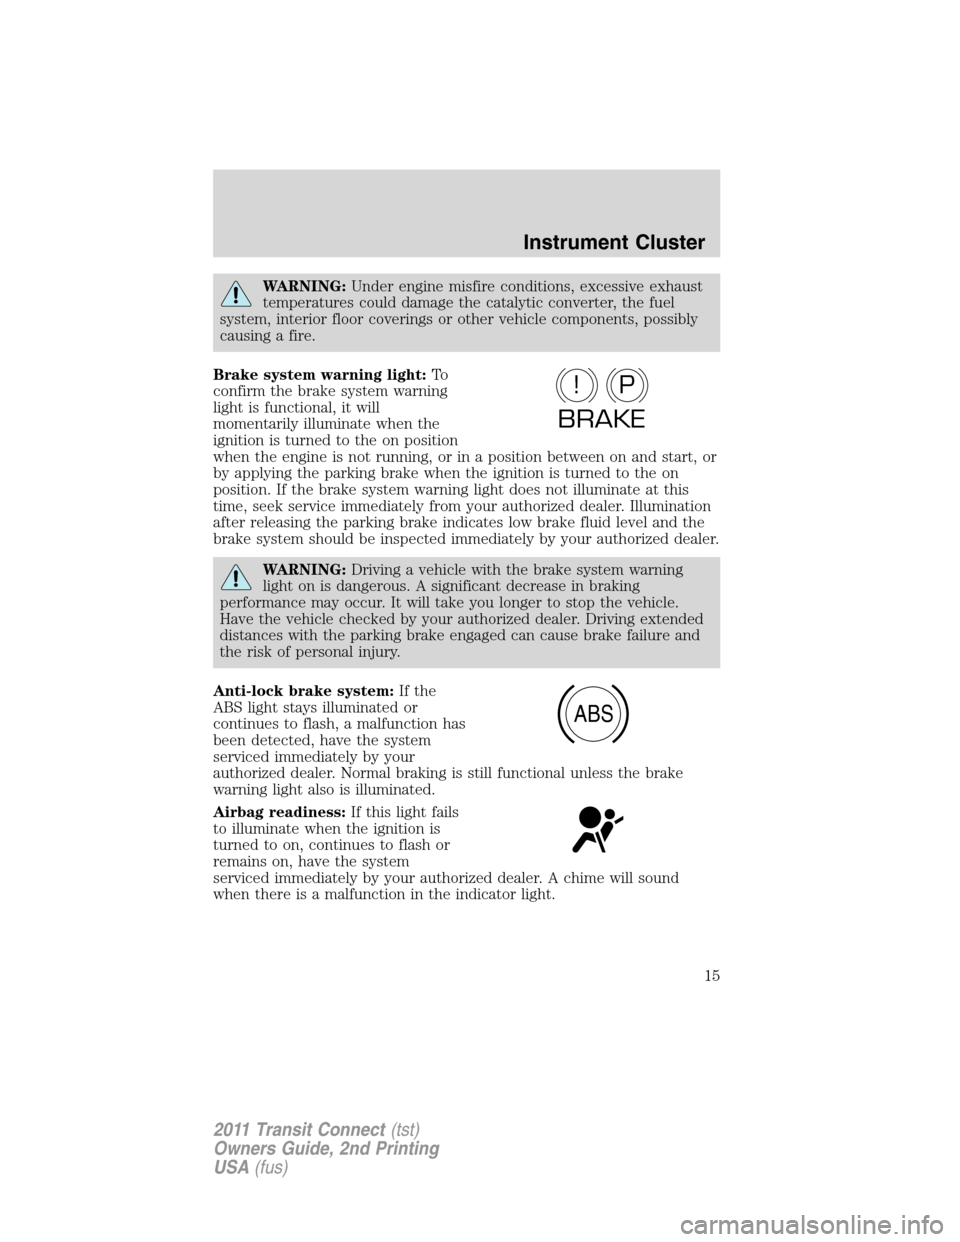
Brake system warning light:To
confirm the brake system warning
light is functional, it will
momentarily illuminate when the
ignition is turned to the on position
when the engine is not running, or in a position between on and start, or
by applying the parking brake when the ignition is turned to the on
position. If the brake system warning light does not illuminate at this
time, seek service immediately from your authorized dealer. Illumination
after releasing the parking brake indicates low brake fluid level and the
brake system should be inspected immediately by your authorized dealer.
WARNING:Driving a vehicle with the brake system warning
light on is dangerous. A significant decrease in braking
performance may occur. It will take you longer to stop the vehicle.
Have the vehicle checked by your authorized dealer. Driving extended
distances with the parking brake engaged can cause brake failure and
the risk of personal injury.
Anti-lock brake system:If the
ABS light stays illuminated or
continues to flash, a malfunction has
been detected, have the system
serviced immediately by your
authorized dealer. Normal braking is still functional unless the brake
warning light also is illuminated.
Airbag readiness:If this light fails
to illuminate when the ignition is
turned to on, continues to flash or
remains on, have the system
serviced immediately by your authorized dealer. A chime will sound
when there is a malfunction in the indicator light.
P!
BRAKE
ABS
Instrument Cluster
15
2011 Transit Connect(tst)
Owners Guide, 2nd Printing
USA(fus)
Page 48 of 295

Examples of acceptable condensation are:
•Presence of thin mist (no streaks, drip marks or droplets)
•Fine mist covers less than 50% of the lens
Examples of unacceptable moisture (usually caused by a lamp water
leak) are:
•Water puddle inside the lamp
•Large water droplets, drip marks or streaks present on the interior of
the lens
Take your vehicle to a dealer for service if any of the above conditions of
unacceptable moisture are present.
Using the right bulbs
Replacement bulbs are specified in the chart below. Headlamp bulbs
must be marked with an authorized “D.O.T.” for North America to ensure
lamp performance, light brightness and pattern and safe visibility. The
correct bulbs will not damage the lamp assembly or void the lamp
assembly warranty and will provide quality bulb burn time.
Function Trade number
Headlamps H13
Turn lamp indicator (front) 3457NAK
Turn lamp indicator (rear) WY21W
Side marker lamp W5W LL
Side repeater lamp 194NA
Front fog lamp H11
Brake and tail lamps W21/5W
Backup lamp W21W
Rear fog lamp W21W
License plate lamp W5W LL
High-mount brake lamp LED
Dome lamps (front and rear) 211
Reading lamps W5W
To replace all instrument panel lights - see your authorized dealer
Replacing interior bulbs
Check the operation of all bulbs frequently.
Lights
48
2011 Transit Connect(tst)
Owners Guide, 2nd Printing
USA(fus)
Page 52 of 295
3. Pull the bulb straight out of the
socket.
Install in reverse order.
Replacing front fog lamp bulbs (if equipped)
1. Make sure the headlamp switch is
in the off position.
2. Reach under the front fender and
remove the aeroshield. Then remove
the harness/bulb assembly from the
fog lamp by turning it
counterclockwise.
3. Disconnect the harness from the
bulb by pulling it straight out.
Install the new bulb in reverse order.
Replacing tail/brake/rear fog/backup lamps and turn signal bulbs
1. Make sure the headlamp control
is in the off position and then open
the cargo door.
2. Remove the two wing nuts and
gently pull the lamp assembly away
from the vehicle.
Lights
52
2011 Transit Connect(tst)
Owners Guide, 2nd Printing
USA(fus)
Page 55 of 295
Replacing high-mount brake lamp bulbs
See your authorized dealer for replacement.
Replacing license plate lamp bulbs
1. Make sure the headlamp control
is in the off position.
2. Remove the lens assembly.
3. Pull the bulb straight out.
Install in reverse order.
Lights
55
2011 Transit Connect(tst)
Owners Guide, 2nd Printing
USA(fus)
Page 73 of 295

are not present during the programming procedure, the transmitters that
are not present during programming will no longer operate the vehicle.
Note:Ensure the brake pedal is not depressed during this sequence.
To reprogram the remote entry transmitters:
1. Ensure the vehicle is unlocked.
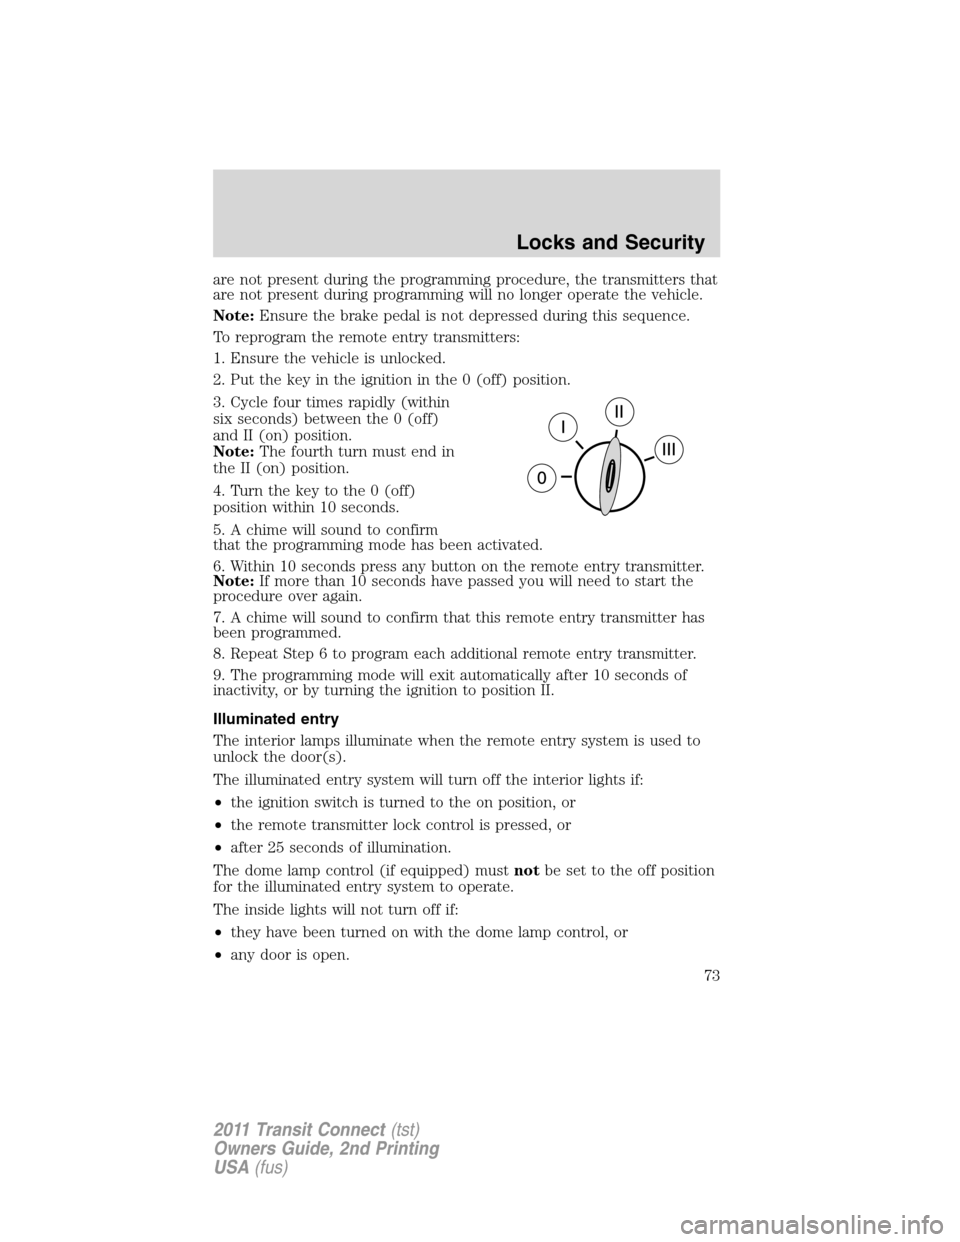
2. Put the key in the ignition in the 0 (off) position.
3. Cycle four times rapidly (within
six seconds) between the 0 (off)
and II (on) position.
Note:The fourth turn must end in
the II (on) position.
4. Turn the key to the 0 (off)
position within 10 seconds.
5. A chime will sound to confirm
that the programming mode has been activated.
6. Within 10 seconds press any button on the remote entry transmitter.
Note:If more than 10 seconds have passed you will need to start the
procedure over again.
7. A chime will sound to confirm that this remote entry transmitter has
been programmed.
8. Repeat Step 6 to program each additional remote entry transmitter.
9. The programming mode will exit automatically after 10 seconds of
inactivity, or by turning the ignition to position II.
Illuminated entry
The interior lamps illuminate when the remote entry system is used to
unlock the door(s).
The illuminated entry system will turn off the interior lights if:
•the ignition switch is turned to the on position, or
•the remote transmitter lock control is pressed, or
•after 25 seconds of illumination.
The dome lamp control (if equipped) mustnotbe set to the off position
for the illuminated entry system to operate.
The inside lights will not turn off if:
•they have been turned on with the dome lamp control, or
•any door is open.
Locks and Security
73
2011 Transit Connect(tst)
Owners Guide, 2nd Printing
USA(fus)
Page 93 of 295

Pregnant women should always
wear their safety belt. The lap belt
portion of a combination lap and
shoulder belt should be positioned
low across the hips below the belly
and worn as tight as comfort will
allow. The shoulder belt should be
positioned to cross the middle of
the shoulder and the center of the
chest.
Safety belt locking modes
All safety restraints in the vehicle are combination lap and shoulder
belts. The driver safety belt has the first locking mode and the passenger
safety belts have both types of locking modes described as follows:
Vehicle sensitive mode
This is the normal retractor mode, which allows free shoulder belt length
adjustment to your movements and locking in response to vehicle
movement. For example, if the driver brakes suddenly or turns a corner
sharply, or the vehicle receives an impact of approximately 5 mph
(8 km/h) or more, the combination safety belts will lock to help reduce
forward movement of the driver and passengers.
In addition, the retractor is designed to lock if the webbing is pulled out
too quickly. If this occurs, let the belt retract slightly and pull webbing
out again in a slow and controlled manner.
Automatic locking mode
In this mode, the shoulder belt is automatically pre-locked. The belt will
still retract to remove any slack in the shoulder belt. The automatic
locking mode is not available on the driver safety belt.
When to use the automatic locking mode
This mode should be usedany timea child safety seat, except a
booster, is installed in passenger front or rear seating positions. Children
12 years old and under should be properly restrained in a rear seating
position whenever possible. Refer toSafety restraints for childrenor
Safety seats for childrenlater in this chapter.
Seating and Safety Restraints
93
2011 Transit Connect(tst)
Owners Guide, 2nd Printing
USA(fus)
Page 99 of 295

WARNING:Do not sit on top of a buckled safety belt or insert a
latchplate into the buckle to avoid the Belt-Minder�chime. To
do so may adversely affect the performance of the vehicle’s airbag
system.
Deactivating/activating the Belt-Minder�feature
Read Steps1-3thoroughly before proceeding with the
deactivation/activation programming procedure.
The Belt-Minder�feature can be deactivated/activated by performing the
following procedure:
Before following the procedure, make sure that:
•The parking brake is set.
•The gearshift is in P (Park).
•The ignition is off.
•The driver and front passenger safety belts are unbuckled.
WARNING:While the design allows you to deactivate your
Belt-Minder�, this system is designed to improve your chances of
being safely belted and surviving an accident. We recommend you
leave the Belt-Minder�system activated for yourself and others who
may use the vehicle. To reduce the risk of injury, do not
deactivate/activate the Belt-Minder�feature while driving the vehicle.
1. Turn the ignition switch to the on position. DO NOT START THE
ENGINE.
2. Wait until the safety belt warning light turns off (approximately
1–2 minutes).
•Step 3 must be completed within 50 seconds after the safety belt
warning light turns off.
3. Buckle then unbuckle the driver’s safety belt nine times at a moderate
speed, ending in the unbuckled state.
•This will disable the Belt-Minder�feature if it is currently enabled or
enable the Belt-Minder�feature if it is currently disabled. As
confirmation, the safety belt warning light will flash three times.
Seating and Safety Restraints
99
2011 Transit Connect(tst)
Owners Guide, 2nd Printing
USA(fus)