2011 FORD F550 park assist
[x] Cancel search: park assistPage 44 of 449

Trailer
Delete Trailer Press the right arrow button when this is highlighted
to show currently stored trailers. Use the up/down
arrows to highlight the trailer you want to delete
and press OK to delete. Follow the on-screen
prompts to exit or confirm delete.
Information
Screen Press the right arrow button when this is highlighted
to display information on the following vehicle
features: Tow Haul mode, Trailer Brake Controller.
Rename Trailer Press the right arrow button when this is highlighted
to display saved or default trailers. Use the up/down
buttons to highlight a trailer and press OK to select
it. Use the up/down arrow buttons to change the
characters as needed. When done, press OK to
accept the change.
Reset Trailer
Mileage /
Kilometers (if
equipped) Press the right arrow button when this is highlighted
to display accumulated distance on a given trailer
within the list of trailer(s). Use the up/down buttons
to select a trailer, then press and hold OK to reset
the trailer mileage (kilometers).
Settings
In this mode, you can configure different driver setting choices. Press
the right arrow key (when in the Settings menu) to reach the Driver
Assist menu:
Driver Assist
Rear Park Aid On/Off
Camera Delay
(Rear View
Camera) On/Off
Trailer Brake
Mode Electric or Elect. Over Hydraulic
Trailer Sway
Control On/OffInstrument Cluster
44
2011 F-250/350/450/550 (f23)
Owners Guide, 4th Printing
USA (fus)
Page 264 of 449

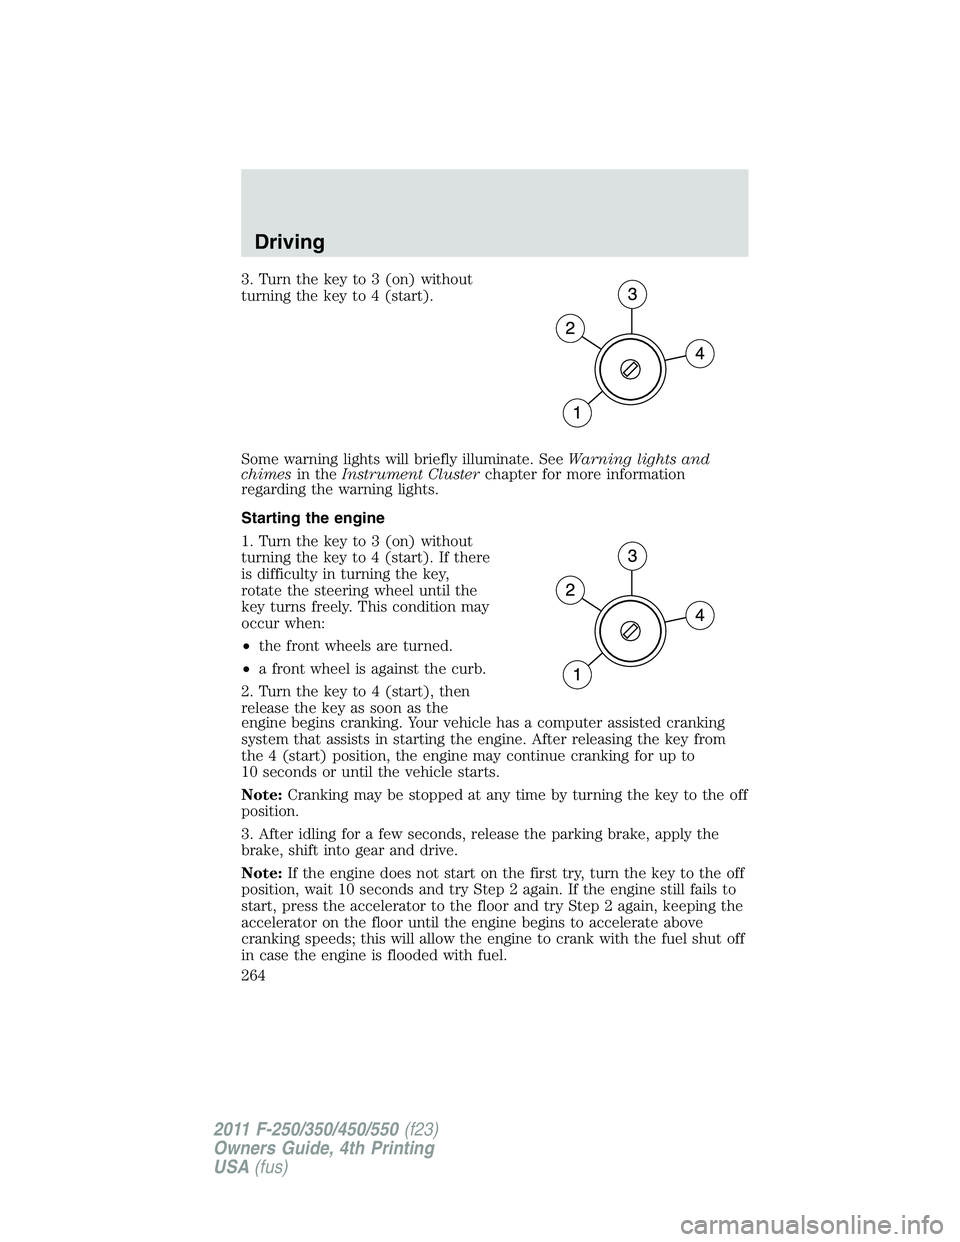
3. Turn the key to 3 (on) without
turning the key to 4 (start).
Some warning lights will briefly illuminate. See Warning lights and
chimes in the Instrument Cluster chapter for more information
regarding the warning lights.
Starting the engine
1. Turn the key to 3 (on) without
turning the key to 4 (start). If there
is difficulty in turning the key,
rotate the steering wheel until the
key turns freely. This condition may
occur when:
• the front wheels are turned.
• a front wheel is against the curb.
2. Turn the key to 4 (start), then
release the key as soon as the
engine begins cranking. Your vehicle has a computer assisted cranking
system that assists in starting the engine. After releasing the key from
the 4 (start) position, the engine may continue cranking for up to
10 seconds or until the vehicle starts.
Note: Cranking may be stopped at any time by turning the key to the off
position.
3. After idling for a few seconds, release the parking brake, apply the
brake, shift into gear and drive.
Note: If the engine does not start on the first try, turn the key to the off
position, wait 10 seconds and try Step 2 again. If the engine still fails to
start, press the accelerator to the floor and try Step 2 again, keeping the
accelerator on the floor until the engine begins to accelerate above
cranking speeds; this will allow the engine to crank with the fuel shut off
in case the engine is flooded with fuel.Driving
264
2011 F-250/350/450/550 (f23)
Owners Guide, 4th Printing
USA (fus)
Page 278 of 449

WARNING: Hill descent control cannot control descent in all
surface conditions and circumstances, such as ice or extremely
steep grades. Hill descent control is a driver assist system and cannot
substitute for good judgment by the driver. Failure to do so may result
in loss of vehicle control, crash or serious injury.
Hill descent control can maintain vehicle speeds on downhill grades
between 2 mph (3 km/h) and 12 mph (20 km/h). Above 20 mph
(32 km/h), the system remains armed, but descent speed cannot be set
or maintained.
WARNING: Hill descent control does not provide hill hold at
zero mph (0 km/h). When stopped, the parking brake must be
applied and/or the vehicle must be placed in P (Park) or it may roll
away.
Hill descent control requires a cooling down interval after a period of
sustained use. The amount of time that the feature can remain active
before cooling varies with conditions. The system will provide a warning
in the message center and a chime will sound when the system is about
to disengage for cooling. At this time, manually apply the brakes as
needed to maintain descent speed.
Enabling hill descent control and setting the descent speed
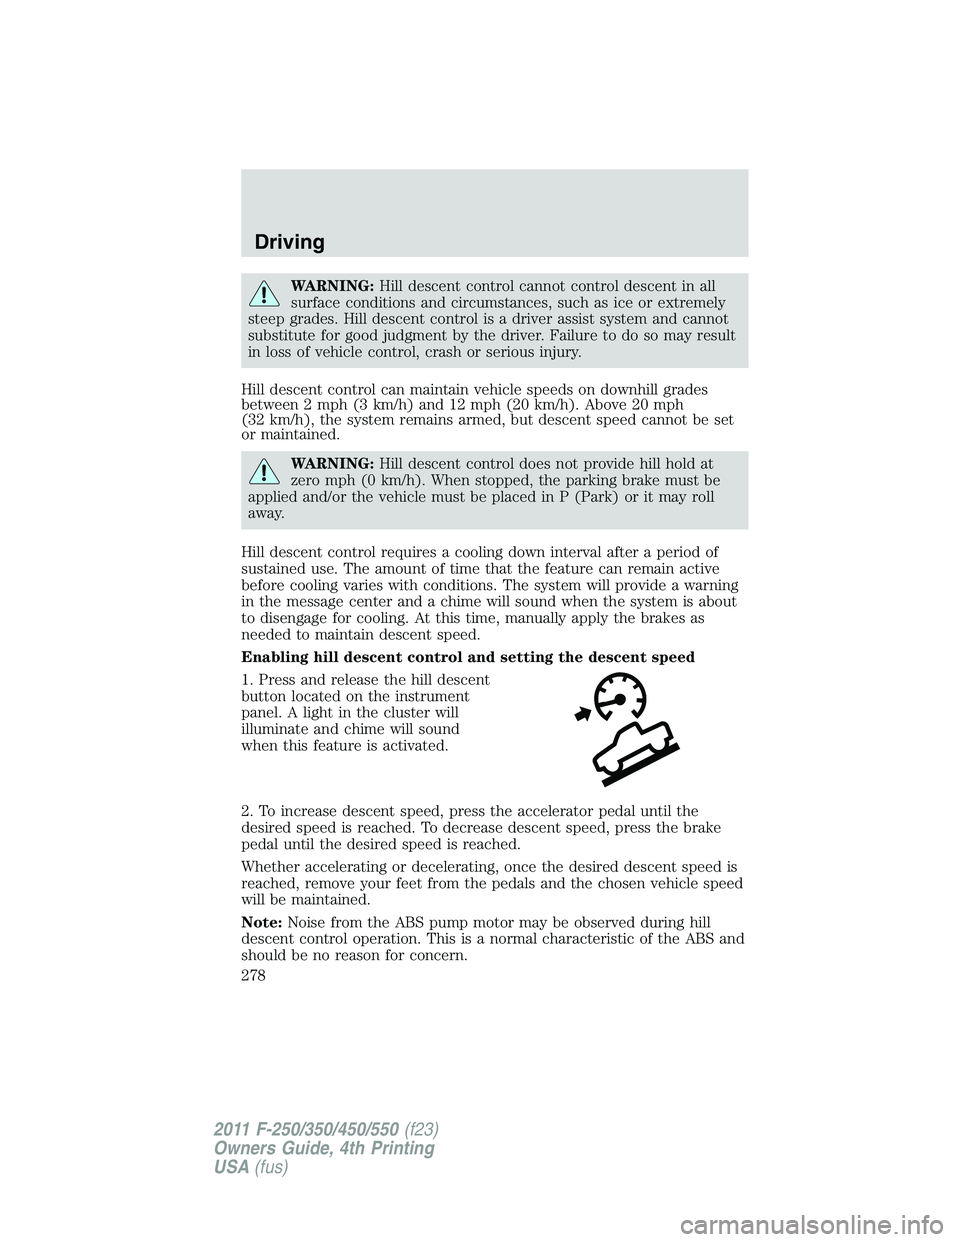
1. Press and release the hill descent
button located on the instrument
panel. A light in the cluster will
illuminate and chime will sound
when this feature is activated.
2. To increase descent speed, press the accelerator pedal until the
desired speed is reached. To decrease descent speed, press the brake
pedal until the desired speed is reached.
Whether accelerating or decelerating, once the desired descent speed is
reached, remove your feet from the pedals and the chosen vehicle speed
will be maintained.
Note: Noise from the ABS pump motor may be observed during hill
descent control operation. This is a normal characteristic of the ABS and
should be no reason for concern.Driving
278
2011 F-250/350/450/550 (f23)
Owners Guide, 4th Printing
USA (fus)
Page 291 of 449

Hill start assist (HSA)
The hill start assist feature makes it easier to pull away when the vehicle
is on a slope without the need to use the parking brake. When the hill
start assist feature is active, the vehicle will remain stationary on the
slope for up to two seconds after you release the brake pedal. During
this time, you have time to move your foot from the brake to the
accelerator pedal and pull away. The brakes are released automatically
once the engine has developed sufficient drive to prevent the vehicle
from rolling down the slope. This is an advantage when pulling away on a
slope; for example from a car park ramp, traffic lights or when reversing
uphill into a parking space.
WARNING: The hill start assist feature does not replace the
parking brake. When you leave the vehicle, always apply the
parking brake and select first or reverse gear.
Using hill start assist
The hill start assist feature is activated automatically when the vehicle is
stopped on a slope greater than five degrees. The hill start assist feature
operates with the vehicle facing downhill if reverse gear is selected. The
hill start assist feature will not operate if the parking brake is activated.
WARNING: You must remain in the vehicle once you have
activated the hill start assist feature.
Activating hill start assist
1. Press the brake pedal to bring the vehicle to a complete standstill.
Keep the brake pedal pressed.
2. If the sensors detect that the vehicle is on a slope, the hill start assist
feature will be activated automatically.
3. When you remove your foot from the brake pedal, the vehicle will
remain on the slope without rolling away for approximately up to two
seconds. This hold time will automatically be extended if you are in the
process of driving off.
4. Drive off in the normal manner. The brakes will be released
automatically.
WARNING: If the engine is revved excessively, or if a
malfunction is detected when the hill start assist feature is
active, the hill start assist feature will be deactivated. Driving
291
2011 F-250/350/450/550 (f23)
Owners Guide, 4th Printing
USA (fus)
Page 292 of 449

If your vehicle gets stuck in mud or snow
If your vehicle gets stuck in mud or snow, it may be rocked out by
shifting between forward and reverse gears, stopping between shifts in a
steady pattern. Press lightly on the accelerator in each gear.
Do not rock the vehicle if the engine is not at normal operating
temperature or damage to the transmission may occur.
Do not rock the vehicle for more than a minute or damage to the
transmission and tires may occur, or the engine may overheat.
REVERSE SENSING SYSTEM (IF EQUIPPED)
The reverse sensing system (RSS) sounds a tone to warn the driver of
obstacles near the rear bumper when the R (Reverse) is selected and the
vehicle is moving at speeds less than 3 mph (5 km/h). The system is not
effective at speeds above 3 mph (5 km/h) and may not detect certain
angular or moving objects.
WARNING: To help avoid personal injury, please read and
understand the limitations of the reverse sensing system as
contained in this section. Reverse sensing is only an aid for some
(generally large and fixed) objects when moving in reverse on a flat
surface at “parking speeds”. Inclement weather may also affect the
function of the RSS; this may include reduced performance or a false
activation.
WARNING: To help avoid personal injury, always use caution
when in reverse and when using the RSS.
WARNING: This system is not designed to prevent contact with
small or moving objects. The system is designed to provide a
warning to assist the driver in detecting large stationary objects to
avoid damaging the vehicle. The system may not detect smaller
objects, particularly those close to the ground.
WARNING: Certain add-on devices such as large trailer hitches,
bike or surfboard racks and any device that may block the
normal detection zone of the RSS system may create false beeps.Driving
292
2011 F-250/350/450/550 (f23)
Owners Guide, 4th Printing
USA (fus)
Page 294 of 449

sensors with sharp objects). If the sensors are covered, it will
affect the accuracy of the RSS.
If your vehicle sustains damage to the rear bumper/fascia, leaving
it misaligned or bent, the sensing zone may be altered causing
inaccurate measurement of obstacles or false alarms.
REARVIEW CAMERA SYSTEM (IF EQUIPPED)
The rearview camera system,
located on the tailgate, provides a
video image, which appears in the
rearview mirror or on the navigation
screen (if equipped), of the area
behind the vehicle. It adds
assistance to the driver while
reversing or reverse parking the
vehicle.
To use the camera system, place the transmission in R (Reverse); an
image will display on the left portion of the rearview mirror or on the
navigation screen (if equipped). The area displayed on the screen may
vary according to the vehicle orientation and/or road condition.Driving
294
2011 F-250/350/450/550 (f23)
Owners Guide, 4th Printing
USA (fus)
Page 295 of 449

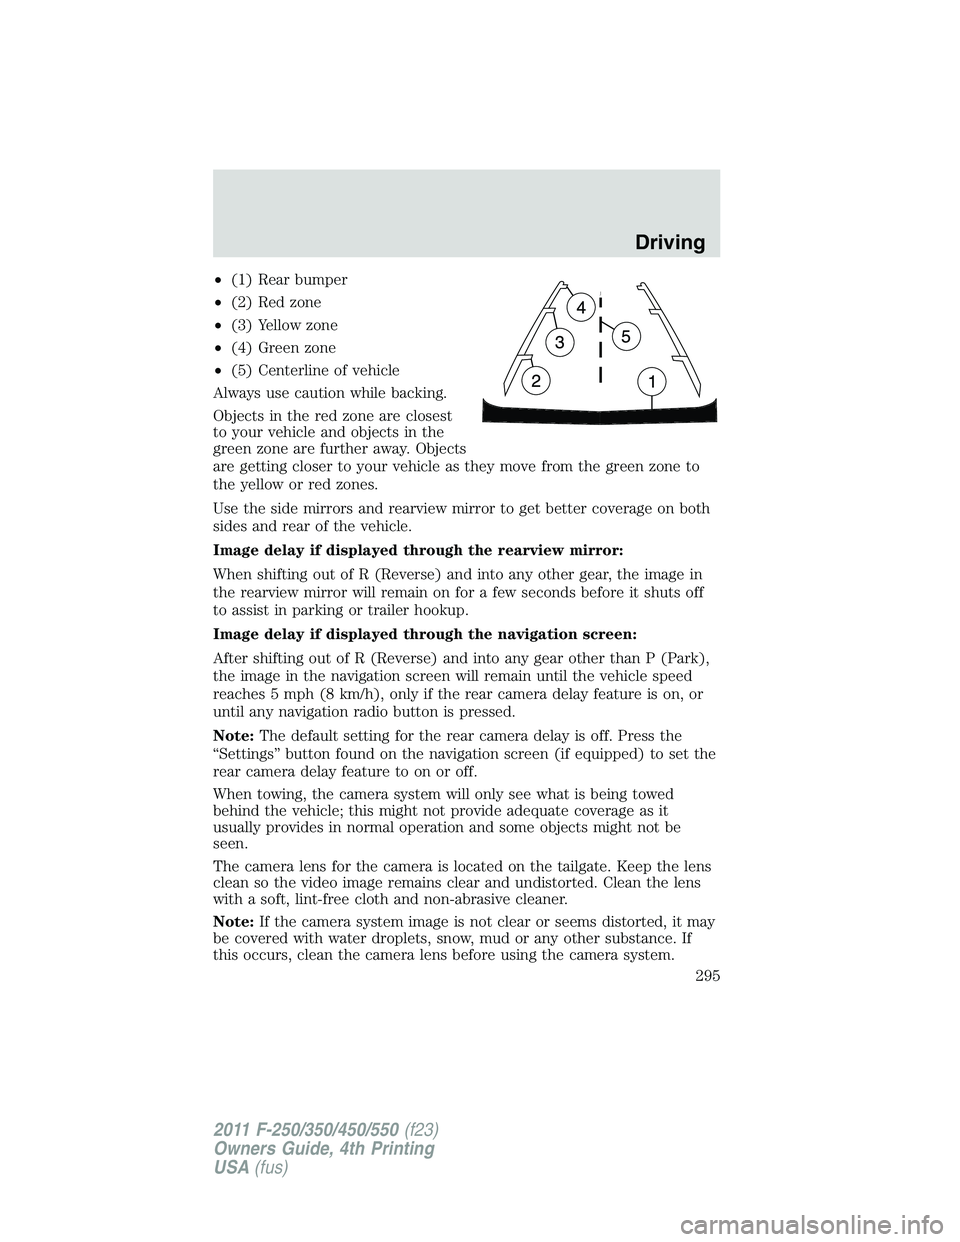
• (1) Rear bumper
• (2) Red zone
• (3) Yellow zone
• (4) Green zone
• (5) Centerline of vehicle
Always use caution while backing.
Objects in the red zone are closest
to your vehicle and objects in the
green zone are further away. Objects
are getting closer to your vehicle as they move from the green zone to
the yellow or red zones.
Use the side mirrors and rearview mirror to get better coverage on both
sides and rear of the vehicle.
Image delay if displayed through the rearview mirror:
When shifting out of R (Reverse) and into any other gear, the image in
the rearview mirror will remain on for a few seconds before it shuts off
to assist in parking or trailer hookup.
Image delay if displayed through the navigation screen:
After shifting out of R (Reverse) and into any gear other than P (Park),
the image in the navigation screen will remain until the vehicle speed
reaches 5 mph (8 km/h), only if the rear camera delay feature is on, or
until any navigation radio button is pressed.
Note: The default setting for the rear camera delay is off. Press the
“Settings” button found on the navigation screen (if equipped) to set the
rear camera delay feature to on or off.
When towing, the camera system will only see what is being towed
behind the vehicle; this might not provide adequate coverage as it
usually provides in normal operation and some objects might not be
seen.
The camera lens for the camera is located on the tailgate. Keep the lens
clean so the video image remains clear and undistorted. Clean the lens
with a soft, lint-free cloth and non-abrasive cleaner.
Note: If the camera system image is not clear or seems distorted, it may
be covered with water droplets, snow, mud or any other substance. If
this occurs, clean the camera lens before using the camera system. Driving
295
2011 F-250/350/450/550 (f23)
Owners Guide, 4th Printing
USA (fus)
Page 306 of 449

WARNING: Always set the parking brake fully and make sure
the gearshift is latched in P (Park). Turn the ignition to the off
position and remove the key whenever you leave your vehicle.
WARNING: If the parking brake is fully released, but the brake
warning lamp remains illuminated, the brakes may not be
working properly. See your authorized dealer.
4WD systems
4WD (when you select a 4WD mode), uses all four wheels to power the
vehicle. This increases traction, enabling you to drive over terrain and
road conditions that a conventional two-wheel drive vehicle cannot.
Power is supplied to all four wheels through a transfer case. On 4WD
vehicles, the transfer case allows you to select 4WD when necessary.
Information on transfer case operation and shifting procedures can be
found in the Driving chapter. Information on transfer case maintenance
can be found in the Maintenance and Specifications chapter. You
should become thoroughly familiar with this information before you
operate your vehicle.
Normal characteristics
On some 4WD models, the initial shift from two-wheel drive to 4x4 while
the vehicle is moving can cause some momentary clunk and ratcheting
sounds. This is the front drivetrain coming up to speed and the
automatic locking hubs engaging and is not cause for concern.
Sand
When driving over sand, try to keep all four wheels on the most solid
area of the trail. Avoid reducing the tire pressures but shift to a lower
gear and drive steadily through the terrain. Apply the accelerator slowly
and avoid spinning the wheels.
Avoid excessive speed because vehicle momentum can work against you
and cause the vehicle to become stuck to the point that assistance may
be required from another vehicle. Remember, you may be able to back
out the way you came if you proceed with caution.
Note: If air is released from your tires, the Tire Pressure Monitoring
System (TPMS) indicator light may illuminate (if equipped).Driving
306
2011 F-250/350/450/550 (f23)
Owners Guide, 4th Printing
USA (fus)