Page 124 of 449
Note:
• Fully close and latch the tailgate step before moving the vehicle.
• Never drive with the step or grab handle deployed.
• Replace slip resistance tape (serviceable item) if worn out.
• Replace handle molding (serviceable item) if damaged.
• Do not tow with grab handle or step frame.
Bed extender (if equipped)
Your vehicle may be equipped with a cargo management feature in the
truck bed.
Note: This feature is not intended for off-road usage.
To open the bed extender into tailgate mode:
1. Pull the locking pin toward the
center of the vehicle.
2. Open the latches to release the
panels.Driver Controls
124
2011 F-250/350/450/550 (f23)
Owners Guide, 4th Printing
USA (fus)
Page 125 of 449
3. Rotate the panels toward the
tailgate.
Repeat Steps 1–3 for the other side of the bed extender.
4. Connect the two panels, then rotate both knobs a quarter-turn
clockwise to secure the panels.
5. Ensure the latch rod is inserted
into the tailgate hole and the locking
pins on both sides are engaged into
their holes in the pick-up box.
6. Reverse steps for storage of the
bed extender. Driver Controls
125
2011 F-250/350/450/550 (f23)
Owners Guide, 4th Printing
USA (fus)
Page 126 of 449
Note: When the vehicle is in motion, ensure the locking pins and knobs
are fully engaged.
Note: Ensure all cargo is secured.
Note: When the vehicle is in motion, the tailgate load must not exceed
150 lb (68 kg).
Note: The bed extender should always be kept in the grocery mode or
stowed position with the tailgate closed when not being used for the
purpose of restraining cargo in the tailgate mode.
To open the bed extender into grocery mode, follow Steps 1–4 by
rotating the panels away from the tailgate. Close the tailgate.Driver Controls
126
2011 F-250/350/450/550 (f23)
Owners Guide, 4th Printing
USA (fus)
Page 140 of 449

REMOTE ENTRY SYSTEM (IF EQUIPPED)
The integrated keyhead transmitter (IKT) complies with part 15 of the
FCC rules and with RSS-210 of Industry Canada. Operation is subject to
the following two conditions: (1) This device may not cause harmful
interference, and (2) This device must accept any interference received,
including interference that may cause undesired operation.
Changes or modifications not expressly approved by the party
responsible for compliance could void the user’s authority to
operate the equipment.
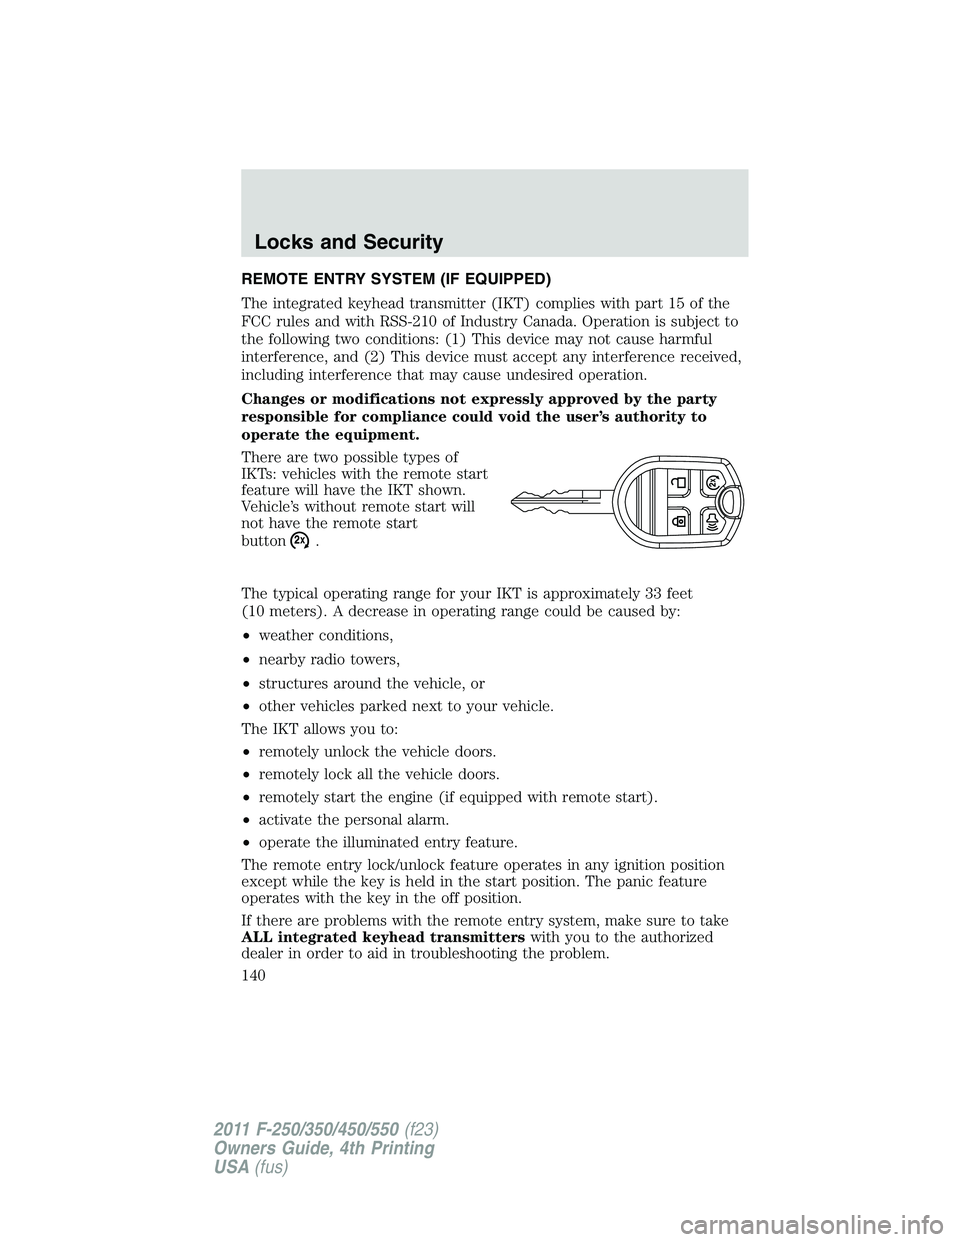
There are two possible types of
IKTs: vehicles with the remote start
feature will have the IKT shown.
Vehicle’s without remote start will
not have the remote start
button
.
The typical operating range for your IKT is approximately 33 feet
(10 meters). A decrease in operating range could be caused by:
• weather conditions,
• nearby radio towers,
• structures around the vehicle, or
• other vehicles parked next to your vehicle.
The IKT allows you to:
• remotely unlock the vehicle doors.
• remotely lock all the vehicle doors.
• remotely start the engine (if equipped with remote start).
• activate the personal alarm.
• operate the illuminated entry feature.
The remote entry lock/unlock feature operates in any ignition position
except while the key is held in the start position. The panic feature
operates with the key in the off position.
If there are problems with the remote entry system, make sure to take
ALL integrated keyhead transmitters with you to the authorized
dealer in order to aid in troubleshooting the problem.Locks and Security
140
2011 F-250/350/450/550 (f23)
Owners Guide, 4th Printing
USA (fus)
Page 148 of 449

Note: The SecuriLock � passive anti-theft system is not compatible with
non-Ford aftermarket remote start systems. Use of these systems may
result in vehicle starting problems and a loss of security protection.
Note: Large metallic objects, electronic devices that are used to
purchase gasoline or similar items, or a second coded key on the same
key chain may cause vehicle starting issues. You need to prevent these
objects from touching the coded key while starting the engine. These
objects will not cause damage to the coded key, but may cause a
momentary issue if they are too close to the key when starting the
engine. If a problem occurs, turn the ignition off, remove all objects on
the key chain away from the coded key and restart the engine.
Note: Do not leave a duplicate coded key in the vehicle. Always
take your keys and lock all doors when leaving the vehicle.
Automatic arming
The vehicle is armed immediately after turning the ignition off.
Automatic disarming
Switching the ignition on with a coded key disarms the vehicle.
Replacement keys
If your keys are lost or stolen and you don’t have an extra coded key,
you will need to have your vehicle towed to an authorized dealer. The
key codes need to be erased from your vehicle and new coded keys will
need to be programmed.
Replacing coded keys can be very costly. Store an extra programmed key
away from the vehicle in a safe place to help prevent any
inconveniences. Please visit an authorized dealer to purchase additional
spare or replacement keys.
Programming spare keys
A maximum of eight keys can be coded to your vehicle. Only
SecuriLock � keys can be used. To program a coded key yourself, you
will need two previously programmed coded keys (keys that already
operate your vehicle’s engine) and the new unprogrammed key(s) readily
accessible for timely implementation of each step in the procedure.
If two previously programmed coded keys are not available, you must
bring your vehicle to your authorized dealer to have the spare coded
key(s) programmed.
Please read and understand the entire procedure before you begin.Locks and Security
148
2011 F-250/350/450/550 (f23)
Owners Guide, 4th Printing
USA (fus)
Page 158 of 449

Using the power lumbar support (if equipped)
The power lumbar control is located on the outboard side of the seat.
Press one side of the control to
adjust firmness.
Press the other side of the control
to adjust softness.
Using the manual lumbar support (if equipped)
The lumbar support control is
located on the outboard side of the
seat
Turn the lumbar support forward
toward the front of the vehicle for
more support.
Turn the lumbar support backward
toward the rear of the vehicle for
less support.
Heated and cooled seats (if equipped)
The controls for the climate controlled seats are located on the climate
control system.
Heated seats
WARNING: Persons who are unable to feel pain to the skin
because of advanced age, chronic illness, diabetes, spinal cord
injury, medication, alcohol use, exhaustion, or other physical
conditions, must exercise care when using the seat heater. The seat
heater may cause burns even at low temperatures, especially if used
for long periods of time. Do not place anything on the seat that
insulates against heat, such as a blanket or cushion, because this may
cause the seat heater to overheat. Do not puncture the seat with pins,
needles, or other pointed objects because this may damage the heating
element which may cause the seat heater to overheat. An overheated
seat may cause serious personal injury.Seating and Safety Restraints
158
2011 F-250/350/450/550 (f23)
Owners Guide, 4th Printing
USA (fus)
Page 160 of 449
To remove an air filter:
1. Turn the vehicle off.
2. Push up on the outside rigid edge
of the filter until the tabs are
released, then rotate the air filter
toward the front of the vehicle.
3. Remove filter.
To install a filter:
1. First, position the filter in its
housing making sure that the far
forward end is all the way up in the
housing.
2. Push in on the center of the
outside edge of the filter and rotate
up into the housing until it clips into
position.Seating and Safety Restraints
160
2011 F-250/350/450/550 (f23)
Owners Guide, 4th Printing
USA (fus)
Page 168 of 449

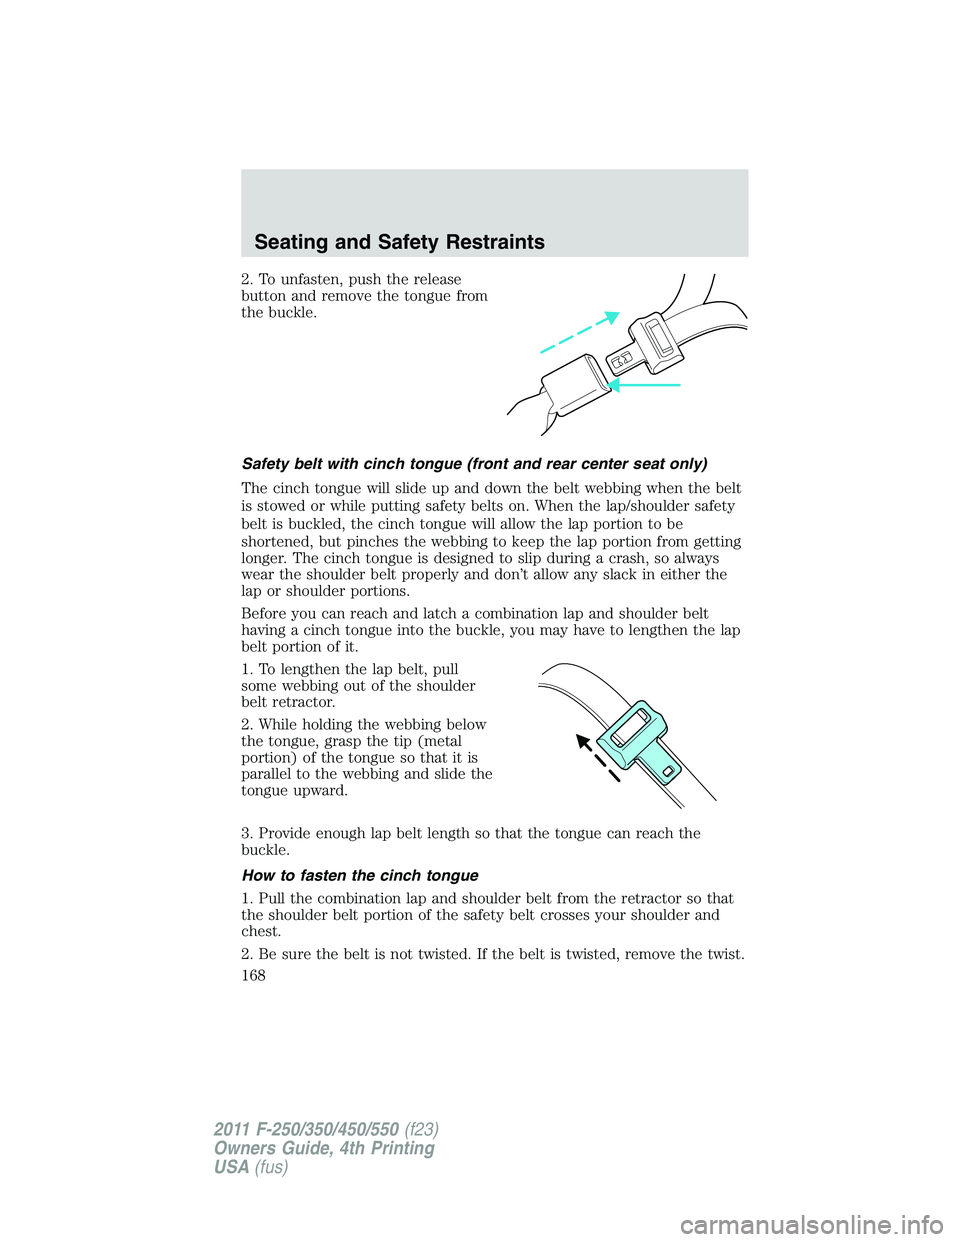
2. To unfasten, push the release
button and remove the tongue from
the buckle.
Safety belt with cinch tongue (front and rear center seat only)
The cinch tongue will slide up and down the belt webbing when the belt
is stowed or while putting safety belts on. When the lap/shoulder safety
belt is buckled, the cinch tongue will allow the lap portion to be
shortened, but pinches the webbing to keep the lap portion from getting
longer. The cinch tongue is designed to slip during a crash, so always
wear the shoulder belt properly and don’t allow any slack in either the
lap or shoulder portions.
Before you can reach and latch a combination lap and shoulder belt
having a cinch tongue into the buckle, you may have to lengthen the lap
belt portion of it.
1. To lengthen the lap belt, pull
some webbing out of the shoulder
belt retractor.
2. While holding the webbing below
the tongue, grasp the tip (metal
portion) of the tongue so that it is
parallel to the webbing and slide the
tongue upward.
3. Provide enough lap belt length so that the tongue can reach the
buckle.
How to fasten the cinch tongue
1. Pull the combination lap and shoulder belt from the retractor so that
the shoulder belt portion of the safety belt crosses your shoulder and
chest.
2. Be sure the belt is not twisted. If the belt is twisted, remove the twist.Seating and Safety Restraints
168
2011 F-250/350/450/550 (f23)
Owners Guide, 4th Printing
USA (fus)