2011 FORD F550 brake light
[x] Cancel search: brake lightPage 88 of 449

Daytime running lamps (DRL) (if equipped)
Turns the headlamps on with a reduced output.
To activate:
• the ignition must be in the on position,
• the headlamp control is in the off or parking lamp position and
• the parking brake must be disengaged.
WARNING: Always remember to turn on your headlamps at
dusk or during inclement weather. The Daytime Running Lamp
(DRL) system does not activate the tail lamps and generally may not
provide adequate lighting during these conditions. Failure to activate
your headlamps under these conditions may result in a collision.
PANEL DIMMER CONTROL
Use to adjust the brightness of the
instrument panel and all applicable
lit components in the vehicle during
headlamp and parking lamp
operation.
• Tapthetoporbottomofthe
control to brighten/dim all interior
lit components incrementally, or
• Press and hold at the first
position the top or bottom of the
control until the desired lighting level is reached.
• Press and hold the top of the control to the full on position to activate
the “dome on” feature. This will turn on the interior courtesy lights.
The lights will remain on until the bottom of the control is pressed.
AIMING THE HEADLAMPS
Your vehicle is equipped with an aerodynamic headlamp system. The
aerodynamic headlamps can only be aimed in the vertical direction
(up/down) using the procedure following. The headlamps on your vehicle
are properly aimed at the assembly plant and should not normally need
adjustment.Lights
88
2011 F-250/350/450/550 (f23)
Owners Guide, 4th Printing
USA (fus)
Page 94 of 449

10. For the headlamp bulb, remove
the bulb by turning it
counterclockwise and pulling it
straight out.
11. For the park or turn lamp bulb,
remove the bulb by turning it
counterclockwise and pulling it
straight out.
WARNING: Handle a halogen headlamp bulb carefully and keep
out of children’s reach. Grasp the bulb only by its plastic base
and do not touch the glass. The oil from your hand could cause the
bulb to break the next time the headlamps are operated.
Install the new bulb(s) in reverse order.
Replacing brake/tail/turn/back-up lamp bulbs (pick-ups only)
1. Make sure the headlamps are off,
then open the tailgate to expose the
lamp assemblies.
2. Remove the two bolts from the
tail lamp assembly and carefully pull
the lamp assembly from the tailgate
pillar by releasing the two retaining
tabs.
3. Rotate the bulb socket counterclockwise and remove from lamp
assembly.
4. Pull the bulb straight out of the socket.Lights
94
2011 F-250/350/450/550 (f23)
Owners Guide, 4th Printing
USA (fus)
Page 95 of 449

Install the new bulb(s) in reverse order.
Replacing brake/tail/turn/back-up lamp bulbs (chassis cabs only)
(if equipped)
1. Make sure the headlamps are off.
2. Remove the four screws and the
lamp lens from lamp assembly.
3. Carefully pull the bulb straight
out of the socket and push in the
new bulb.
Replacing cargo lamp and high-mount brakelamp bulbs
1. Make sure the headlamps are off.
2. Remove the screws and lamp
assembly from the vehicle as wiring
permits.
3. Remove the bulb socket by
rotating it counterclockwise.
4. Pull the bulb straight out of the
socket. Lights
95
2011 F-250/350/450/550 (f23)
Owners Guide, 4th Printing
USA (fus)
Page 109 of 449

The accelerator and brake pedal positions are saved when doing a
memory set function and can be recalled along with the vehicle
personality features when a memory position is selected. Refer to
Memory seats/power mirrors/adjustable pedals in the Seating and
Safety Restraints chapter.
SPEED CONTROL (IF EQUIPPED)
With speed control set, you can maintain a set speed without keeping
your foot on the accelerator pedal.
WARNING: Do not use the speed control in heavy traffic or on
roads that are winding, slippery or unpaved.
Using speed control
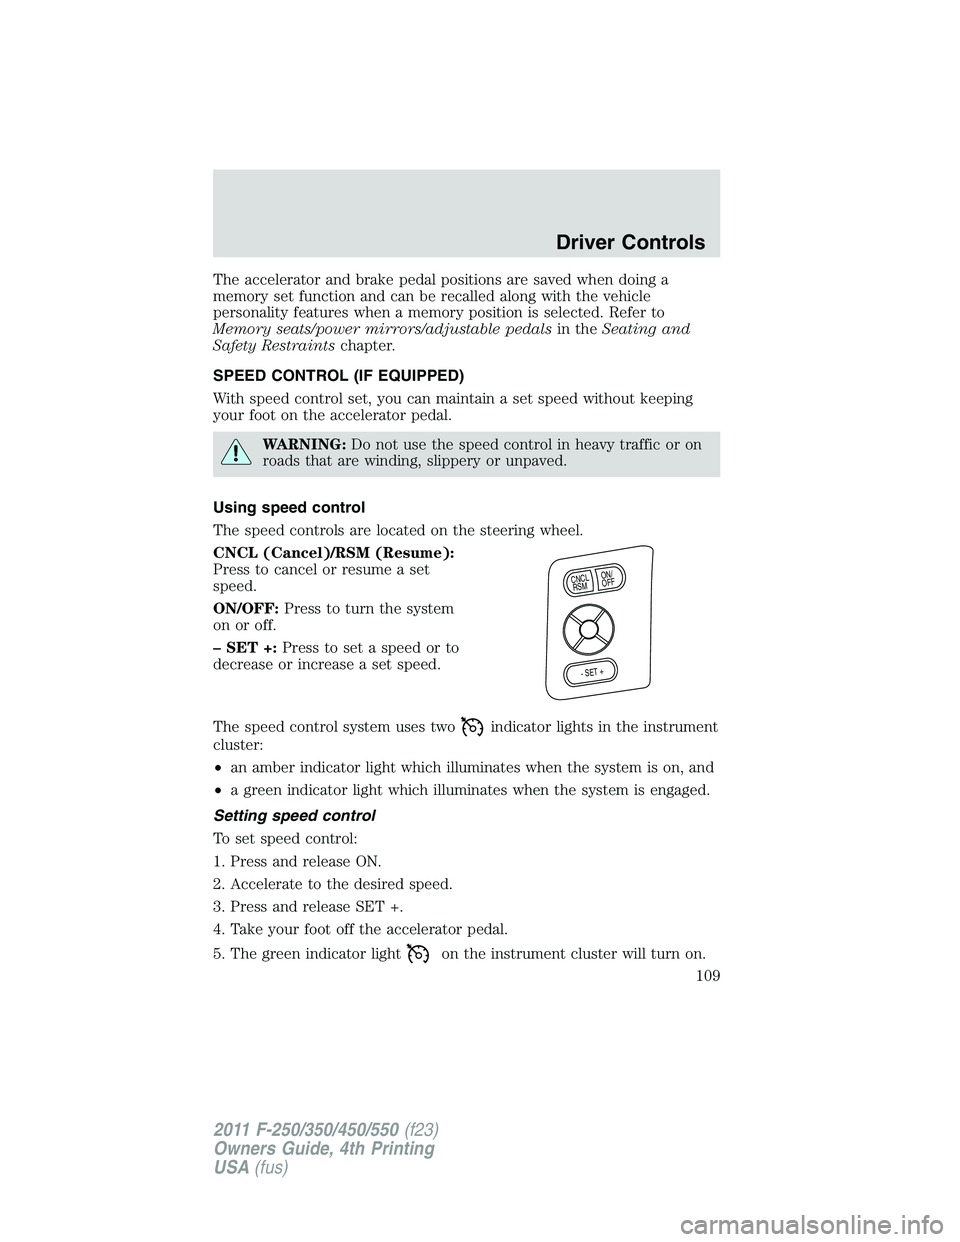
The speed controls are located on the steering wheel.
CNCL (Cancel)/RSM (Resume):
Press to cancel or resume a set
speed.
ON/OFF: Press to turn the system
on or off.
– SET +: Press to set a speed or to
decrease or increase a set speed.
The speed control system uses two indicator lights in the instrument
cluster:
• an amber indicator light which illuminates when the system is on, and
• a green indicator light which illuminates when the system is engaged.
Setting speed control
To set speed control:
1. Press and release ON.
2. Accelerate to the desired speed.
3. Press and release SET +.
4. Take your foot off the accelerator pedal.
5. The green indicator light on the instrument cluster will turn on. O N /
O F FC N C L
R S M
- S E T +
Driver Controls
109
2011 F-250/350/450/550 (f23)
Owners Guide, 4th Printing
USA (fus)
Page 220 of 449

under-inflation of the tires, improper tires (load range, size, or type), or
vehicle modifications such as lift-kits. In the event that your vehicle
experiences shimmy, you should slowly reduce speed by either lifting off
the accelerator pedal or lightly applying the brakes. The shimmy will
cease as the vehicle speed decreases.
Maximum Permissible Inflation Pressure is the tire manufacturer’s
maximum permissible pressure and/or the pressure at which the
maximum load can be carried by the tire. This pressure is normally
higher than the manufacturer’s recommended cold inflation pressure
which can be found on the Safety Compliance Certification Label or Tire
Label which is located on the B-Pillar or the edge of the driver’s door.
The cold inflation pressure should never be set lower than the
recommended pressure on the Safety Compliance Certification Label or
Tire Label.
When weather temperature changes occur, tire inflation pressures also
change. A 10°F (6°C) temperature drop can cause a corresponding drop
of 1 psi (7 kPa) in inflation pressure. Check your tire pressures
frequently and adjust them to the proper pressure which can be found
on the Safety Compliance Certification Label or Tire Label.
To check the pressure in your tire(s):
1. Make sure the tires are cool, meaning they are not hot from driving
even a mile.
If you are checking tire pressure when the tire is hot, (i.e. driven more
than 1 mile [1.6 km]), never “bleed” or reduce air pressure. The tires are
hot from driving and it is normal for pressures to increase above
recommended cold pressures. A hot tire at or below recommended cold
inflation pressure could be significantly under-inflated.
Note: If you have to drive a distance to get air for your tire(s), check
and record the tire pressure first and add the appropriate air pressure
when you get to the pump. It is normal for tires to heat up and the air
pressure inside to go up as you drive.
2. Remove the cap from the valve on one tire, then firmly press the tire
gauge onto the valve and measure the pressure.
3. Add enough air to reach the recommended air pressure.
Note: If you overfill the tire, release air by pushing on the metal stem in
the center of the valve. Then recheck the pressure with your tire gauge.
4. Replace the valve cap.
5. Repeat this procedure for each tire, including the spare.Tires, Wheels and Loading
220
2011 F-250/350/450/550 (f23)
Owners Guide, 4th Printing
USA (fus)
Page 258 of 449

• The TBC is equipped with a feature which reduces output at vehicle
speeds below 11 mph (18 km/h) so trailer and vehicle braking is not
jerky or harsh. This feature is only available when applying the brakes
using the vehicle’s brake pedal, not the TBC.
• The TBC interacts with the brake system of the vehicle, including
ABS, in order to reduce the likelihood of trailer wheel lock-up;
therefore, if these systems are not functioning properly, the TBC may
not function at full performance.
• Your vehicle’s brake system and the trailer brake system work
independently of each other; changing the GAIN setting on the TBC
does not affect the operation of your vehicle’s brakes whether a trailer
is attached or not.
• When the vehicle is turned off, the TBC output is disabled and the
display is shut down; turning the ignition from off to on awakens the
TBC module.
• The TBC is only a factory- or dealer-installed item; Ford is not
responsible for warranty or performance of the TBC due to misuse or
customer installation.
• Do not attempt removal of the TBC without consulting the
Workshop Manual; damage to the unit may result.
Trailer lamps
Trailer lamps are required on most towed vehicles. Make sure all running
lights, brake lights, turn signals and hazard lights are working. Contact
your authorized dealer or trailer rental agency for proper instructions
and equipment for hooking-up trailer lamps.
Driving while you tow
When towing a trailer:
• Consult your local motor vehicle laws for towing a trailer.
• Do not drive faster than 70 mph (113 km/h) during the first 500 miles
(800 km) of trailer towing and don’t make full-throttle starts.
• Turn off the speed control. The speed control may shut off
automatically when you are towing on long, steep grades.
• Activate the tow/haul feature to eliminate excessive transmission
shifting and assist in transmission cooling. For additional information,
refer to Automatic transmission operation in the Driving chapter.
• Allow more distance for stopping with a trailer attached; anticipate
stops and brake gradually.Tires, Wheels and Loading
258
2011 F-250/350/450/550 (f23)
Owners Guide, 4th Printing
USA (fus)
Page 262 of 449

STARTING
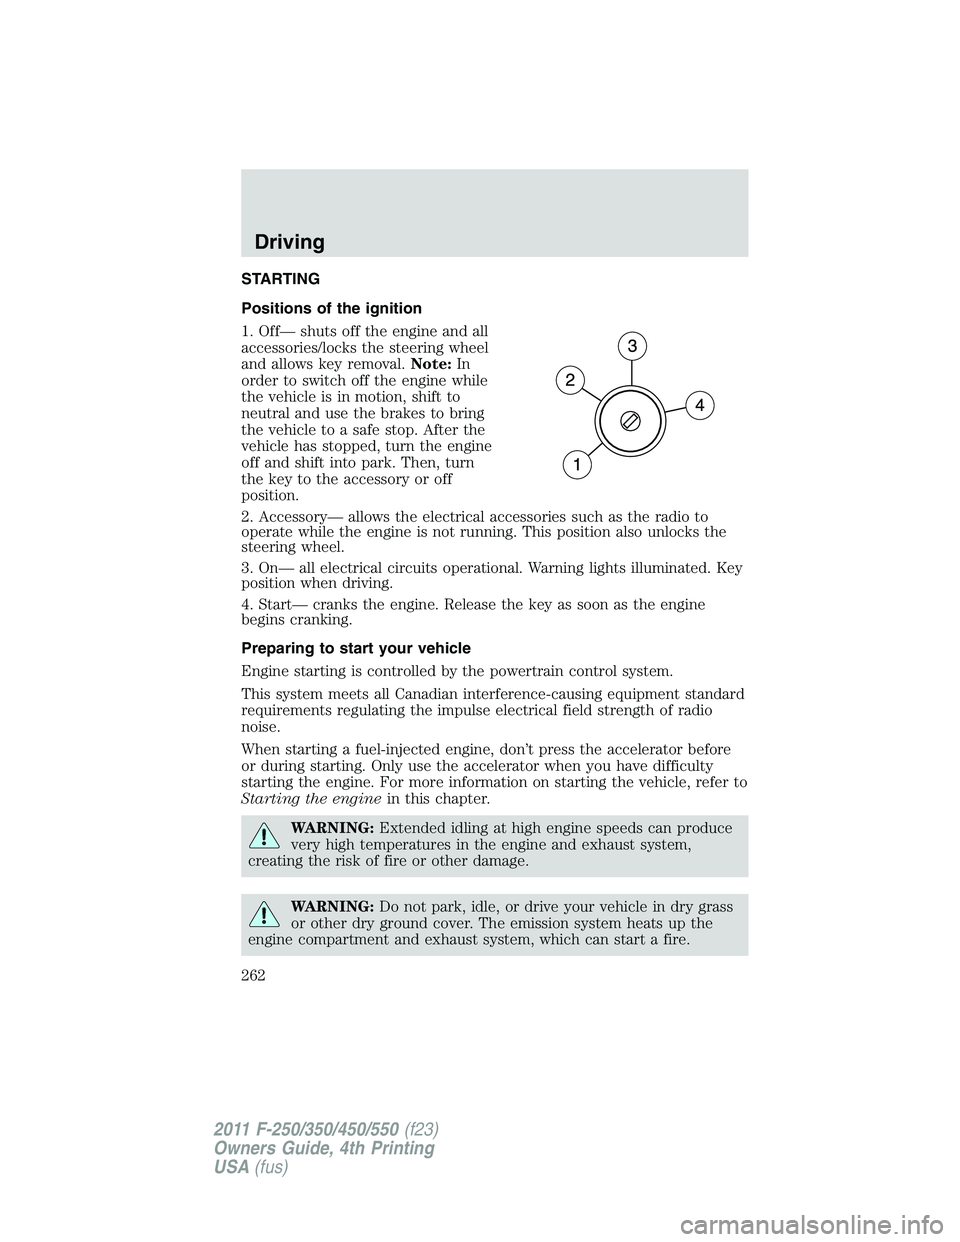
Positions of the ignition
1. Off— shuts off the engine and all
accessories/locks the steering wheel
and allows key removal. Note: In
order to switch off the engine while
the vehicle is in motion, shift to
neutral and use the brakes to bring
the vehicle to a safe stop. After the
vehicle has stopped, turn the engine
off and shift into park. Then, turn
the key to the accessory or off
position.
2. Accessory— allows the electrical accessories such as the radio to
operate while the engine is not running. This position also unlocks the
steering wheel.
3. On— all electrical circuits operational. Warning lights illuminated. Key
position when driving.
4. Start— cranks the engine. Release the key as soon as the engine
begins cranking.
Preparing to start your vehicle
Engine starting is controlled by the powertrain control system.
This system meets all Canadian interference-causing equipment standard
requirements regulating the impulse electrical field strength of radio
noise.
When starting a fuel-injected engine, don’t press the accelerator before
or during starting. Only use the accelerator when you have difficulty
starting the engine. For more information on starting the vehicle, refer to
Starting the engine in this chapter.
WARNING: Extended idling at high engine speeds can produce
very high temperatures in the engine and exhaust system,
creating the risk of fire or other damage.
WARNING: Do not park, idle, or drive your vehicle in dry grass
or other dry ground cover. The emission system heats up the
engine compartment and exhaust system, which can start a fire.Driving
262
2011 F-250/350/450/550 (f23)
Owners Guide, 4th Printing
USA (fus)
Page 264 of 449

3. Turn the key to 3 (on) without
turning the key to 4 (start).
Some warning lights will briefly illuminate. See Warning lights and
chimes in the Instrument Cluster chapter for more information
regarding the warning lights.
Starting the engine
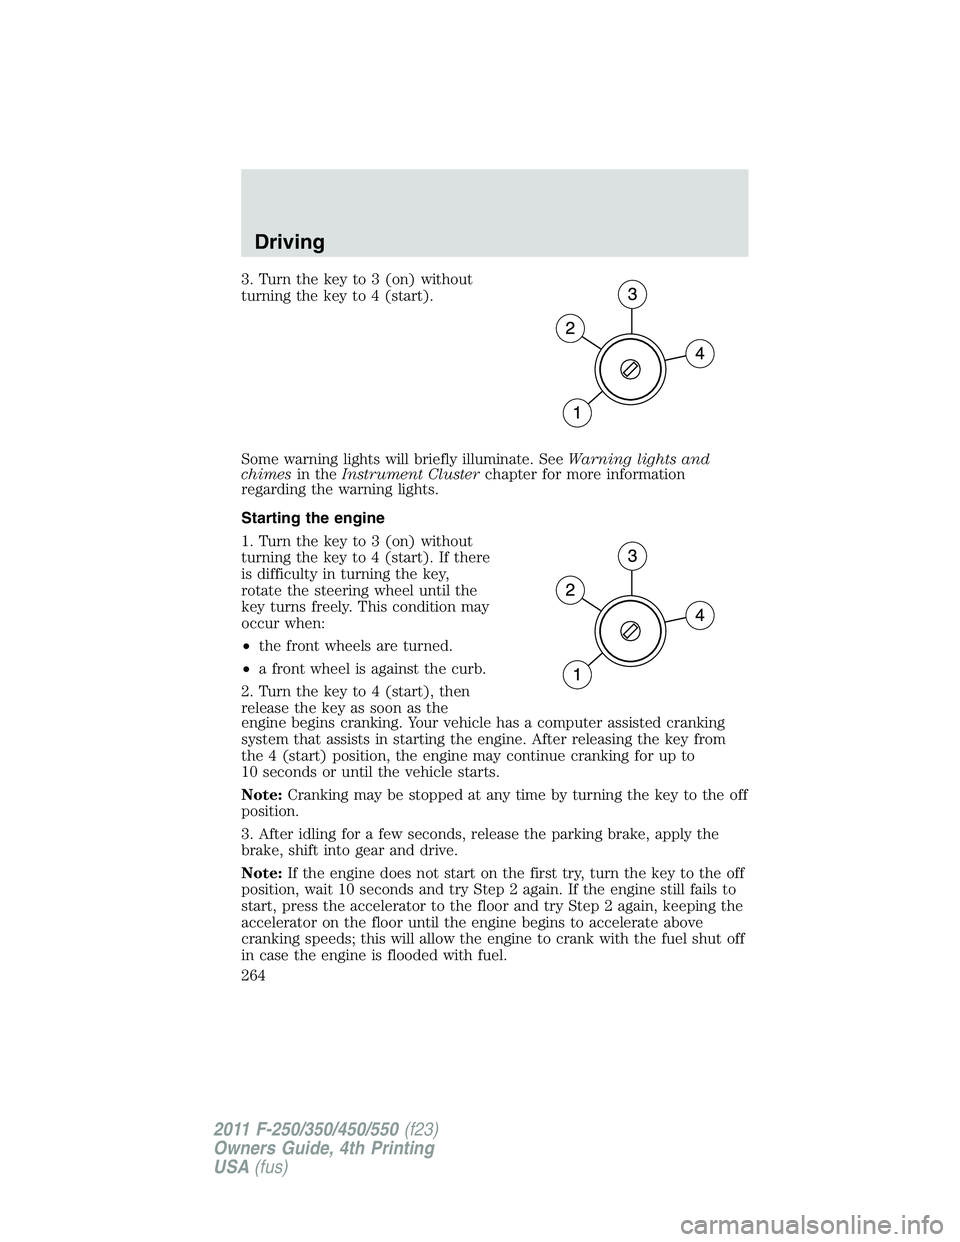
1. Turn the key to 3 (on) without
turning the key to 4 (start). If there
is difficulty in turning the key,
rotate the steering wheel until the
key turns freely. This condition may
occur when:
• the front wheels are turned.
• a front wheel is against the curb.
2. Turn the key to 4 (start), then
release the key as soon as the
engine begins cranking. Your vehicle has a computer assisted cranking
system that assists in starting the engine. After releasing the key from
the 4 (start) position, the engine may continue cranking for up to
10 seconds or until the vehicle starts.
Note: Cranking may be stopped at any time by turning the key to the off
position.
3. After idling for a few seconds, release the parking brake, apply the
brake, shift into gear and drive.
Note: If the engine does not start on the first try, turn the key to the off
position, wait 10 seconds and try Step 2 again. If the engine still fails to
start, press the accelerator to the floor and try Step 2 again, keeping the
accelerator on the floor until the engine begins to accelerate above
cranking speeds; this will allow the engine to crank with the fuel shut off
in case the engine is flooded with fuel.Driving
264
2011 F-250/350/450/550 (f23)
Owners Guide, 4th Printing
USA (fus)