Page 59 of 461

2. Do not set the portable music player’s volume level higher than is
necessary to match the volume of the CD or FM radio in your audio
system as this will cause distortion and will reduce sound quality. Many
portable music players have different output levels, so not all players
should be set at the same levels. Some players will sound best at full
volume and others will need to be set at a lower volume.
3. If the music sounds distorted at lower listening levels, turn the
portable music player volume down. If the problems persists, replace or
recharge the batteries in the portable music player.
4. The portable music player must be controlled in the same manner
when it is used with headphones as the AIJ does not provide control
(play, pause, etc.) over the attached portable music player.
5. For safety reasons, connecting or adjusting the settings on your
portable music player should not be attempted while the vehicle is
moving. Also, the portable music player should be stored in a secure
location, such as the center console or the glove box, when the vehicle is
in motion. The audio extension cable must be long enough to allow the
portable music player to be safely stored while the vehicle is in motion.
USB port (if equipped)
WARNING:Driving while distracted can result in loss of vehicle
control, accident and injury. Ford strongly recommends that
drivers use extreme caution when using any device that may take their
focus off the road. Your primary responsibility is the safe operation of
the vehicle. We recommend against the use of any handheld device
while driving, encourage the use of voice-operated systems when
possible and that you become aware of applicable state and local laws
that may affect the use of electronic devices while driving.
Your vehicle may be equipped with a
USB port located on the instrument
panel. This feature allows you to
plug in media playing devices,
memory sticks, and also to charge
devices if they support this feature.
For further information on this feature, refer toAccessing and using
your USB portin theSYNC�supplement orNavigation System
supplement.
Entertainment Systems
59
2011 F-150(f12)
Owners Guide, 1st Printing
USA(fus)
Page 121 of 461

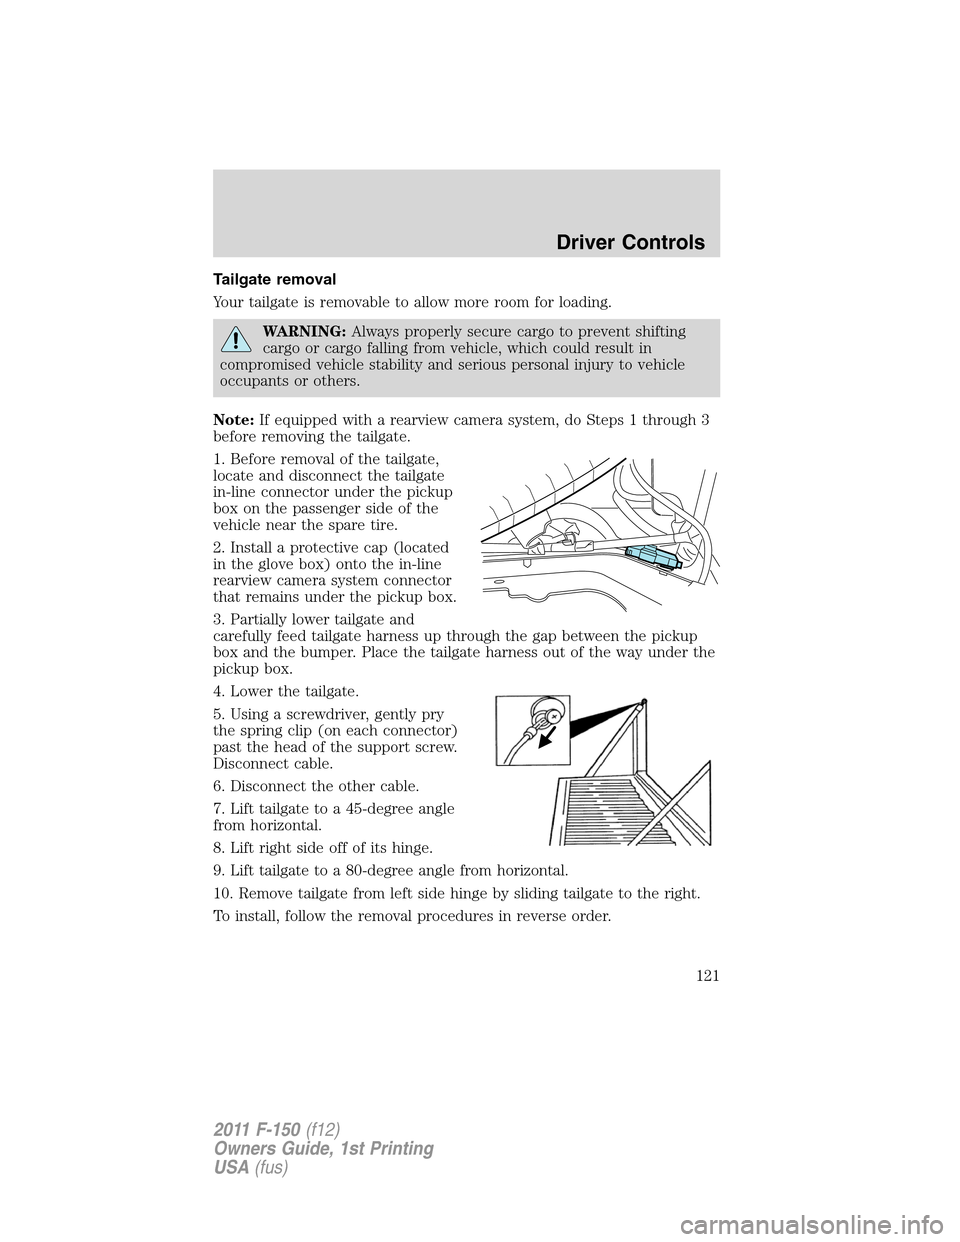
Tailgate removal
Your tailgate is removable to allow more room for loading.
WARNING:Always properly secure cargo to prevent shifting
cargo or cargo falling from vehicle, which could result in
compromised vehicle stability and serious personal injury to vehicle
occupants or others.
Note:If equipped with a rearview camera system, do Steps 1 through 3
before removing the tailgate.
1. Before removal of the tailgate,
locate and disconnect the tailgate
in-line connector under the pickup
box on the passenger side of the
vehicle near the spare tire.
2. Install a protective cap (located
in the glove box) onto the in-line
rearview camera system connector
that remains under the pickup box.
3. Partially lower tailgate and
carefully feed tailgate harness up through the gap between the pickup
box and the bumper. Place the tailgate harness out of the way under the
pickup box.
4. Lower the tailgate.
5. Using a screwdriver, gently pry
the spring clip (on each connector)
past the head of the support screw.
Disconnect cable.
6. Disconnect the other cable.
7. Lift tailgate to a 45-degree angle
from horizontal.
8. Lift right side off of its hinge.
9. Lift tailgate to a 80-degree angle from horizontal.
10. Remove tailgate from left side hinge by sliding tailgate to the right.
To install, follow the removal procedures in reverse order.
Driver Controls
121
2011 F-150(f12)
Owners Guide, 1st Printing
USA(fus)
Page 151 of 461

Turning the engine off after using remote start
•Press
one time. The parking lamps will turn off.
You may have to be closer to the vehicle than when starting due to
ground reflection and the added noise of the running engine.
You can disable or enable the remote start system through the message
center. Refer toMessage centerin theInstrument Clusterchapter.
SECURICODE™ KEYLESS ENTRY SYSTEM (IF EQUIPPED)
You can use the keyless entry
keypad to lock or unlock the doors
without using a key.
The keypad can be operated with
the factory set 5–digit entry code;
this code is located on the owner’s wallet card in the glove box, is
marked on the computer module, and is available from your authorized
dealer. You can also create your own 5–digit personal entry code.
When pressing the controls on the keypad, press the middle of the
controls to ensure a good activation.
Programming a personal entry code and keypad association to
memory seats, mirrors and pedals
To create your own personal entry code:
1. Enter the factory set code.
2. Within five seconds press the 1•2 on the keypad.
3. Enter your personal 5-digit code. Each number must be entered
within five seconds of each other.
4. To associate the entry code with a memory setting, enter a sixth digit
to indicate which driver should be set in a memory recalled by the
personal entry code:
•Pressing 1•2 recalls Driver 1 settings.
•Pressing 3•4 recalls Driver 2 settings.
•Pressing other keypad buttons or not pressing a keypad button as a
sixth digit does not set a driver and will not recall a memory setting.
Note:The factory-set code cannot be associated with a memory
setting.
5. The doors will again lock then unlock to confirm that your personal
entry code has been programmed to the module.
Locks and Security
151
2011 F-150(f12)
Owners Guide, 1st Printing
USA(fus)