2011 FORD F150 automatic transmission
[x] Cancel search: automatic transmissionPage 293 of 461

AUTOMATIC TRANSMISSION OPERATION
Understanding the shift positions of the 6-speed automatic
transmission
This vehicle is equipped with an adaptive transmission shift strategy. The
adaptive transmission shift strategy offers the optimal transmission
operation and shift quality. When the engine is turned off, the shift data
which includes the adaptive information will be stored automatically in
the powertrain control module (PCM). If the battery is disconnected for
any reason, the stored information from the last time the key was turned
to off will be read. This way, no information will be lost with any battery
removal or battery disconnect.
P (Park)
This position locks the transmission
and prevents the rear wheels from
turning.
To put your vehicle in gear:
•Press the brake pedal
•Start the engine
•Move the gearshift lever into the
desired gear. If your vehicle is
equipped with a floor-shift transmission, press the gearshift lever
release button (on the front of the lever) while shifting into the
desired gear.
To put your vehicle in P (Park):
•Come to a complete stop
•Move the gearshift lever and securely latch it in P (Park)
WARNING:Always set the parking brake fully and make sure
the gearshift is latched in P (Park). Turn the ignition to the off
position and remove the key whenever you leave your vehicle.
R (Reverse)
With the gearshift lever in R (Reverse), the vehicle will move backward.
Always come to a complete stop before shifting into and out of R
(Reverse).
N (Neutral)
With the gearshift lever in N (Neutral), the vehicle can be started and is
free to roll. Hold the brake pedal down while in this position.
T/H
PR
N
D
M
2
1
+
-
Driving
293
2011 F-150(f12)
Owners Guide, 1st Printing
USA(fus)
Page 295 of 461

To deactivate the tow/haul feature and return to normal driving mode,
press the button on the end of the gearshift lever. The TOW HAUL light
will no longer be illuminated. Tow/haul will also deactivate when the
vehicle is powered down.
WARNING:Do not use the tow/haul feature when driving in icy
or slippery conditions as the increased engine braking can cause
the rear wheels to slide and the vehicle to swing around with the
possible loss of vehicle control.
3 (Third) (column-shift only)
Transmission operates in third gear only.
Used for improved traction on slippery roads. Selecting 3 (Third)
provides engine braking.
2 (Second)
Transmission operates in 2nd gear only.
Use 2 (Second) to start-up on slippery roads or to provide additional
engine braking on downgrades.
1 (First)
•Transmission operates in 1st gear only.
•Provides maximum engine braking.
•Allows upshifts by moving gearshift lever.
•Will not downshift into 1 (First) at high speeds; allows for 1 (First)
when vehicle reaches slower speeds.
Forced downshifts
•Allowed in D (Drive) only.
•Press the accelerator to the floor.
•Allows transmission to select an appropriate gear.
Understanding your SelectShift Automatic™ transmission (SST)
gearshift lever
This vehicle is equipped with a SelectShift Automatic™ transmission
(SST) gearshift lever. The SST is an automatic transmission with the
ability for the driver to change gears up or down (without a clutch) as
desired. The SST feature has two modes: PRS and M mode.
Driving
295
2011 F-150(f12)
Owners Guide, 1st Printing
USA(fus)
Page 296 of 461
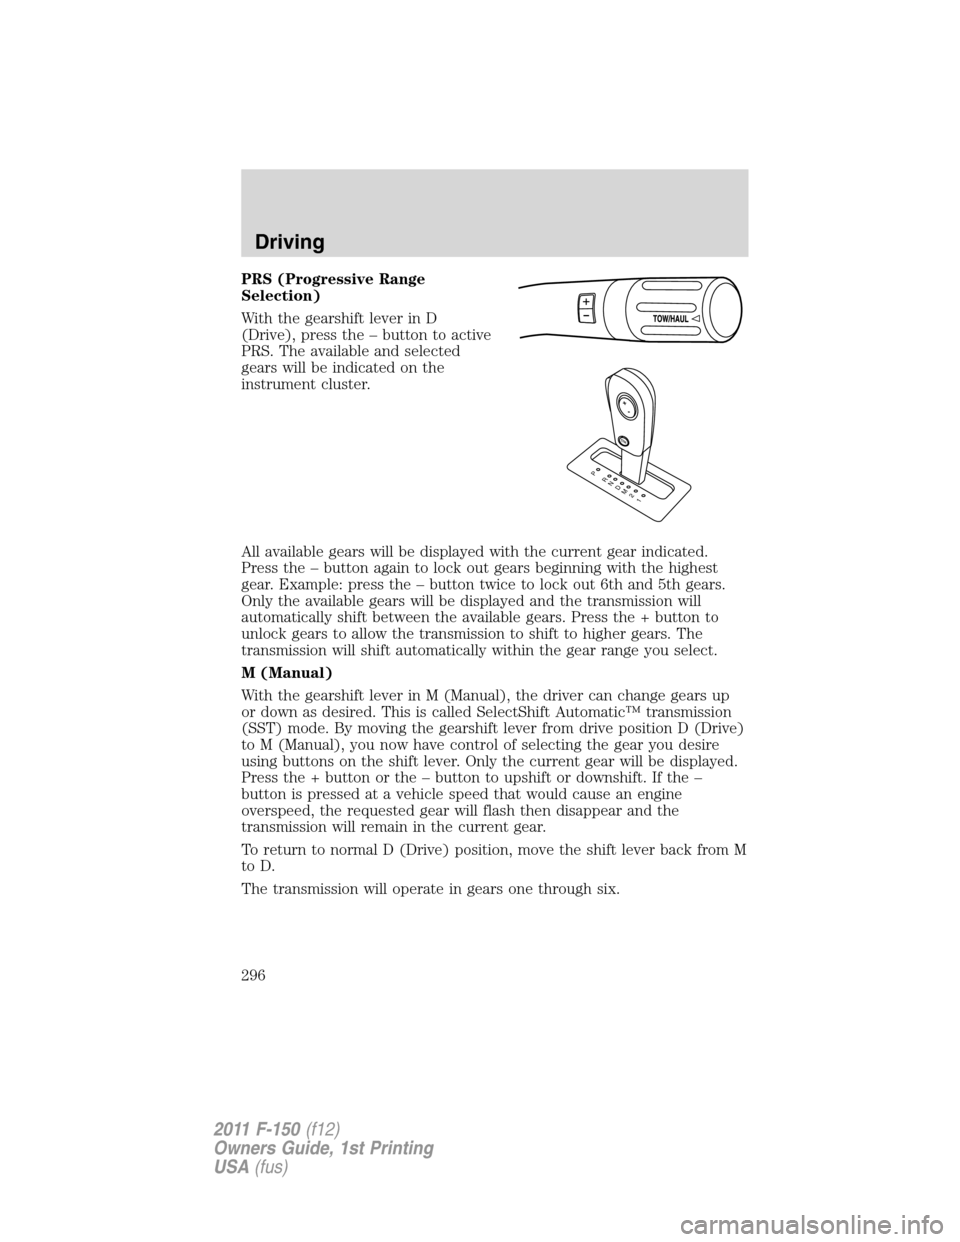
PRS (Progressive Range
Selection)
With the gearshift lever in D
(Drive), press the – button to active
PRS. The available and selected
gears will be indicated on the
instrument cluster.
All available gears will be displayed with the current gear indicated.
Press the – button again to lock out gears beginning with the highest
gear. Example: press the – button twice to lock out 6th and 5th gears.
Only the available gears will be displayed and the transmission will
automatically shift between the available gears. Press the + button to
unlock gears to allow the transmission to shift to higher gears. The
transmission will shift automatically within the gear range you select.
M (Manual)
With the gearshift lever in M (Manual), the driver can change gears up
or down as desired. This is called SelectShift Automatic™ transmission
(SST) mode. By moving the gearshift lever from drive position D (Drive)
to M (Manual), you now have control of selecting the gear you desire
using buttons on the shift lever. Only the current gear will be displayed.
Press the + button or the – button to upshift or downshift. If the –
button is pressed at a vehicle speed that would cause an engine
overspeed, the requested gear will flash then disappear and the
transmission will remain in the current gear.
To return to normal D (Drive) position, move the shift lever back from M
to D.
The transmission will operate in gears one through six.
T/H
PR
N
D
M
2
1
+
-
Driving
296
2011 F-150(f12)
Owners Guide, 1st Printing
USA(fus)
Page 297 of 461
Recommended shift speeds
Upshift according to the following chart:
Upshifts when accelerating
Shift from:
1 – 2 15 mph (24 km/h)
2 – 3 25 mph (40 km/h)
3 – 4 40 mph (64 km/h)
4 – 5 45 mph (72 km/h)
5 – 6 50 mph (80 km/h)
In order to prevent the engine from running at too low an RPM, which
may cause it to stall, the SST will still automatically make some
downshifts if it has determined that you have not downshifted in time.
Although the SST will make some downshifts for you, it will still allow
you to downshift at any time as long as the SST determines that the
engine will not be damaged from over-revving.
The SST will not automatically upshift, even if the engine is approaching
the RPM limit. It must be shifted manually by pressing the + button.
Engine damage may occur if excessive engine revving is held
without shifting.
If your vehicle gets stuck in mud or snow
If your vehicle gets stuck in mud or snow, it may be rocked out by
shifting between forward and reverse gears, stopping between shifts in a
steady pattern. Press lightly on the accelerator in each gear.
Do not rock the vehicle if the engine is not at normal operating
temperature or damage to the transmission may occur.
Do not rock the vehicle for more than a minute or damage to the
transmission and tires may occur, or the engine may overheat.
Driving
297
2011 F-150(f12)
Owners Guide, 1st Printing
USA(fus)
Page 315 of 461
called for. Avoid abrupt steering, acceleration or braking which could
result in an increased risk of loss of vehicle control, vehicle rollover
and/or personal injury. Use all available road surface to return the
vehicle to a safe direction of travel.
•In the event of an emergency stop, avoid skidding the tires and do not
attempt any sharp steering wheel movements.
WARNING:Vehicles with a higher center of gravity such as
utility and four-wheel drive vehicles handle differently than
vehicles with a lower center of gravity. Utility and four-wheel drive
vehicles arenotdesigned for cornering at speeds as high as passenger
cars any more than low-slung sports cars are designed to perform
satisfactorily under off-road conditions. Avoid sharp turns, excessive
speed and abrupt maneuvers in these vehicles. Failure to drive
cautiously could result in an increased risk of loss of vehicle control,
vehicle rollover, personal injury and death.
•If the vehicle goes from one type of surface to another (i.e., from
concrete to gravel) there will be a change in the way the vehicle
responds to a maneuver (steering, acceleration or braking). Again,
avoid these abrupt inputs.
Parking
On some 4WD vehicles, when the transfer case is in the N (Neutral)
position, the engine and transmission are disconnected from the rest of
the driveline. Therefore, the vehicle is free to roll even if the automatic
transmission is in P (Park) or the manual transmission is in gear. Do not
leave the vehicle unattended with the transfer case in the N (Neutral)
position. Always set the parking brake fully and turn off the ignition
when leaving the vehicle.
WARNING:Always set the parking brake fully and make sure
the gearshift is latched in P (Park). Turn the ignition to the off
position and remove the key whenever you leave your vehicle.
WARNING:If the parking brake is fully released, but the brake
warning lamp remains illuminated, the brakes may not be
working properly. See your authorized dealer.
4WD systems
4WD (when you select a 4WD mode) uses all four wheels to power the
vehicle. This increases traction, enabling you to drive over terrain and
road conditions that a conventional two-wheel drive vehicle cannot.
Driving
315
2011 F-150(f12)
Owners Guide, 1st Printing
USA(fus)
Page 341 of 461
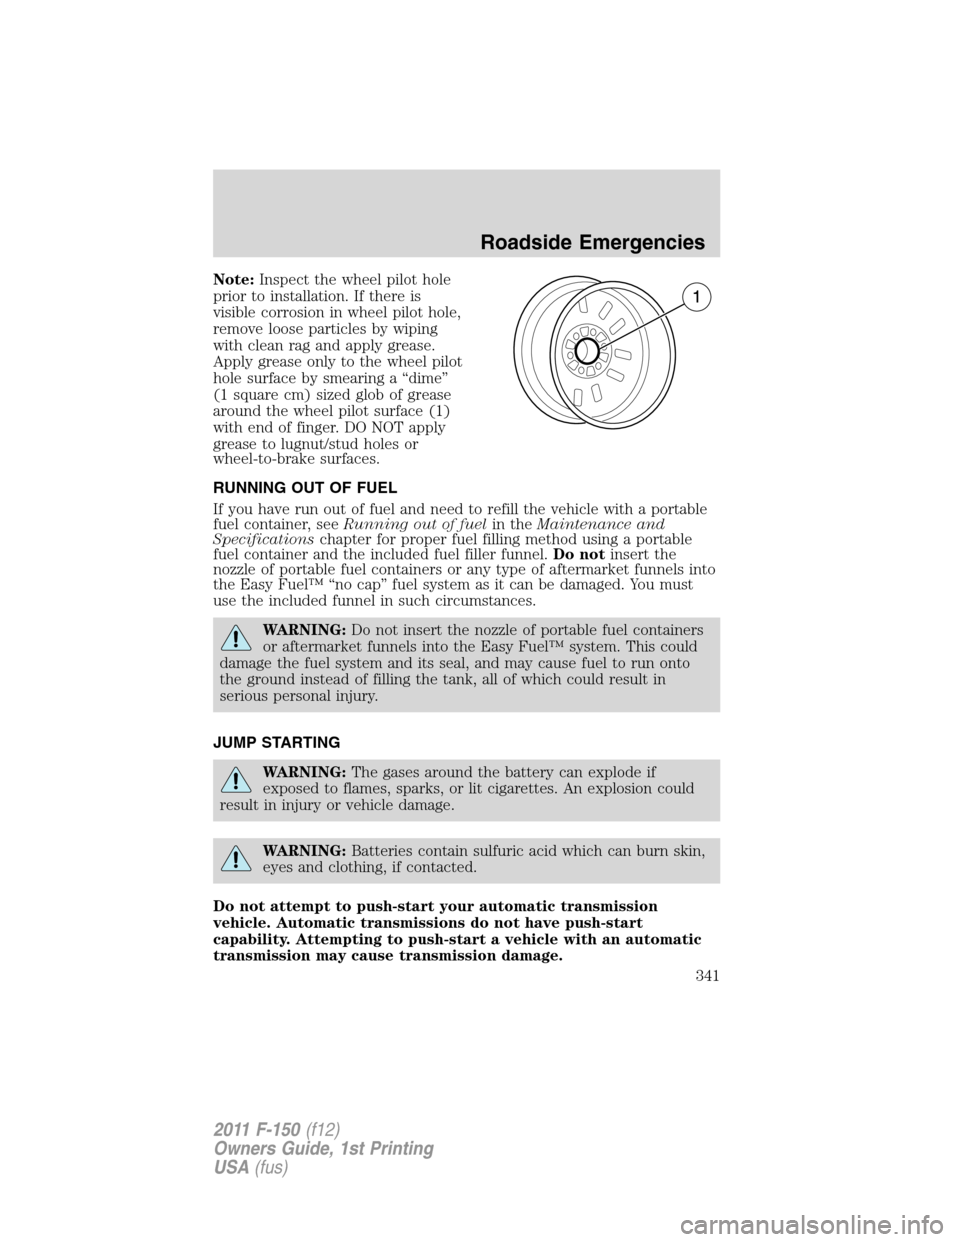
Note:Inspect the wheel pilot hole
prior to installation. If there is
visible corrosion in wheel pilot hole,
remove loose particles by wiping
with clean rag and apply grease.
Apply grease only to the wheel pilot
hole surface by smearing a “dime”
(1 square cm) sized glob of grease
around the wheel pilot surface (1)
with end of finger. DO NOT apply
grease to lugnut/stud holes or
wheel-to-brake surfaces.
RUNNING OUT OF FUEL
If you have run out of fuel and need to refill the vehicle with a portable
fuel container, seeRunning out of fuelin theMaintenance and
Specificationschapter for proper fuel filling method using a portable
fuel container and the included fuel filler funnel.Do notinsert the
nozzle of portable fuel containers or any type of aftermarket funnels into
the Easy Fuel™ “no cap” fuel system as it can be damaged. You must
use the included funnel in such circumstances.
WARNING:Do not insert the nozzle of portable fuel containers
or aftermarket funnels into the Easy Fuel™ system. This could
damage the fuel system and its seal, and may cause fuel to run onto
the ground instead of filling the tank, all of which could result in
serious personal injury.
JUMP STARTING
WARNING:The gases around the battery can explode if
exposed to flames, sparks, or lit cigarettes. An explosion could
result in injury or vehicle damage.
WARNING:Batteries contain sulfuric acid which can burn skin,
eyes and clothing, if contacted.
Do not attempt to push-start your automatic transmission
vehicle. Automatic transmissions do not have push-start
capability. Attempting to push-start a vehicle with an automatic
transmission may cause transmission damage.
Roadside Emergencies
341
2011 F-150(f12)
Owners Guide, 1st Printing
USA(fus)
Page 342 of 461
Preparing your vehicle
When the battery is disconnected or a new battery is installed, the
automatic transmission must relearn its shift strategy. As a result, the
transmission may have firm and/or soft shifts. This operation is
considered normal and will not affect function or durability of the
transmission. Over time, the adaptive learning process will fully update
transmission operation.
1.Use only a 12–volt supply to start your vehicle.
2. Do not disconnect the battery of the disabled vehicle as this could
damage the vehicle’s electrical system.
3. Park the booster vehicle close to the hood of the disabled vehicle
making sure the two vehiclesdo nottouch. Set the parking brake on
both vehicles and stay clear of the engine cooling fan and other moving
parts.
4. Check all battery terminals and remove any excessive corrosion before
you attach the battery cables. Ensure that vent caps are tight and level.
5. Turn the heater fan on in both vehicles to protect from any electrical
surges. Turn all other accessories off.
Connecting the jumper cables
Note:In the illustration, the vehicle on the bottom is used to designate
the assisting (boosting) battery.
Roadside Emergencies
342
2011 F-150(f12)
Owners Guide, 1st Printing
USA(fus)
Page 403 of 461
TRANSMISSION FLUID
Checking 6-speed automatic transmission fluid
The automatic transmission does not have a transmission fluid dipstick.
Refer to yourscheduled maintenance informationfor scheduled
intervals for fluid checks and changes. Your transmission does not
consume fluid. However, the fluid level should be checked if the
transmission is not working properly, (i.e., if the transmission slips or
shifts slowly) or if you notice some sign of fluid leakage.
Transmission fluid should be checked by an authorized dealer. If
required, fluid should be added by an authorized dealer.
Do not use supplemental transmission fluid additives, treatments or
cleaning agents. The use of these materials may affect transmission
operation and result in damage to internal transmission components.
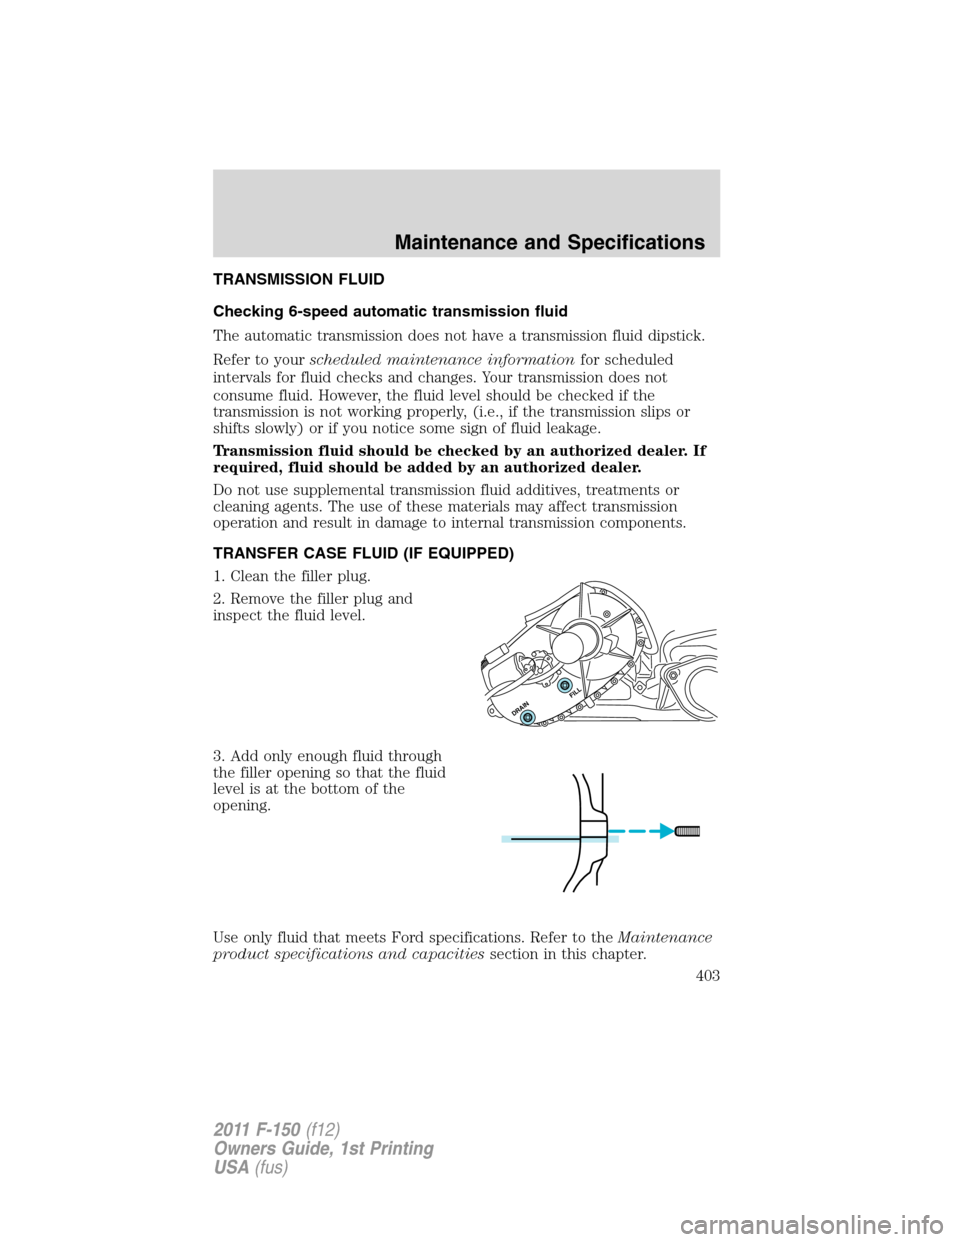
TRANSFER CASE FLUID (IF EQUIPPED)
1. Clean the filler plug.
2. Remove the filler plug and
inspect the fluid level.
3. Add only enough fluid through
the filler opening so that the fluid
level is at the bottom of the
opening.
Use only fluid that meets Ford specifications. Refer to theMaintenance
product specifications and capacitiessection in this chapter.
D
R
A
IN
F
IL
L
Maintenance and Specifications
403
2011 F-150(f12)
Owners Guide, 1st Printing
USA(fus)