2011 FORD EXPLORER warning
[x] Cancel search: warningPage 135 of 449

Check MyKey™ system status
The vehicle’s message center information menu will provide the status of
the following MyKey™ parameters:
•MYKEY MILES (km) — This odometer only tracks distance when a
MyKey™ is used. If distance does not accumulate as expected, then
the MyKey™ is not being used by the intended user. The only way to
reset this odometer to zero is by clearing MyKey™. If this odometer is
lower than the last time you checked, then the MyKey™ system has
been recently cleared.
•# MYKEY(S) PROGRAMMED — Indicates how many MyKeys™ are
programmed to the vehicle. Can be used to detect deletion of a
MyKey™.
•# ADMIN KEYS PROGRAMMED — Indicates how many admin keys
are programmed to the vehicle. Can be used to detect if an additional
spare key has been programmed to the vehicle.
Refer toMessage centerin theInstrument Clusterchapter for MyKey™
system warnings displays.
Using MyKey™ with remote start systems
MyKey™ is not compatible with non Ford-approved aftermarket remote
start systems. If you choose to install a remote start system please see
your authorized dealer for a Ford-approved remote start system.
The following information MAY help customers who choose to use a non
Ford-approved remote start system. The actions provided below do NOT
make MyKey™ compatible with non Ford-approved remote start
systems, but it MAY help you to retain some MyKey™ functions.
Vehicles equipped with traditional keys:
When using a non Ford-approved remote start system, the default
settings may recognize the remote start system as an additional admin
key with its associated privileges. This makes it NOT compatible with
MyKey™. The following action may help you to retain some MyKey™
functions:
1. Restart the engine when you insert a key into the ignition cylinder.
2. In addition to the key that you have already programmed as a
MyKey™, owners of vehicles equipped with traditional keys may want to
program the non Ford-approved remote start system as a MyKey™ if the
remote start fob is used by the MyKey driver.
Locks and Security
134
2011 Explorer(exp)
Owners Guide, 1st Printing
USA(fus)
Page 146 of 449

Car finder
Press
twice within three seconds. The horn will chirp and the turn
lamps will flash. It is recommended that this method be used to locate
your vehicle, rather than using the panic alarm.
Sounding a panic alarm
Press
to activate the alarm. Press again or turn the ignition to on to
deactivate.
Note:The panic alarm will only operate when the ignition is off.
Opening the power liftgate (if equipped)
Presstwice within three seconds to fully unlatch and open the
liftgate.
WARNING:Make sure all persons are clear of the liftgate area
before using power liftgate control.
In order to fully lower and latch the liftgate, press the control twice.
If the liftgate stops mid-travel, it may have detected an obstacle. Check
to ensure the liftgate swing zone is free from obstruction and reset the
power assist by manually closing the liftgate. Normal operation can then
be resumed. Liftgate open/close can be reversed by pressing
twice
within three seconds.
WARNING:Make sure the liftgate is closed to prevent exhaust
fumes from being drawn into the vehicle. This will also prevent
passengers and cargo from falling out. If you must drive with the
liftgate open, keep the vents open so outside air comes into the
vehicle.
Memory feature (seat and mirrors) (if equipped)
The integrated keyhead transmitter (IKT) or intelligent access key (IA
key) allows you to recall the memory seat and power mirrors feature.
Press
to automatically move the seat and power mirrors to the
desired memory position. The mirrors will move to the programmed
position and the seat will move to the easy entry position. The seat will
move to the final position when the ignition is switched out of off (if
easy entry feature is enabled).
Locks and Security
145
2011 Explorer(exp)
Owners Guide, 1st Printing
USA(fus)
Page 151 of 449

To help make the vehicle as comfortable as possible, the engine idle can
be increased during a remote start. You can enable or disable engine idle
increase by selecting Remote Start Quiet in the message center. Refer to
Message centerin theInstrument Clusterchapter.
Many states and provinces have restrictions for the use of remote start.
Check your local and state or provincial laws for specific requirements
regarding remote start systems.
Note:Do not use remote start if your vehicle is low on fuel.
WARNING:To avoid exhaust fumes, do not use remote start if
your vehicle is parked indoors or areas that are not well
ventilated.
The remote start system will not work if:
•The ignition is on.
•The alarm system is triggered.
•The feature has been disabled.
•The hood is not closed.
•Two remote vehicle starts have already been attempted within the last
hour.
•The vehicle is not in P (Park).
•The vehicle battery voltage is too low.
Starting the engine with remote start
The remote start label on your transmitter details the engine starting
procedure. To start the engine using remote start:
Note:Each button press must be done within three seconds of each
other. If this sequence is not followed, the vehicle will not remote start
and the horn will not chirp.
1. Press
to lock all the doors.
2. Press
two times. The exterior
lamps will flash twice.
If for some reason, the system fails to start, the horn will chirp.
Locks and Security
150
2011 Explorer(exp)
Owners Guide, 1st Printing
USA(fus)
Page 161 of 449

FRONT SEATS
WARNING:Reclining the seatback can cause an occupant to
slide under the seat’s safety belt, resulting in severe personal
injuries in the event of a collision.
WARNING:Do not pile cargo higher than the seatbacks to
reduce the risk of injury in a collision or sudden stop.
WARNING:Before returning the seatback to its original
position, make sure that cargo or any objects are not trapped
behind the seatback. After returning the seatback to its original
position, pull on the seatback to ensure that it has fully latched. An
unlatched seat may become dangerous in the event of a sudden stop or
collision.
Adjustable head restraints
Your vehicle is equipped with front row outboard head restraints that are
vertically adjustable.
WARNING:To minimize the risk of neck injury in the event of a
crash, the driver and passenger occupants should not sit in
and/or operate the vehicle, until the head restraint is placed in its
proper position. The driver should never adjust the head restraint
while the vehicle is in motion.
The adjustable head restraints
consist of:
•a trimmed energy absorbing foam
and structure (1),
•two steel stems (2),
•a guide sleeve adjust/release
button (3),
•and a guide sleeve unlock/remove
button (4).
Seating and Safety Restraints
160
2011 Explorer(exp)
Owners Guide, 1st Printing
USA(fus)
Page 162 of 449

To adjust the head restraint, do the following:
1. Adjust the seatback to an upright driving/riding position.
2. Raise the head restraint by pulling up on the head restraint.
3. Lower the head restraint by pressing and holding the guide sleeve
adjust/release button and pushing down on the head restraint.
Properly adjust the head restraint so that the top of the head restraint is
even with the top of your head and positioned as close as possible to the
back of your head. For occupants of extremely tall stature, adjust the
head restraint to its full up position.
WARNING:The adjustable head restraint is a safety device.
Whenever possible it should be installed and properly adjusted
when the seat is occupied.
To remove the adjustable head restraint, do the following:
1. Pull up the head restraint until it reaches the highest adjustment
position.
2. Simultaneously press and hold both the adjust/release button and the
unlock/remove button, then pull up on the head restraint.
To reinstall the adjustable head restraint, do the following:
1. Insert the two stems into the guide sleeve collars.
2. Push the head restraint down until it locks.
Properly adjust the head restraint so that the top of the head restraint is
even with the top of your head and positioned as close as possible to the
back of your head. For occupants of extremely tall stature, adjust the
head restraint to its full up position.
WARNING:To minimize the risk of neck injury in the event of a
crash, head restraints must be installed properly.
Tilting head restraints (if equipped)
The front head restraints may have a tilting feature for extra comfort. To
tilt the head restraint, do the following:
1. Adjust the seatback to an upright driving/riding position.
Seating and Safety Restraints
161
2011 Explorer(exp)
Owners Guide, 1st Printing
USA(fus)
Page 163 of 449

2. Pivot the head restraint forward
towards your head to the desired
location.
After the head restraint reaches
the forward-most tilt position,
pivoting it forward again will then
release it to the rearward
un-tilted position.
Adjusting the front manual seat (if equipped)
WARNING:Never adjust the driver’s seat or seatback when the
vehicle is moving.
WARNING:Always drive and ride with your seatback upright
and the lap belt snug and low across the hips.
Lift handle to move seat forward or
backward.
Pull lever up to adjust seatback.
Seating and Safety Restraints
162
2011 Explorer(exp)
Owners Guide, 1st Printing
USA(fus)
Page 164 of 449

WARNING:Before returning the seatback to its original
position, make sure that cargo or any objects are not trapped
behind the seatback. After returning the seatback to its original
position, pull on the seatback to ensure that it has fully latched. An
unlatched seat may become dangerous in the event of a sudden stop or
collision.
Using the manual lumbar support (if equipped)
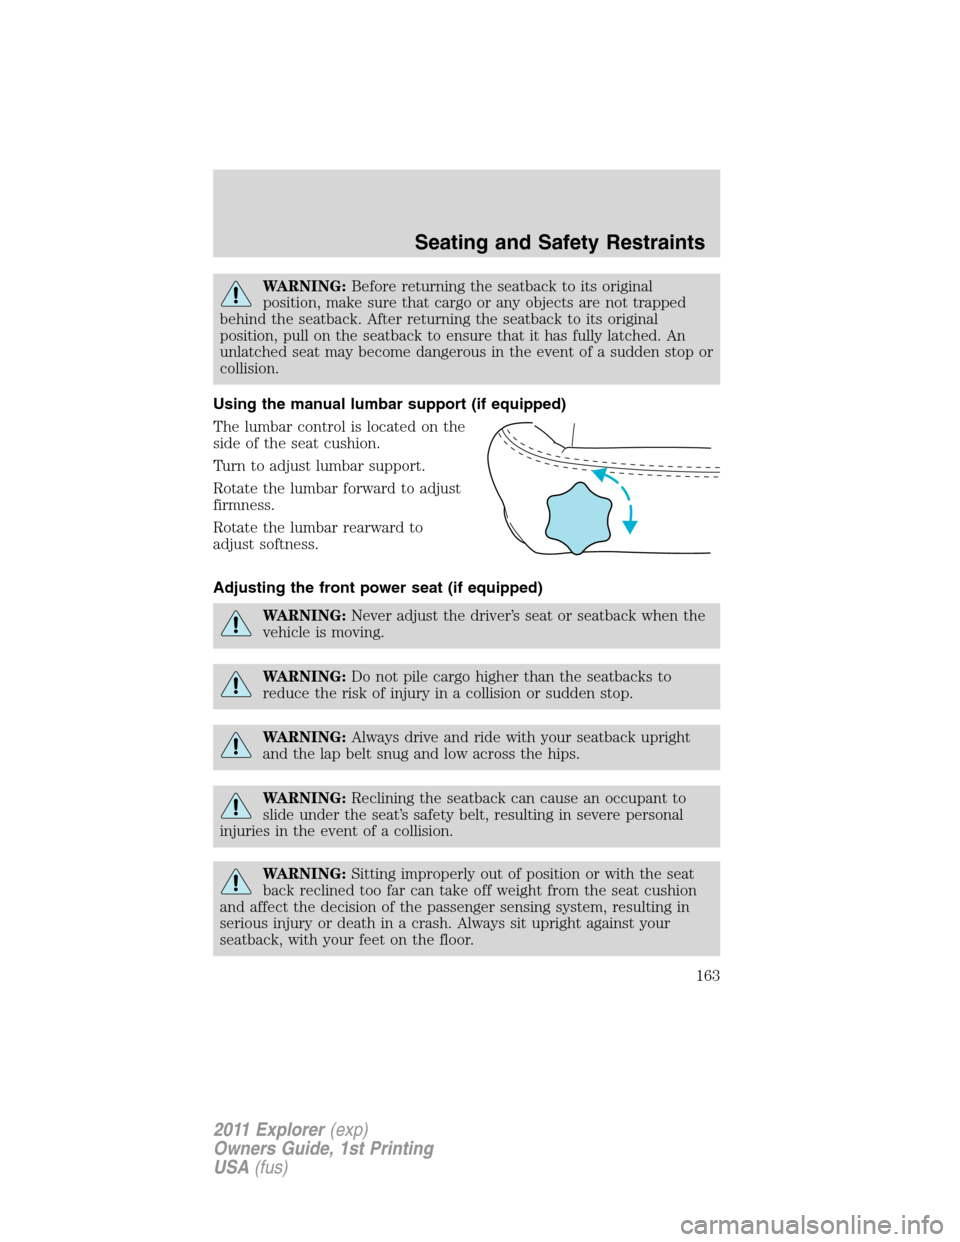
The lumbar control is located on the
side of the seat cushion.
Turn to adjust lumbar support.
Rotate the lumbar forward to adjust
firmness.
Rotate the lumbar rearward to
adjust softness.
Adjusting the front power seat (if equipped)
WARNING:Never adjust the driver’s seat or seatback when the
vehicle is moving.
WARNING:Do not pile cargo higher than the seatbacks to
reduce the risk of injury in a collision or sudden stop.
WARNING:Always drive and ride with your seatback upright
and the lap belt snug and low across the hips.
WARNING:Reclining the seatback can cause an occupant to
slide under the seat’s safety belt, resulting in severe personal
injuries in the event of a collision.
WARNING:Sitting improperly out of position or with the seat
back reclined too far can take off weight from the seat cushion
and affect the decision of the passenger sensing system, resulting in
serious injury or death in a crash. Always sit upright against your
seatback, with your feet on the floor.
Seating and Safety Restraints
163
2011 Explorer(exp)
Owners Guide, 1st Printing
USA(fus)
Page 165 of 449

WARNING:To reduce the risk of possible serious injury: Do not
hang objects off seat back or stow objects in the seatback map
pocket (if equipped) when a child is in the front passenger seat. Do not
place objects underneath the front passenger seat or between the seat
and the center console (if equipped). Check the “passenger airbag off” or
“pass airbag off” indicator lamp for proper airbag status. Refer toFront
passenger sensing systemin theAirbag supplemental restraint
system (SRS)section for additional details. Failure to follow these
instructions may interfere with the front passenger seat sensing system.
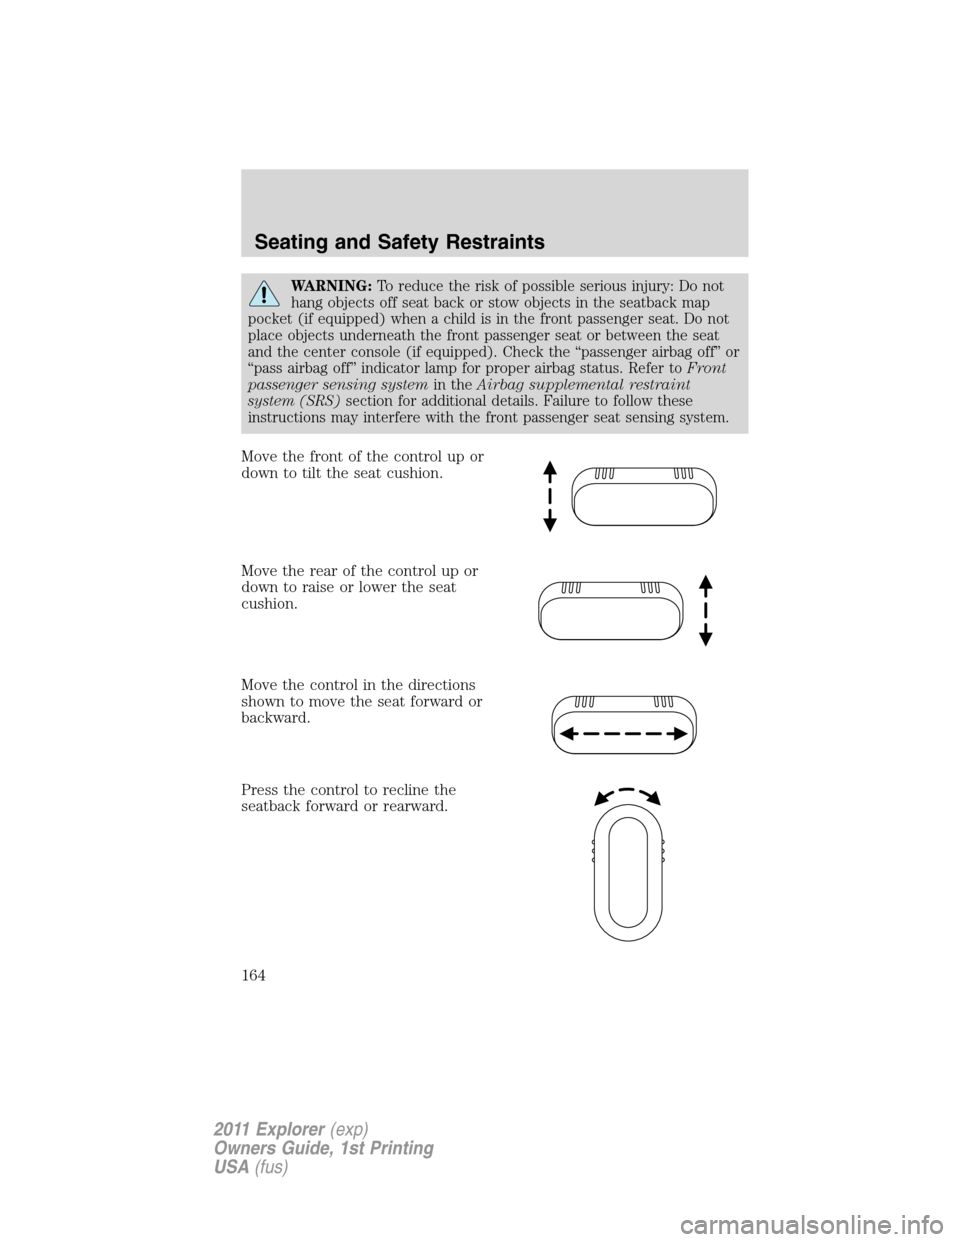
Move the front of the control up or
down to tilt the seat cushion.
Move the rear of the control up or
down to raise or lower the seat
cushion.
Move the control in the directions
shown to move the seat forward or
backward.
Press the control to recline the
seatback forward or rearward.
Seating and Safety Restraints
164
2011 Explorer(exp)
Owners Guide, 1st Printing
USA(fus)