2011 FORD EXPLORER instrument panel
[x] Cancel search: instrument panelPage 128 of 449
The new open liftgate height will now be recalled when the power
liftgate is opened. To change the programmed height, repeat the above
procedure. Once the power liftgate is opened it can be manually moved
to a different height.
Note:Do not drive with the liftgate open without first disabling the
power function and securing the liftgate to the vehicle.
Note:The new liftgate height will be retained even if the battery is
disconnected.
To manually operate the liftgate:
1. Disable the liftgate power function. Refer to theMessage centerin the
Instrument Clusterchapter.
2. Open and close the liftgate as you would a standard liftgate. Refer to
Manual liftgatein this chapter.
Note:In case of operation in extreme cold -40°F (-40°C), or on extreme
inclines, manual operation of the liftgate is suggested.
Obstacle detection
The power liftgate system is equipped with an obstacle detection feature.
If the power liftgate is closing, the system will reverse to full open when
it detects an obstacle. A chime will sound three times when an obstacle
is detected as the liftgate begins to reopen. Once the obstacle is
removed, the liftgate can be closed under power.
If the power liftgate is opening, the system will stop and a chime will
sound three times when an obstacle is detected. Once the obstacle is
removed, the liftgate can again be operated normally.
Resetting the power liftgate:
The power liftgate may not operate properly and may need to be reset if
any of these conditions occur:
•a low voltage or dead battery
•disconnected battery
•the liftgate is manually closed and left ajar (unlatched)
To reset the power liftgate:
1. Disconnect the battery for 20 seconds then, reconnect the battery.
2. Manually close and fully latch the liftgate.
3. Power open the liftgate by using the transmitter, or the instrument
panel control button.
Driver Controls
127
2011 Explorer(exp)
Owners Guide, 1st Printing
USA(fus)
Page 129 of 449
Note:If the power liftgate system is turned off in the message center,
the system cannot be activated with the outside release handle or
control button on the liftgate. The system will need to be turned on to
resume operation with the outside release handle or control button on
the liftgate. The power liftgate is still operational through the use of the
transmitter and instrument panel button when the power liftgate is
turned off in the message center.
ROOF RACK SYSTEM (IF EQUIPPED)
Loads should never be placed directly on the roof panel. For proper
function of the roof rack system, loads must be placed directly on
crossbars affixed to the roof rack side rails. Your vehicle may be
equipped with factory-installed crossbars. Ford Genuine Accessory
crossbars, designed specifically for your vehicle, are also recommended
for use with your roof rack system.
The vehicle’s roof panel isNOTdesigned to directly carry a load.The
maximum recommended load is 100 lb (45 kg), evenly distributed
on the crossbars.Ensure that the load is securely fastened. When the
rail system is loaded, check the tightness of the load before driving and
at each fuel stop.
WARNING:When loading the roof rail crossbars, it is
recommended to evenly distribute the load, as well as maintain a
low center of gravity. Loaded vehicles, with higher centers of gravity,
may handle differently than unloaded vehicles. Extra precautions, such
as slower speeds and increased stopping distance, should be taken
when driving a heavily loaded vehicle.
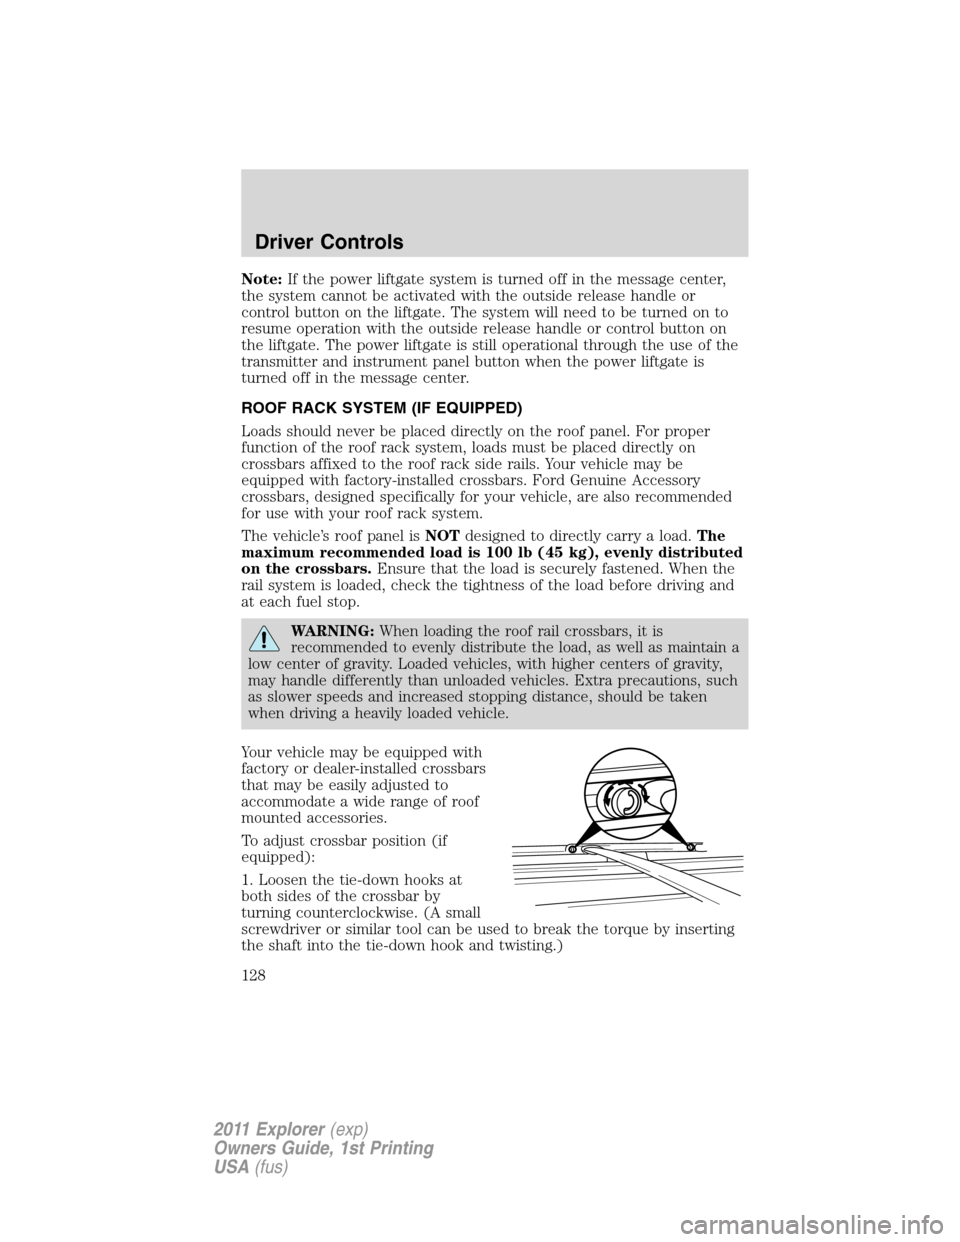
Your vehicle may be equipped with
factory or dealer-installed crossbars
that may be easily adjusted to
accommodate a wide range of roof
mounted accessories.
To adjust crossbar position (if
equipped):
1. Loosen the tie-down hooks at
both sides of the crossbar by
turning counterclockwise. (A small
screwdriver or similar tool can be used to break the torque by inserting
the shaft into the tie-down hook and twisting.)
Driver Controls
128
2011 Explorer(exp)
Owners Guide, 1st Printing
USA(fus)
Page 142 of 449
Deactivating/activating autounlock feature
Your vehicle comes with the autounlock feature activated; there are three
methods to enable/disable this feature:
•Through your authorized dealer,
•by using a power door unlock/lock sequence, or
•by using the instrument cluster message center. Refer toMessage
centerin theInstrument Clusterchapter.
Note:The autounlock feature can be activated/deactivated
independently of the autolock feature.
Power door lock switch autounlock enable/disable procedure
Before starting, ensure the ignition is off and all vehicle doors are closed.
You must complete Steps 1–5 within 30 seconds or the procedure will
have to be repeated. If the procedure needs to be repeated, wait a
minimum of 30 seconds before beginning again.
1. Turn the ignition on.
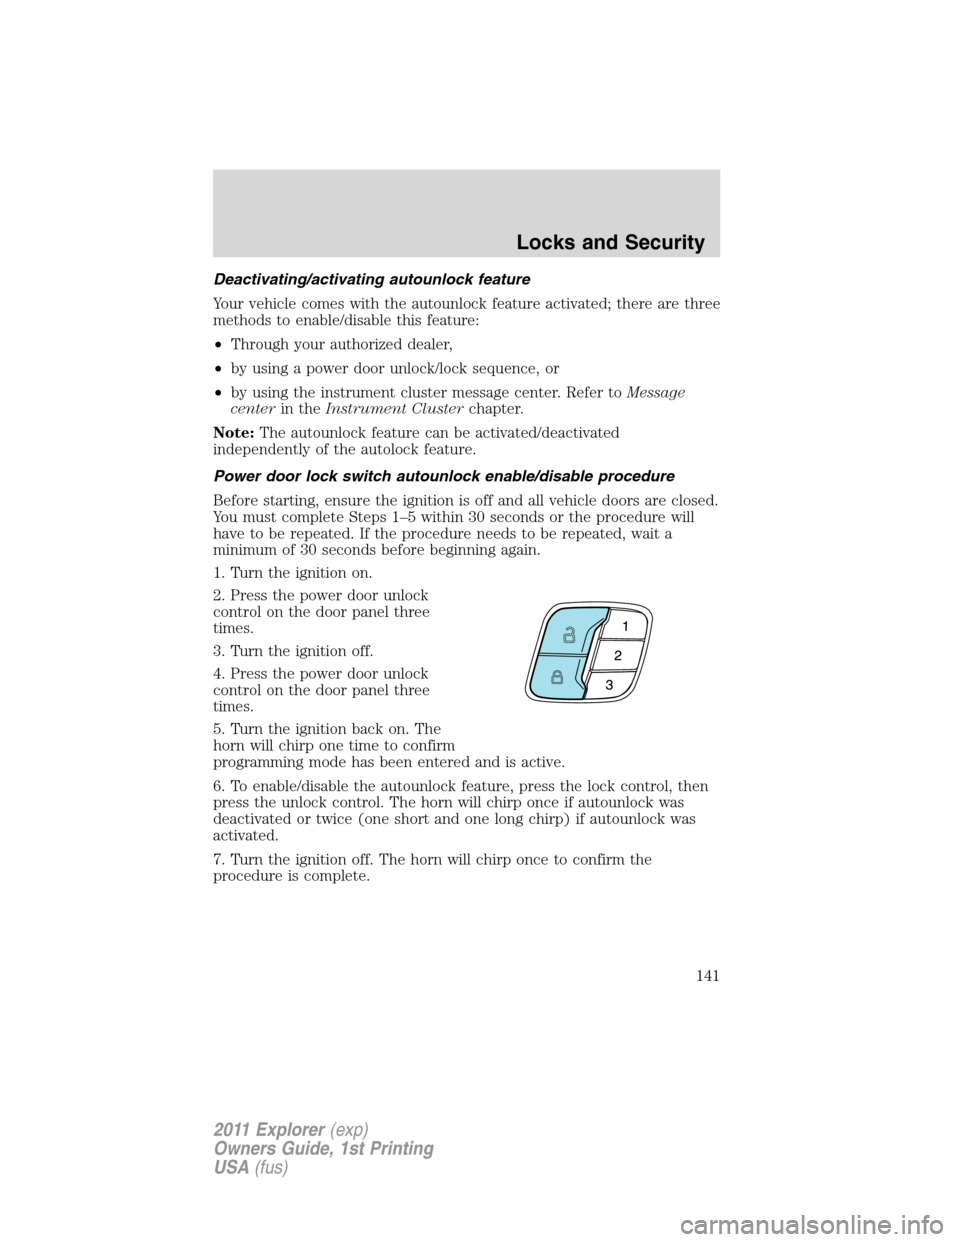
2. Press the power door unlock
control on the door panel three
times.
3. Turn the ignition off.
4. Press the power door unlock
control on the door panel three
times.
5. Turn the ignition back on. The
horn will chirp one time to confirm
programming mode has been entered and is active.
6. To enable/disable the autounlock feature, press the lock control, then
press the unlock control. The horn will chirp once if autounlock was
deactivated or twice (one short and one long chirp) if autounlock was
activated.
7. Turn the ignition off. The horn will chirp once to confirm the
procedure is complete.
Locks and Security
141
2011 Explorer(exp)
Owners Guide, 1st Printing
USA(fus)
Page 150 of 449

Illuminated exit
When all vehicle doors are closed, the ignition is turned off and the key
is removed from the ignition (IKT only), the interior dome lamps,
parking lamps and the puddle lamps (if equipped) will illuminate.
The lamps will turn off if all the doors remain closed and
•25 seconds elapse, or
•the key is inserted in the ignition (IKT only) or (if equipped with
intelligent access with push button start feature) the start button is
pressed.
Battery saver
The battery saver will shut off the lamps 10 minutes after the ignition
has been turned off.
•If the dome lamps were turned on using the panel dimmer control, the
battery saver will shut them off 10 minutes after the ignition has been
turned off.
•If the courtesy lamps were turned on because one of the vehicle doors
or the trunk was opened, the battery saver will shut them off
10 minutes after the ignition has been turned off.
•The battery saver will shut off the headlamps 10 minutes after the
ignition has been turned off.
Accessory mode battery saver for intelligent access keys with
push button start (if equipped)
If you shut off the engine and leave the ignition in the on or accessory
mode, the ignition will shut off after 30 minutes.
Remote start (if equipped)
The remote start feature allows you to start the engine from outside the
vehicle. If your transmitter has a
icon, you have remote start. The
remote start feature has an extended operating range which allows you
to remote start your vehicle from a farther distance from your vehicle.
All the buttons have this increased range performance capability when
equipped with remote start.
Vehicles with automatic climate control can be configured to operate
when the vehicle is started. Refer toRemote start climate optionsin
theClimate Controlschapter for more information and also refer to
Message centerin theInstrument Clusterchapter to learn how to
enable different climate options. A manual climate control system will
run at the setting it was set to when the vehicle was last turned off.
Locks and Security
149
2011 Explorer(exp)
Owners Guide, 1st Printing
USA(fus)
Page 152 of 449
Note:If the vehicle has been remote started and is equipped with an
IKT, you must turn the ignition on before driving the vehicle. If equipped
with an IA transmitter, you must press the START/STOP button on the
instrument panel once while applying the brake pedal before driving the
vehicle.
The power windows will be inhibited during the remote start and the
radio will not turn on.
The parking lamps will remain on and the engine will run for 5, 10, or
15 minutes, depending on how you programmed the system. To select
the duration of the remote start system refer toMessage centerin the
Instrument Clusterchapter.
Extending the engine run time
To keep the engine running for another remote start duration, repeat
Steps 1 and 2 with the engine still running. If you programmed the
duration to last 10 minutes, the second 10 minutes will begin
immediately so that, for example, if the vehicle had been running from
the first remote start for five minutes, the engine will continue to run for
a total of 15 minutes. You can only extend the remote start once.
The ignition must be turned on and then back off or allow one hour to
pass before using remote start again if additional remote starts are
desired.
Turning the engine off after using remote start
•Press
one time. The parking lamps will turn off.
You may have to be closer to the vehicle than when starting due to
ground reflection and the added noise of the running engine.
You can disable or enable the remote start system through the message
center. Refer toMessage centerin theInstrument Clusterchapter.
Locks and Security
151
2011 Explorer(exp)
Owners Guide, 1st Printing
USA(fus)
Page 199 of 449

WARNING:Do not place any object between an occupant and
an airbag or near any other airbag covering. The airbag may not
inflate properly and might force an object into that person causing
severe injury or death. The instrument panel grab handle should never
be used for storage. The path of an inflating airbag must be kept clear
at all times.
WARNING:All occupants of the vehicle, including the driver,
should always properly wear their safety belts, even when an air
bag supplemental restraint system (SRS) is provided.
WARNING:When possible, all children 12 years old and under
should be properly restrained in a rear seating position.
WARNING:The National Highway Traffic Safety Administration
(NHTSA) recommends a minimum distance of at least 10 inches
(25 cm) between an occupant’s chest and the driver airbag module.
WARNING:Never place your arm over the air bag module as a
deploying air bag can result in serious arm fractures or other
injuries.
To properly position yourself away from the airbag:
•Move your seat to the rear as far as you can while still reaching the
pedals comfortably.
•Recline the seat slightly one or two degrees from the upright position.
WARNING:Do not put anything on or over the air bag module.
Placing objects on or over the air bag inflation area may cause
those objects to be propelled by the air bag into your face and torso
causing serious injury.
WARNING:Do not attempt to service, repair, or modify the
airbag supplemental restraint systems or its fuses. See your
authorized dealer.
Seating and Safety Restraints
198
2011 Explorer(exp)
Owners Guide, 1st Printing
USA(fus)
Page 203 of 449
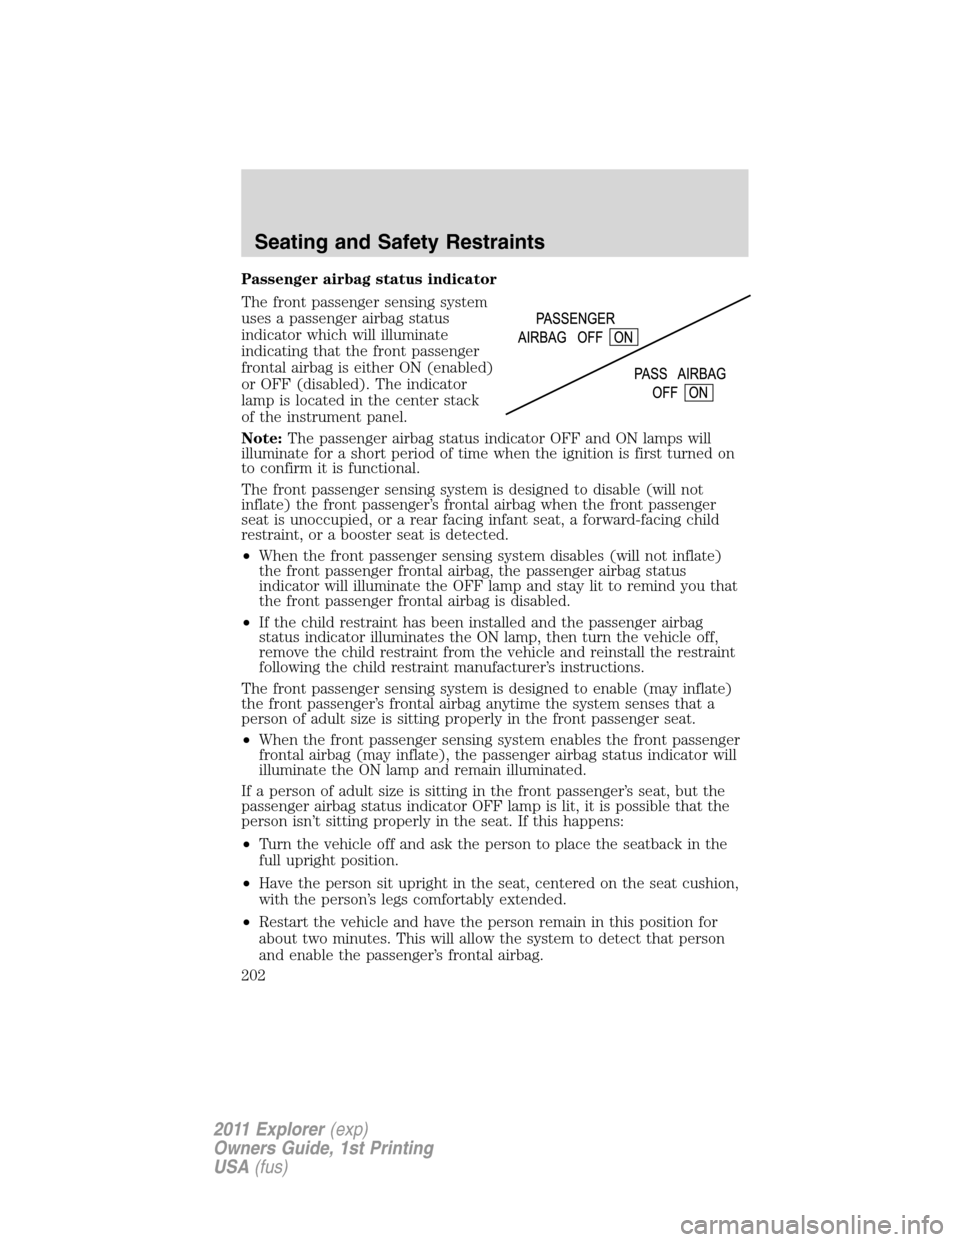
Passenger airbag status indicator
The front passenger sensing system
uses a passenger airbag status
indicator which will illuminate
indicating that the front passenger
frontal airbag is either ON (enabled)
or OFF (disabled). The indicator
lamp is located in the center stack
of the instrument panel.
Note:The passenger airbag status indicator OFF and ON lamps will
illuminate for a short period of time when the ignition is first turned on
to confirm it is functional.
The front passenger sensing system is designed to disable (will not
inflate) the front passenger’s frontal airbag when the front passenger
seat is unoccupied, or a rear facing infant seat, a forward-facing child
restraint, or a booster seat is detected.
•When the front passenger sensing system disables (will not inflate)
the front passenger frontal airbag, the passenger airbag status
indicator will illuminate the OFF lamp and stay lit to remind you that
the front passenger frontal airbag is disabled.
•If the child restraint has been installed and the passenger airbag
status indicator illuminates the ON lamp, then turn the vehicle off,
remove the child restraint from the vehicle and reinstall the restraint
following the child restraint manufacturer’s instructions.
The front passenger sensing system is designed to enable (may inflate)
the front passenger’s frontal airbag anytime the system senses that a
person of adult size is sitting properly in the front passenger seat.
•When the front passenger sensing system enables the front passenger
frontal airbag (may inflate), the passenger airbag status indicator will
illuminate the ON lamp and remain illuminated.
If a person of adult size is sitting in the front passenger’s seat, but the
passenger airbag status indicator OFF lamp is lit, it is possible that the
person isn’t sitting properly in the seat. If this happens:
•Turn the vehicle off and ask the person to place the seatback in the
full upright position.
•Have the person sit upright in the seat, centered on the seat cushion,
with the person’s legs comfortably extended.
•Restart the vehicle and have the person remain in this position for
about two minutes. This will allow the system to detect that person
and enable the passenger’s frontal airbag.
Seating and Safety Restraints
202
2011 Explorer(exp)
Owners Guide, 1st Printing
USA(fus)
Page 271 of 449

Note:Cranking may be stopped at any time by turning the key to the off
position.
3. After idling for a few seconds, release the parking brake, apply the
brake, shift into gear and drive.
Note:If the engine does not start on the first try, turn the vehicle to the
off position, wait 10 seconds and try Step 2 again. If the engine still fails
to start, press the accelerator to the floor and try Step 2 again, keeping
the accelerator on the floor until the engine begins to accelerate above
cranking speeds; this will allow the engine to crank with the fuel shut off
in case the engine is flooded with fuel.
Push button start system (if equipped)
If your vehicle is equipped with the
push button start system, you can
start your vehicle by pressing the
start button in combination with the
brake pedal rather than using a key.
The start button is located on the
instrument panel to the right of the
steering wheel.
In order to operate the push button
start system and start the vehicle,
your intelligent access key (IA key)
must be present inside the vehicle.
Ignition modes
1. Off — press and release the START/STOP button without applying the
brake pedal when your vehicle is in accessory or on modes or when the
engine is running.
Note:In order to switch off the engine while the vehicle is in motion,
shift to neutral and use the brakes to bring the vehicle to a safe stop.
After the vehicle has stopped, turn the engine off and shift into park.
Then, press and hold the START/STOP button for at least one second or
press the START/STOP button three times within two seconds.
2. Accessory — press and release the START/STOP button without
applying the brake pedal. This allows electrical accessories such as the
radio to operate while the engine is not running. ACCESSORY POWER
ACTIVE and PRESS BRAKE TO START will be displayed in the message
center. Refer toMessage centerin theInstrument Clusterchapter for
more information.
Driving
270
2011 Explorer(exp)
Owners Guide, 1st Printing
USA(fus)