Page 22 of 195

20
FRONT SEAT BELT HEIGHT
ADJUSTMENT
Always adjust the height of the seat
belt to the body of the passenger.
This precaution may considerably
reduce the risk of injury in the event
of a collision.
Correct adjustment is obtained
when the belt passes approximately
half way between the shoulder and
the neck.
According to the version, there may
be as many as 5 height adjustment
positions fig. 22:
To raise: lift the ring B to the
desired position.
The height of the seat
belts must be adjusted
with the vehicle stationary.
WARNING
SEAT BELTS
HOW TO USE THE
SEAT BELTS fig. 21
To fasten the seat belts, hold the
tongue A and insert it into the
buckle B, until it clicks into place.
Pull the belt lightly. If the seat belt
jams, let it rewind for a short
stretch, then pull it out again
without jerking.
fig. 21
F0X0022m
To unfasten the seat belt, press
button C. Guide the seat belt while
it is rewinding, to prevent it from
twisting. Through the reel, the belt
automatically adapts to the body of
the passenger wearing it, allowing
freedom of movement.
The reel may lock when the vehicle
is parked on a steep slope: this is
normal.
Furthermore, the reel mechanism
locks the belt if it is pulled sharply or
in the event of sudden braking,
collisions and high-speed bends.
For maximum
protection, keep the
backrest upright, lean back
into it and make sure that the
seat belt fits closely across the
chest and pelvis.
WARNING
Page 23 of 195
21
To lower: press button A and move
ring B downwards to the desired
position at the same time.
When you have finished, check that
it has locked by pushing ring B
downwards without pressing
button A.
fig. 22
F0X0023m
fig. 23
F0X0024m
After adjustment,
always check that the
cursor to which the ring is fixed
is locked in one of the set
positions.
WARNING
REAR SEAT BELTS
Depending on the version, the rear
seat may be fitted with inertia seat
belts with three anchor points and a
reel.
The belts must be worn in
accordance with the diagram in
fig. 23.
fig. 24
F0X0026m
When they are not in use, always
return the rear seats belts to their
dedicated housings A-fig. 24.
Page 27 of 195

25
The pretensioner does not require
any maintenance or lubrication.
Anything that modifies its original
conditions invalidates its efficiency.
If, due to unusual natural events
(floods, sea storms, etc.), the device
has been affected by water and mud,
it must be replaced.
To obtain the highest degree of
protection from the action of the
pretensioner, wear the seat belt
tight across the chest and pelvis.PRETENSIONERS
To make the protective action of the
seat belts even more effective, the
Fiat Strada is fitted with
pretensioners. These devices “feel”,
through a sensor, the occurrence of
a severe impact, retracting the belts
by a few centimetres. This
guarantees that the belt adheres
perfectly to the body of the
occupants, before the restraining
action begins. The reel locks to
indicate that the pretensioner has
intervened; the seat belt cannot be
drawn back up even when guided.
A small amount of smoke may be
emitted. This smoke is not harmful
and does not indicate a fire.The pretensioners
require neither internal
lubrication nor maintenance
interventions. The
pretensioners must not be
tampered with under any
circumstances. This could
compromise the operation of
the safety devices. Should
intervention be necessary,
contact a Fiat Dealership.
WARNING
Page 34 of 195

32
On some versions, when a door is
opened / closed with the key
removed, the display shows the total
milometer reading and the clock for
10 seconds; others will display the
time permanently.
The display can also show the
following:
– through the flashing “spanner”
icon, when the vehicle must be
taken to a Fiat Dealership for
Scheduled Servicing;
– TRIP COMPUTER indications;
– FIAT MY CAR menu;
– warning messages in the event of
failures;
– notification that the previously set
speed has been exceeded. – select one of the various TRIP
COMPUTER functions
– confirm / modify a selected
function
– enter TRIP mode.
Before carrying out any operation,
you are advised to read the whole of
this section carefully.
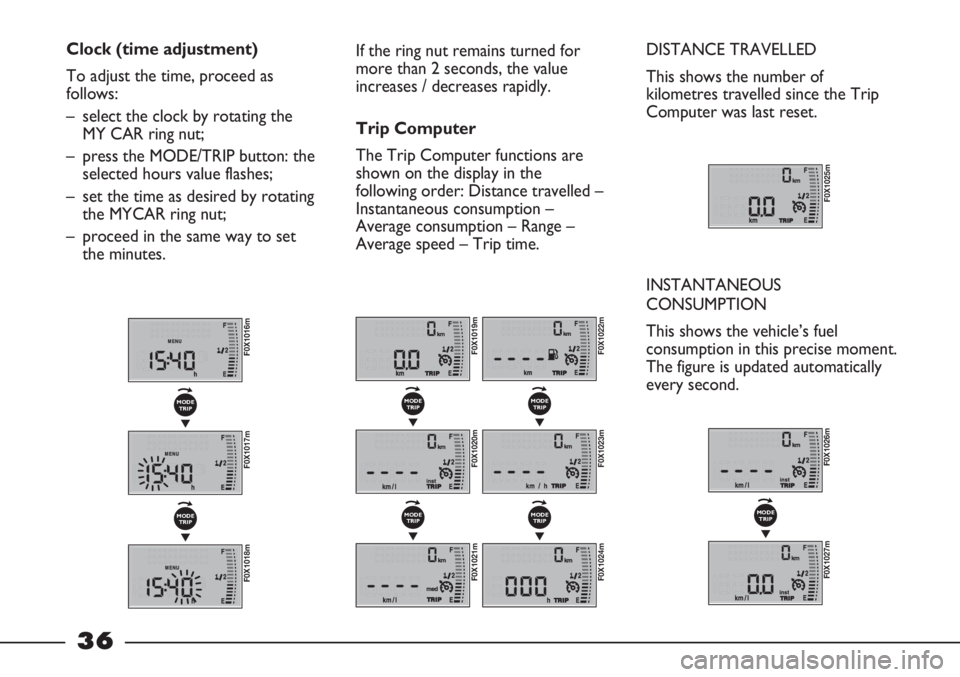
Standard display fig. 43
A – milometer (total/trip)
B – clock.ELECTRONIC DISPLAY
The functions and messages
provided by the electronic display
depend on the optionals / version of
your vehicle.
CONTROL BUTTONS
To correctly make use of the
information that the display can
provide, with ignition key at MAR-
ON, you need to familiarise yourself
with the MODE/TRIP button A-fig. 42
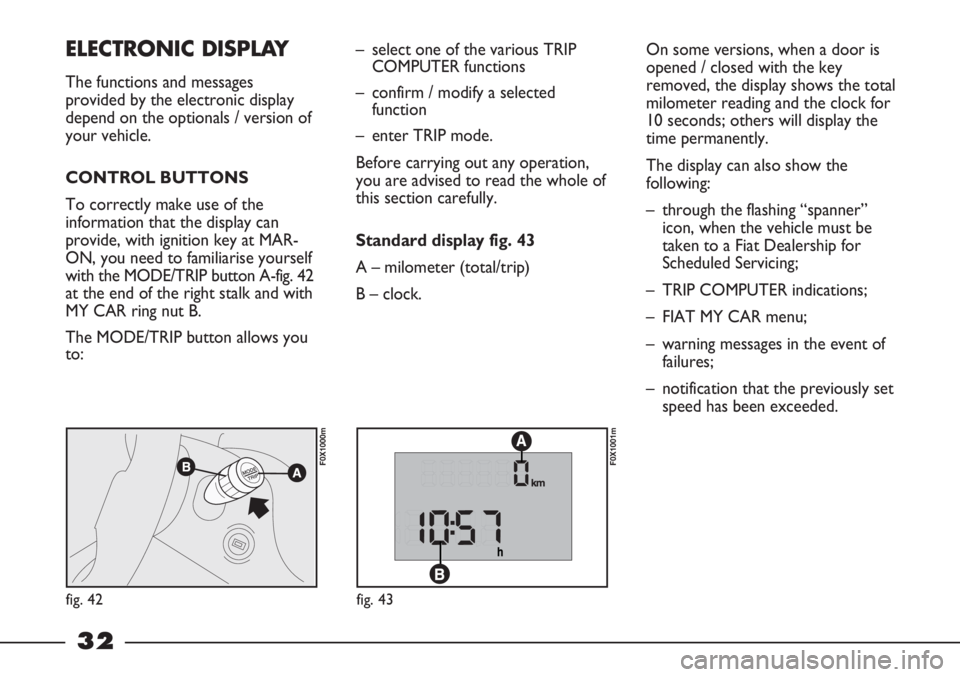
at the end of the right stalk and with
MY CAR ring nut B.
The MODE/TRIP button allows you
to:
fig. 42
F0X1000m
fig. 43
F0X1001m
Page 38 of 195

36
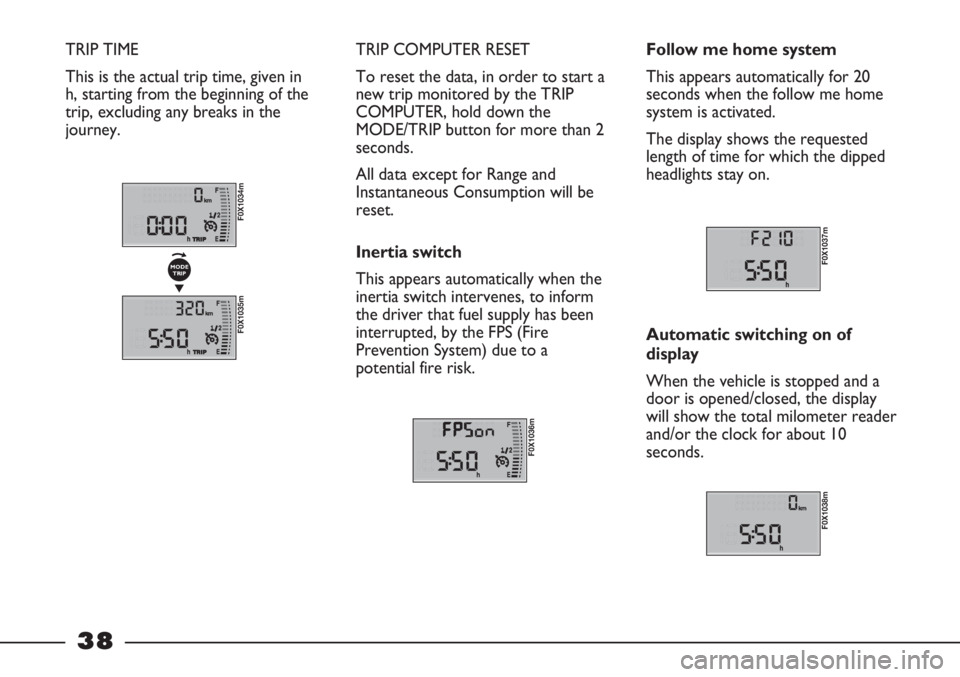
Clock (time adjustment)
To adjust the time, proceed as
follows:
– select the clock by rotating the
MY CAR ring nut;
– press the MODE/TRIP button: the
selected hours value flashes;
– set the time as desired by rotating
the MYCAR ring nut;
– proceed in the same way to set
the minutes.If the ring nut remains turned for
more than 2 seconds, the value
increases / decreases rapidly.
Trip Computer
The Trip Computer functions are
shown on the display in the
following order: Distance travelled –
Instantaneous consumption –
Average consumption – Range –
Average speed – Trip time.DISTANCE TRAVELLED
This shows the number of
kilometres travelled since the Trip
Computer was last reset.
INSTANTANEOUS
CONSUMPTION
This shows the vehicle’s fuel
consumption in this precise moment.
The figure is updated automatically
every second.
F0X1025m
F0X1019m
F0X1020m
▼
MODE
TRIP
F0X1021m
▼
MODE
TRIP
F0X1022m
F0X1023m
▼
MODE
TRIP
F0X1024m
▼
MODE
TRIP
F0X1016m
F0X1017m
▼
MODE
TRIP
F0X1018m
▼
MODE
TRIP
F0X1026m
F0X1027m
▼
MODE
TRIP
Page 40 of 195

38
TRIP TIME
This is the actual trip time, given in
h, starting from the beginning of the
trip, excluding any breaks in the
journey. TRIP COMPUTER RESET
To reset the data, in order to start a
new trip monitored by the TRIP
COMPUTER, hold down the
MODE/TRIP button for more than 2
seconds.
All data except for Range and
Instantaneous Consumption will be
reset.
Inertia switch
This appears automatically when the
inertia switch intervenes, to inform
the driver that fuel supply has been
interrupted, by the FPS (Fire
Prevention System) due to a
potential fire risk.
F0X1036m
Follow me home system
This appears automatically for 20
seconds when the follow me home
system is activated.
The display shows the requested
length of time for which the dipped
headlights stay on.
F0X1037m
Automatic switching on of
display
When the vehicle is stopped and a
door is opened/closed, the display
will show the total milometer reader
and/or the clock for about 10
seconds.
F0X1038m
F0X1034m
F0X1035m
▼
MODE
TRIP
Page 42 of 195

40
TRIP button
Pressed briefly, accesses TRIP
COMPUTER information.
Held down, resets TRIP
COMPUTER.
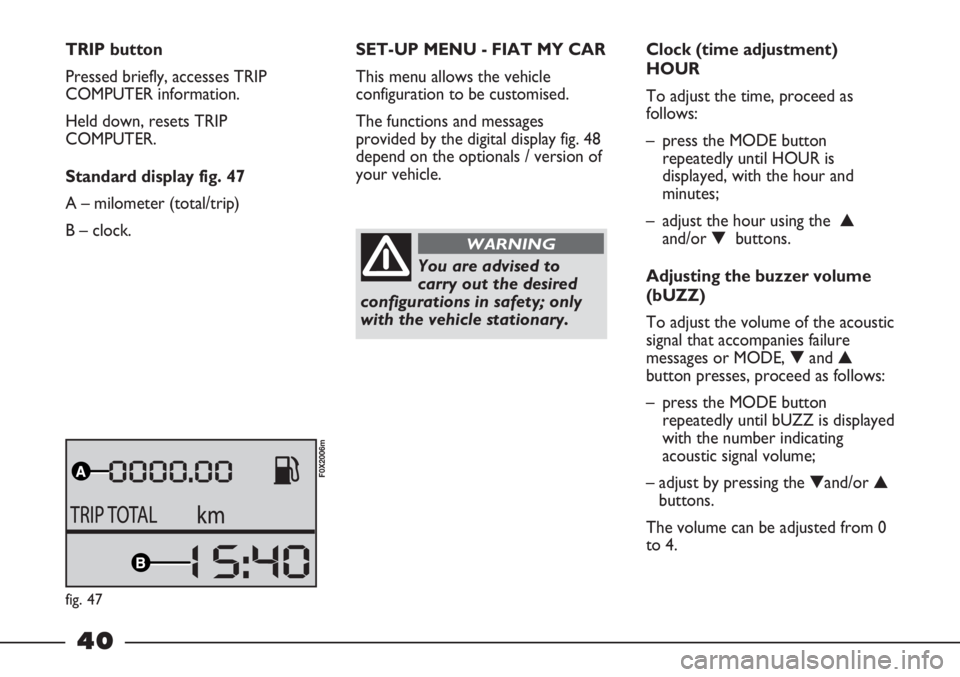
Standard display fig. 47
A – milometer (total/trip)
B – clock.SET-UP MENU - FIAT MY CAR
This menu allows the vehicle
configuration to be customised.
The functions and messages
provided by the digital display fig. 48
depend on the optionals / version of
your vehicle.
You are advised to
carry out the desired
configurations in safety; only
with the vehicle stationary.
WARNING
Clock (time adjustment)
HOUR
To adjust the time, proceed as
follows:
– press the MODE button
repeatedly until HOUR is
displayed, with the hour and
minutes;
– adjust the hour using the ▲
and/or ▼ buttons.
Adjusting the buzzer volume
(bUZZ)
To adjust the volume of the acoustic
signal that accompanies failure
messages or MODE, ▼and ▲
button presses, proceed as follows:
– press the MODE button
repeatedly until bUZZ is displayed
with the number indicating
acoustic signal volume;
– adjust by pressing the ▼and/or ▲
buttons.
The volume can be adjusted from 0
to 4.
fig. 47
F0X2006m
Page 45 of 195
43
TRIP button
Brief press:
– access TRIP COMPUTER
information.
Long press:
– reset TRIP COMPUTER.Standard display fig. 51
A – date
B – milometer (total/trip)
C – clock
D – outside temperature.
On some versions, when a door is
opened / closed with the key
removed, the display shows the total
milometer reading and the clock for
a few seconds.
F0X3002m
The display can also show the
following:
– through the flashing “spanner”
icon, when the vehicle must be
taken to a Fiat Dealership for
Scheduled Servicing;
– TRIP COMPUTER indications;
– brightness level adjustment for
some internal controls;
– FIAT MY CAR menu;
– warning messages in the event of
failures.
fig. 51