Page 29 of 497

NOTE:Changes or modifications not expressly ap-
proved by the party responsible for compliance could
void the user’s authority to operate the equipment.
If your RKE transmitter fails to operate from a normal
distance, check for these two conditions:
1. Weak battery in RKE transmitter. The expected life of
the battery is from one to two years.
2. Closeness to a radio transmitter such as a radio station
tower, airport transmitter, and some mobile or CB radios.
REMOTE STARTING SYSTEM — IF EQUIPPED
This system uses the Remote Keyless Entry
(RKE) transmitter to start the engine conve-
niently from outside the vehicle while still
maintaining security. The system has a range of
approximately 300 ft (91 m).
NOTE: The vehicle must be equipped with an auto-
matic transmission to be equipped with Remote Start.
How To Use Remote Start
All of the following conditions must be met before the
engine will remote start:
•Shift lever in PARK
•Doors closed
•Hood closed
•Hazard switch off
•Brake switch inactive (brake pedal not pressed)
•Ignition key removed from ignition switch
•Battery at an acceptable charge level
•RKE PANIC button not pressed
26 THINGS TO KNOW BEFORE STARTING YOUR VEHICLE
Page 50 of 497
6. To release the belt, push the red button on the buckle.
The belt will automatically retract to its stowed position.
If necessary, slide the latch plate down the webbing to
allow it to retract fully.
WARNING!
A frayed or torn belt could rip apart in an accident
and leave you with no protection. Inspect the belt
system periodically, checking for cuts, frays, or loose
parts. Damaged parts must be replaced immediately.
Do not disassemble or modify the system. Seat belt
assemblies must be replaced after an accident if they
have been damaged (bent retractor, torn webbing,
etc.).
Lap/Shoulder Belt Untwisting Procedure
Use the following procedure to untwist a twisted lap/
shoulder belt.
1. Position the latch plate as close as possible to the
anchor point.Removing Slack From Belt
2
THINGS TO KNOW BEFORE STARTING YOUR VEHICLE 47
Page 56 of 497
1. Grasp the deployed AHR from the rear seat.
2. Position the hands on the top of the deployed AHR at
a comfortable position.3. Pull
downthenrearward towards the rear of the
vehicle then downto engage the locking mechanism.
Hand Positioning Points On AHR
1 — Downward Movement
2 — Rearward Movement
2
THINGS TO KNOW BEFORE STARTING YOUR VEHICLE 53
Page 59 of 497

5 mph (8 km/h), BeltAlert�will chime once and illumi-
nate the Seat Belt Reminder Light, then will proceed to
the 96 second warning sequence.
The front passenger seat BeltAlert� is not active when the
front passenger seat is unoccupied. BeltAlert� may be
triggered when an animal or heavy object is on the front
passenger seat or when the seat is folded flat (if
equipped). It is recommended that pets be restrained in
the rear seat in pet harnesses or pet carriers that are
secured by seat belts, and cargo is properly stowed.
BeltAlert� can be enabled or disabled by your authorized
dealer or by following these steps:
NOTE: The following steps must occur within the first
60 seconds of the ignition switch being cycled to the
ON/RUN position. Chrysler Group LLC does not recom-
mend deactivating BeltAlert�. 1. With the ignition in the OFF position, buckle the
driver ’s seat belt.
2. Turn the ignition switch to the ON/RUN position (do
not start the engine), and wait for the Seat Belt Reminder
Light to turn off.
3. Unbuckle and then re-buckle the driver ’s seat belt
three times, ending with the seat belt buckled. This must
be completed within 60 seconds of turning the ignition
switch to the ON/RUN position.
4. Turn the ignition switch to the OFF position. A single
chime will sound to signify that you have successfully
completed the programming.
NOTE:
Watch for the Seat Belt Reminder Light to turn
on while the seat belt retracts and turn off while re-
buckling the seat belt.
BeltAlert� can be reactivated by repeating this procedure.
56 THINGS TO KNOW BEFORE STARTING YOUR VEHICLE
Page 100 of 497
MIRRORS
Inside Day/Night Mirror
A two-point pivot system allows for horizontal and
vertical adjustment of the mirror. The mirror should be
adjusted to center on the view through the rear window.
Headlight glare can be reduced by moving the small
control under the mirror to the night position (toward the
rear of the vehicle). The mirror should be adjusted while
set in the day position (toward the windshield).
Adjusting Rearview Mirror
3
UNDERSTANDING THE FEATURES OF YOUR VEHICLE 97
Page 103 of 497

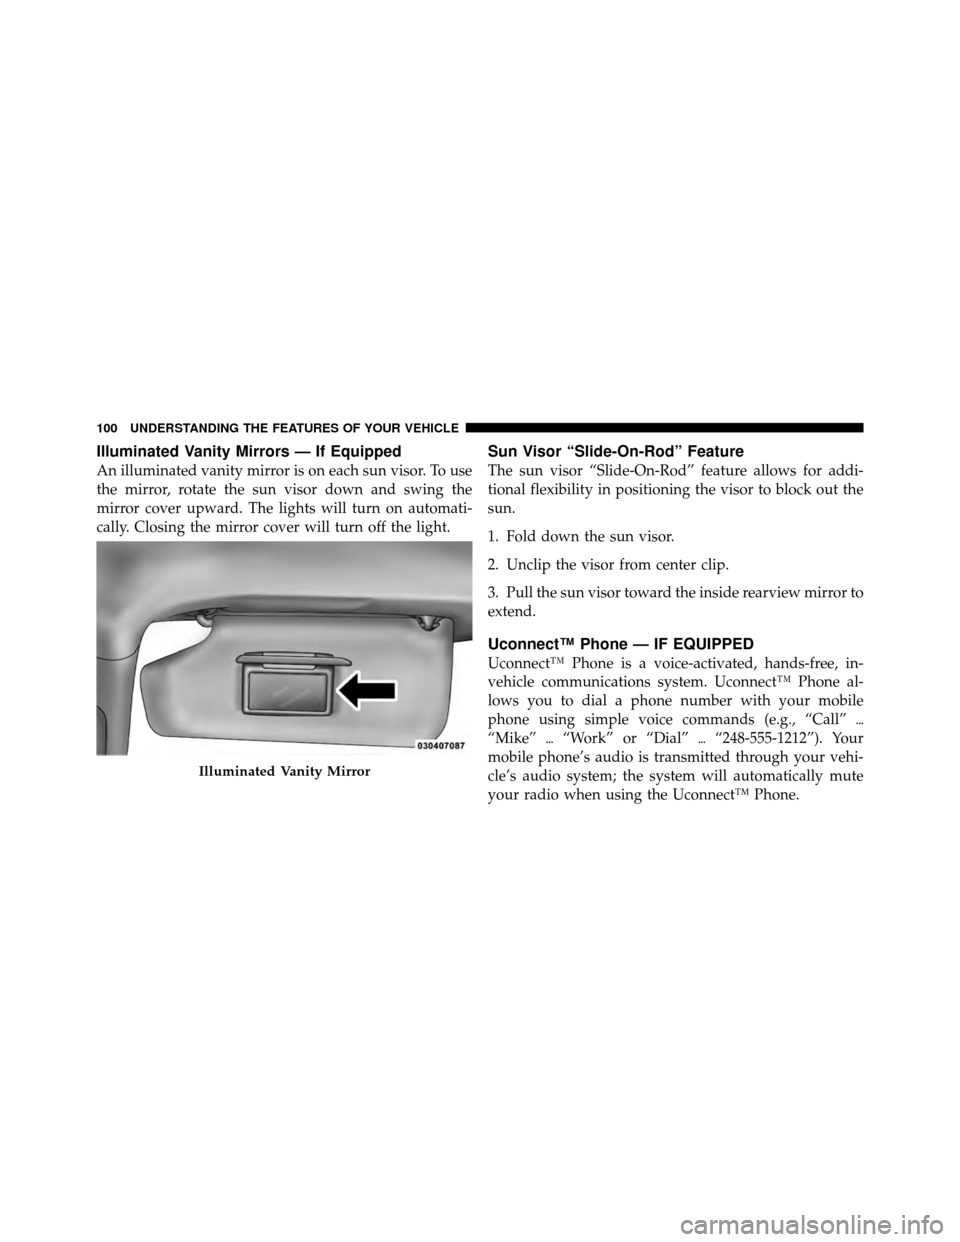
Illuminated Vanity Mirrors — If Equipped
An illuminated vanity mirror is on each sun visor. To use
the mirror, rotate the sun visor down and swing the
mirror cover upward. The lights will turn on automati-
cally. Closing the mirror cover will turn off the light.
Sun Visor “Slide-On-Rod” Feature
The sun visor “Slide-On-Rod” feature allows for addi-
tional flexibility in positioning the visor to block out the
sun.
1. Fold down the sun visor.
2. Unclip the visor from center clip.
3. Pull the sun visor toward the inside rearview mirror to
extend.
Uconnect™ Phone — IF EQUIPPED
Uconnect™ Phone is a voice-activated, hands-free, in-
vehicle communications system. Uconnect™ Phone al-
lows you to dial a phone number with your mobile
phone using simple voice commands (e.g., “Call”\b
“Mike” \b“Work” or “Dial” \b“248-555-1212”). Your
mobile phone’s audio is transmitted through your vehi-
cle’s audio system; the system will automatically mute
your radio when using the Uconnect™ Phone.
Illuminated Vanity Mirror
100 UNDERSTANDING THE FEATURES OF YOUR VEHICLE
Page 104 of 497

NOTE:The Uconnect™ Phone requires a mobile phone
equipped with the Bluetooth� “Hands-Free Profile”, Ver-
sion 0.96 or higher. See the Uconnect™ website for
supported phones.
For Uconnect™ customer support, visit the following
websites:
•www.chrysler.com/uconnect
•www.dodge.com/uconnect
•www.jeep.com/uconnect
•or call 1–877–855–8400
Uconnect™ Phone allows you to transfer calls between
the system and your mobile phone as you enter or exit
your vehicle and enables you to mute the system’s
microphone for private conversation.
The Uconnect™ Phone is driven through your Bluetooth�
“Hands-Free Profile” mobile phone. Uconnect™ features Bluetooth�
technology - the global standard that enables
different electronic devices to connect to each other with-
out wires or a docking station, so Uconnect™ Phone
works no matter where you stow your mobile phone (be
it your purse, pocket, or briefcase), as long as your phone
is turned on and has been paired to the vehicle’s
Uconnect™ Phone. The Uconnect™ Phone allows up to
seven mobile phones to be linked to the system. Only one
linked (or paired) mobile phone can be used with the
system at a time. The system is available in English,
Spanish, or French languages.
WARNING!
Any voice commanded system should be used only
in safe driving conditions following local laws and
phone use. All attention should be kept on the
roadway ahead. Failure to do so may result in a
collision causing serious injury or death.
3
UNDERSTANDING THE FEATURES OF YOUR VEHICLE 101
Page 117 of 497

Canada and 060 for Mexico). The number dialed may
not be applicable with the available mobile service and
area.
•If supported, this number may be programmable on
some systems. To do this, press the
button and
say “Setup”, followed by “Emergency”.
•The Uconnect™ Phone does slightly lower your
chances of successfully making a phone call as to that
for the mobile phone directly.
WARNING!
To use your Uconnect™ Phone System in an emer-
gency, your mobile phone must be:
•turned on,
•paired to the Uconnect™ System,
•and have network coverage.
Towing Assistance
If you need towing assistance:
•Press thebutton to begin.
•After the “Ready” prompt and the following beep, say
“Towing Assistance”.
NOTE:
•The towing assistance number dialed is based on the
country where the vehicle is purchased (1-800-528-
2069 for the U.S., 1-877-213-4525 for Canada, 55-14-
3454 for Mexico City and 1-800-712-3040 for outside
Mexico City in Mexico). Please refer to the 24-Hour
“Towing Assistance” coverage details on the DVD in
the Warranty Information Booklet and the 24-Hour
Towing Assistance references.
•If supported, this number may be programmable on
some systems. To do this, press the
button and
say “Setup”, followed by “Towing Assistance”.
114 UNDERSTANDING THE FEATURES OF YOUR VEHICLE