2011 DODGE NITRO torque
[x] Cancel search: torquePage 215 of 497

30. Compass/Trip Computer or Electronic Vehicle
Information Center (EVIC) Display — If Equipped
When the appropriate conditions exist, this display
shows the Compass/Trip Computer or Electronic Vehicle
Information Center (EVIC) messages.
For further information, refer to “Compass/Trip Com-
puter” or “Electronic Vehicle Information Center
(EVIC)”.
31. 4WD Indicator — If EquippedThis light indicates the vehicle is in four-wheel
drive and 4LOCK. 4WD allows all four wheels
to receive torque from the engine
simultaneously.
COMPASS AND TRIP COMPUTER —
IF EQUIPPED
The Compass/Trip Computer features a driver-
interactive display (displays information on outside tem-
perature, compass direction, and trip information). It is located on the lower left part of the cluster below the fuel
and engine temperature gauge, and the tachometer.
Control Buttons
Press and release the odometer/trip odometer reset but-
ton (right side of the instrument cluster) to access the
compass/trip computer displays.
Compass/Trip Computer Display
212 UNDERSTANDING YOUR INSTRUMENT PANEL
Page 302 of 497

The “TOW/HAUL Indicator Light” will illuminate in the
instrument cluster to indicate when the switch has been
activated. Pressing the switch a second time restores
normal operation. If the TOW/HAUL mode is desired,
the switch must be pressed each time the engine is
started.
Transmission Limp Home Mode
Transmission function is monitored for abnormal condi-
tions. If a condition is detected that could result in
transmission damage, the Transmission Limp Home
Mode will be engaged. In this mode, the transmission
will remain in second gear in any forward driving range.
To reset the transmission, use the following procedure:
1. Stop the vehicle.
2. Move the shift lever to the PARK position.
3. Turn the engine off and turn the key to the LOCK
position.4. Wait approximately 10 seconds, then restart the en-
gine.
5. Move the shift lever to the desired gear range.
If the problem is no longer detected, the transmission will
return to normal operation. If the problem persists,
PARK, REVERSE, and NEUTRAL will continue to oper-
ate. Only second gear range will operate in the DRIVE
position. Have the transmission checked at your autho-
rized dealer as soon as possible.
Torque Converter Clutch
A feature designed to improve fuel economy has been
added to the automatic transmission of this vehicle. A
clutch within the torque converter engages automatically
at calibrated speeds. This may result in a slightly differ-
ent feeling or response during normal operation in high
gear. When the vehicle speed drops or during accelera-
tion, the clutch automatically and smoothly disengages.
5
STARTING AND OPERATING 299
Page 306 of 497

risen to a suitable level. Refer to the “Note” under
“Torque Converter Clutch” later in this section.
During cold temperature operation, you may notice
delayed upshifts depending on engine and transmission
temperature. This feature improves the warm up time of
the engine and transmission.
During cold temperature operation, the transmission
may not downshift from second gear into first gear after
the initial first to second gear upshift.
Transmission Limp Home Mode
Transmission function is monitored for abnormal condi-
tions. If a condition is detected that could result in
transmission damage, the Transmission Limp Home
Mode will be engaged. In this mode, the transmission
will remain in the current gear until the vehicle is
brought to a stop.To reset the transmission, use the following procedure:
1. Stop the vehicle.
2. Move the shift lever to the PARK position.
3. Turn the engine off and turn the key to the LOCK
position.
4. Wait approximately 10 seconds, then restart the en-
gine.
5. Move the shift lever to the desired gear range.
If the problem is no longer detected, the transmission will
return to normal operation. If the problem persists,
PARK, REVERSE, and NEUTRAL will continue to oper-
ate. Only second gear will operate in the DRIVE position.
Have the transmission checked at your authorized dealer
as soon as possible.
5
STARTING AND OPERATING 303
Page 307 of 497
Torque Converter Clutch
A feature designed to improve fuel economy has been
included in the automatic transmission on your vehicle.
A clutch within the torque converter engages automati-
cally at a calibrated speed at light throttle. It engages at
higher speeds under heavier acceleration. This may re-
sult in a slightly different feeling or response during
normal operation in high gear. When the vehicle speed
drops below a calibrated speed, or during acceleration,
the clutch automatically and smoothly disengages.
NOTE:If the vehicle has not been driven in several
days, the first few seconds of operation after shifting the
transmission into gear may seem sluggish. This is due to
the fluid partially draining from the torque converter into
the transmission. This condition is normal and will not
cause damage to the transmission. The torque converter
will refill within five seconds of starting the engine.
FOUR-WHEEL DRIVE OPERATION — IF EQUIPPED
Single-Speed Part-Time Transfer Case
Operating Information/Precautions
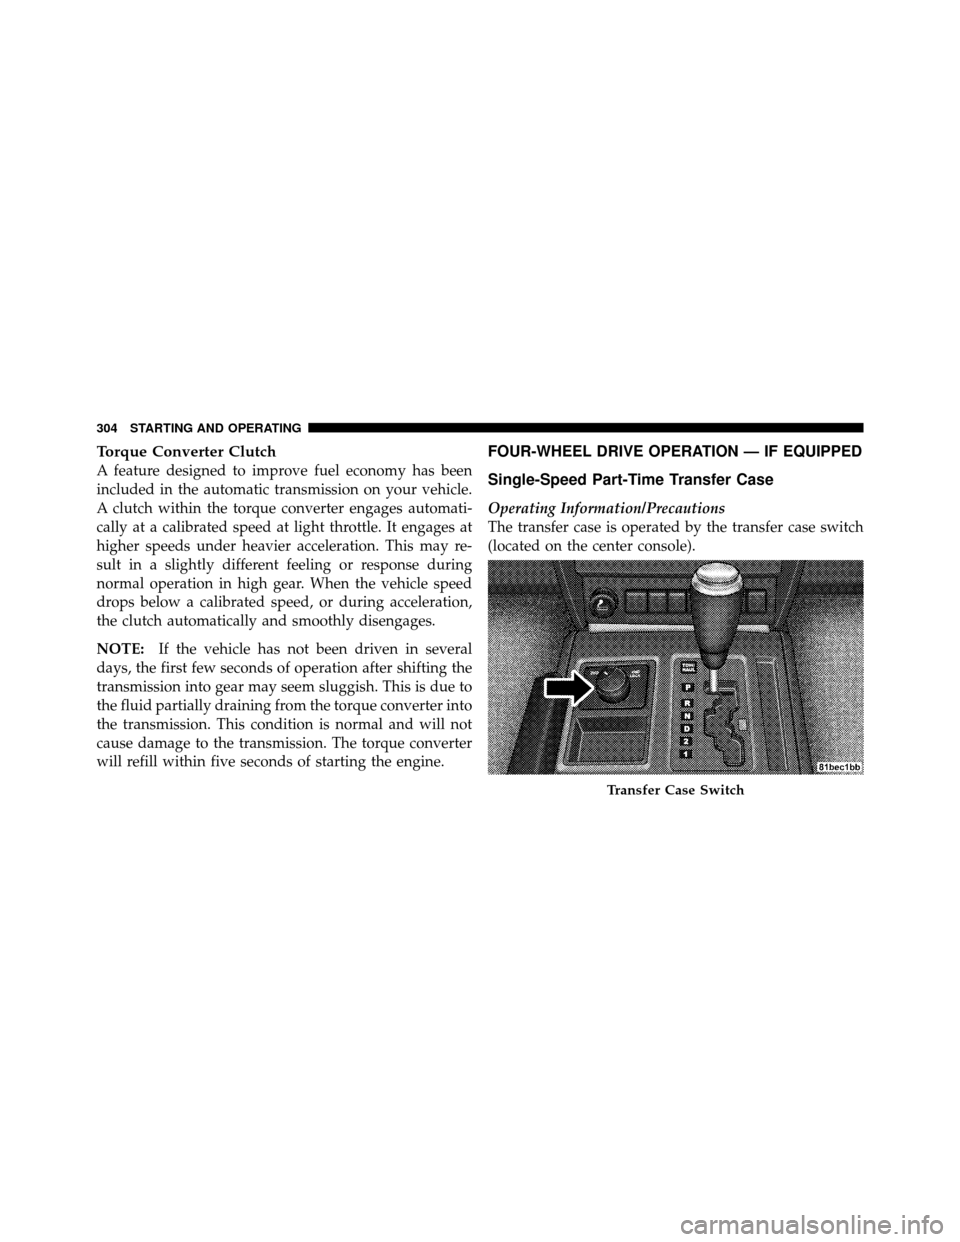
The transfer case is operated by the transfer case switch
(located on the center console).
Transfer Case Switch
304 STARTING AND OPERATING
Page 318 of 497
a limited slip differential and controls the wheel spin
across a driven axle. If one wheel on a driven axle is
spinning faster than the other, the system will apply the
brake of the spinning wheel. This will allow more engine
torque to be applied to the wheel that is not spinning.
This feature remains active even if TCS and ESC are in
the “Partial Off” mode. Refer to “Electronic Stability
Control (ESC)” in this section for further information.
Brake Assist System (BAS)
The BAS is designed to optimize the vehicle’s braking
capability during emergency braking maneuvers. The
system detects an emergency braking situation by sens-
ing the rate and amount of brake application and then
applies optimum pressure to the brakes. This can help
reduce braking distances. The BAS complements the
Anti-Lock Brake System (ABS). Applying the brakes very
quickly results in the best BAS assistance. To receive the
benefit of the system, you must apply continuous brak-
ing pressure during the stopping sequence. Do notreduce brake pedal pressure unless braking is no longer
desired. Once the brake pedal is released, the BAS is
deactivated.
WARNING!
The Brake Assist System (BAS) cannot prevent the
natural laws of physics from acting on the vehicle,
nor can it increase the traction afforded by prevailing
road conditions. BAS cannot prevent collisions, in-
cluding those resulting from excessive speed in
turns, driving on very slippery surfaces, or hydro-
planing. The capabilities of a BAS-equipped vehicle
must never be exploited in a reckless or dangerous
manner which could jeopardize the user’s safety or
the safety of others.
5
STARTING AND OPERATING 315
Page 381 of 497
Flat towing (with all four wheels on the ground) is
allowed ONLY if the driveshaft is removed.Towing
with the rear wheels on the ground while the driveshaft
is connected will result in severe transmission damage.
WARNING!
If the driveshaft is removed, the vehicle can roll even
if the transmission is in PARK, which could cause
serious injury or death.
The parking brake mustbe firmly engaged and the
wheels chocked during driveshaft removal and installa-
tion. The parking brake must remainengaged unless the
vehicle is securely and properly connected to the tow
vehicle, or the driveshaft is completely reinstalled. See
your authorized dealer for proper driveshaft removal
and reinstallation procedures, including flange
orientation/alignment, use of thread-locking compound,
proper bolt torque specifications, etc.
CAUTION!
Towing with the rear wheels on the ground (while the
driveshaft is connected) will cause severe transmis-
sion damage. Damage from improper towing is not
covered under the New Vehicle Limited Warranty.
Recreational Towing — Four-Wheel Drive Models
Recreational towing is not allowed. These models do
not have a NEUTRAL position in the transfer case.
NOTE:
This vehicle may be towed on a flatbed or vehicle
trailer provided all four wheels are OFF
the ground.
CAUTION!
Towing this vehicle in violation of the above require-
ments can cause severe transmission and/or transfer
case damage. Damage from improper towing is not
covered under the New Vehicle Limited Warranty.
378 STARTING AND OPERATING
Page 390 of 497
WARNING!
Raising the vehicle higher than necessary can make
the vehicle less stable and cause a collision. It could
slip off the jack and hurt someone near it. Raise the
vehicle only enough to remove the tire.
6. Remove the lug nuts and wheel.
7. Position the spare wheel/tire on the vehicle and install
the lug nuts with the cone-shaped end toward the wheel.
Lightly tighten the nuts.
WARNING!
To avoid the risk of forcing the vehicle off the jack,
do not tighten the wheel nuts fully until the vehicle
has been lowered. 8. Lower the vehicle by turning the jack screw to the left,
and remove the jack and wheel blocks.
9. Finish tightening the lug nuts. Push down on the
wrench while tightening for increased leverage. Alternate
nuts until each nut has been tightened twice. The correct
wheel nut tightness is 95 ft lbs (130 N·m). If in doubt
about the correct tightness, have them checked with a
torque wrench by your authorized dealer or at a service
station.
10. Lower the jack to its fully closed position.
WARNING!
A loose tire or jack thrown forward in a collision or
hard stop could endanger the occupants of the ve-
hicle. Always stow the jack parts and the spare tire in
the places provided.
6
WHAT TO DO IN EMERGENCIES 387
Page 400 of 497
15 miles (24 km), tow with the rear wheelsOFFthe
ground (on a flatbed, or with the rear wheels raised using
a wheel lift or towing dolly), or remove the driveshaft.
WARNING!
If the driveshaft is removed, the vehicle can roll even
if the transmission is in PARK, which could cause
serious injury or death.
The parking brake mustbe firmly engaged and the
wheels chocked during driveshaft removal and installa-
tion. The parking brake must remainengaged unless the
vehicle is securely and properly connected to the tow
vehicle, or the driveshaft is completely reinstalled. See
your authorized dealer for proper driveshaft removal
and reinstallation procedures, including flange
orientation/alignment, use of thread-locking compound,
proper bolt torque specifications, etc.
Four-Wheel Drive Vehicles
The manufacturer requires towing with all wheels OFF
the ground. Acceptable methods are to tow the vehicle on
a flatbed or with one end of vehicle raised and the
opposite end on a towing dolly.
CAUTION!
•Front or rear wheel lifts should not be used.
Internal damage to the transmission or transfer
case will occur if a front or rear wheel lift is used
when towing.
•Failure to follow these towing methods could
result in damage to the transmission and/or trans-
fer case. Such damage is not covered by the New
Vehicle Limited Warranty.6
WHAT TO DO IN EMERGENCIES 397