2011 DODGE NITRO change wheel
[x] Cancel search: change wheelPage 155 of 497

To change the brightness of the instrument panel lights,
rotate the center portion of the multifunction lever up or
down.
NOTE:If the driver’s door is left open, and the head-
lights or parking lights are left on, a chime will sound.
Daytime Running Lights — If Equipped
The high beam headlights will turn on as Daytime
Running Lights (DRL) and operate at lower intensity
whenever the ignition is ON, the engine is running, the
headlight switch is off, the parking brake is released and
the shift lever is in any position except PARK.
NOTE: The Daytime Running Lights will turn off
automatically when a turn signal is in operation and turn
on again when the turn signal is not operating.
Lights-On Reminder
If the headlights or parking lights are on after the ignition
is turned OFF, a chime will sound when the driver’s door
is opened.
High/Low Beam Switch
Push the multifunction lever away from you to switch
the headlights to high beams. Pull the lever toward you
to switch the headlights back to low beams.
Flash-to-Pass
You can signal another vehicle with your headlights by
lightly pulling the multifunction lever toward the steer-
ing wheel. This will turn on the high beam headlights
until the lever is released.
Front Fog Lights — If Equipped
The front fog light switch is in the multifunction
lever. To activate the front fog lights, turn on the
parking or low beam headlights and pull out the
end of the lever.
152 UNDERSTANDING THE FEATURES OF YOUR VEHICLE
Page 220 of 497

•Tire Pressure Monitor System (if equipped)
•Personal Settings (Customer-Programmable Features)
•Compass Display
•Outside Temperature Display
•Trip Computer Functions
•Uconnect™ gps system screens (if equipped)
•Audio Mode Display
The system allows the driver to select information by
pressing the following buttons mounted on the steering
wheel:
MENU Button Press and release the MENU button and the
mode displayed will change between Trip
Functions, Uconnect™ gps (if equipped), Sys-
tem Status, and Personal Settings. Press the FUNCTION SELECT button to accept
a selection. Also, the FUNCTION SELECT but-
ton changes the current CD track being played
(if equipped) when the EVIC is in the
Compass/Temp/Audio screen.
Press the SCROLL button to scroll through
Navigation (if equipped), System Status Mes-
sages, and Personal Settings (Customer-
Programmable Features).Press and release the COMPASS/TEMPERA-
TURE button to display one of eight compass
readings and the outside temperature.
Electronic Vehicle Information Center (EVIC)
Displays
When the appropriate conditions exist, the EVIC displays
the following messages:
•Turn signal on (with a continuous warning chime)
4
UNDERSTANDING YOUR INSTRUMENT PANEL 217
Page 319 of 497

Electronic Roll Mitigation (ERM)
This system anticipates the potential for wheel lift by
monitoring the driver ’s steering wheel input and the
speed of the vehicle. When ERM determines that the rate
of change of the steering wheel angle and vehicles speed
are sufficient to potentially cause wheel lift, it applies the
appropriate brake and may reduce engine power to
lessen the chance that wheel lift will occur. ERM will only
intervene during very severe or evasive driving maneu-
vers. ERM can only reduce the chance of wheel lift
occurring during severe or evasive driving maneuvers. It
can not prevent wheel lift due to other factors such as
road conditions, leaving the roadway, striking objects
and/or other vehicles.WARNING!
Many factors, such as vehicle loading, road condi-
tions and driving conditions, influence the chance
that wheel lift or rollover may occur. ERM cannot
prevent all wheel lift or rollovers, especially those
that involve leaving the roadway or striking objects
or other vehicles. The capabilities of an ERM-
equipped vehicle must never be exploited in a reck-
less or dangerous manner which could jeopardize the
user’s safety or the safety of others.
Electronic Stability Control (ESC)
This system enhances directional control and stability of
the vehicle under various driving conditions. ESC cor-
rects for oversteering or understeering of the vehicle by
applying the brake of the appropriate wheel to assist in
316 STARTING AND OPERATING
Page 341 of 497

WARNING!
•Do not use a tire, wheel size or rating other than
that specified for your vehicle. Some combinations
of unapproved tires and wheels may change sus-
pension dimensions and performance characteris-
tics, resulting in changes to steering, handling, and
braking of your vehicle. This can cause unpredict-
able handling and stress to steering and suspen-
sion components. You could lose control and have
a collision resulting in serious injury or death. Use
only the tire and wheel sizes with load ratings
approved for your vehicle.
•Never use a tire with a smaller load index or
capacity, other than what was originally equipped
on your vehicle. Using a tire with a smaller load
index could result in tire overloading and failure.
You could lose control and have a collision.(Continued)
WARNING! (Continued)
•Failure to equip your vehicle with tires having
adequate speed capability can result in sudden tire
failure and loss of vehicle control.
CAUTION!
Replacing original tires with tires of a different size
may result in false speedometer and odometer read-
ings.
TIRE CHAINS
Use “Class S” chains or other traction aids that meet SAE
Type “S” specifications.
NOTE:Chains must be the proper size for the vehicle as
recommended by the chain manufacturer.
338 STARTING AND OPERATING
Page 346 of 497

CAUTION! (Continued)
•After inspecting or adjusting the tire pressure,
always reinstall the valve stem cap. This will
prevent moisture and dirt from entering the valve
stem, which could damage the Tire Pressure Moni-
toring Sensor.
NOTE:
•The TPMS is not intended to replace normal tire care
and maintenance, or to provide warning of a tire
failure or condition.
•The TPMS should not be used as a tire pressure gauge
while adjusting your tire pressure.
•Driving on a significantly under-inflated tire causes
the tire to overheat and can lead to tire failure.
Under-inflation also reduces fuel efficiency and tire
tread life, and may affect the vehicle’s handling and
stopping ability.
•The TPMS is not a substitute for proper tire mainte-
nance, and it is the driver ’s responsibility to maintain
correct tire pressure using an accurate tire pressure
gauge, even if under-inflation has not reached the
level to trigger illumination of the “Tire Pressure
Monitoring Telltale Light.”
•Seasonal temperature changes will affect tire pressure,
and the TPMS will monitor the actual tire pressure in
the tire.
Base System
The Tire Pressure Monitor System (TPMS) uses wireless
technology with wheel rim mounted electronic sensors to
monitor tire pressure levels. Sensors, mounted to each
wheel as part of the valve stem, transmit tire pressure
readings to the receiver module.
NOTE: It is particularly important for you to check the
tire pressure in all of the tires on your vehicle monthly
and to maintain the proper pressure.
5
STARTING AND OPERATING 343
Page 384 of 497

NOTE:There are steps that you can take to slow down
an impending overheat condition:
•If your air conditioner (A/C) is on, turn it off. The A/C
system adds heat to the engine cooling system and
turning the A/C off can help remove this heat.
•You can also turn the temperature control to maximum
heat, the mode control to floor and the blower control
to high. This allows the heater core to act as a
supplement to the radiator and aids in removing heat
from the engine cooling system.
WARNING!
You or others can be badly burned by hot engine
coolant (antifreeze) or steam from your radiator. If
you see or hear steam coming from under the hood,
do not open the hood until the radiator has had time
to cool. Never try to open a cooling system pressure
cap when the radiator or coolant bottle is hot.
JACKING AND TIRE CHANGING
WARNING!
•Do not attempt to change a tire on the side of the
vehicle close to moving traffic. Pull far enough off
the road to avoid the danger of being hit when
operating the jack or changing the wheel.
•Being under a jacked-up vehicle is dangerous. The
vehicle could slip off the jack and fall on you. You
could be crushed. Never put any part of your body
under a vehicle that is on a jack.
•Never start or run the engine while the vehicle is
on a jack. If you need to get under a raised vehicle,
take it to a service center where it can be raised on
a lift.
(Continued)6
WHAT TO DO IN EMERGENCIES 381
Page 387 of 497

WARNING!
Do not attempt to change a tire on the side of the
vehicle close to moving traffic, pull far enough off
the road to avoid being hit when operating the jack
or changing the wheel.
2. Turn on the Hazard Warning flasher.
3. Set the parking brake.
4. Place the shift lever into PARK.
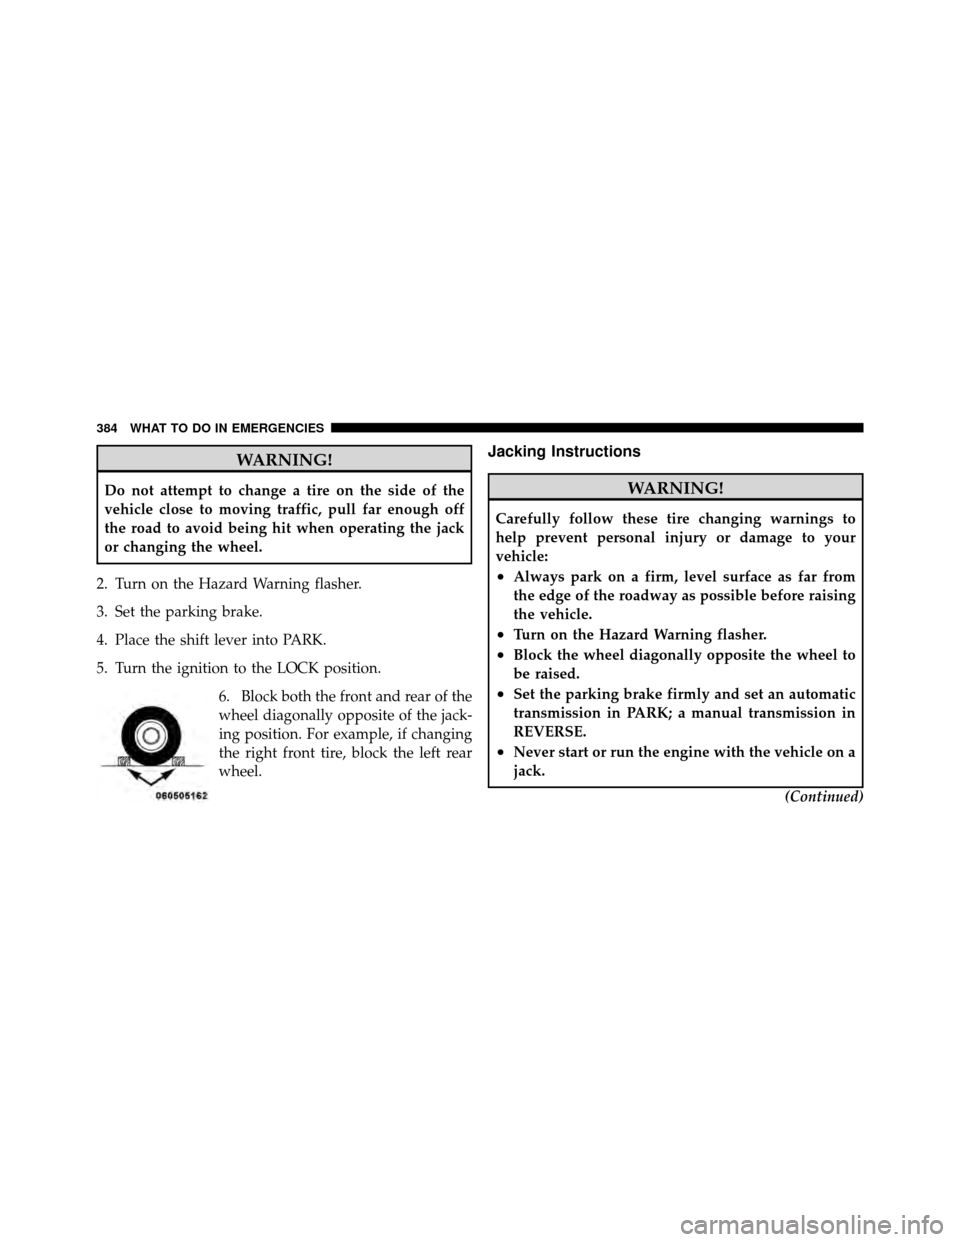
5. Turn the ignition to the LOCK position. 6. Block both the front and rear of the
wheel diagonally opposite of the jack-
ing position. For example, if changing
the right front tire, block the left rear
wheel.
Jacking Instructions
WARNING!
Carefully follow these tire changing warnings to
help prevent personal injury or damage to your
vehicle:
•Always park on a firm, level surface as far from
the edge of the roadway as possible before raising
the vehicle.
•Turn on the Hazard Warning flasher.
•Block the wheel diagonally opposite the wheel to
be raised.
•Set the parking brake firmly and set an automatic
transmission in PARK; a manual transmission in
REVERSE.
•Never start or run the engine with the vehicle on a
jack. (Continued)
384 WHAT TO DO IN EMERGENCIES
Page 388 of 497

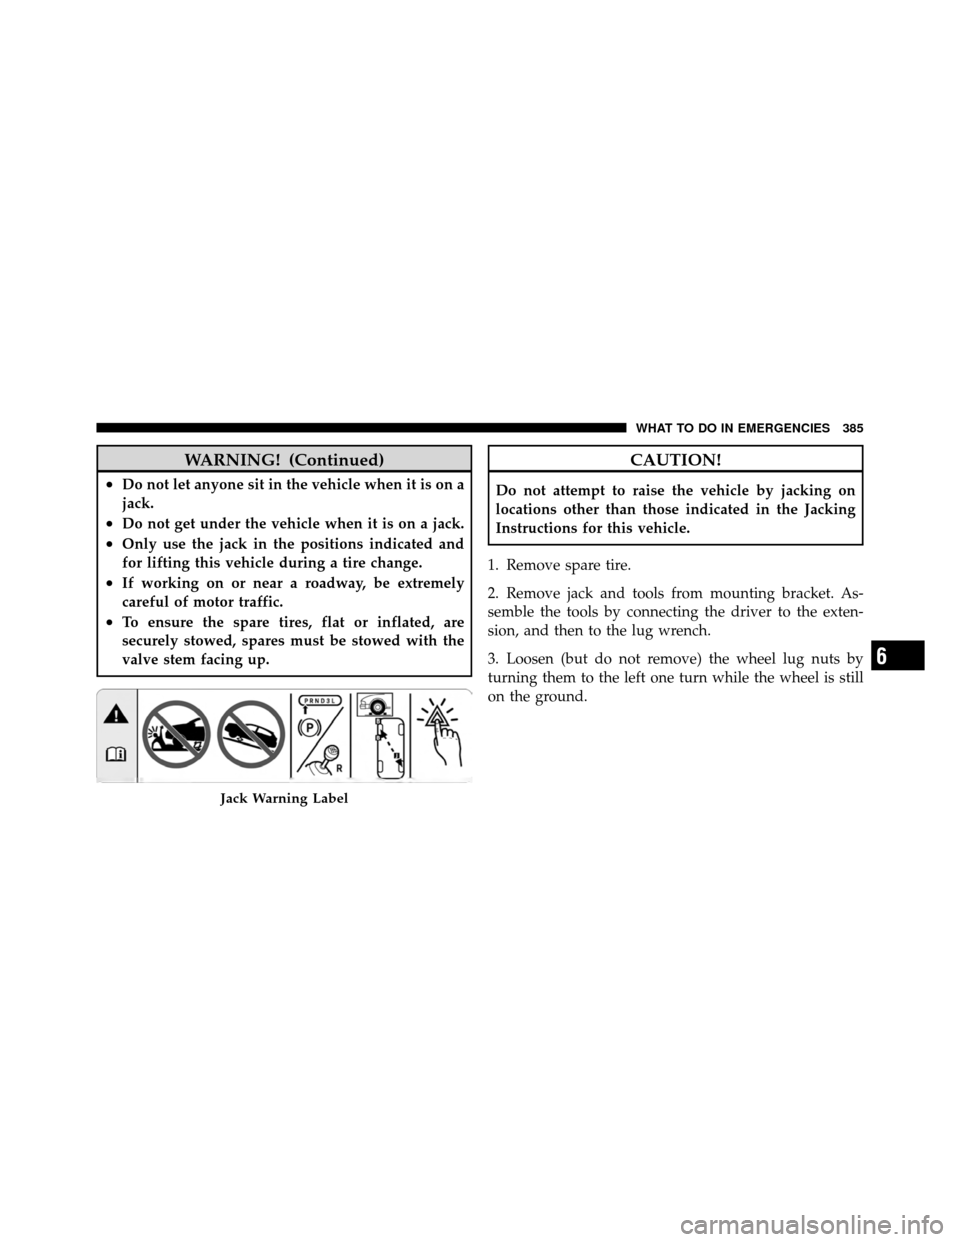
WARNING! (Continued)
•Do not let anyone sit in the vehicle when it is on a
jack.
•Do not get under the vehicle when it is on a jack.
•Only use the jack in the positions indicated and
for lifting this vehicle during a tire change.
•If working on or near a roadway, be extremely
careful of motor traffic.
•To ensure the spare tires, flat or inflated, are
securely stowed, spares must be stowed with the
valve stem facing up.
CAUTION!
Do not attempt to raise the vehicle by jacking on
locations other than those indicated in the Jacking
Instructions for this vehicle.
1. Remove spare tire.
2. Remove jack and tools from mounting bracket. As-
semble the tools by connecting the driver to the exten-
sion, and then to the lug wrench.
3. Loosen (but do not remove) the wheel lug nuts by
turning them to the left one turn while the wheel is still
on the ground.
Jack Warning Label
6
WHAT TO DO IN EMERGENCIES 385